DieselTech
-
Posts
1,738 -
Joined
-
Last visited
Content Type
Profiles
Forums
Events
Blogs
Gallery
Store
Everything posted by DieselTech
-
Seeking Input on Sheath Design
DieselTech replied to rktaylor's topic in Gun Holsters, Rifle Slings and Knife Sheathes
Are them knives what they refer to as a chore knife? RK you make some nice stuff! If it were me & these were chore/work knives to be used around the farm/ranch. I would make sheaths a bit longer & wet form more around the handle. So the knife sits a bit deeper in the sheath for more retention. They look great to me as is. -
Ok thanks. I looked on his sight & ordered a couple of his pattern books yesterday. I will have to go back & look at his digital downloads. Thanks. Much appreciated.
-
Went looking for a Landis Splitter, came home with a...???
DieselTech replied to LMullins's topic in Leather Machinery
Thanks. Yes if you get time & can post a few more pics, that would be great. I would not mind seeing what the chewed/chipped up gears look like. Keep me in mind when & if you decide to move it down the road. P.M me. Thanks. -
Something like this?
-
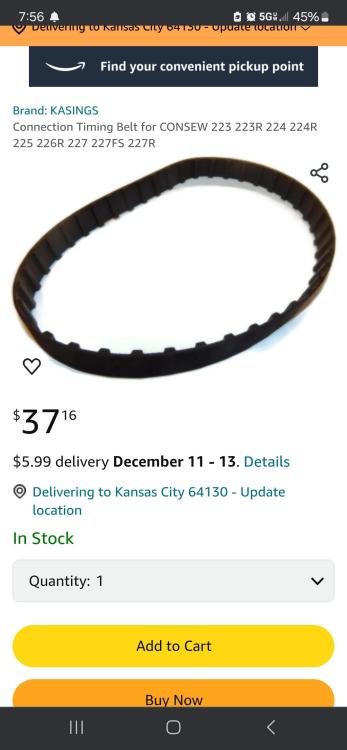
Would that be the timing belt possibly?
-
Thanksgiving Recovery, Black Dye Rubbing Off Belt
DieselTech replied to AlamoJoe2002's topic in How Do I Do That?
Do you think it is something about the black dye with rub off? It seems like it is a re-occurring question asked on here & it always seems to be black. Or do you think it is more to do with how it was applied? -
Looks nice! I looked today for a pattern/line art of the feathers & arrow belt. Is that by chance a digital pattern? Or is this your artwork? Thanks.
-
Thanksgiving Recovery, Black Dye Rubbing Off Belt
DieselTech replied to AlamoJoe2002's topic in How Do I Do That?
I am wondering if you possibly got too much neats foot oil in the belt. Usually 24-48 hours is sufficient for the neatsfoot oil to distribute thru the belt. I would wipe it down with a rag & acetone & then let it dry completely. Then check it for dye rub off. Others may have a better solution. -
Can you post a pick or 2. I always like seeing the classic old tools/machines. Thanks.
-
Looks nice! That's is going to be a awesome belt.
-
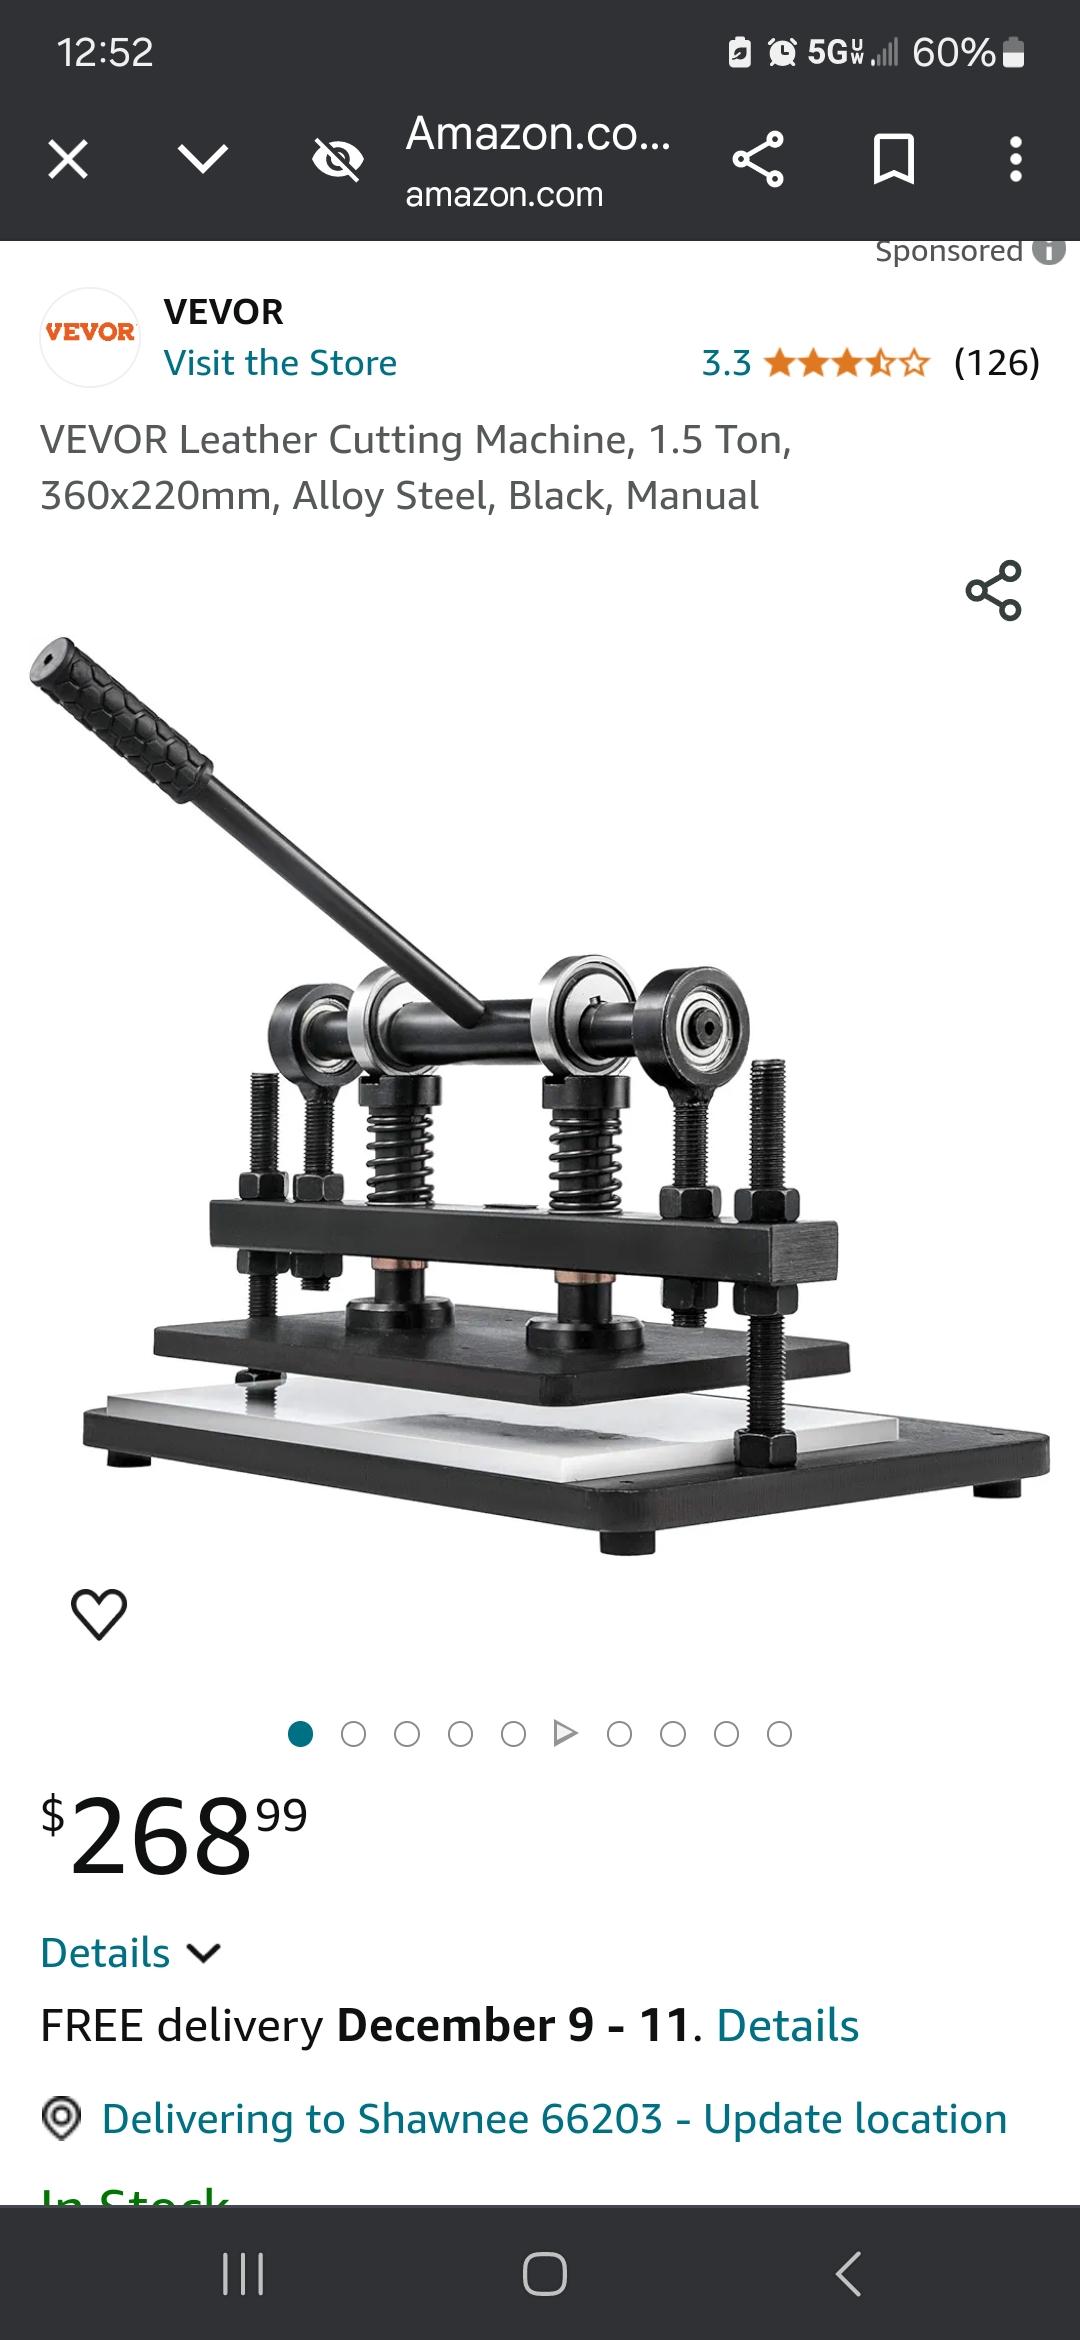
Guys & gals I been wanting a clicker press for mainly T-pockets for wallets. They are timely to make to me. So I was looking into cheap clicker presses, till I can afford a big one. Well I went ahead & ordered 1 in hopes it would do my T-pockets & 4" square coasters. What do you guys & gals think? Will 1.5tons be sufficient? Thanks.
-
Went looking for a Landis Splitter, came home with a...???
DieselTech replied to LMullins's topic in Leather Machinery
Let us know if you find a sheared key or something else. Yeah that machine would be perfect for thinning wallet card pockets down. If you decide to turn/sell this machine give me a shout. I am hoping to buy a power splitter next year myself. -
Went looking for a Landis Splitter, came home with a...???
DieselTech replied to LMullins's topic in Leather Machinery
Cool deal! & did you say, you got this machine for free? Awesome! -
Went looking for a Landis Splitter, came home with a...???
DieselTech replied to LMullins's topic in Leather Machinery
Good deal. Share some pics if you don't mind. I am wondering if it may have just sheared a key on 1 of the gear sets. Maybe at 1 time it was stuck/froze up & someone forced it & sheared a key. Great find in my eyes if it can be repaired. Thanks. -
Went looking for a Landis Splitter, came home with a...???
DieselTech replied to LMullins's topic in Leather Machinery
Is it really missing the gears? -
My latest binge on belts
DieselTech replied to Dwight's topic in Purses, Wallets, Belts and Miscellaneous Pocket Items
Thanks. Much appreciated. That is what I was wanting to know. I was going to make a few lined belts to sell, but was worried about exactly what you described. Thanks. -
What type of Edge beveler do you use?
DieselTech replied to Yukonrookie's topic in How Do I Do That?
1st thing to ask? What kind of money do you want to spend on your edge bevelers? I finally broke down & bought a good set of bevelers. I bought Palosanto edge bevelers from #0 to #3 I can get you the specs on theirs if you want them. -
My latest binge on belts
DieselTech replied to Dwight's topic in Purses, Wallets, Belts and Miscellaneous Pocket Items
Nice work. They all look great! I got a question to ask? Do you ever make random belt lengths to sell at craft shows/ leather shows? & if so. What seems to be your hottest selling lengths? Thanks. -
I am looking for advice on how to add a coin to a keychain
DieselTech replied to sgtfury488's topic in How Do I Do That?
I can think of a couple different ways. But I'm not good at explaining it. But I could show you a couple ways. Let me know. -
Nice work. It looks great. Classy!
-
How the heck did you get the colors to alternate if 2 threads were joined? I'm amazed & baffled. Very cool thou.
-
Overwhelmed - Which industrial for leather bag making
DieselTech replied to Novalee's topic in Leather Sewing Machines
Nice looking duffle. Looks great! -
Nice work. Looks great. Did you use 2 different colors of thread? Or is my eyes deceiving me. Thanks.
-
Looks good. It definitely stands out more now. Nice work.
-
Manual Strap Cutter Machine: Opinions/Recommendations
DieselTech replied to DieselTech's topic in Leather Machinery
The gears are made of metal, & it's got sealed roller bearings on all the shafts. It seems to be a decent machine for the money. I'm pretty happy with it.