DieselTech
-
Posts
1,728 -
Joined
-
Last visited
Content Type
Profiles
Forums
Events
Blogs
Gallery
Store
Everything posted by DieselTech
-
Another thought, if they just want a black to brown fade or halo effect, you possibly could airbrush the bracelet/cuff with black dye. But I would be worried about the cream colored lining.
-
I'm thinking if they can afford 18k gold adornments, then it would be best to just buy some black stingray & make a new bracelet. A re-dye or color change is going to be tricky with that cream white lining that bracelet/cuff has.
-
Thanks. Lmao it only took me a month. I like the skidmores conditioning cream, it darkens the leather a bit at application, but the color always seems to lighten back to the original color after a day of sitting. Plus it smells great.
-
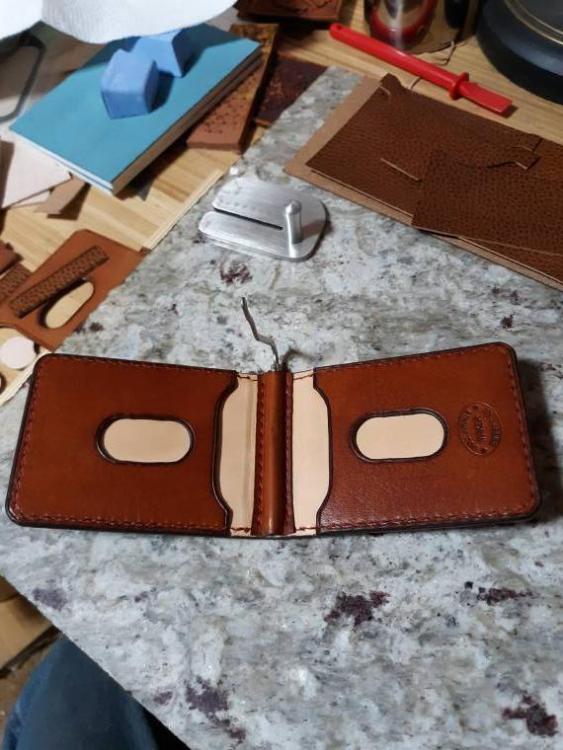
Put the finishing touches on it. Rubbed in some Skidmores conditioning cream & buffed it out with a horse hair brush. It's got some more color depth & sheen now.
-
Yeah toxo I should have been more informative on my terms. I should have mentioned that 2 of them are french skivers or wide mouth skiver. Thanks I appreciate the tips.
-
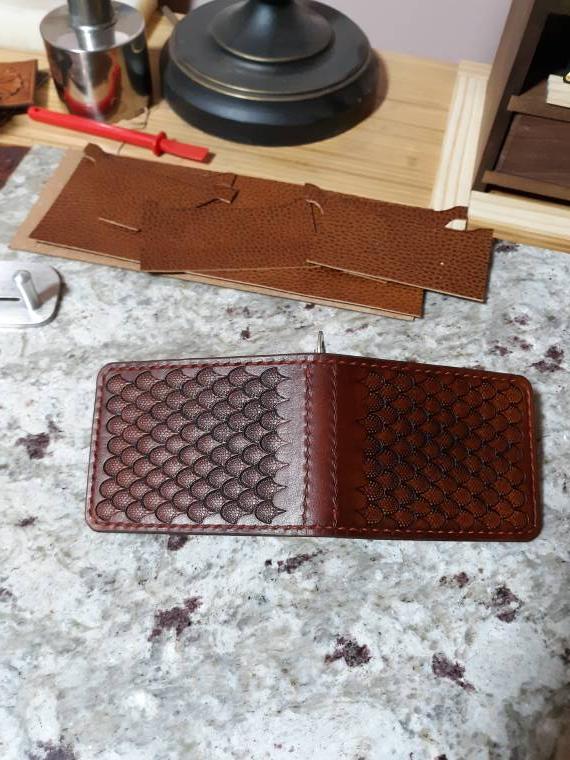
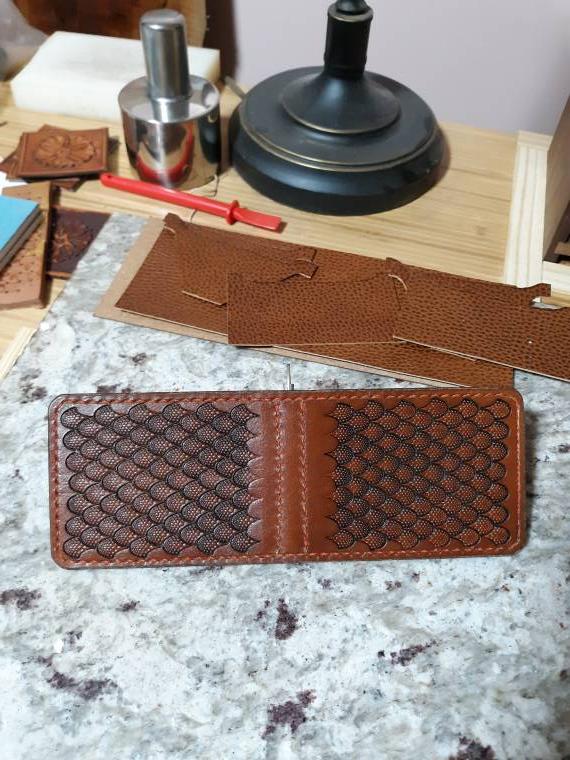
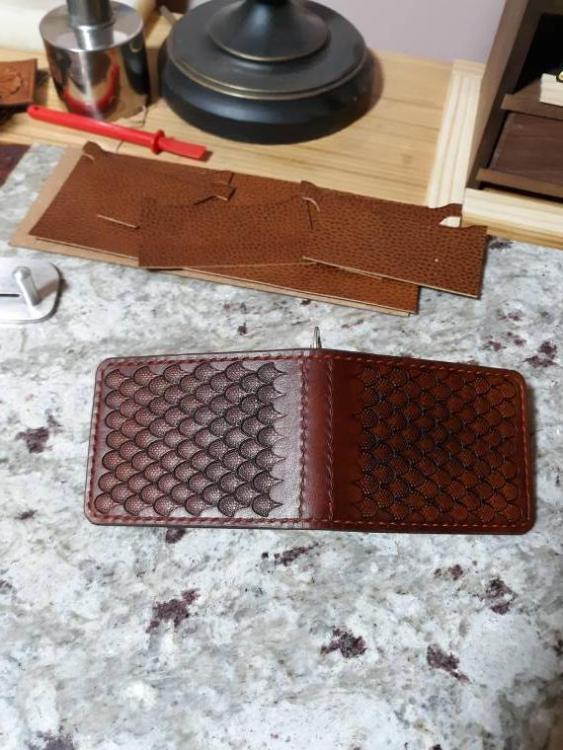
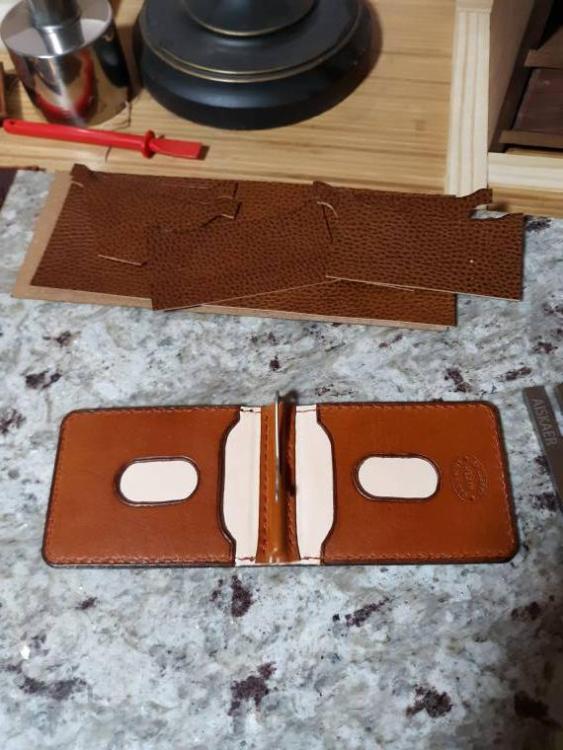
Guys & gals I finally got it done. After having to re-line it. Dang glue incompatibility or old spray adhesive, had to peel it off & then skive the rest off. But I saved it! Here it is. Sewn together with .55mm poly-braid rust red thread. Had my new electric creaser a bit hot. But it will be ok. Well how bad did I mess up? Also like to add I sewed this 1 all the way around. Thanks.

-
Thanks. I've seen that french head style knife before & I do like the style of it. I think you can still buy that knife new. But I bet it isn't as good as a old one.
-
Yeah they say once you find the head knife you like & learn the techniques of using the knife. You will never go back to using any other type of knife. I think I'll get a half head knife or a real small head knife & learn it 1st.
-
Yeah they are great edge bevelers. I got them for the thin italian leather I've been making wallets out of. I bought the french bevelers/wide mouth bevelers cause I was there buying tools & i thought why not. I'm going to order the rest of the edge bevelers for the set i want to complete. They are nice. Lol I've been too scared to run a head knife yet. Lol i be mad if i messed up my leather, not including my hands. Thanks.
-
Should keep your face warm & Vampires off your neck. Looks good.
-
Welcome to the group. Bunch of great people here.
-
Yeah I'm curious to what others have to say as well. Lol my wallet looked like a dalmatian dog, my 1st time using fiebings dye & dip dying. But I saved it, but at the cost of it being a lot darker than originally planned.
-
Is that a Fiebings dye? I was making a nice tri-fold wallet & had that happen to me with fiebings light brown dye when I tried dip dying it. I eventually put it back in the dye for about 8-10 minutes & it came out even then. It was my first time doing a dip dye process & was pissed & freaked out both. But I saved it & it turned out good.
-
Great looking weight belt. Thing looks to be about 4" wide. Nice work. May I ask where you got your buckle/clasp that you used. Thanks.
-
Yes it is! I remember getting my 1st set, then trading them up for the latest & greatest comfort grip.
-
Yeah I had a few guys say they broke some of the french skivers by dropping them. Boy do they cut nice thou, I did notice tonight that if you try to change angle mid skive these dont like it. Thanks for the heads up on being careful with them. I figured it was time to start buying some nicer tools. I'm a diesel technician soo I already got a tool problem. Lol The leather working is my second venture in life & I'm enjoying it.
-
I've went thru a couple cheap bevelers from amazon before I learned a couple sharpening techniques. I read a few reviews & watched some vids, & it seem like they all had a glowing review about them. I've been slowly trying to update my cheaper tools, since I've dived a bit deeper in the hobby. I'm really happy with the purchase. I highly recommend. Thanks.
-
CalgaryJim is there any watch strap speciality tools you have bought on your watch strap journey? I have been looking into the idea of making watch straps, & I kind of figured it would cost at least a $1000 dollars on quality tools to make watch straps. Do you think that is a accurate figure? Thanks.
-
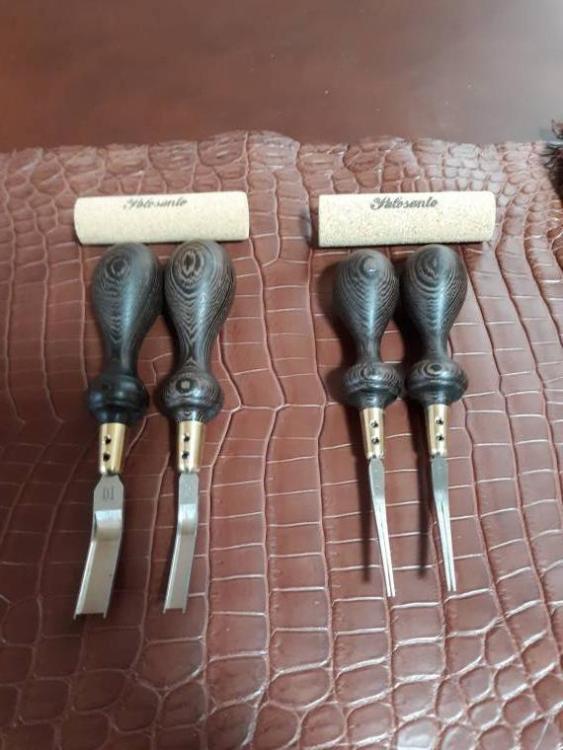
Guys & gals I decided to try a couple Palosanto bevelers out. I have only made 1 cut each with them & I must say these tools are exquisite! Cost after receiving them. Who cares! They are that nice. I already decided I'm ordering the rest to complete the set I want. Superbly Nice!
-
Lol we dont need no Stomped on Tokonole!
-
Thanks I'll be in touch. Much appreciated.
-
Great looking knives & sheaths. Beautiful work.
-
Great looking bag. That's awesome for the 1st bag. Yeah I dont have a computer & lol I'm kinda computer illiterate. So me I always try to come up with my own pattern. I have been buying a few acrylic patterns/templates. I wish more places offered physical patterns to buy. Thanks everybody. I just need to make a bag or 2 for the practice & experience.
-
Yeah I feel I started this hobby too late in life to learn everything I would like to. You are ahead of me it the bag making department, I have yet to try & make a bag. I need to buy some books on bag & case making, that shows the different types of gussets & when & where is the place to deploy such gussets.
-
Thanks. I look forward to seeing more of your work. You constructed your handles as I would of. Lol Idk how to use a rein rounder either, but watched a few vids on the process.