DieselTech
-
Posts
1,728 -
Joined
-
Last visited
Content Type
Profiles
Forums
Events
Blogs
Gallery
Store
Everything posted by DieselTech
-
Has anyone attended Jim Linnell's classes at Tandy?
DieselTech replied to SUP's topic in Leatherwork Conversation
Nice. Just awesome. Cherish that feather. Great work on the pendant. It fooled me. -
Looks good. Great work. Does that hold 3balls? & where do you strap it? Thanks.
-
Have it brazed or welded with nickel rod if it is cast iron. Being a 29-4 I'm sure it is.
-
I believe Chuck Dorsett has a video on this. It's a vid for making bracers & bracelets.
-
To me it looks like a bunch of leather strips sewn together.
-
I think I would attach the top part of the leather to the rear rack if possible, with straps like a apron. Then I would tuck the bottom part of the leather under the black part of your lower foot guards. Basically take the black plastic loose enough where you can tuck the bottom part of leather in & snug the black foot guards afterwards.
-
I think bonded polyester thread is more UV resistant.
-
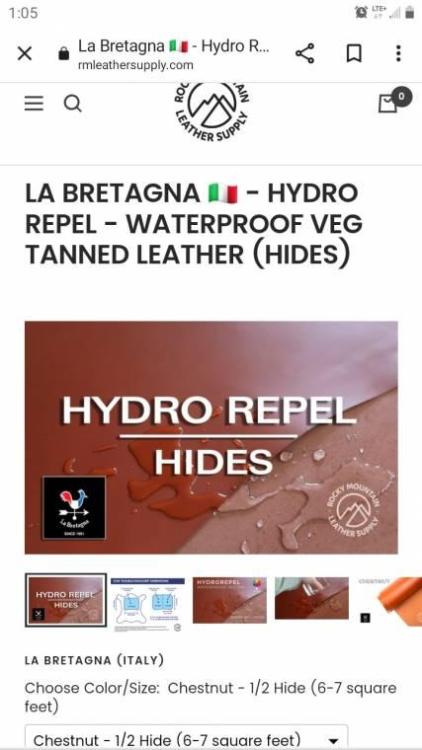
The other leather to look at is this hydro repel leather. It comes in brown & black only thou.
-
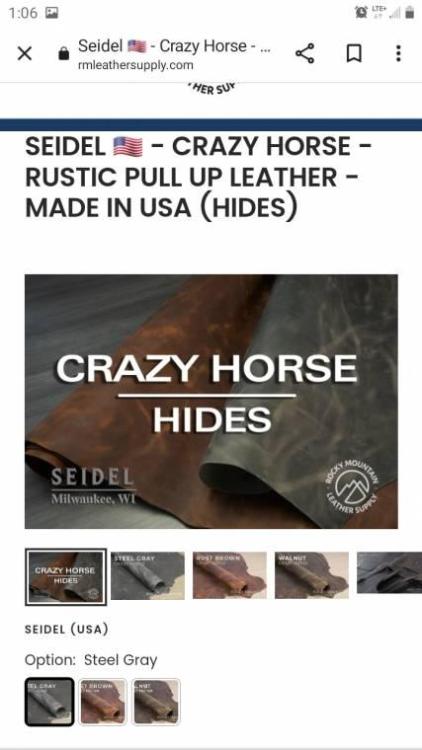
I would use some crazy horse leather. That way as you scratch the leather up, from getting on& off. The leather will only get better looking with age. Plus the crazy horse has lots of waxes & oils in it to help preserve it from the elements. Let's get a pic of your atv where you want to attach the leather wear panels. That way we all know what we are working with/against. Thanks.
-
Nice work. They look great. You look to be on a great path. BTW Welcome to the group.
-
If you find the price of original too expensive...
DieselTech replied to Stitcher64's topic in Show Off!!
Lol you should of displayed your holster in it's full glory. With the vintage pistol strapped in it. -
If you find the price of original too expensive...
DieselTech replied to Stitcher64's topic in Show Off!!
Looks great. Nice work. -
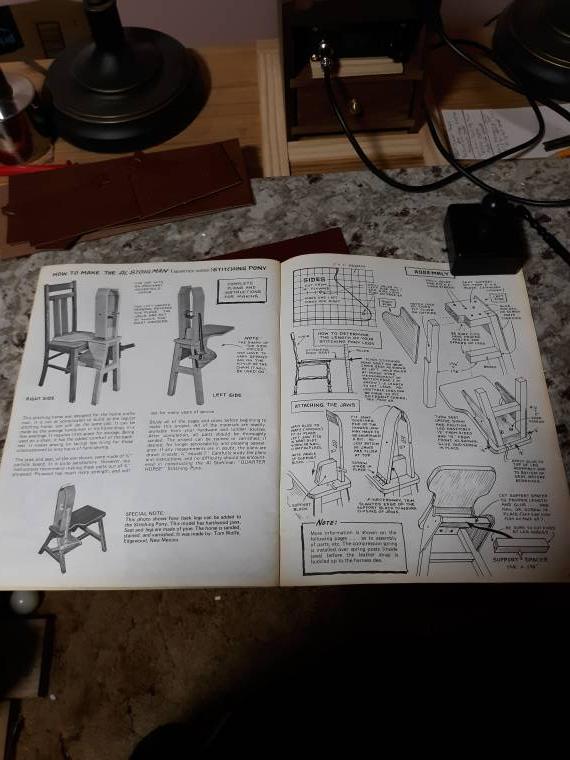
stitching horse plans to build from
DieselTech replied to rdahlinspeedboy77's topic in How Do I Do That?
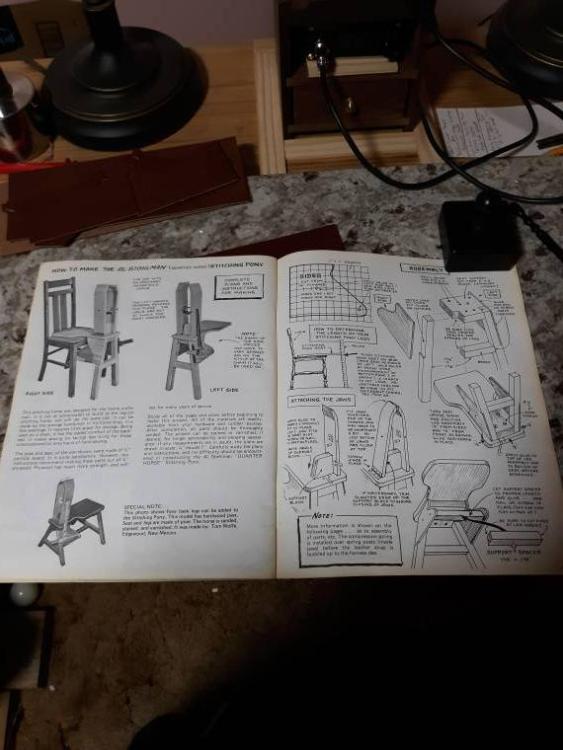
If you wanted me to I could copy them & send the stitching horse plans. -
Yeah but I dont have all that stuff. I improvised. My stamps are hand held stamps.
-
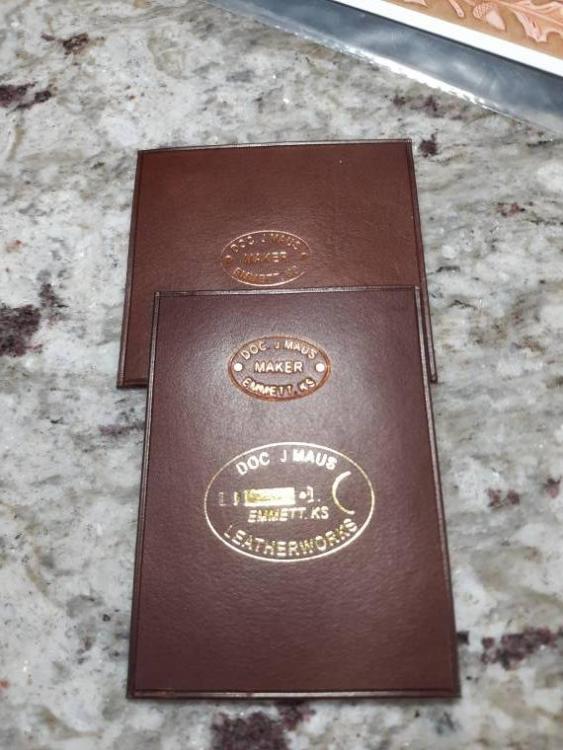
Here is another sample with a bigger stamp & gold foil.
-
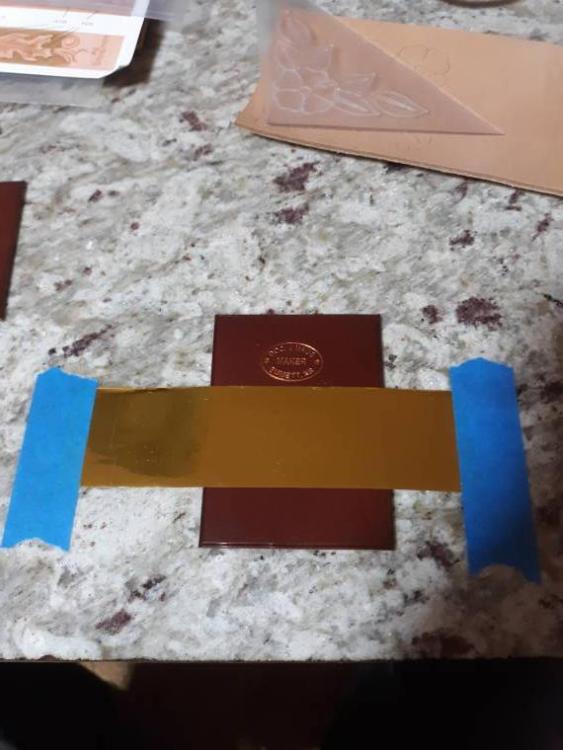
Here is how I set my foil up.
-
Thanks guys & gals. I figured its 1 more weapon to have in your arsenal bag. Another option to offer your customers. I think it looks quite well to boot.
-
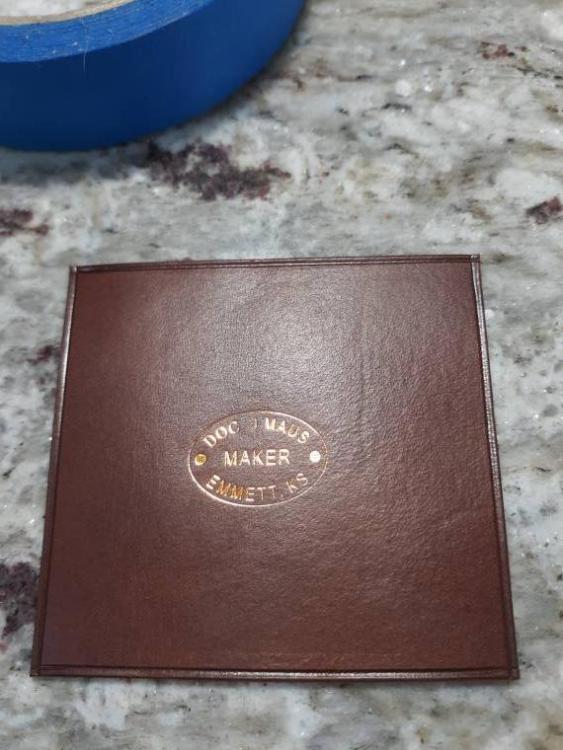
Here is a couple pics of the finish hot foil. This is a copper foil.
-
Guy & gals I wanted to share my procedure for hot foiling with a steel makers stamp. 1st off I reached out to Tim at steel stamps to make sure it would not hurt my stamp. He said nope it wont hurt them. So a toaster oven works the best for accurate temperature settings. Preheat toaster oven to 300°f & then place your steel stamp in the oven for a minimum of 15minutes. Then once the stamp is heated. Place your stamp on the hot foil on the leather & sit stamp on the foil & leather. Leave it there for 10-30seconds. It leaves a nice foil stamp on your leather.
-
Cant access picture. For some reason I can now. Sorry.
-
Nice work. Looks professional to me. I say thumbs up on your fabrication work.
-
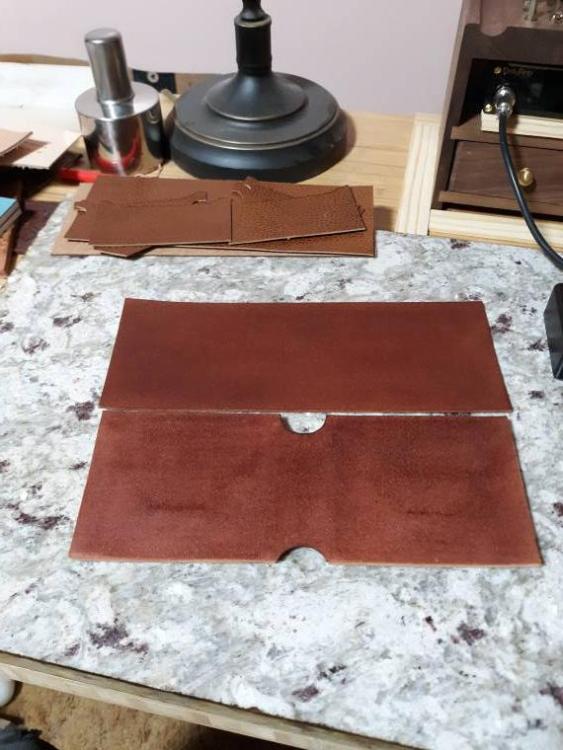
Yeah I have been accused for making too heavy/thick wallets. Said they caused back issues. Lol. Soo I figured I would put this design on a diet & thin things down. It should be a nice thin wallet when done, with the ability to carry quite a bit of stuff.
-
Ok thanks. Much appreciated. I'll check out your store/products.
-
stitching horse plans to build from
DieselTech replied to rdahlinspeedboy77's topic in How Do I Do That?
If you buy this book. There is 4-6 pages with every measurement, nut, bolt, screw needed to make a stitching pony.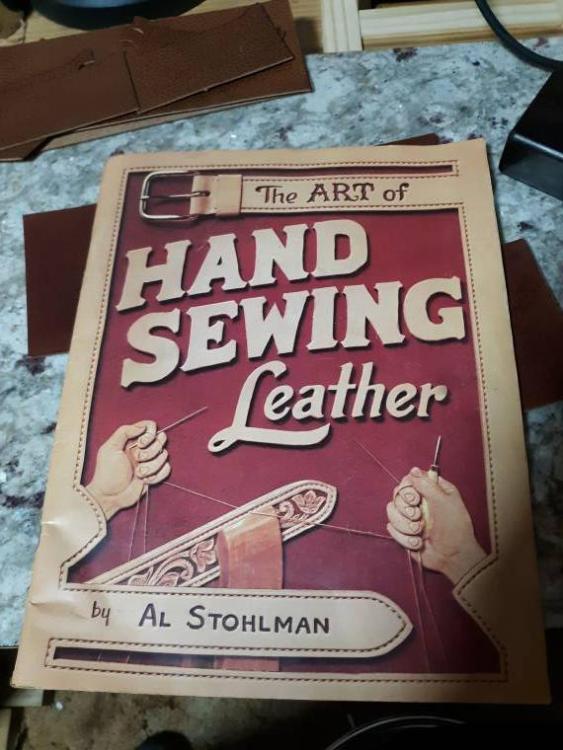
-
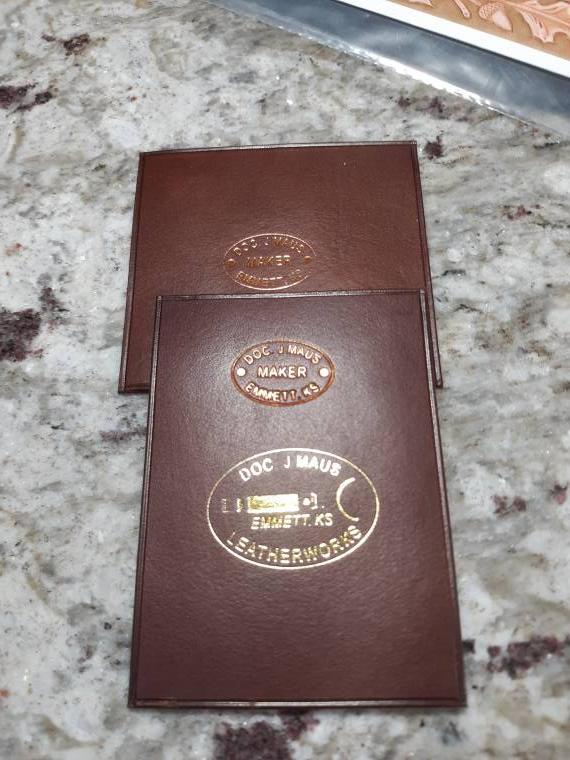
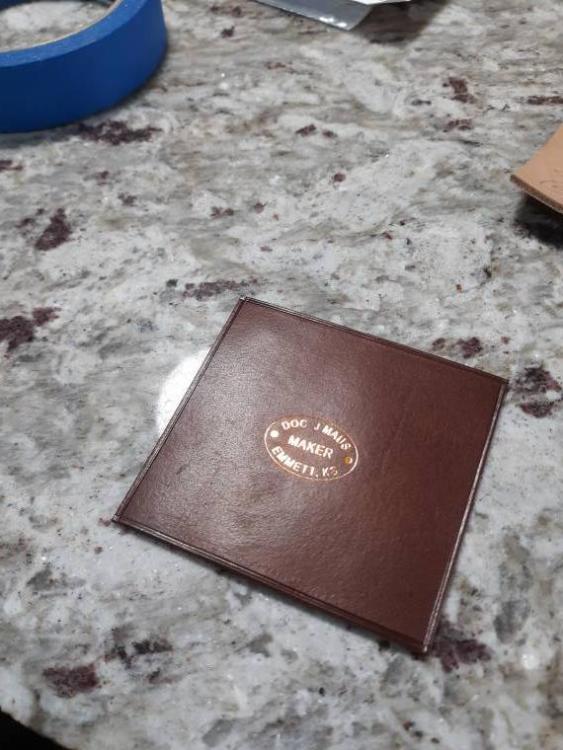
Here it is after a coat of fiebings mahogany pro dye & a quick rub down. The fiebings mahogany pro dye is a perfect match to the Conceria Walpier mahogany Buttero. But if you put it on too heavy it will darken the exterior of the leather. I'm glad I did a test run before doing the wallet. Another pic for ya all. Thanks.