All Activity
- Past hour
-
 Try dying a piece of the leather before you do anything to it, this will tell you if it's the vinegaroon or something you're doing to the leather (highly likely).
 -
I presume the needle is hitting the needle plate? That will happen if you put sideways pressure on the workpiece, been there done that! You have to guide the piece not force it.
-
Had some mishaps over the years, always due to being an idiot with a tool or using it without the proper guards. Personally, I don't like trying to make machine's "idiot proof" as it seems that they keep coming up with better idiots, but if something had a guard when it was new, it's better to keep it in place and adjust your job rather than take it off and forget about it. Ultimately, no guard will compensate for someone not keeping their mind on their work or trying to do it faster than is safe. It's better to treat the machine like it would kill you if it could, like a tiger on a chain, not a kitten to play with. I was cutting up some 3x3x3 hardwood blocks a few years back and didn't plan ahead and cut them to length before I sized the height/width on the jointer or planer. Being in a hurry, I made the idiot decision to run the short blocks through the table saw. One bound up and kicked back into my face, making a comical *ploink* noise and I later found it had a dent in the side where it hit the floor AFTER hitting me. It momentarily dislocated my jaw, knocked my safety glasses off my face, vision went blurry for a bit, and I was bleeding pretty good. Got a ride to the hospital and was EXTREAMLY LUCKY that it just skipped off my face doing no bone damage, no bruising, and I only needed 14 stitches and some superglue to get put back together. Also fortunate that the ER guy on duty that day specialized in facial sutures, and he dug some wood shrapnel out of my face. Got a neat scar out of the deal, but better than that I gained more respect for using a table saw correctly and I replaced the missing blade guard. I finished the blocks later (belt sander), which were being cut into some support rests for a tool, and the one with the buzz mark across the side where the blade caught It I kept visible for a personal reminder. Speaking of table saws, long before my time my dad worked with a leather shop that did silver work as well. He was doing some silver work on a mechanical die press and it took the last 1/4" off of one thumb. He went to the hospital but didn't bring the severed bit, so they had to pull the bottom edge of the wound up under the nail (which he said hurt the most). For the longest time, he had one thumb shorter than the other, which made for some fun stories, until one day he cut 1/4" off of the OTHER thumb while using a table saw. This time the doctors didn't want the bit and stitched it up like they had the other thumb, so for many years he kept the severed bit in his desk in a little jar of formaldehyde. He used to say when he was buried he wanted us to burry ALL of him, but when he passed we couldn't find it (I miss him anyway and don't mind if he wants to haunt me). Speaking of thumb's, another time I was making adjustments to a band knife splitter, which required the machine to be opened up but running so I can see how it was moving and make adjustments. While I was sitting and giving it a moment to run, I noticed one of the blade wipers was vibrating. I thought that it was covering the blade and I stuck my thumb on it to see if the vibration would stop, and when I did it slid back letting the blade slice into my thumb about 1/2". The guy I was with wanted to call 911 but after I had a chance sit and to breath through the wooziness, it didn't seem so bad once I taped it up, so I finished my work for the day and went home. When I got there my visiting father-in-law helped me re-dress it and told me 'Nope. You're going to the hospital.' Once there, the nurse messed around with it cleaning it out and by-golly that was x10 worse than when it happened. They recommended stitches but too much time had passed (6 hours), so they would have to cut it back open If I wanted it to leave less of a scar. I was more concerned with infection than cosmetics and they confirmed that I didn't NEED stitches, so they taped it up and gave me some antibiotics. As it healed, I realized I had cut through a nerve as the end of my thumb had lost feeling, but it closed up fine and didn't hurt. After 3 or so years I've got about 90% feeling in the end again. I've gotten nicked by non-moving band knives plenty of times over the years, but I still cringe when I think of getting my fingers that close to a moving blade again.
-
Try 20 feet with an extension ladder sliding out from under me. Landed on my feet, crushed right ankle that the MD couldn't even bother to look at the x-ray or radiologists report. Came down between 2 rising stem gate valves on 6" lines. Right side of my shirt was ripped open, slight scratch on my chest. Could have ripped my shoulder off if I had been a few inches further forward. Very thankful that didn't happen. The ankle was bad enough, limped for 15 years. Still can't bear to lace up an ice skate to go skating 54 years later. For years, too much or too little exercise on that ankle resulted in severe pain. Had to keep moving, but not too much, We have lots of safety standards. They are there for a reason. If I had waited for my fellow worker to come back and brace the ladder before I stepped down onto the rung, this wouldn't have happened. He was called away because a couple 1000 scfm air compressors had tripped and had to be restarted immediately else the whole utility plant that supplied steam, compressed air, 54MW of electricity, utility water, boiler feed water, cooling water would have been lost and the whole process including a refinery would have shut down. We were in a isolated location 100 miles from the electrical grid. I should have just sat there and waited!
- Today
-
I managed to get my finger caught in a rotating bit on a spindle moulder. That didn't look so pretty. But nothing was really harmed, so just a bit more scars to the collection. :-) I have always been a bit scared of the Z-blades for the moulder, those things are aggressive, once a board got caught while I was shifting it around, smashed the end into a wall and made a big dent in the mortar covered wall.
-
That armored tee-shirt saved you. Sucked up the energy of the spinning bit.
-
I was wearing a tee shirt which wrapped it up , had to cut the bit out of the shirt .
-
 Just to be clear you tried to dye it after you glued it to the wood?
 -
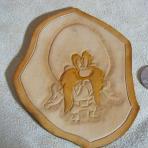
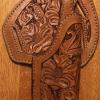
 Good evening, I'm working on a medieval sword scabbard with wooden core. I am at the final stepsn and I need to dye it. I want it black and, to mantain historical accuracy, I chose vinegaroon which I made by myself following the tutorial here only got a small part of the steel wool in contact with air, a little of rust has developed. I dyed my piece. At first, leather became deep black and I was very satisfied...but the next day it turned grey, and had lots of blothces and spots with no colour. I tried adding more and more but no difference. Tried a light sanding, nothing. The leather covering is made with 1.2 mm vegtan calfskin, which has been cased and glued to the wooden core. I used a bone folder to shape it and adhere to the wood, using hot hide glue; leather got burnished after the process. My guess is that the process closed the pores of the leather preventing the solution to penetrate...after a light sanding I noticed a better penetration but little change in colour. Pics attached: at the bottom the scabbard; the strip next to it is a piece of the same leather...this got a nice and even colour, but with a gray tone (which darkens a lot after applying some conditioner). Will try also applying black tea to darken the colour on a scrap. In the meantime, i'm preparing a new batch of vinegaroon using degreased iron wire pieces which have not the problem of floating, so no possibility of rusting. Thanks a lot in advance!
-
Close shave. Did it wrap around your shirt?
-

singer 45k Singer 45K25 Roller Foot
depodarcom replied to nategines's topic in Leather Sewing Machines
Thanks for your replies. Im going to search for Adler and GA5. it would be a bit difficult I guess -
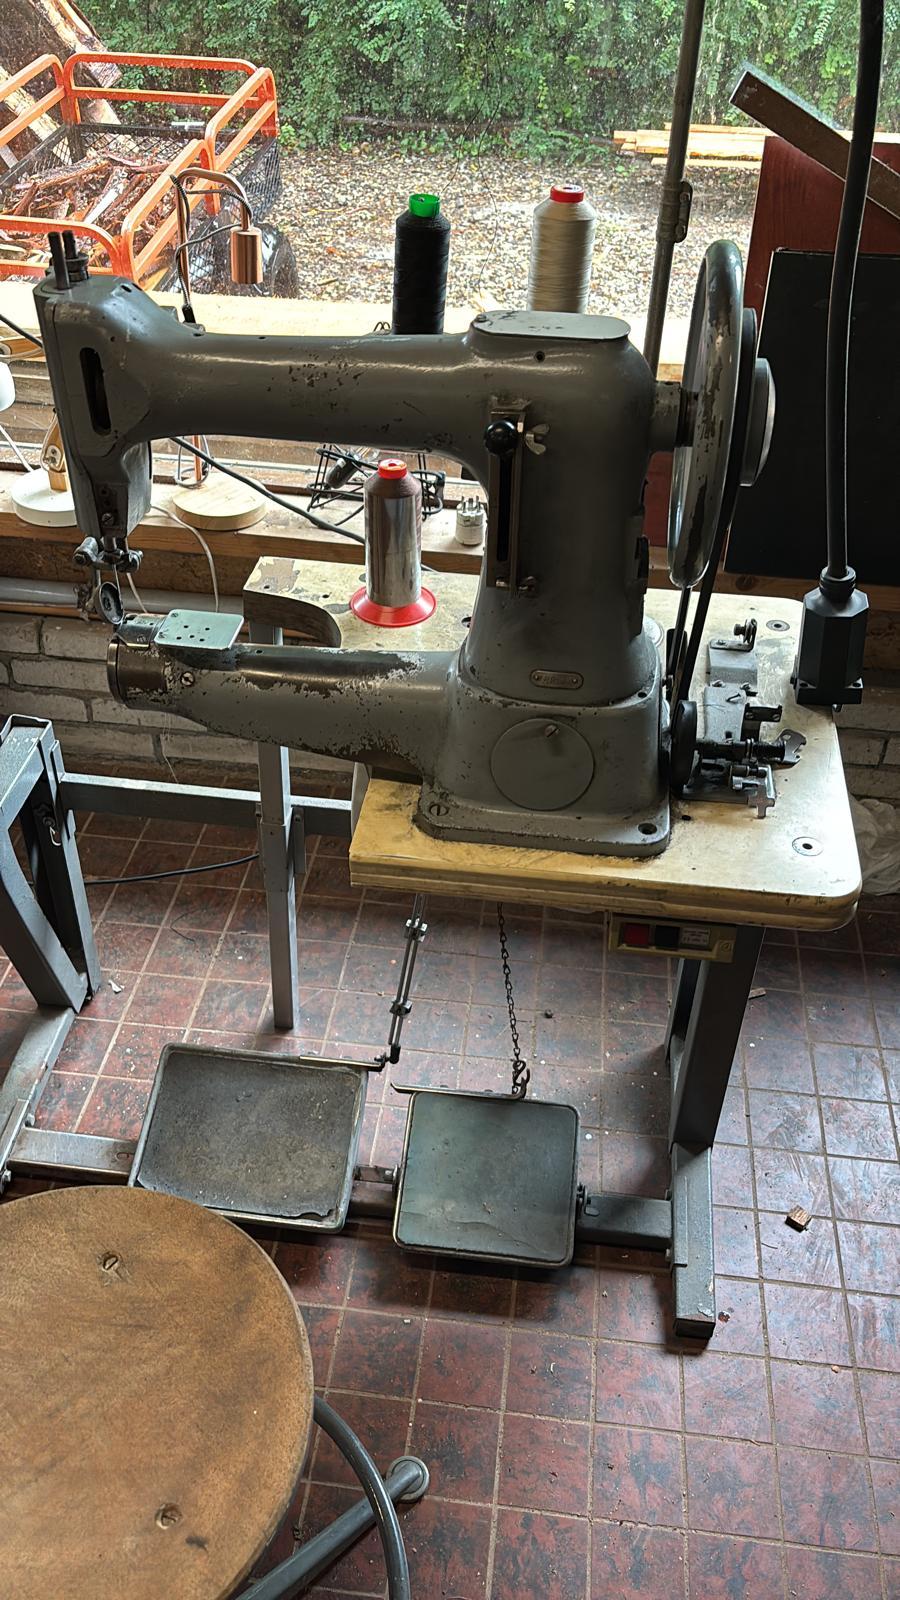
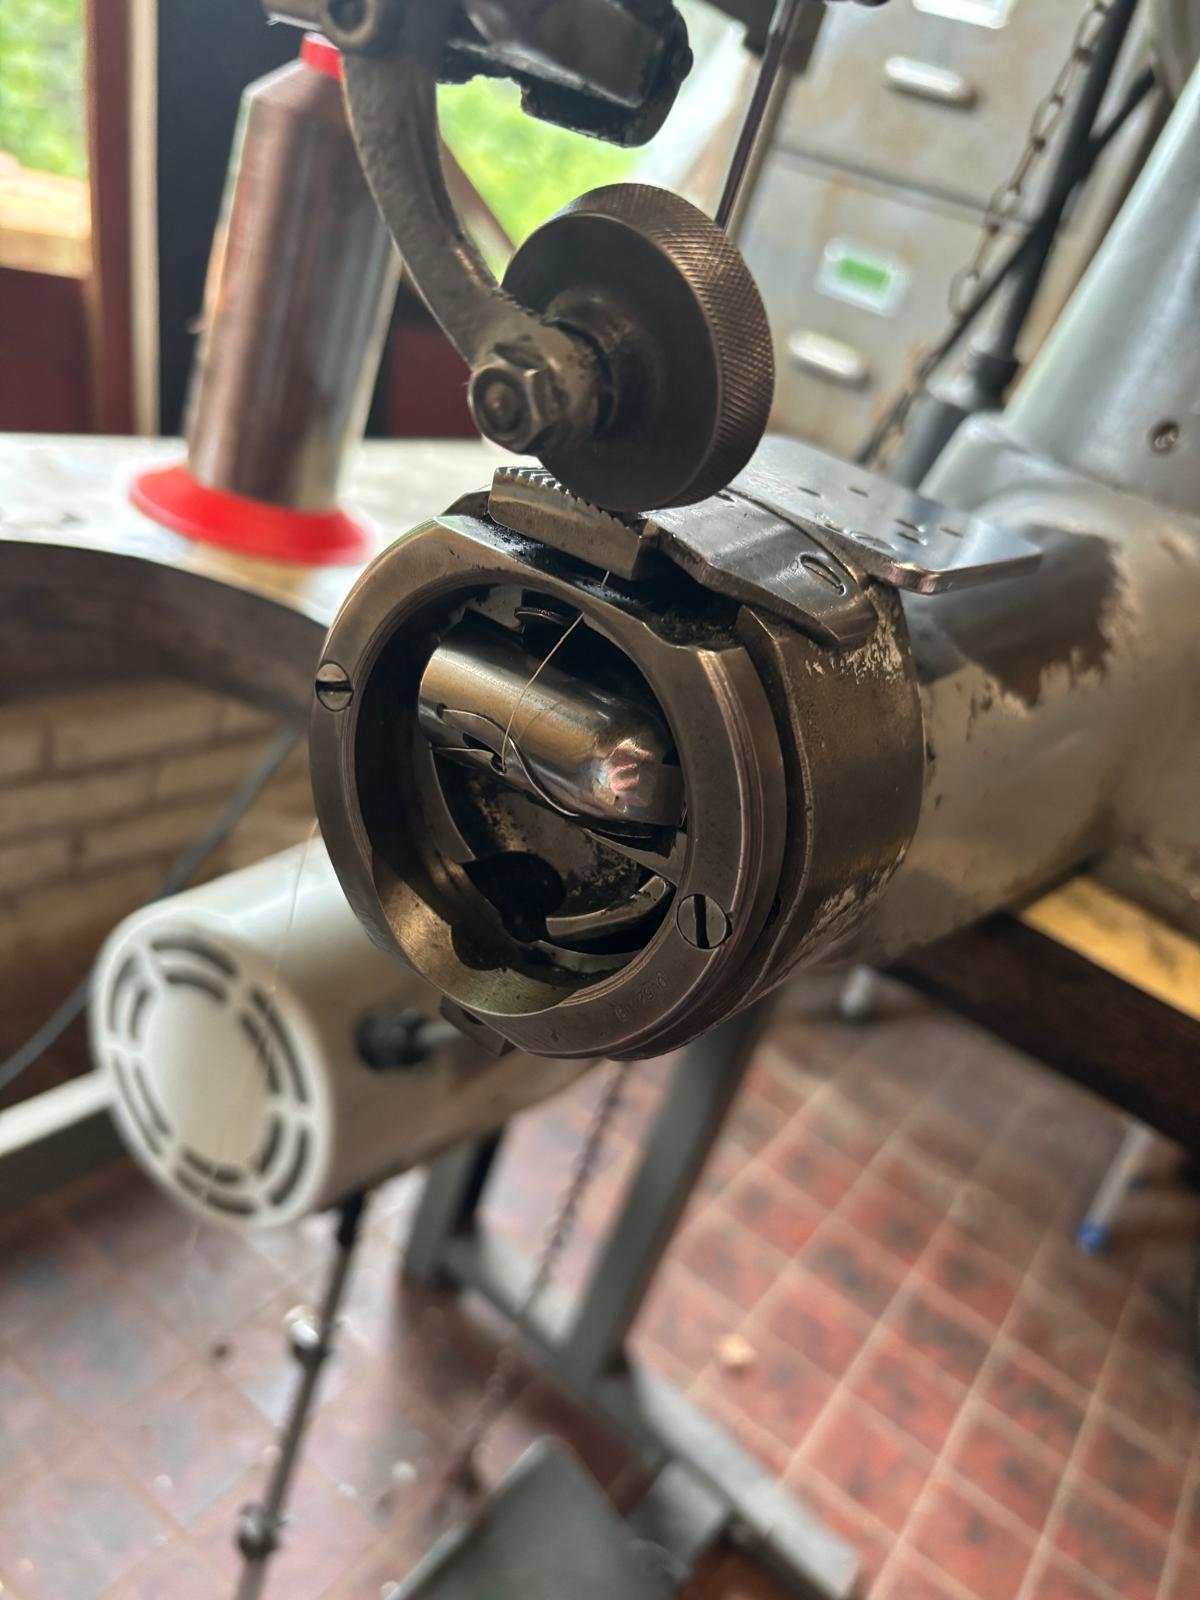
Hello everyone! First time , I've read the rules but if I am missing something let me know! I've had leatherworking as a hobby since 2022 now, and I've been enjoying it a lot. After 3 years of sewing by hand I wanted to look into a sewing machine. After doing some research and looking around locally at what was available (the more crucial to the search of the two), I found and fell in love with this Adler 105-27. But as any young man who has fallen in love. I am not sure how to get it to work. I have watched videos and read posts on how a sewing machine generally works, so I am not completely out of my depth... Sadly I seem to have chosen amachine on which there is not a lot of information online. I've found the manual online, and read through some posts about the 105 but was unable to come up with a solution by myself. I did read that the 205 and the singer 45k are models similar to the 105, but am not sure of that enough to use the manuals for the fixing of my machine. The problem I am running into is that my top thread seems to be breaking after a couple of stitches (2 or 3). I've lowered and increased the upper thread tension, exchanged the needle. But to no avail. I've included a slowmotion video of the side of the machine whilst stitching and a couple pictures of the machine in question. In the video the top thread seems to be jumping around a lot during sewing. Not sure if this might be the culprit. If anyone is able to offer me any advice I would be very grateful! If there is any information that I have not included let me know. Thanks in advance! Video of stitching in slow motion, shot (poorly) on my Iphone:
-
Had a 1/2 x 2 1/2 carbide door panel bit come out of a running router , hit me in the stomach . Got some minor cuts and lost a shirt , wasn't my time as it should have come out my back ....
-
I was a roofer, worked on church steeples, and was also a cement finisher and cabinet maker, all of which were dangerous jobs. I fell 3 feet from a steep ladder, and that was a life-changing event. you never know. LOL
-
I didn't want to tag this onto the sewing machine accidents post so I'll say it here. Many years ago an engineering pal told me about the day when when a 1 1/2 inch by 12 inch grindstone came loose at full speed. It whizzed around the workshop 3 times causing much damage before coming to a stop such was the inertia. My worst nightmare accident is getting a tie caught in one of those. You wouldn't be able to stop it in time. Makes me shiver. Is why ties are banned.
-
My dogs (only two left now) won't leave my side even when sitting on the loo they have little beds at my feet. This goes for the project room as well and once or twice one of em has trod on the pedal, fortunately at a safe time. I know I should find a way to stop this happening. If I kept them out of the room they would howl the place down.
-
@mbnaegle ouch.. That is some really ice cold thinking under pressure, to be able to tell someone quietly that they need to step on the pedal to loosen the brake and getting them to back the handwheel!. Kudos to your dad! I agree completely with the problems of making things safer without messing up the utility. Brgds Jonas
-

singer 45k Singer 45K25 Roller Foot
Constabulary replied to nategines's topic in Leather Sewing Machines
what Wiz said! The above linked roller foot will NOT WORK. But OEM Adler 4, 5, 104, 105 roller feet will work but they cost big $$ We had this topic before: -
Yep, gotta make sure the machine is off and the motor is wound down (if it's the old clutch motors) or the power is bled out (if it's the newer servo motors). The old motors need time for the momentum of the motor to wind down, while the servo motors have some electricity stored in capacitors that needs to bleed off. My dad used to tell the story that not long after he and my mom got together (they met and worked together doing leatherwork) he was sewing on one of his old Landis 3 needle-and-awl stitchers, which have an awl punching from the top and a hook tipped needle coming up from the bottom. He always used his thumbs for edge guides as he sewed and did so safely for years, until one day he got a little too close and the awl came down into the nail of his right thumb. He stopped right away and said it wasn't too bad, but he couldn't reach the handwheel with his left had to back it up. He knew if he kept going, the awl would come out but immediately followed by the needle which would really tear up his thumb when it came out. He called for my mom to come help, but as soon as she saw it she got scared and ran off. She came back a couple times and kept running off saying "Oh my gosh! Oh my gosh! Oh my gosh!" until finally my dad had to raise his voice and holler "STOP!!!....... Ok..... I'm going to step on the pedal a little bit to take the brake off of the motor, and you're going to turn the wheel BACKWARDS slowly...." Which she did, he pulled his thumb out, sucked the drop of blood off of the nail, and finished sewing the tack or harness he was doing. He still used his thumbs as edge guides too, as do I, and Mom quickly got better acquainted with the "blood and gore" associated with working in a shop too. Having level-headed help with you is a major necessity. Over the years, we've had lots of people try or ask us to make sewing machine more OSHA friendly to operators, adding barriers and switches and everything to keep hands out of the danger zone, and in almost every case the safety measures significantly reduces it's utility and increases spoiled work, if not making it just impossible to use. It's just one of those things that takes some training and respect for the machine and the task at hand. It's like trying to make a bicycle impossible to crash. On the plus side, the new servo motors shut down a lot quicker than the old clutch motors, but you still need to tap the pedal or watch the LED light dim away until the power is all the way out.
-
 Brett Halsey joined the community
 -
Might contact Bob Klenda about his batwing pattern #44. https://www.klendasaddlery.com/patterns.html He's a regular contributor to the Leather Crafters and Saddlers Journal, and recently published a book on making chinks and chaps. https://leathercraftersjournal.com/product/from-my-bench-to-yours-a-handbook-for-making-chapschinksarmitas/
-
In addition to the other comments you never mentioned what size of thread being used with what size of needle in how thick of leather. kgg
-
Email me some pictures and how your wanting this to work and we can talk. Mike@desertmoonleather.com
-
Yeah, I knew somebody would spot that I burnished before I glued ... Normally, I would glue/sand/burnish. It also would have flattened that edge and avoided the little stitching hiccup on the back. Appreciate the comments ...
-
Thanks Tom, I had seen that continuation sewing somewhere on this forum, and I immediately liked it, Brgds Jonas
-
I'll see if I can dig up his name, He just shows up at the show and I recognize him.
.thumb.jpg.6e903dd66163ad5672f00f144058c571.jpg)