All Activity
- Past hour
-

Juki 5550N experiencing problem in the bobbin area
friquant replied to thobgood's topic in Leather Sewing Machines
I'm enjoying learning hidden qualities of the thread check spring. Which of these screws do I loosen on my 341 to effect #1 and #2?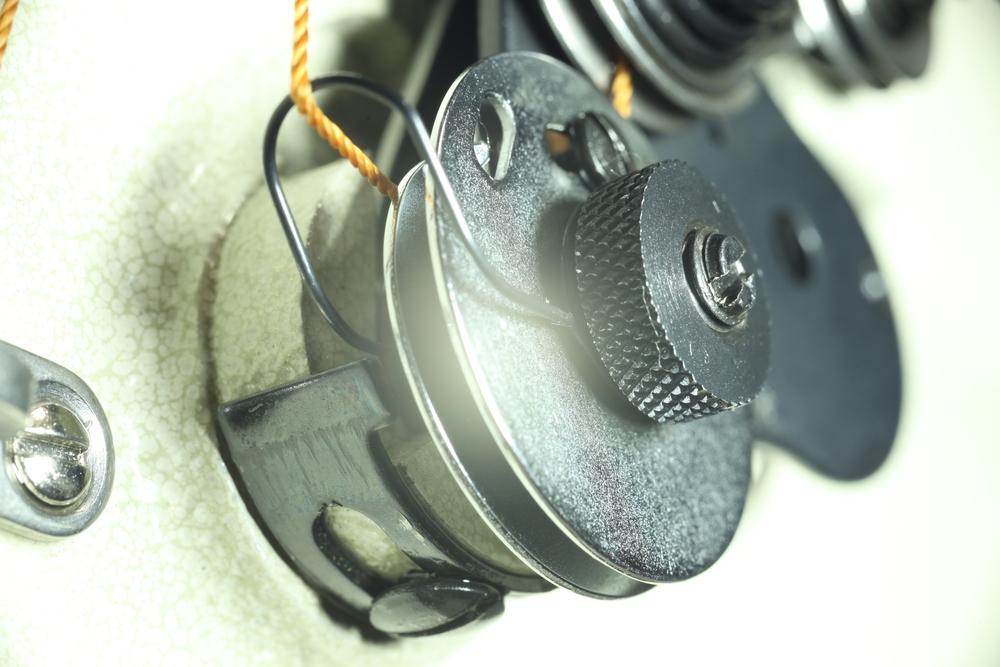
-

Juki 5550N experiencing problem in the bobbin area
AlZilla replied to thobgood's topic in Leather Sewing Machines
-
I think my next project is going to be fabricating a couple of hinges out of angle iron. It is a genuine PITA trying to work on this thing, flopping around on the bench ...
-
Juki 5550N experiencing problem in the bobbin area
thobgood replied to thobgood's topic in Leather Sewing Machines
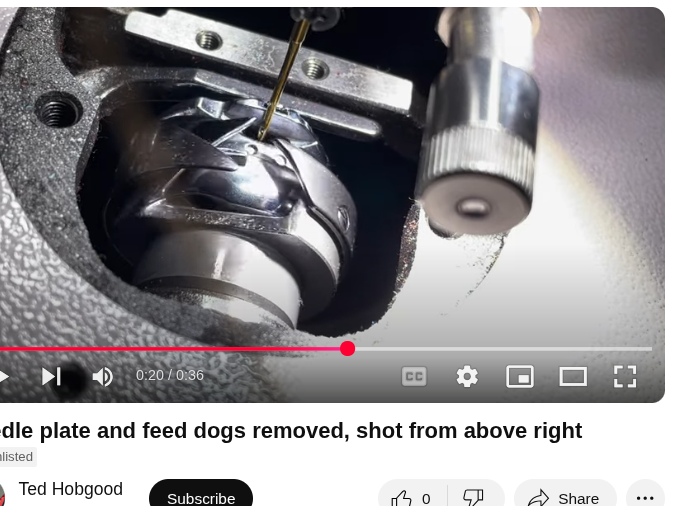
Okay, I have made some more videos as requested by friquant. (I've actually made a few more videos, some while the machine is threaded, but YouTube says I've reached my daily upload limit. Grr. I'll try to upload them tomorrow.) Needle plate and feed dogs removed, shot from top left https://youtu.be/gU6iqXo5XkE Needle plate and feed dogs removed, shot from above https://youtu.be/KzAVHOavvZE Needle plate and feed dogs removed, shot from above right https://youtu.be/ecs0gZc86z4 Needle plate and feed dogs removed, shot from underneath left https://youtu.be/lTKJZDKKaQY -
Nice work. Looks good.
- Today
-
Juki 5550N experiencing problem in the bobbin area
AlZilla replied to thobgood's topic in Leather Sewing Machines
That whole post should be a sticky entitled "When Your Sewing Machine Skips Stitches". I'm going to print it out and go through all my overlooked check springs the next time I have to work on my machines. Thanks for the time and effort putting that together. -
@Mulesaw thanks for the PDF. I was looking for mine but I think I have a paper set of patterns
-
Why not use a simple double edge guide that would be attached to the bed that way it creates a track that you would feed the webbing into???? I did a small table top attachment for my 441 clone that I think the same principal maybe would work for your needs. You can see the two edge guides to the left of the binder attachment in the photo. kgg
.jpg.d69f4e49724e4bde336456bc462ff84a.jpg)
-
@UnderTheRedMoon Hmm, if your character needs to be able to use the scimitar, then tying a lot of leather (braided and strips) to the pommel will just get in the way. Could the character make a cover for the sheath that is made from the leather and braids? That would be how I would do it in real life. If it has to be tied to the pommel ring, then I would use silver thread or gold thread or something valuable that I could later break a piece of to use for payment (I have never played DND, so I don't know if you need some sort of valuables to pay for stuff in the game) Brgds Jonas
-
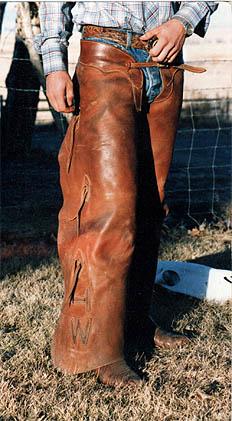
@Appalachiancowboy38 Tandy has a free pattern pack in their leathercraft library https://leathercraftlibrary.storage.googleapis.com/Archives/PDFs/2664-Batwing-And-Shotgun-Chap-Patterns.pdf I made the shotgun patterns for my daughter a couple of years back, and they fit pretty well. To make batwings that fit like shotguns, I'd take the shotgun pattern and just substitute the zipper for some snaps. Perhaps you should add 1" more to the leg width, but apart from that just go with the shotgun pattern. Admittedly I haven't made batwing chaps for anyone yet, but as far as I can see, they seem to flare out a good deal more at the lower part of the leg, and that plus the closing mechanism seems to be the only real difference. Brgds Jonas
-
@jcuk Thanks for the nice comment :-) To me it is also sort of a relaxing experience to sew it, just one stitch at the time, a bit like a zen moment I guess? Out here there is no pressure on speed, and it isn't like wrestling a saddle trying sew on a new girth strap in where they put the fabric strap so high up under the flap that you can't see what youy are doing. Nope, this is just pure straight down the road and new leather etc :-) I rarely listen to anything while I am working, just never gotten into it. I tried to listen to some historical podcasts, and that worked pretty well, but I like quiet time, being able to hear my Newfoundland dog sigh or snore next to me. I have used 4.5 SPI, It is the coarsest wheel on my stitch roller. Given that it is a fairly thick thread (1 mm), I think it looks good with a bold large stitch. Brgds Jonas
-

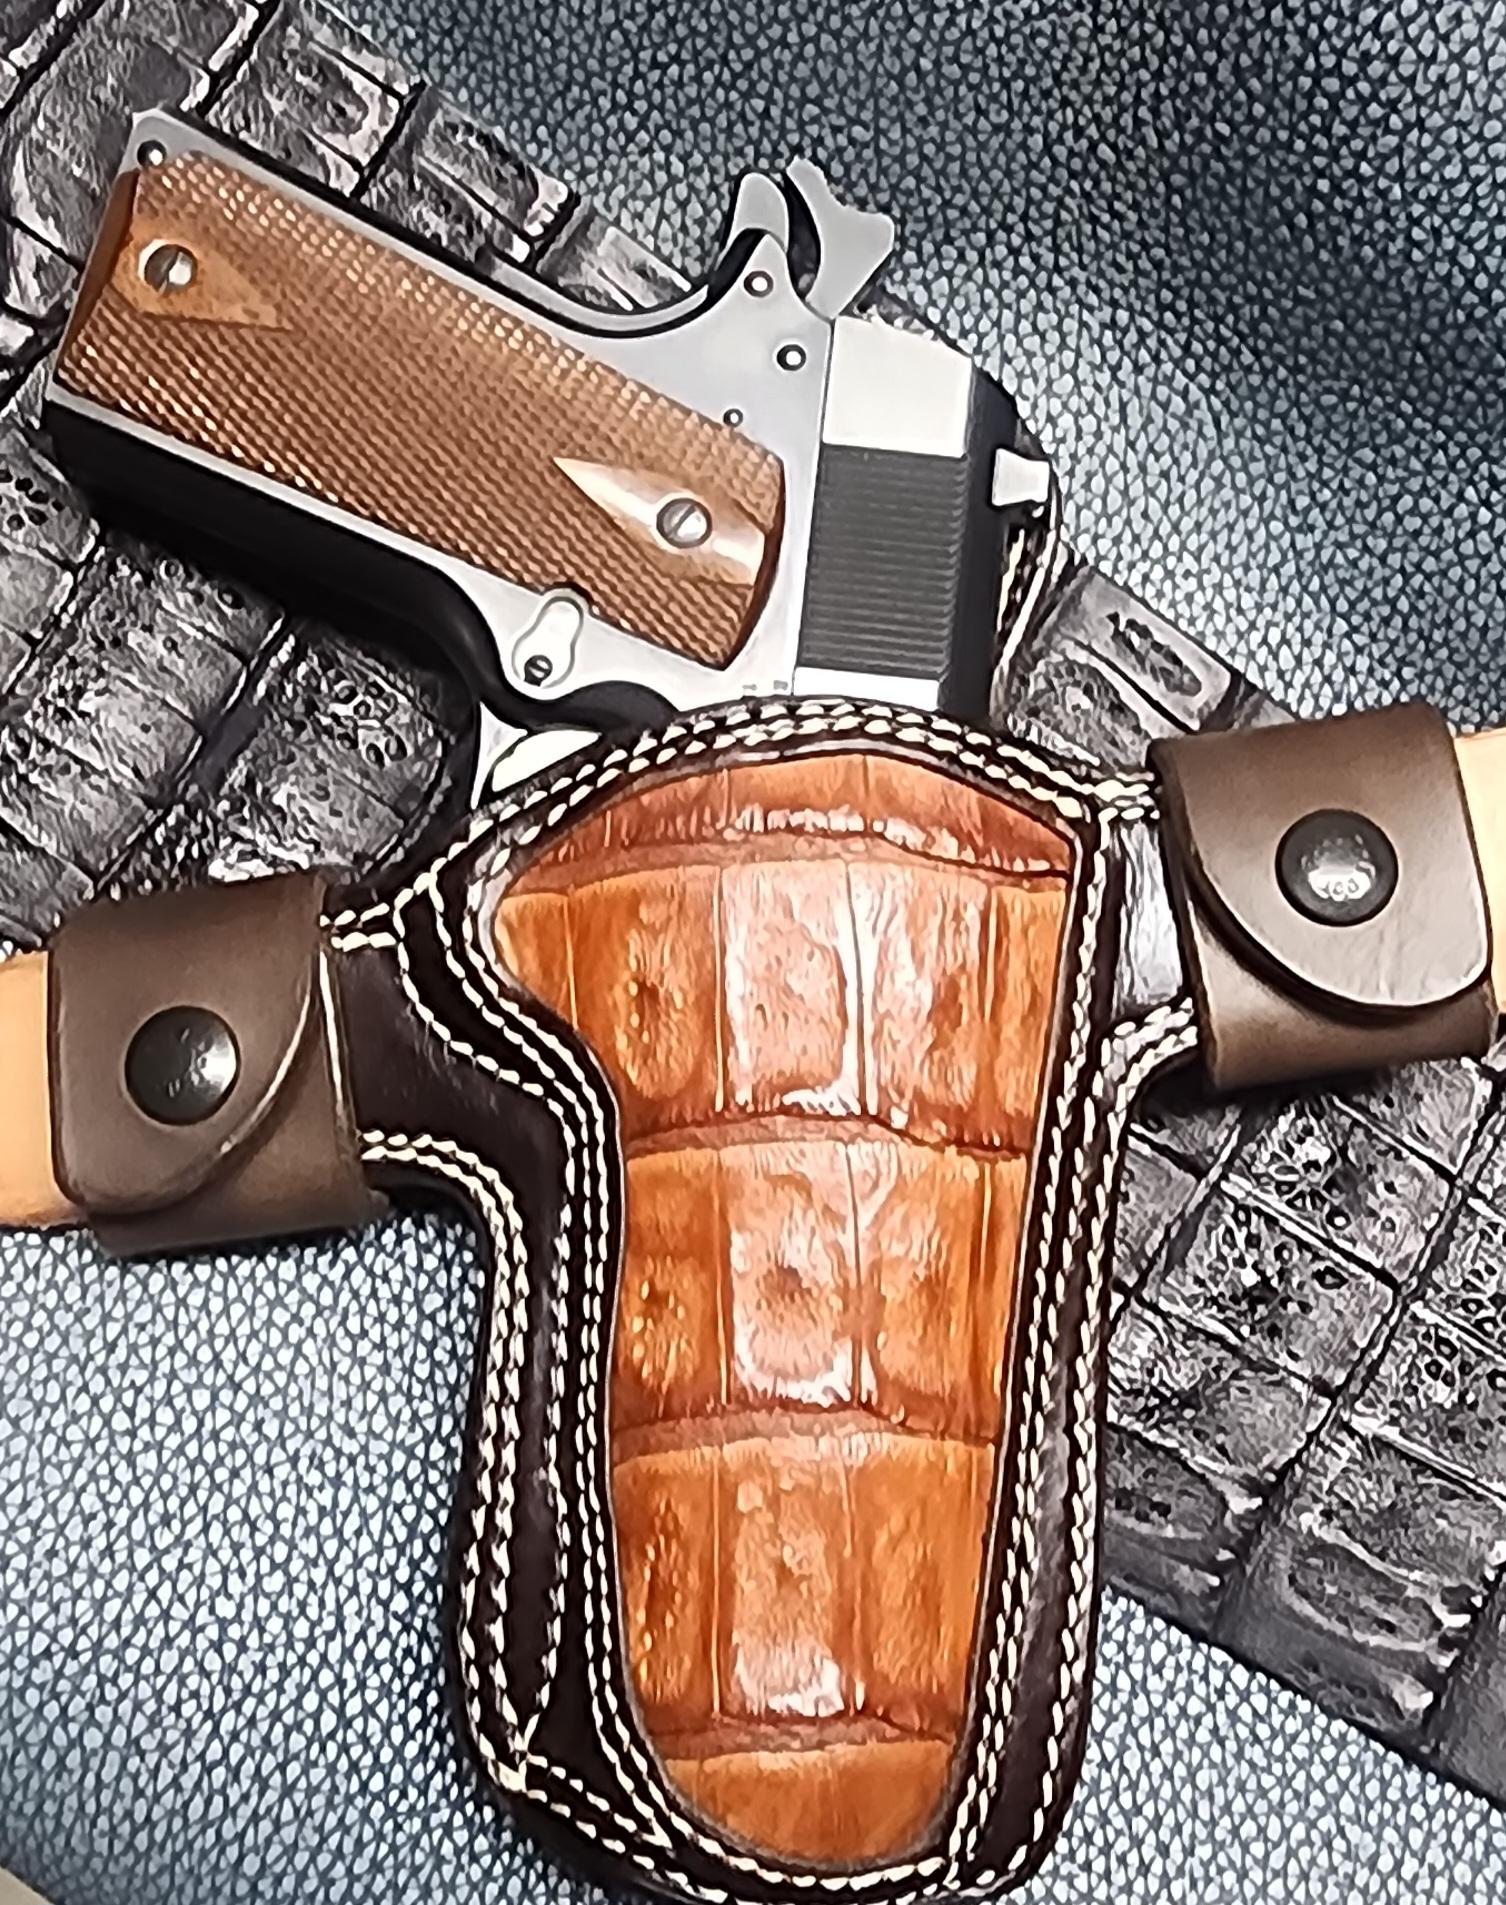
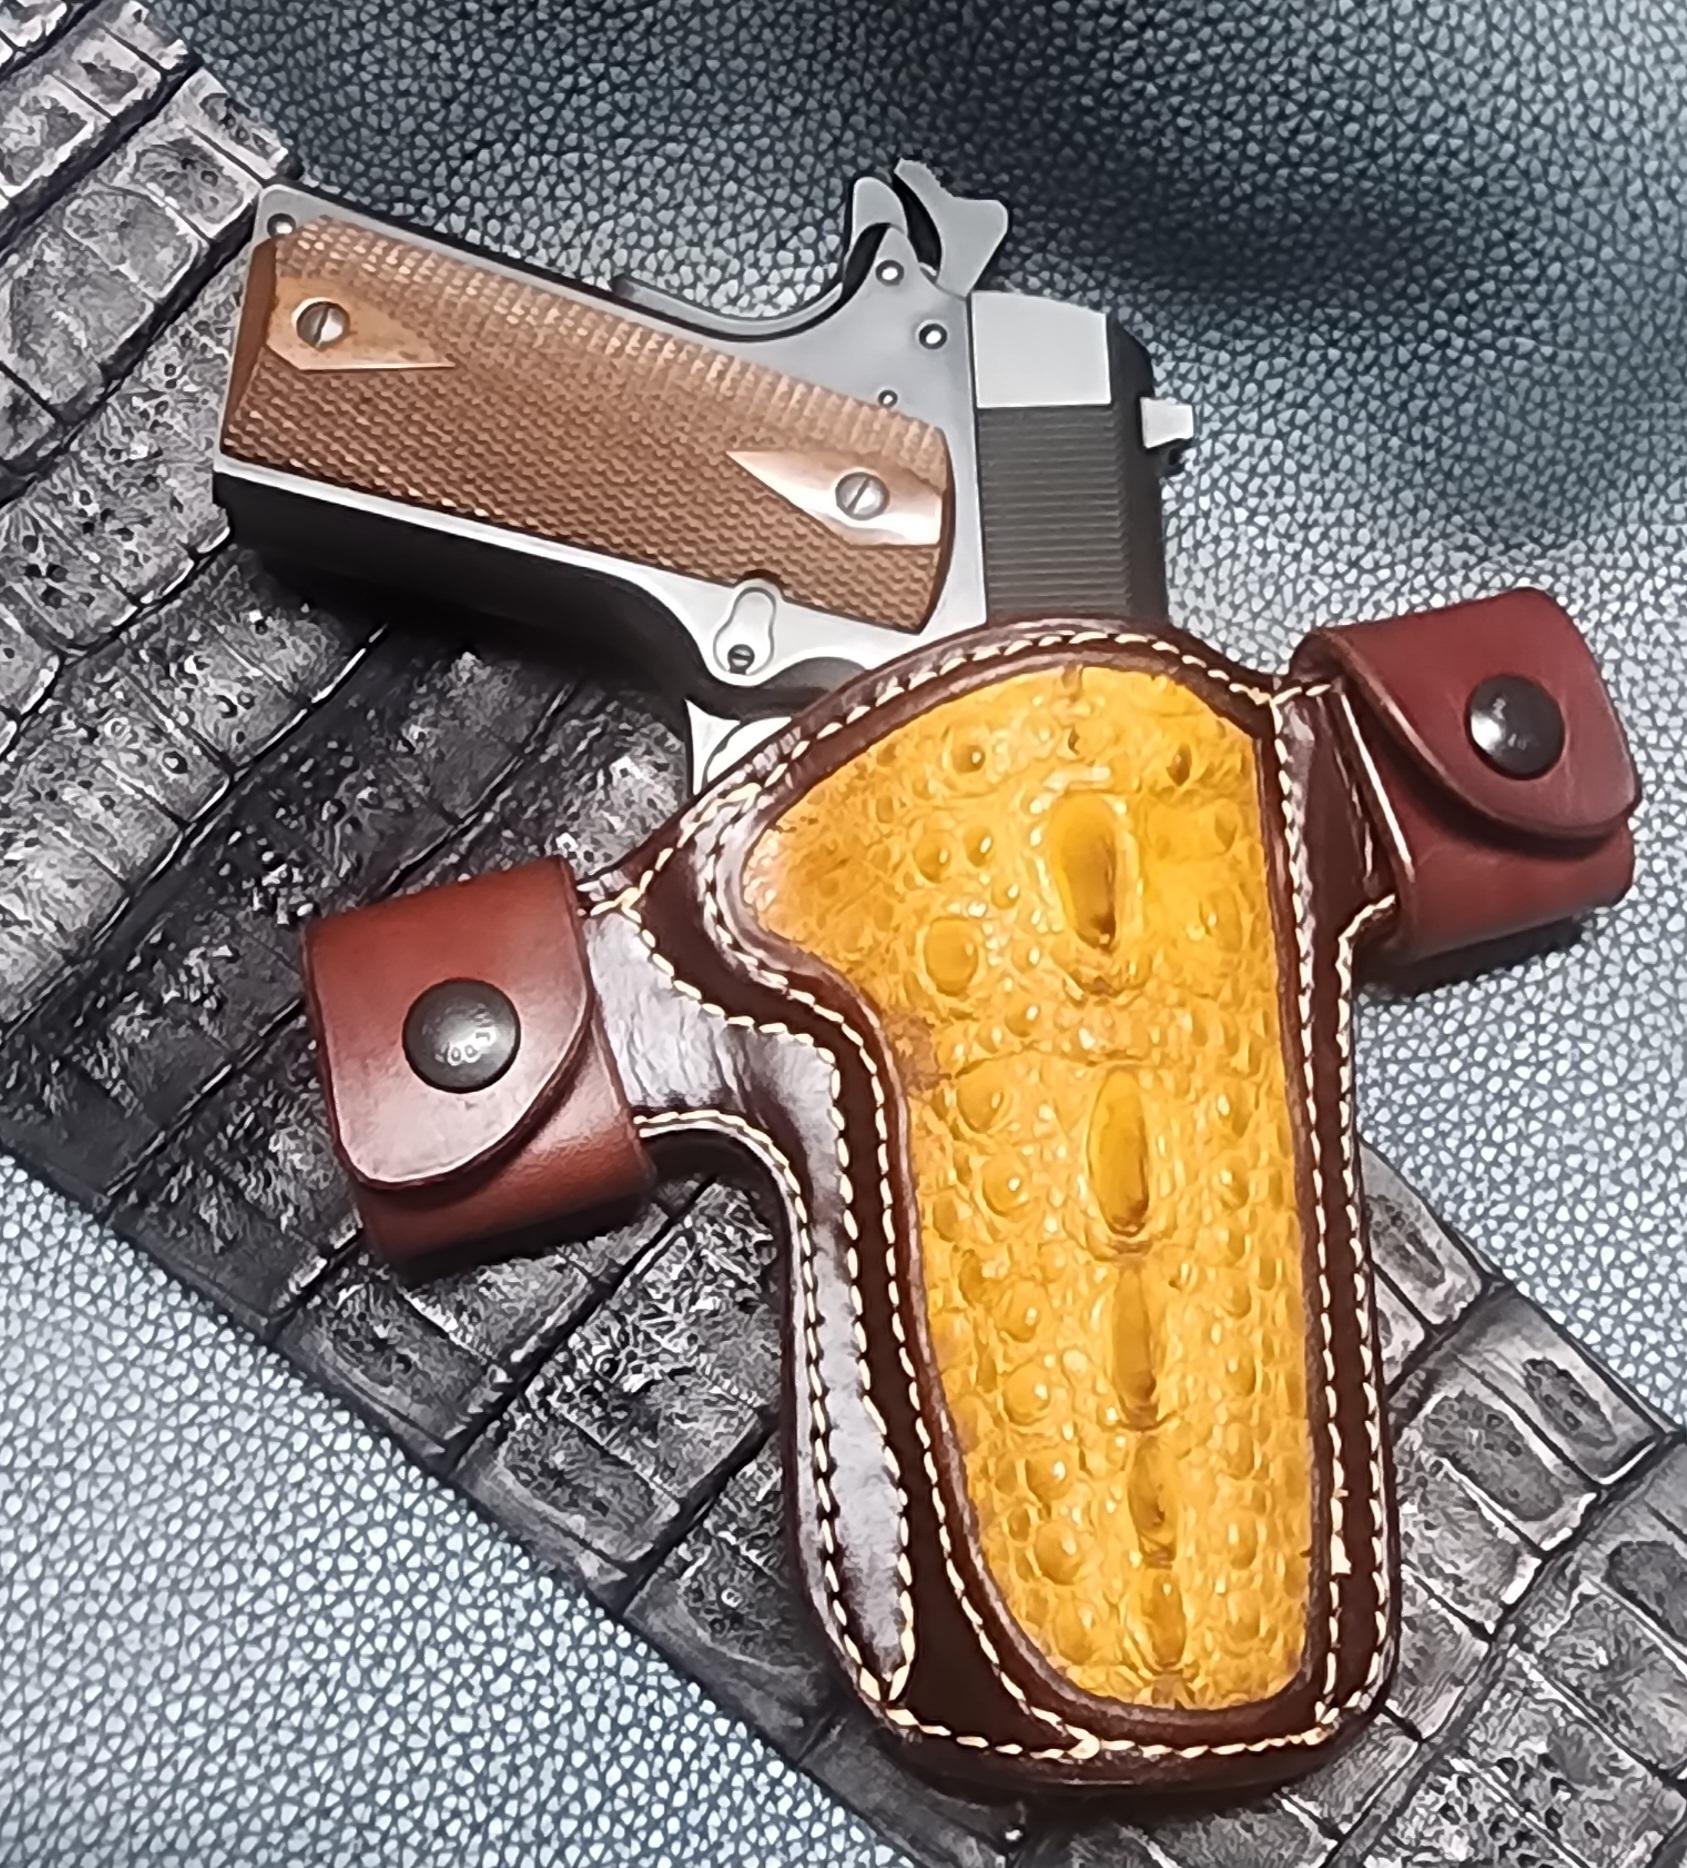
Some exotic inlay for 1911
Stetson912 replied to Stetson912's topic in Gun Holsters, Rifle Slings and Knife Sheathes
Thanks. The caiman is a bear to work with. The snapping turtle was far simpler. Thanks. Fun builds. I Definitely like the snapping turtle and need to get some more of that haha -
Tandy does/did a pattern set for Chaps I'm sure the Bat-wing pattern in that set could be adapted to your needs
-
I’m wanting to make myself a new pair of chaps. I’ve been trying (with no luck) to find a slim batwing that fits almost like a shotgun. I found these that Shooting Star Saddlery makes as an example.Does anybody have a pattern or know where I can find one? thanks in advance!
-

Very wide twin needle guage machines?
nylonRigging replied to medion's topic in Leather Sewing Machines
That good to know . I mulling it around in my head right now on doing a 7/8" gauge on an old 112 that is sitting not being used . Setting it up for stitching both edges of 1" webbing on a pattern I been doing . My personal quest/problem at this moment on the gauge setup is . On the 112/212 press feet . They offer Press Feet with a L-side and R-side edge guide, and that pretty standard ... BUT, What I really like to find is a Presser Foot with an ' edge guide on both sides ' so I can feed the strips webbing directly into/under Press foot . But most likely me getting double-edge guide is probably something that I am going to have to end-up myself Garage McGver'ing and soldering small thin strips of material to both sides of Foot for a double edge guide Foot . . -
Nicely done and definitely more functional !!!!
-
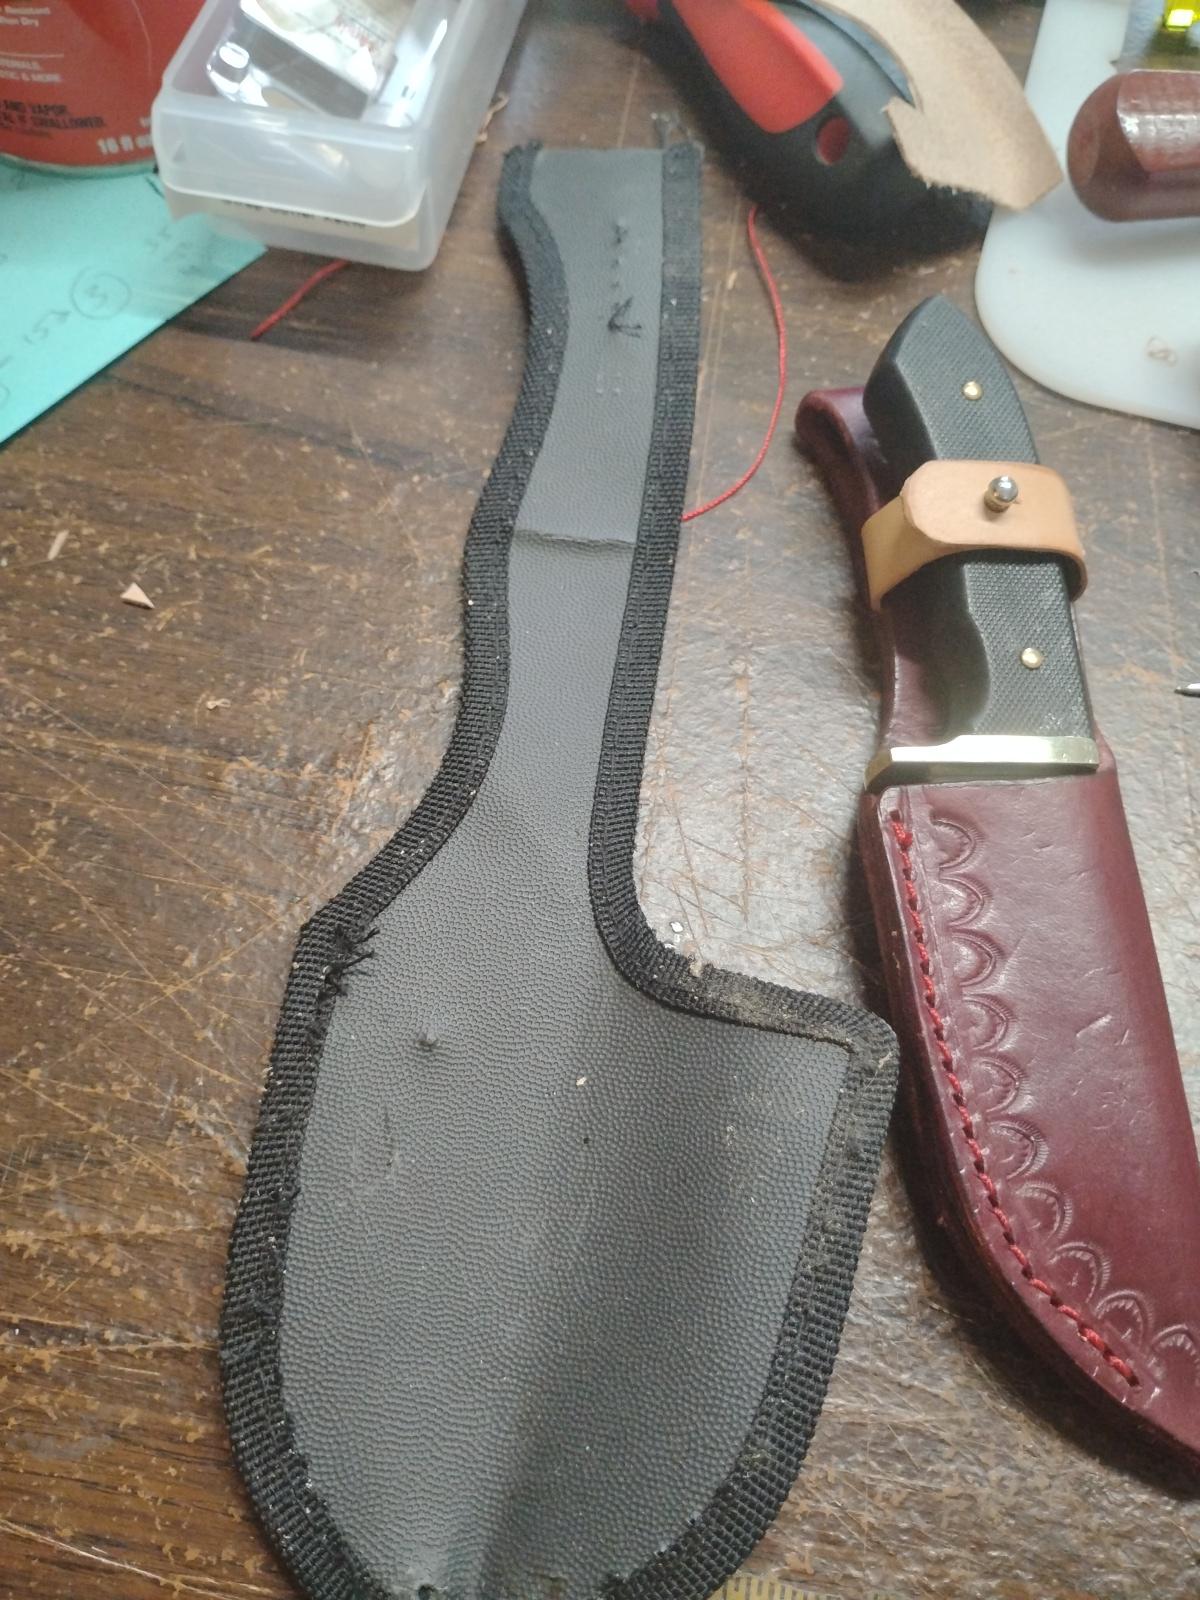
Generally I just make functional things, including this one. But I thought I'd post it anyway. I bought a cheap Tractor Supply knife, put a razor edge on it, cut the junk sheath apart and used it for a template. Here's the result. Machine sewn, for the curious.
.jpg.442ba33f0e0a6b457c45387319bd5ed1.jpg)
.jpg.35750c11062811f63a3e4718c037f11d.jpg)
.jpg.246afc3c10d815290fd489dbaec85f3f.jpg)
-
Juki 5550N experiencing problem in the bobbin area
thobgood replied to thobgood's topic in Leather Sewing Machines
A lot to absorb indeed, Wizcrafts, but exactly the sort of information I need! I shall make the video that friquant requested earlier, and then I shall delve into all the information you have provided me. I always see you answering people's questions in here over the years, and that's very kind and generous of you. I appreciate your wisdom and your assistance. Crossing my fingers I'll be smart enough to figure out a solution with the information you've given me. Thank you so much! -

Some exotic inlay for 1911
rleather replied to Stetson912's topic in Gun Holsters, Rifle Slings and Knife Sheathes
They both are really awesome! Very nice work. -

Juki 5550N experiencing problem in the bobbin area
Wizcrafts replied to thobgood's topic in Leather Sewing Machines
@thobgood When a machine that normally sews well suddenly starts missing stitches, there are three usual suspects. The first is when the needle and hook are out of time. The second is when the check spring motion is incorrect. The third is when the foot pressure is too light to hold the material flat during the needle take-up cycle. Since you have removed the cover plate, you can easily see if the hook is intersecting the needle above the eye, but still within the cutout "scarf." Where the point of the hook is can matter a lot, depending on the quality of the loop that's formed by the ascending needle. You could have perfect timing, but a too small thread loop that might not persist when the hook arrives to pick it off. I normally time my machines so that the hook intersects the needle 1/8 inch above the eye after it ascends about 1/8th inch. This isn't set in stone, but is a good starting point. If your timing isn't close to that, either move the needle bar or the hook. The quality of the loop is determined by two main parts. The first is the motion of the needle. The needle needs to go all the way down with the thread basically taut, then begin to ascend after the thread loosens up. That's where the upward motion comes into play. The hook must wait until the needle comes up as mentioned before. But, if the needle rises as specified and the hook arrives at the designated position and the loop doesn't get picked off reliably, the usual suspect is the check spring assembly! The check spring assembly usually has these three adjustable components. The stop motion bracket. This is a movable bracket that stops the downward motion of the spring where the thread comes out of it. It must keep tension on the top thread until the needle pierces the top of the material. Then it can stop moving. You might let the spring move down after the needle penetrates the bottom layer if it leads to better results. But, never stop before the needle meets the top or it might separate the thread and shred it! The slack adjustment. This is usually a curved slot with a tiny screw that is set to give a decent amount of slack thread. Normally, setting it to the far left gives the least slack thread and vice-versa. The normal position is dead center in the slot. A tighter setting leads to tighter laying stitches and the opposite direction leads to looser stitches. The spring tension adjustment. The tension is adjusted by finding and loosening a screw that is close to the body. It locks the shaft holding the spring in its position. That shaft is slotted on the outside for a flat blade screwdriver. Loosen it and use a screw driver to rotate it one way or the other until it just has enough pressure to hold the thread taut until it stops moving down. If it is too light, the spring may not move all the way down, which can lead to skipped stitches. However, it is it too tight, it may override the main thread tension disks setting. Balance the overall thread knot position by adjusting the top disks after any adjustments to the check spring assembly, and/or the bobbin spring. This may be a lot to absorb, but, it's important to understand. By playing with these adjustments you will better understand why your machine sews as it does, or misses stitches. The last thing I mentioned was the foot pressure. This is actually a two pronged issue. The foot, or feet in a walking foot system, must hold the materiel flat as the needle ascends and the hook arrives at pick-off time. If the material lifts with the needle, you will probably get skipped stitches! So, tighten the foot pressure screw on top of the head! But, what if you have tightened the foot action and the material still lifts between the legs? Yep, skipped stitches! When this happens, buy another foot with less space between the inside of the legs! Recap. Either confirm or adjust the nook to needle timing. Adjust the quality of the thread loop via the check spring. Make sure your presser foot is able to hold down the material between the legs. Once you fine-tune these settings, your stitches will be more reliable. Afterward, you might want to tweak the hook position for the quietest pick-off. If it is too close to or too far from the needle's eye, the thread will snap as it goes around the hook. It is usually louder if the timing is a little late. Try advancing the hook a little. Just make sure it arrives about 1/8th above the eye after the needle rises about 1/8th inch. Your manual may give the exact factory specification for timing the needle. If so, use them. The check spring slack setting can fine tune the quality of the loop. I hope this helps! -
I have never worked with canvas so I don’t know, but I can’t imagine it affecting any edge binding that you do. It might not take edge paint very well if you decide to go that route. There are some pretty good YouTube videos on how to do edge binding, my wife has been working on a purse that she is using a Mexican round braid around the edge. Chrome tanned leathers will also help you with keeping your malleability but it my be pretty floppy if you use it for the cover but an edge braiding will shore it up pretty well.
-

Some exotic inlay for 1911
fredk replied to Stetson912's topic in Gun Holsters, Rifle Slings and Knife Sheathes
yup, I like them, A bit of class -
These were fun. Hope you like em.
-

Made a little something for myself
dhaverstick replied to dhaverstick's topic in Archery Quivers and Bow Cases
Thanks, all! Each hook has two holes drilled into its base. I then just sewed the hook to the arm guard. Darren -
Nice work on the stitching without a clam, I love hand stitching things no matter how tedious it can seem to be at times once I get into it, music playing in the back round or listening to the TMS ( Test Match Special ) its Cricket commentary. What is the spi you have used. Regards JCUK