All Activity
- Past hour
-
So near and yet so far. Epic fail. How do I get the tape to come out of the folder the same on both sides of the leather? Is it a question of what type of tape is used?
-
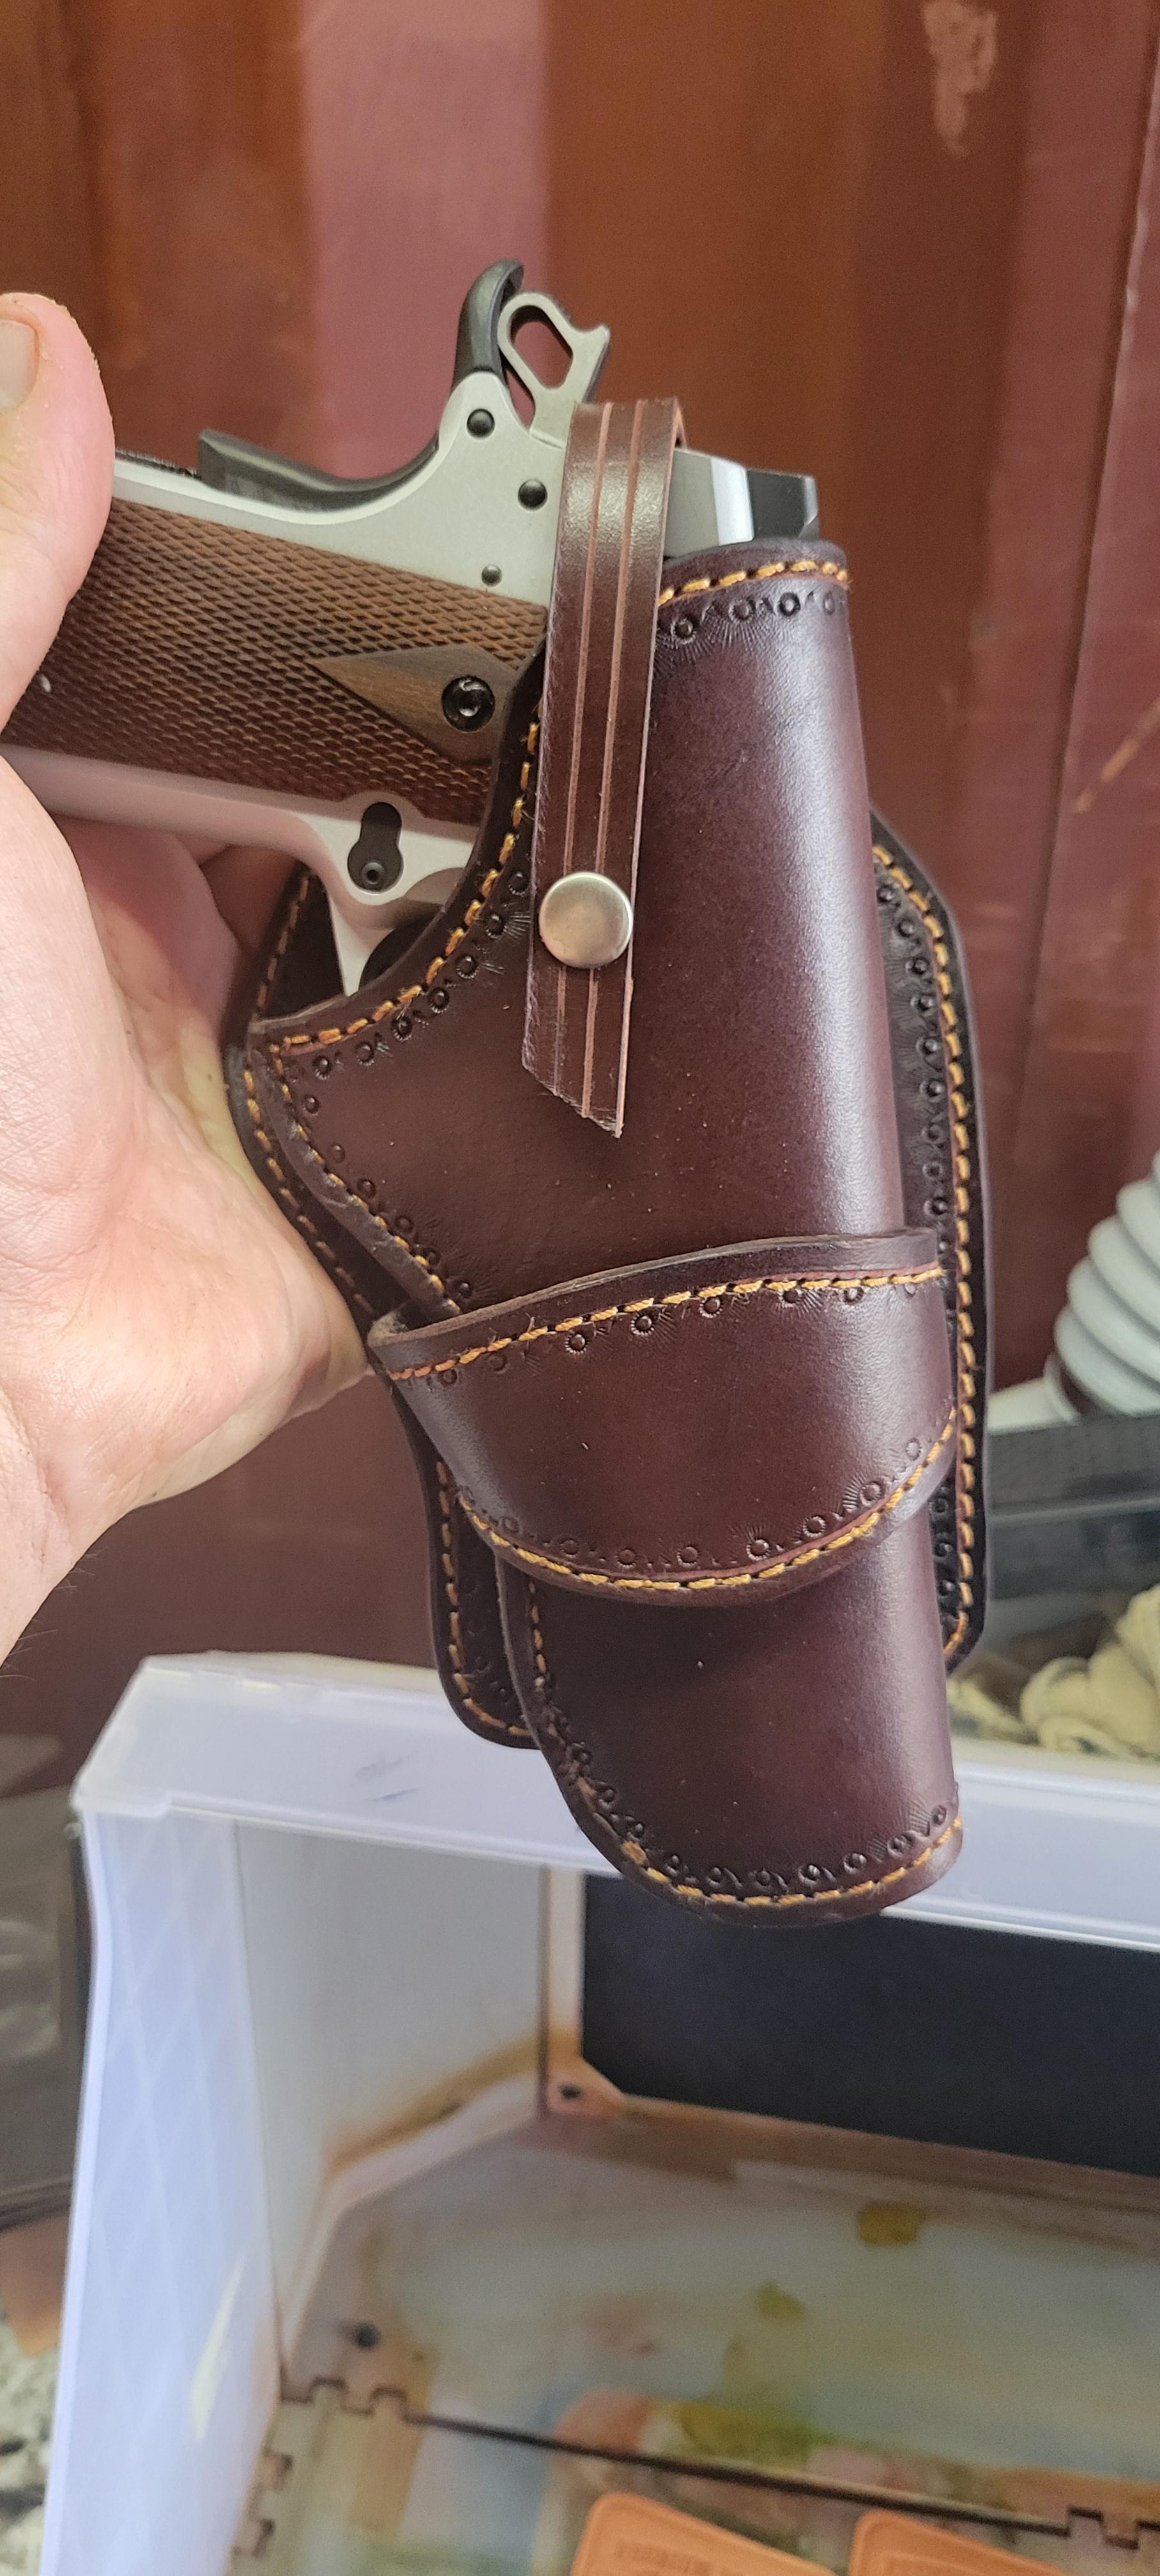
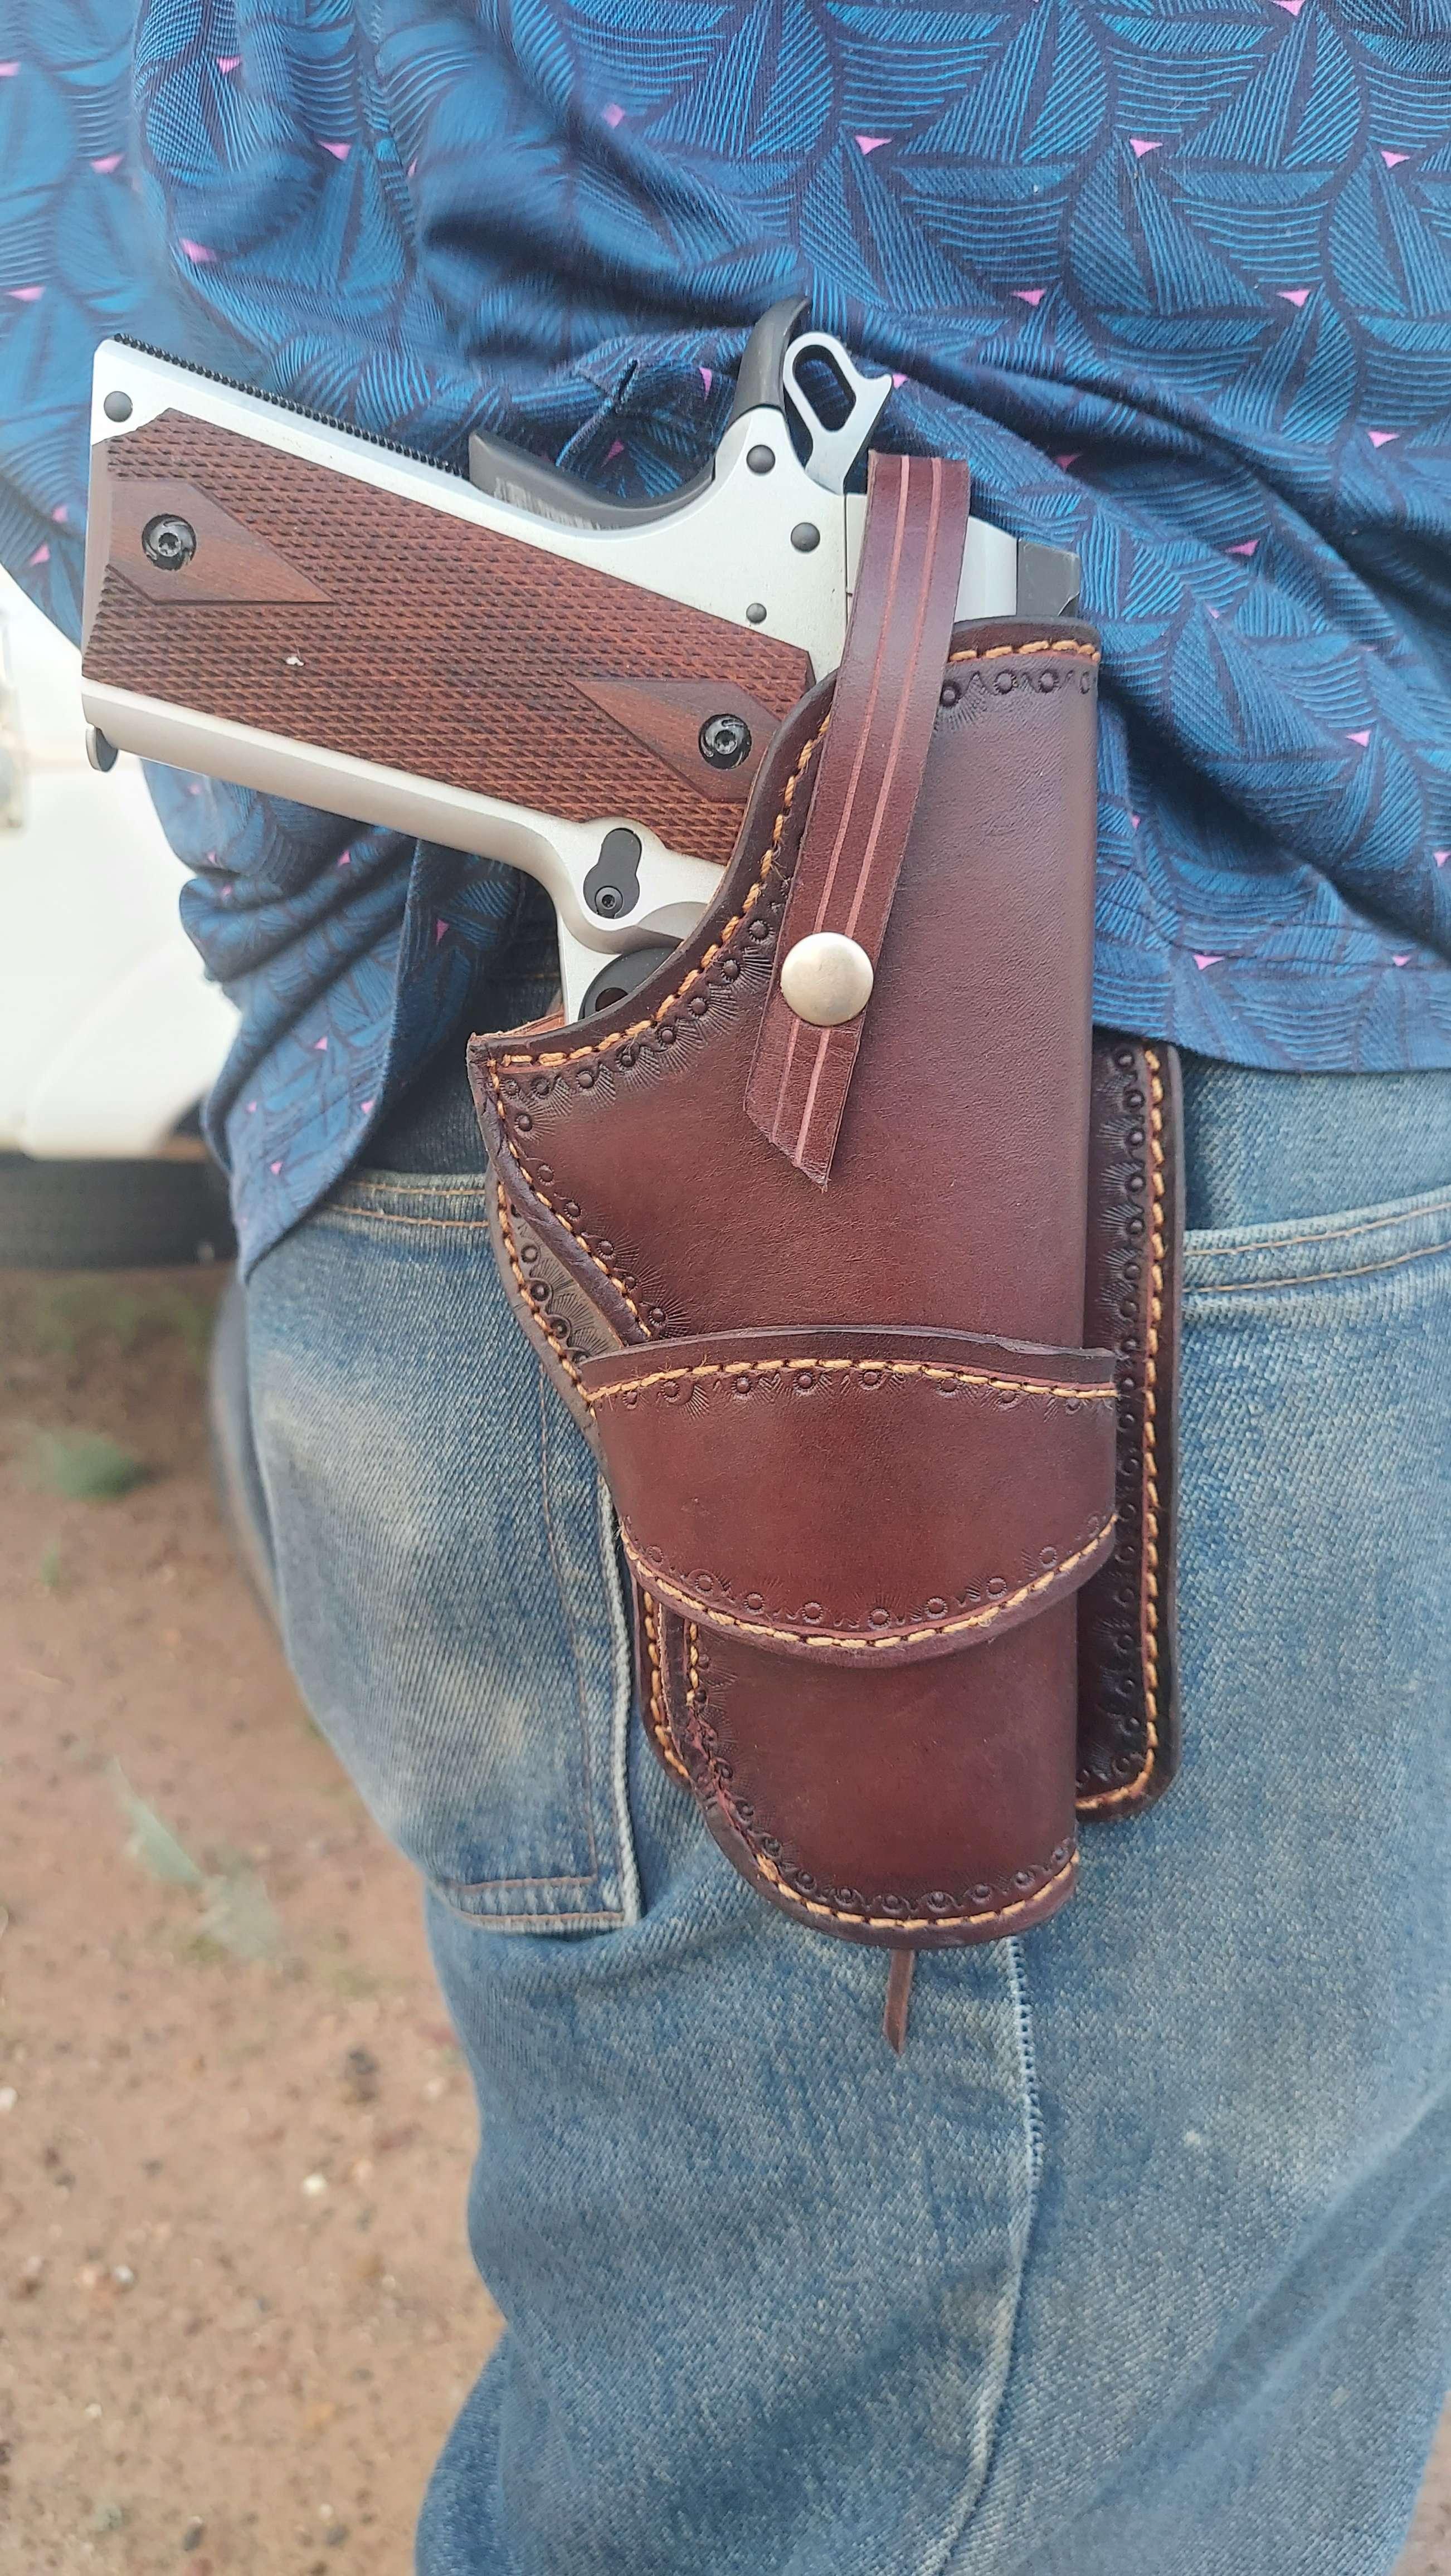
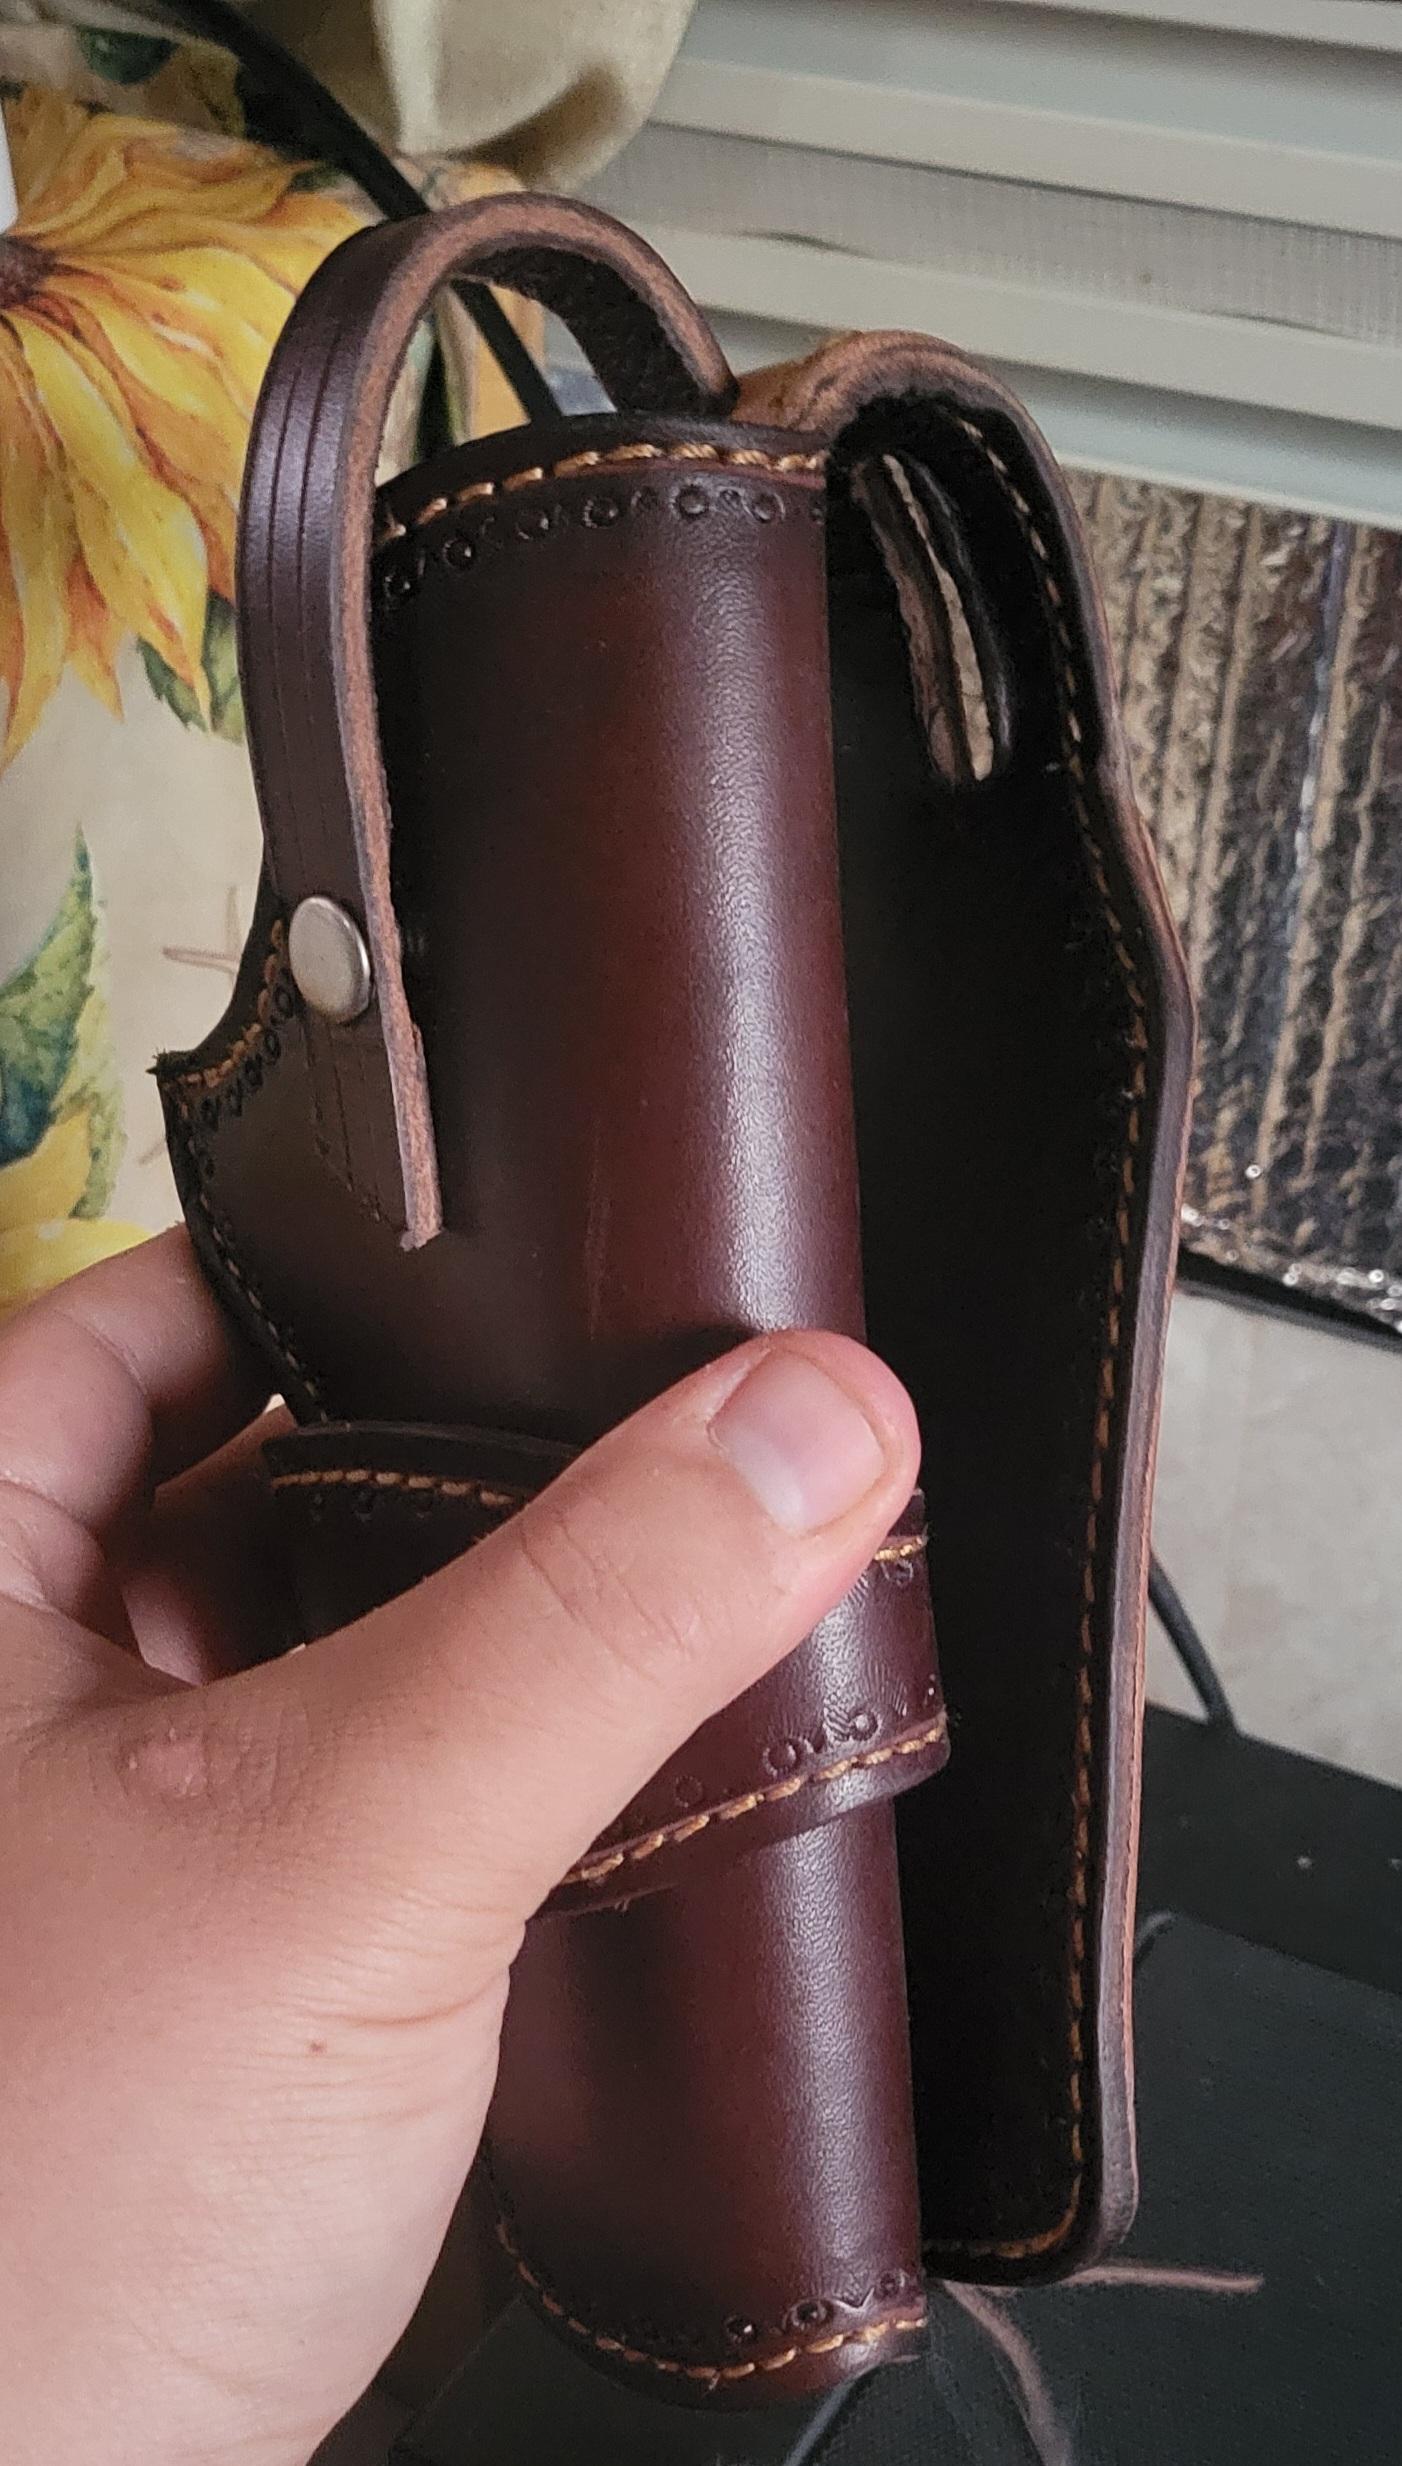
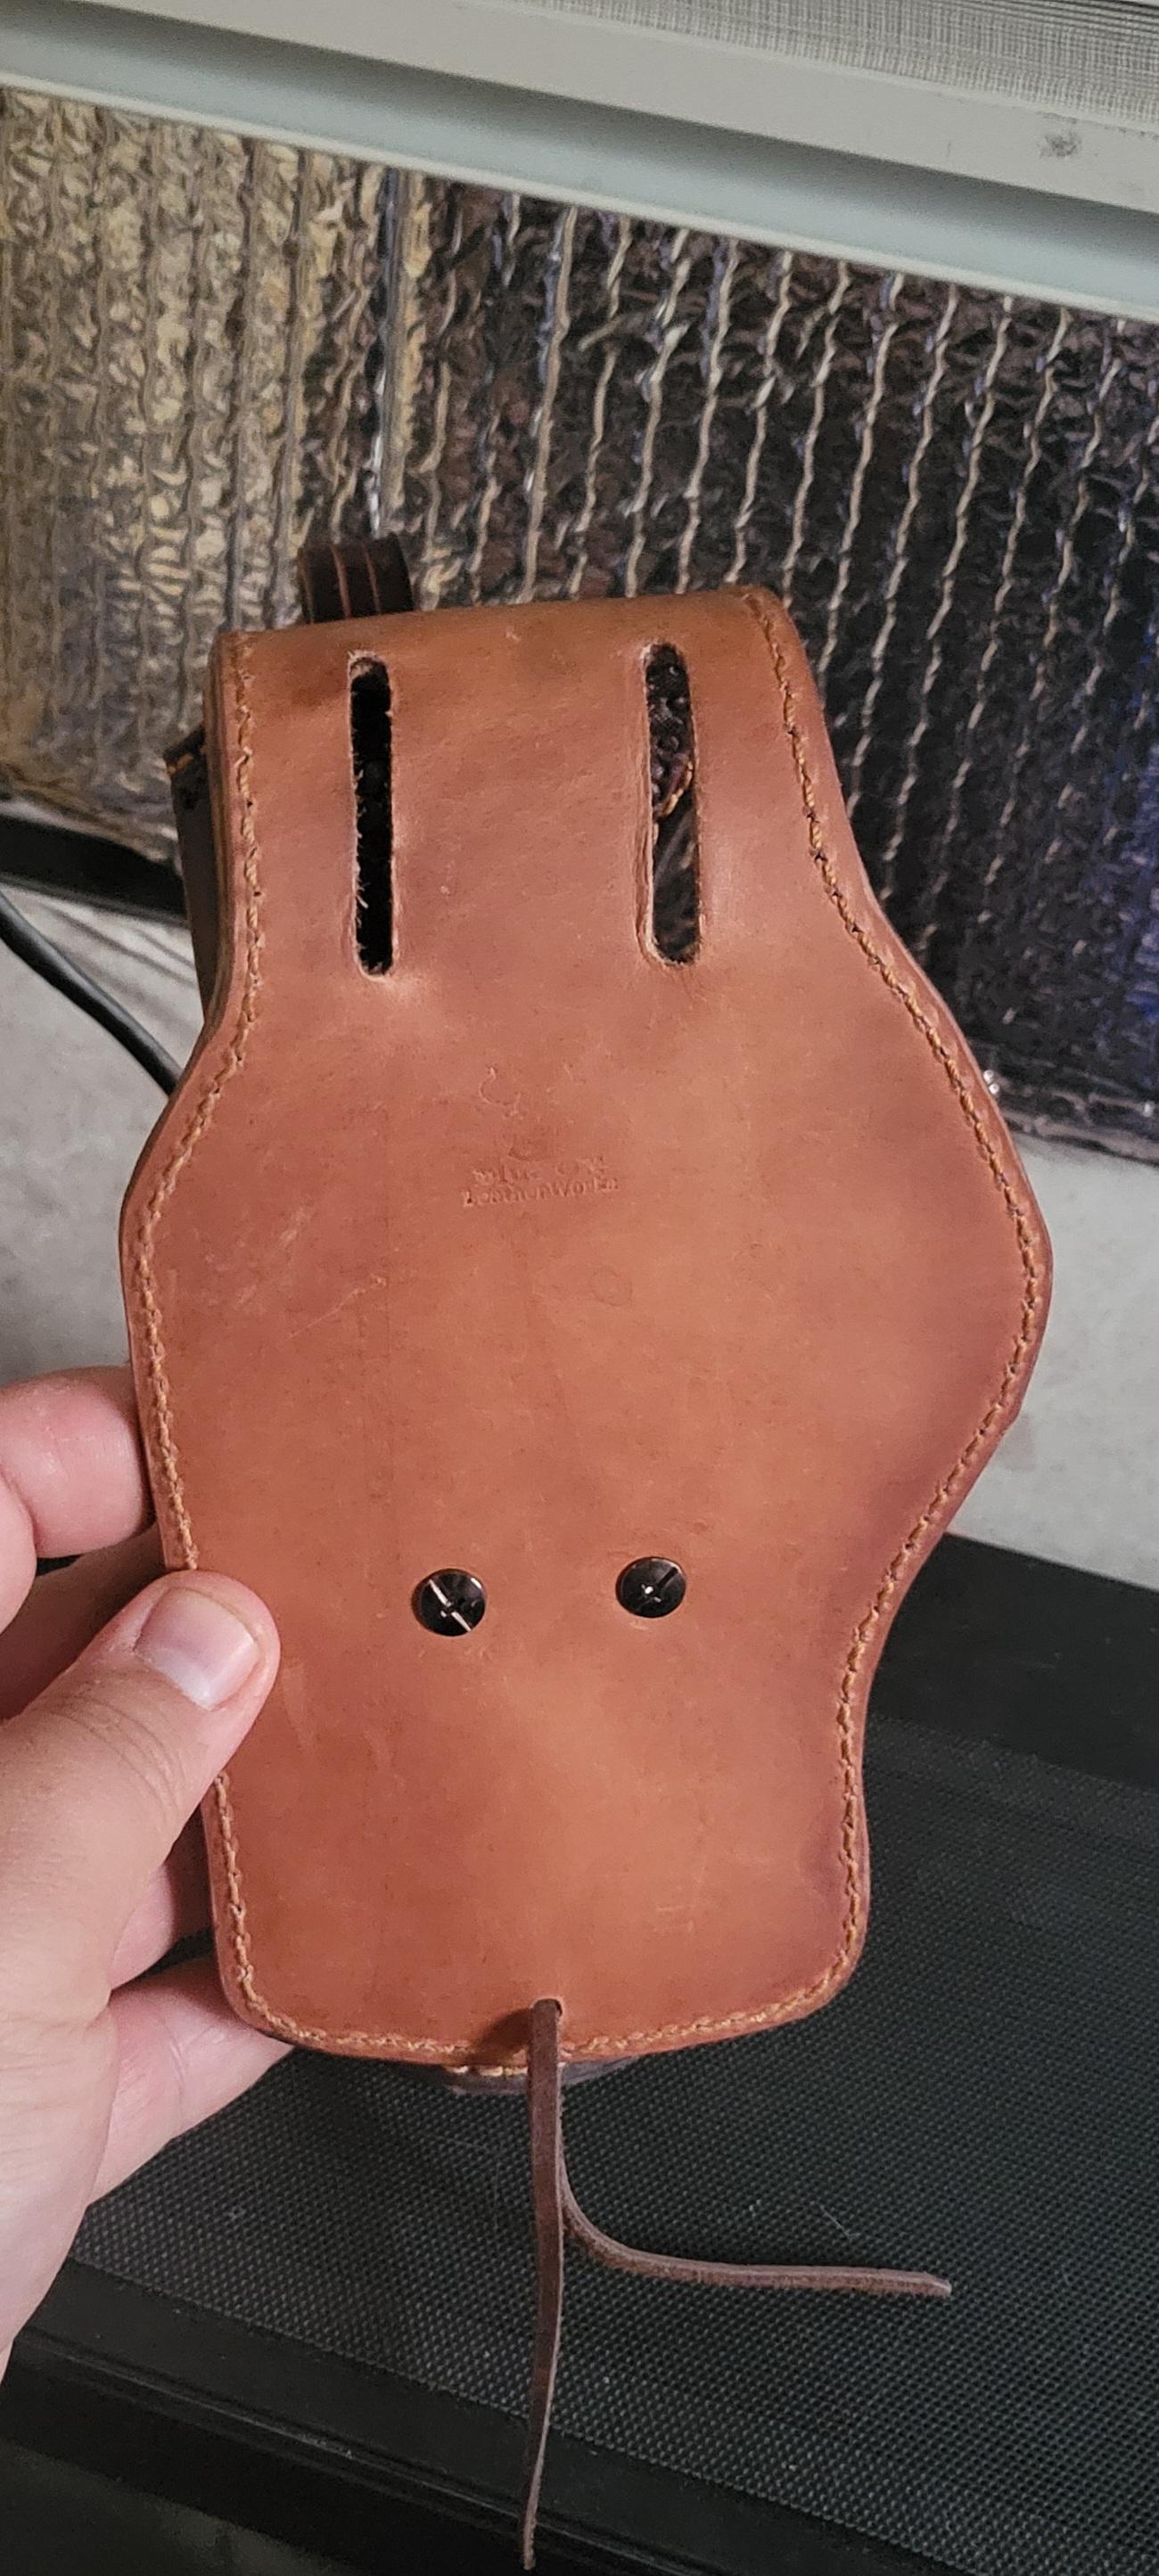
Thank you, the few people I've shown didn't notice the stitching issues. So you're probably right that I should just not point it out. But since I made it it seems so obvious. So far it does carry a 45 1911 pretty well, even with my extra weight. So I think the height does help a bit.
-
That looks easier than I expected! I should be able to make that. Maybe a dog collar itself for my Poochie as I learn how to lace like that. Thanks @TomE
-
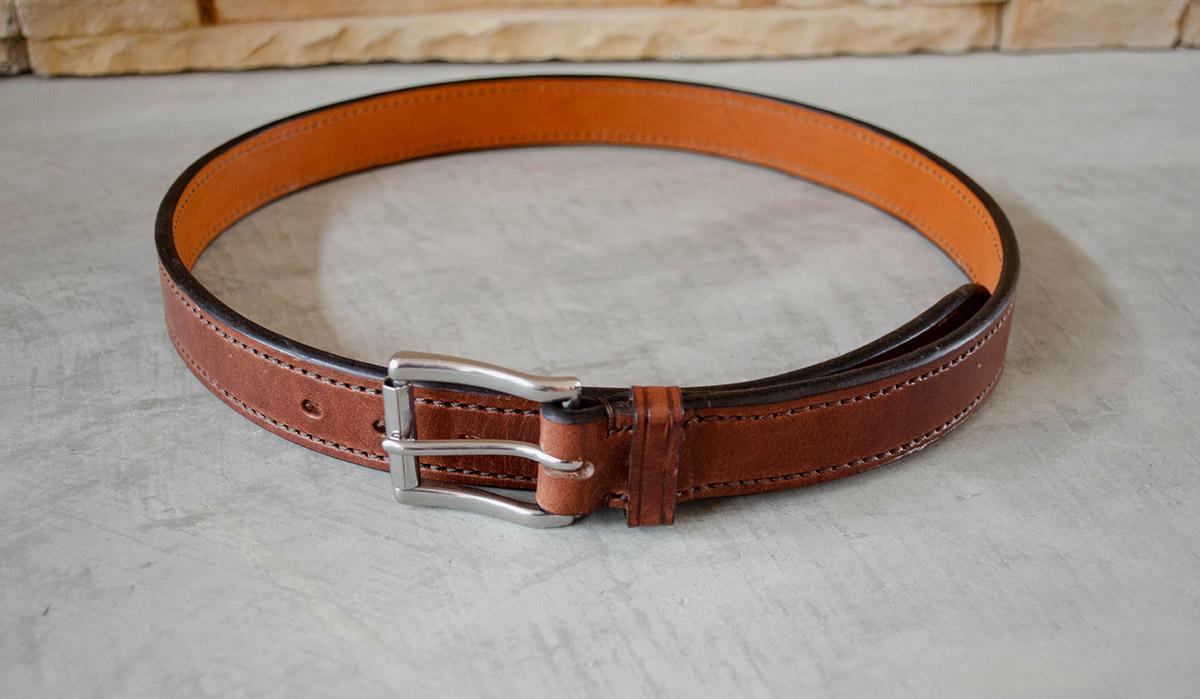
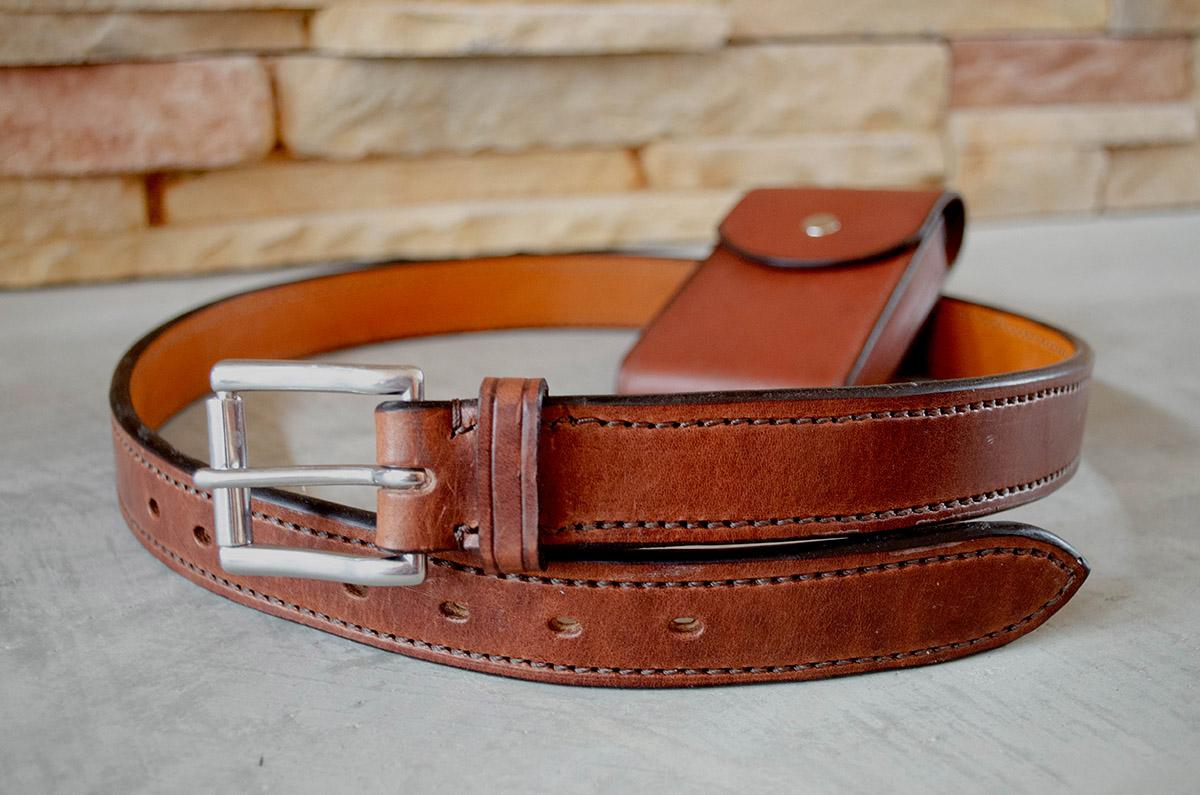
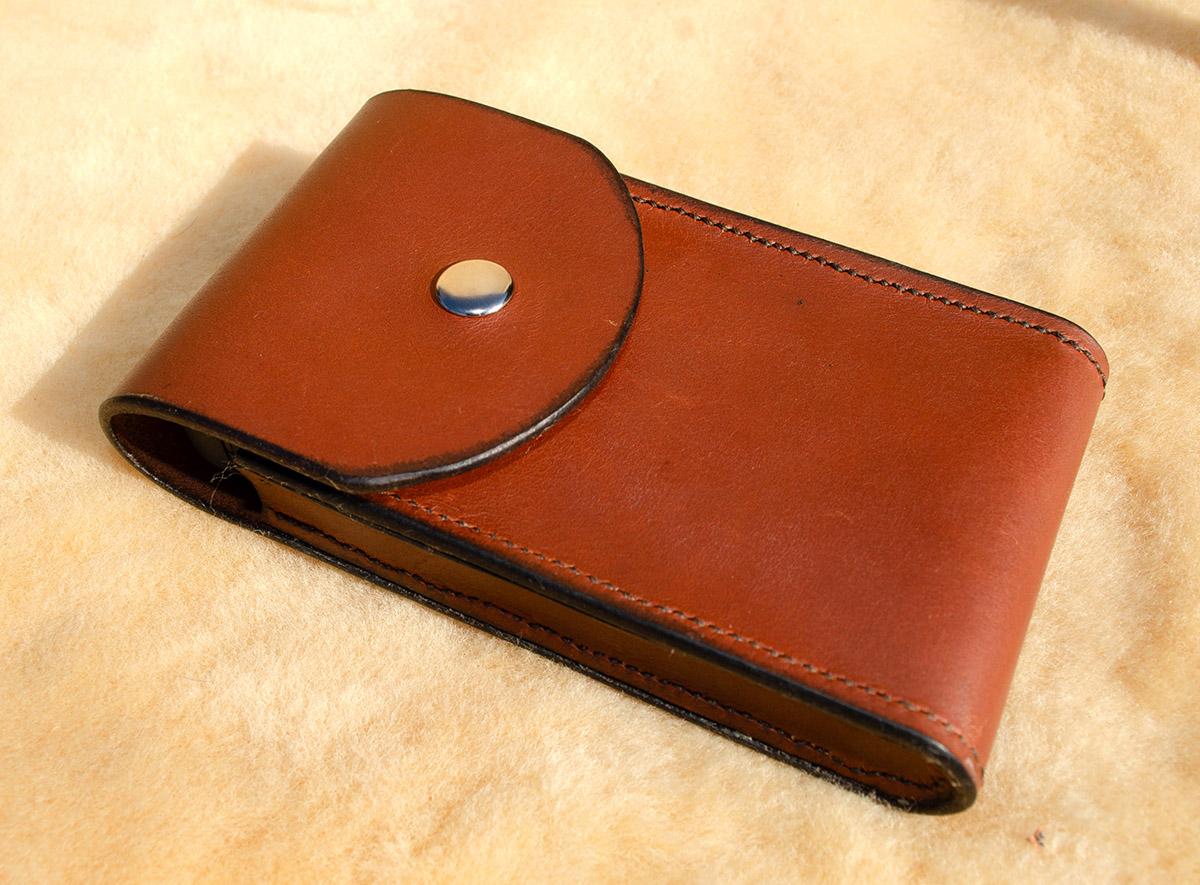
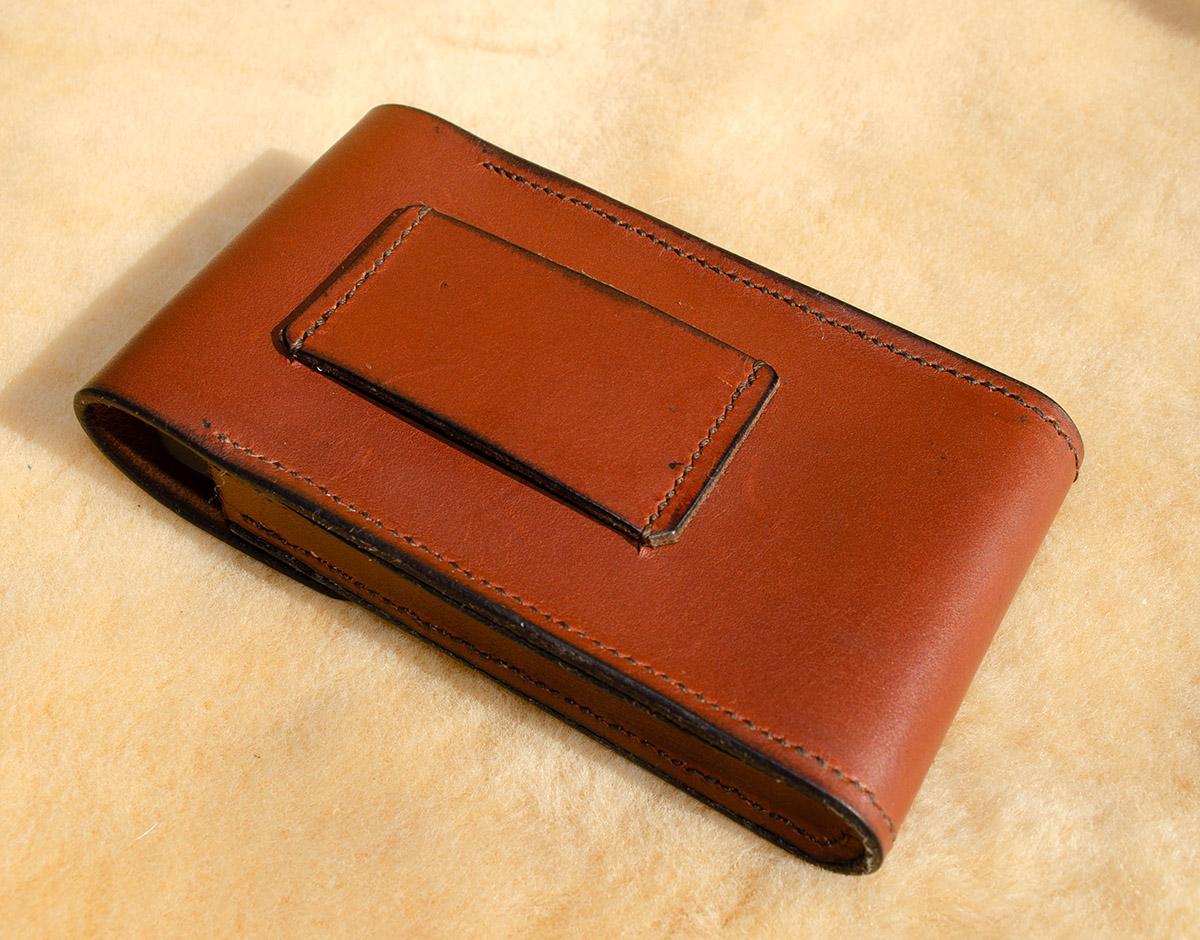
I got tired of my stretchy work belt and phone clips that break, so I made a couple of accessories for my day job as assistant mucker at Maefield Farm. The belt is made from 10 oz Hermann Oak chocolate harness leather with a liner. The phone case is made from 5-6 oz "oil tanned" leather from the SB Foot Tanning Co. The case was constructed around a block of closed cell foam, glued and sewn at 10 stitches per inch. The edges of the belt and case are sealed with beeswax.
- Today
-
Slipped this over to leather sewing machines. It might make a difference which Pfaff you got. If it's a standard industrial with the motor under the table, swapping the motor out might solve part of it. If it doesn't care about the source of it's compressed air, a small contractor compressor might be the rest of the solution.
-
This post contains @Wizcrafts recent dissertation on all things Check Spring.
-
That's a great holster, first one or not. I think I see where you're talking about on the stitching but it's no big issue. Julia Child said don't tell your guests what's wrong with your food and they'll never figure it out. The height of the belt loop slots might keep the top of the firearm from torquing out. I suspect this is more a fat guy problem
-
While working a commission for a company, one of the employees asked if I could do holsters. I had never made one so I did my best to find out if I could. I see many mistakes in my part, especially messing up the last bit of stitching of the entire piece. But for a first try im pretty pleased with myself. I'll have to use it for awhile before I'd be comfortable trusting one I made enough to sell though.
-
A #23 needle is the right size for #138 thread on the top and bottom. Look closely at the leather under the needle to see if it is lifting with the needle as it ascends. This almost always causes skipped stitches. If it is lifting, add more foot pressure. Inserting the needle backwards has the same effect. Make sure the rib side is on the left and the scarf side faces due-right. If the check spring is set wrong for the work, it can cause skipped stitches. The bottom stopper should halt the downward motion of the check spring as or just after the tip of the needle enters the top of the work. The longest it should allow downward motion would be as the eye shows just under the bottom layer. The other settings are spring tension and slack adjustment, via a set screw inside a curved slot. Try changing the position of that screw.
-
Very nice and very interesting. Looks easy enuff to replicate. I might try it on a sword/axe hangar
-

Ryan Neel and Neel Saddlery- a review you need to read
jrdunn replied to HideDesigns's topic in Leatherwork Conversation
Agreed! It is heartening to find this level of service and commitment. JM2C, Jim -
I think you could adapt the method for laced reins to make this pattern. Would decrease the spacing between holes and perhaps use a lacing chisel (or a sharpened screwdriver), instead of a round hole punch, on the outer holes of the pattern. This would help to keep the lace lying flat. I'd make lace out of the leather of your choice, about 1/8" wide of 5 oz thickness. I would use bridle leather for some stiffness and tap it with a polished hammer to set the shape. Here's how laced reins are laced:
-
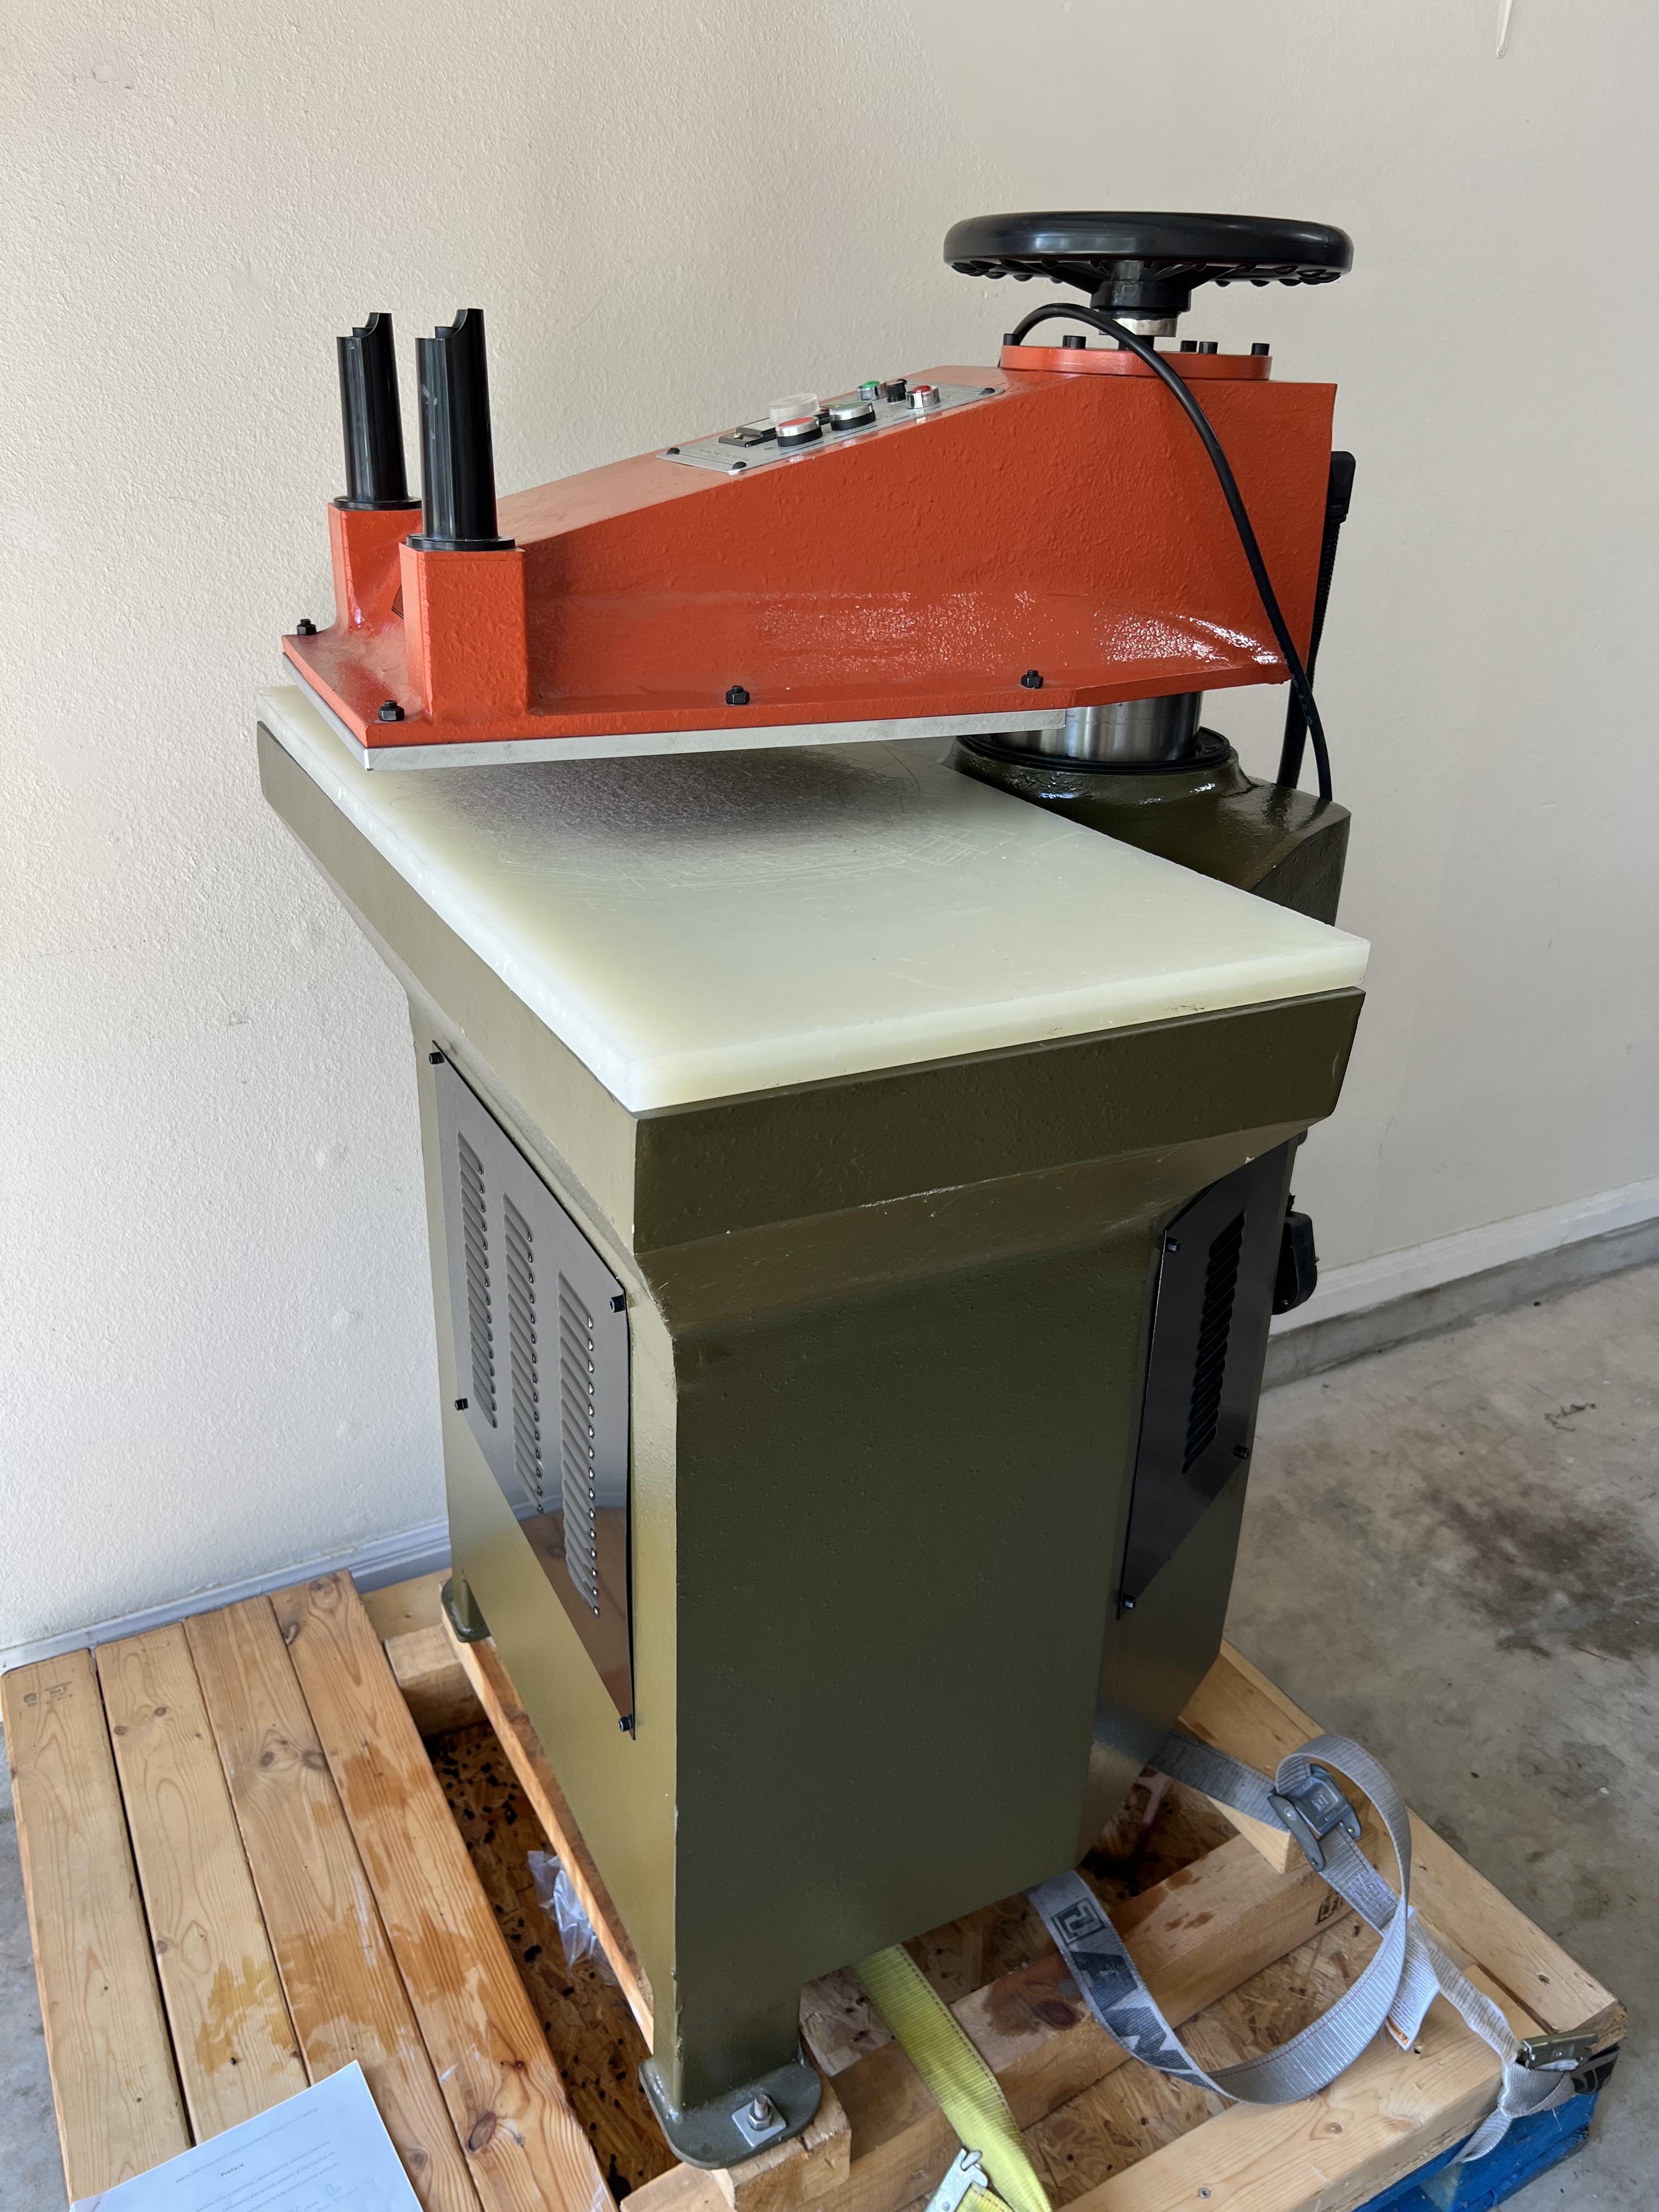
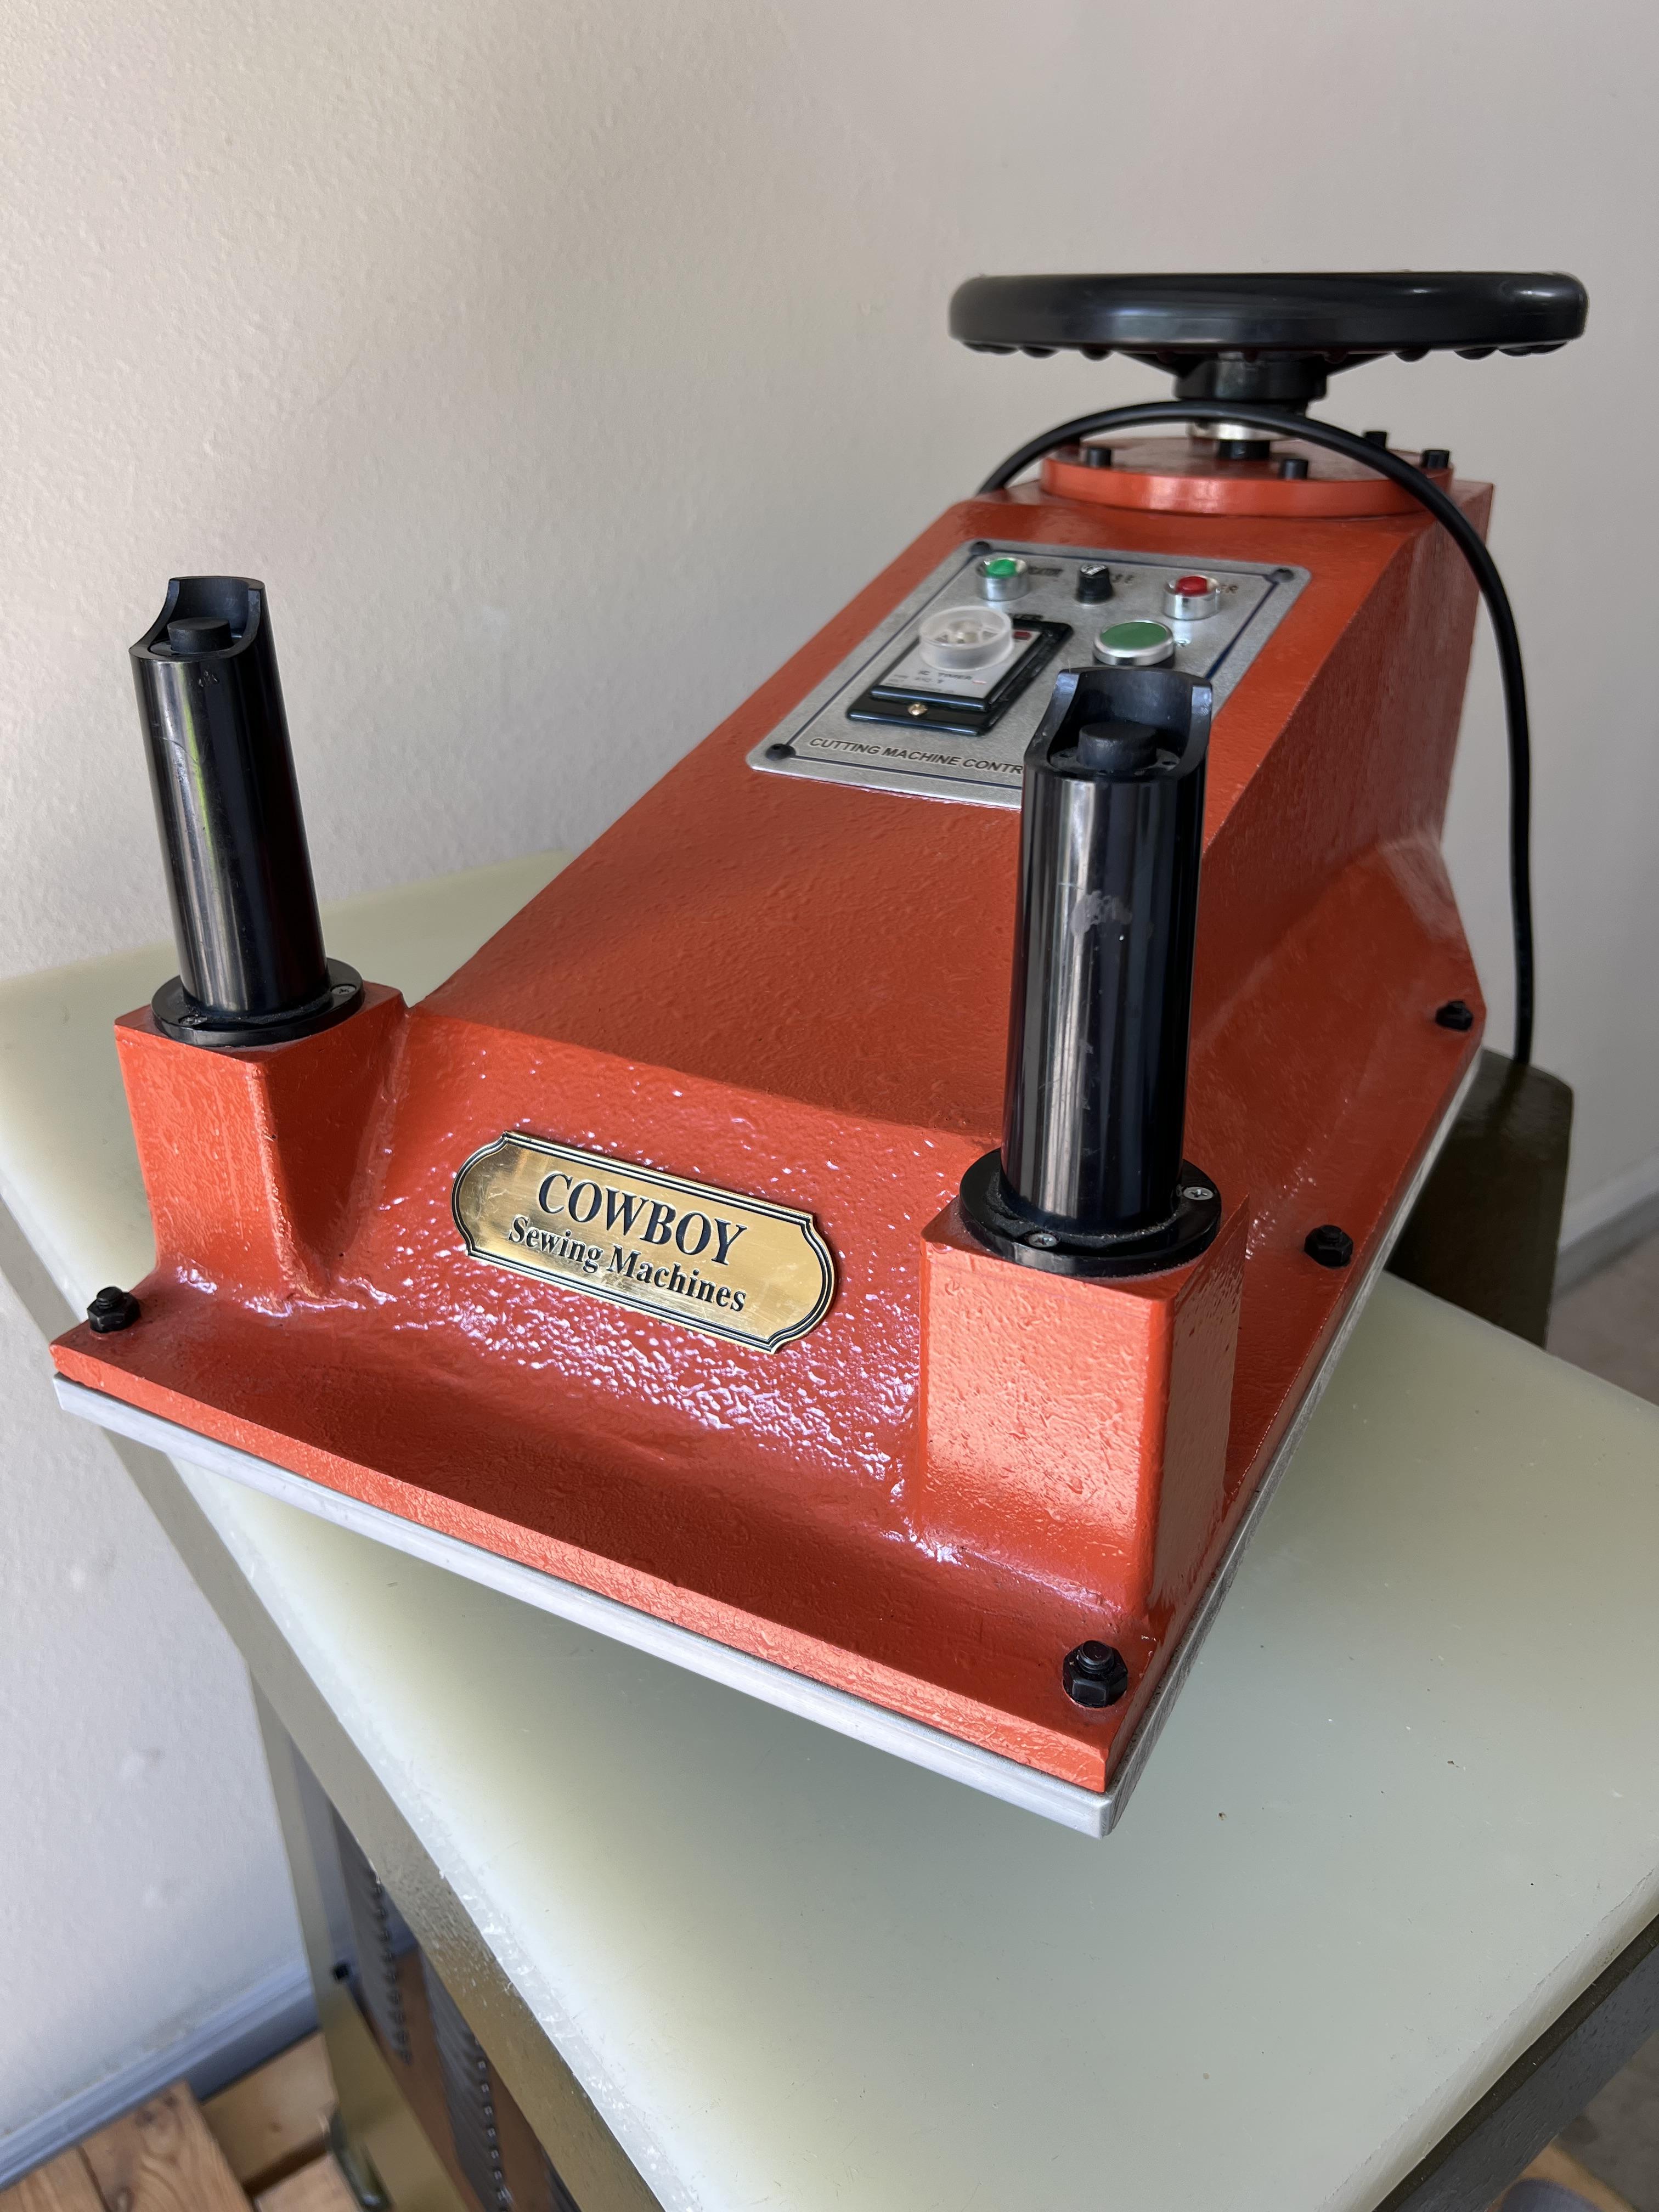
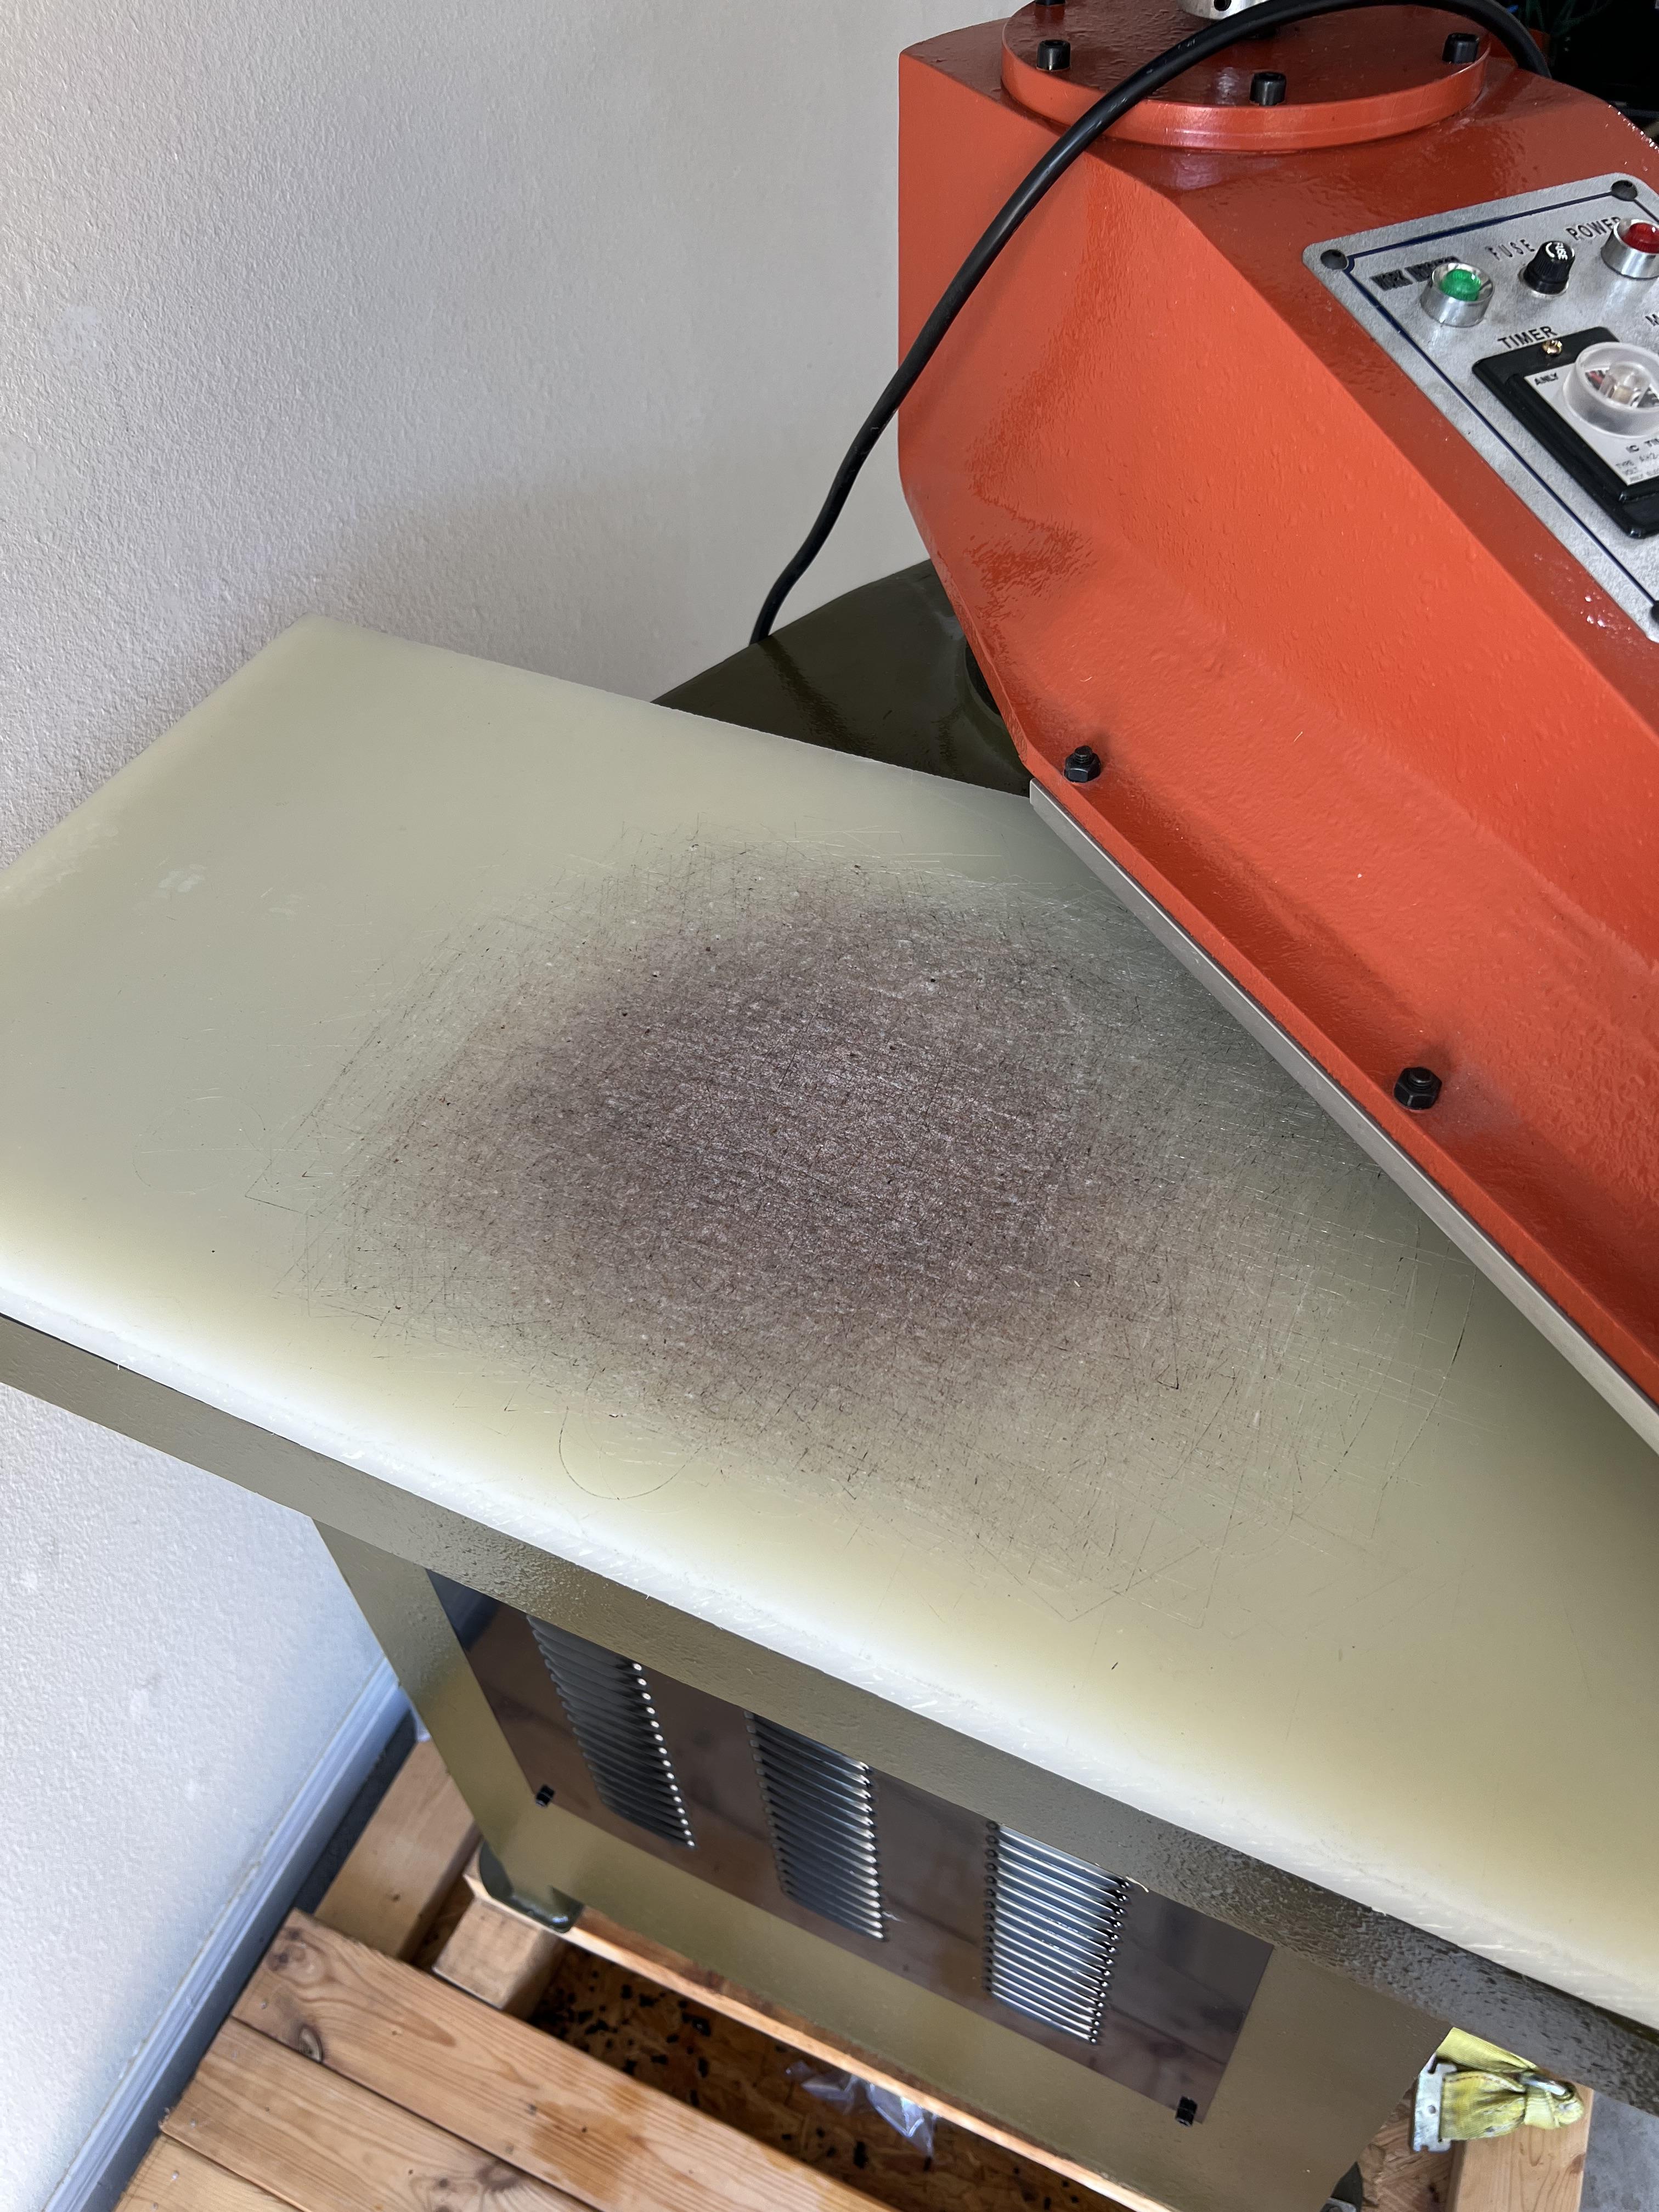
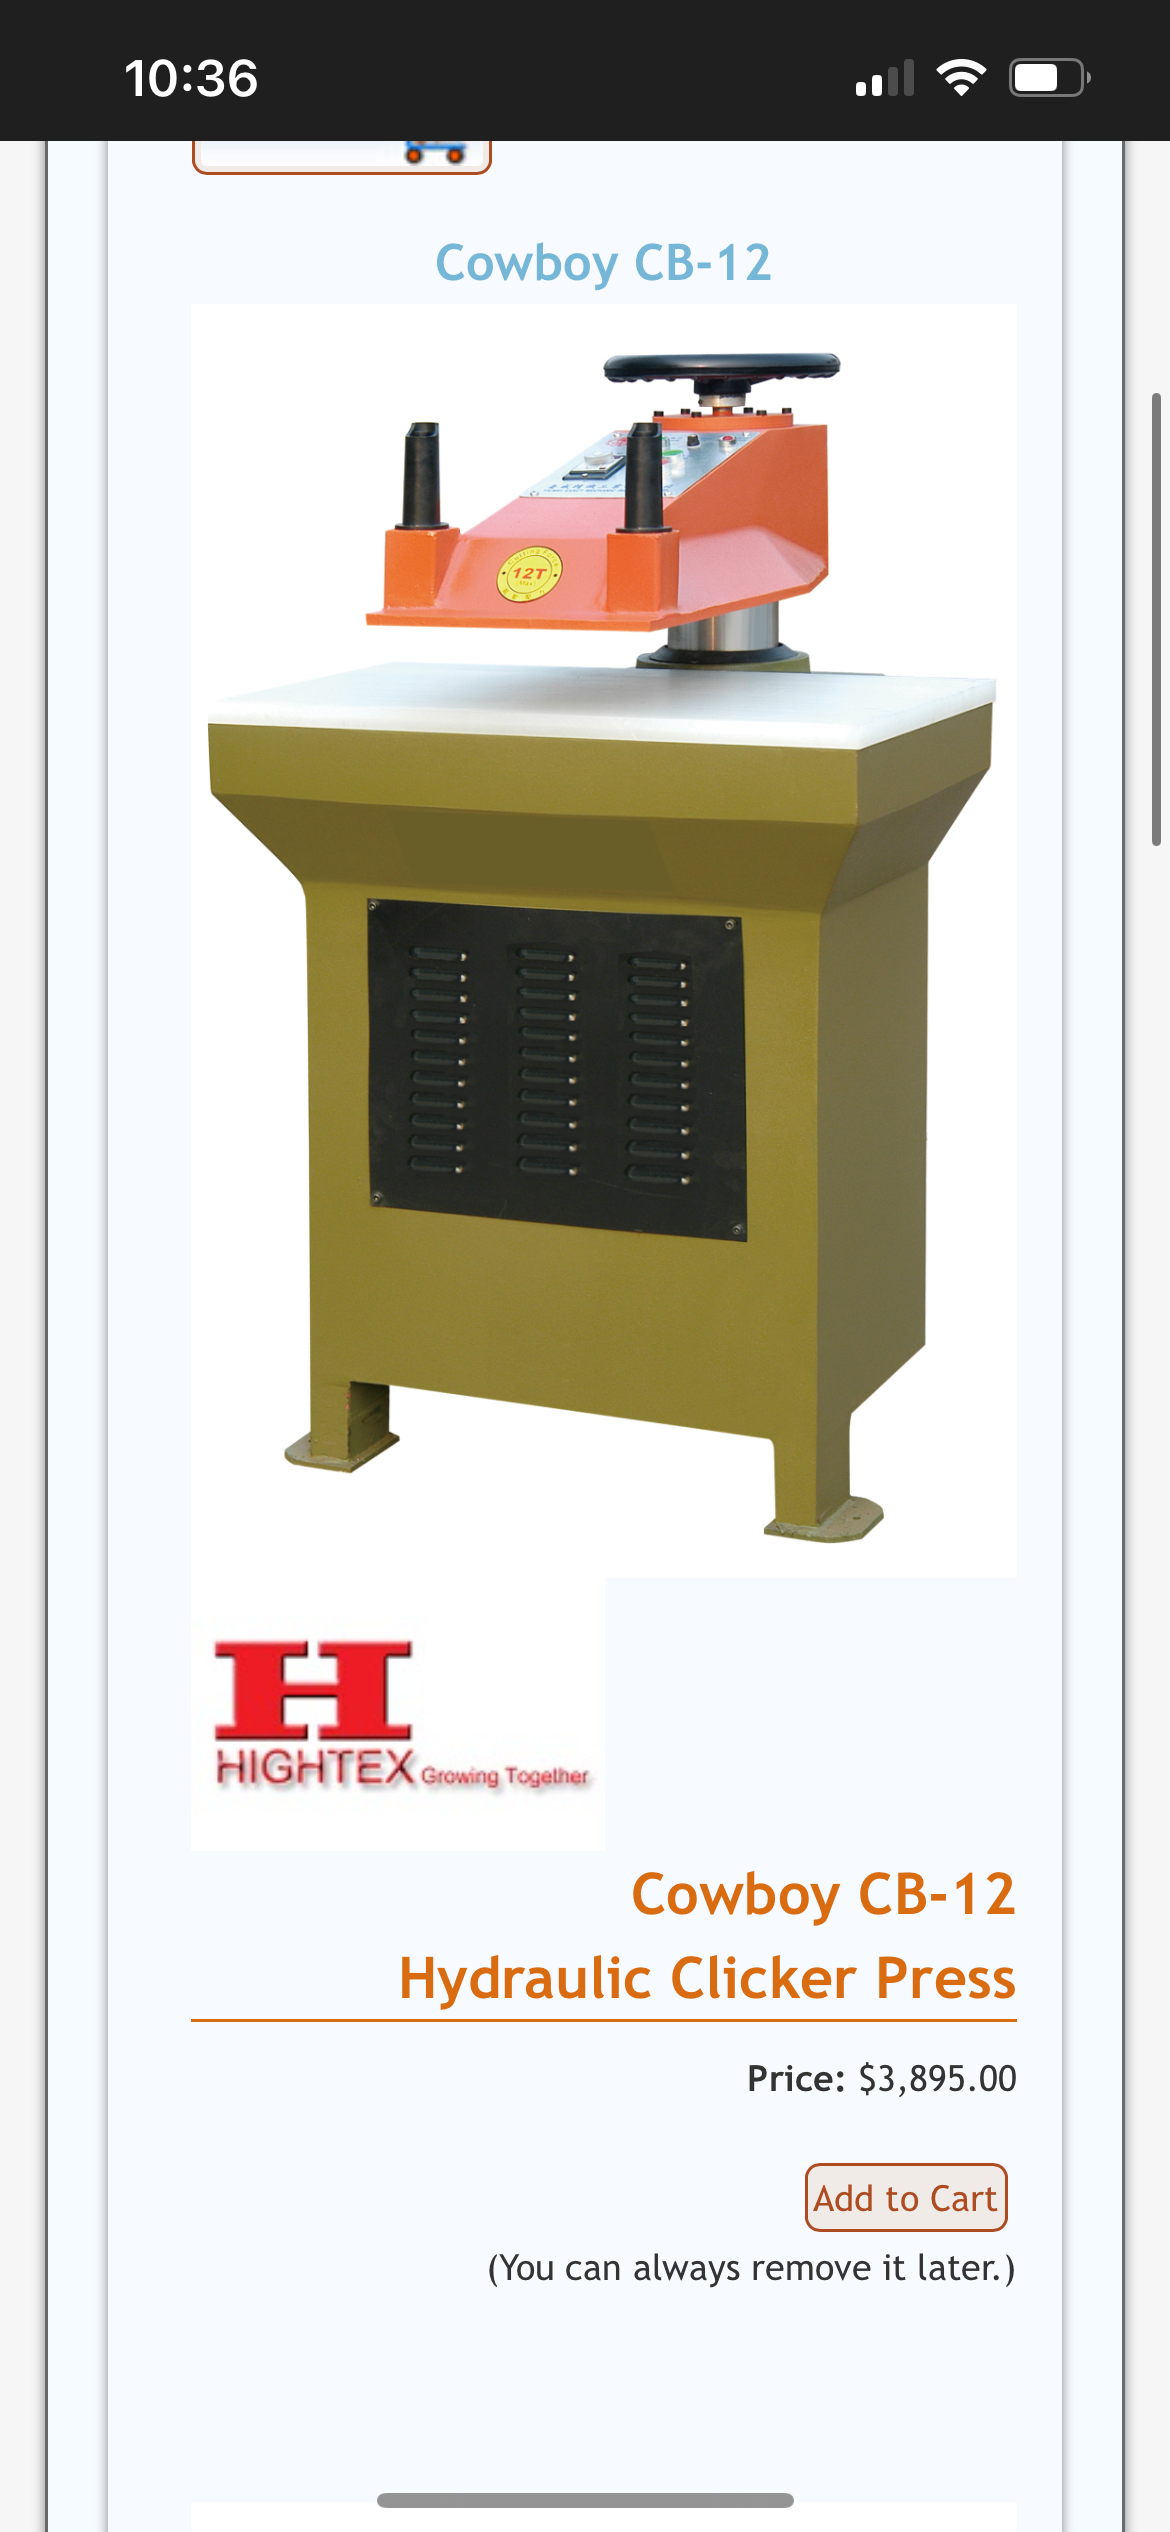
 ASKING $2800 Located in Cedar Park, Texas in the buttercup creek neighborhood (North Austin, Texas) Industrial Cowboy hydraulic clicker press is in great working condition. Outside of the HDPE boards its as good as new. It's runs on standard 220v. Here are the specs... - 10 Tons of Cutting Pressure - Cutting Bed is 17" x 36" - Cutting Bed is 36" from the ground - Swing Arm Pressure Foot is 13" x 18" It Is still on the pallet It was shipped on to make It easy to move with a forklift or pallet jack. A pallet jack and box truck WITH LIFT GATE need to be utilized as it Is too heavy to be moved by hand. It weight approximately 900 pound including the pallet. Reach out if you have any questions.
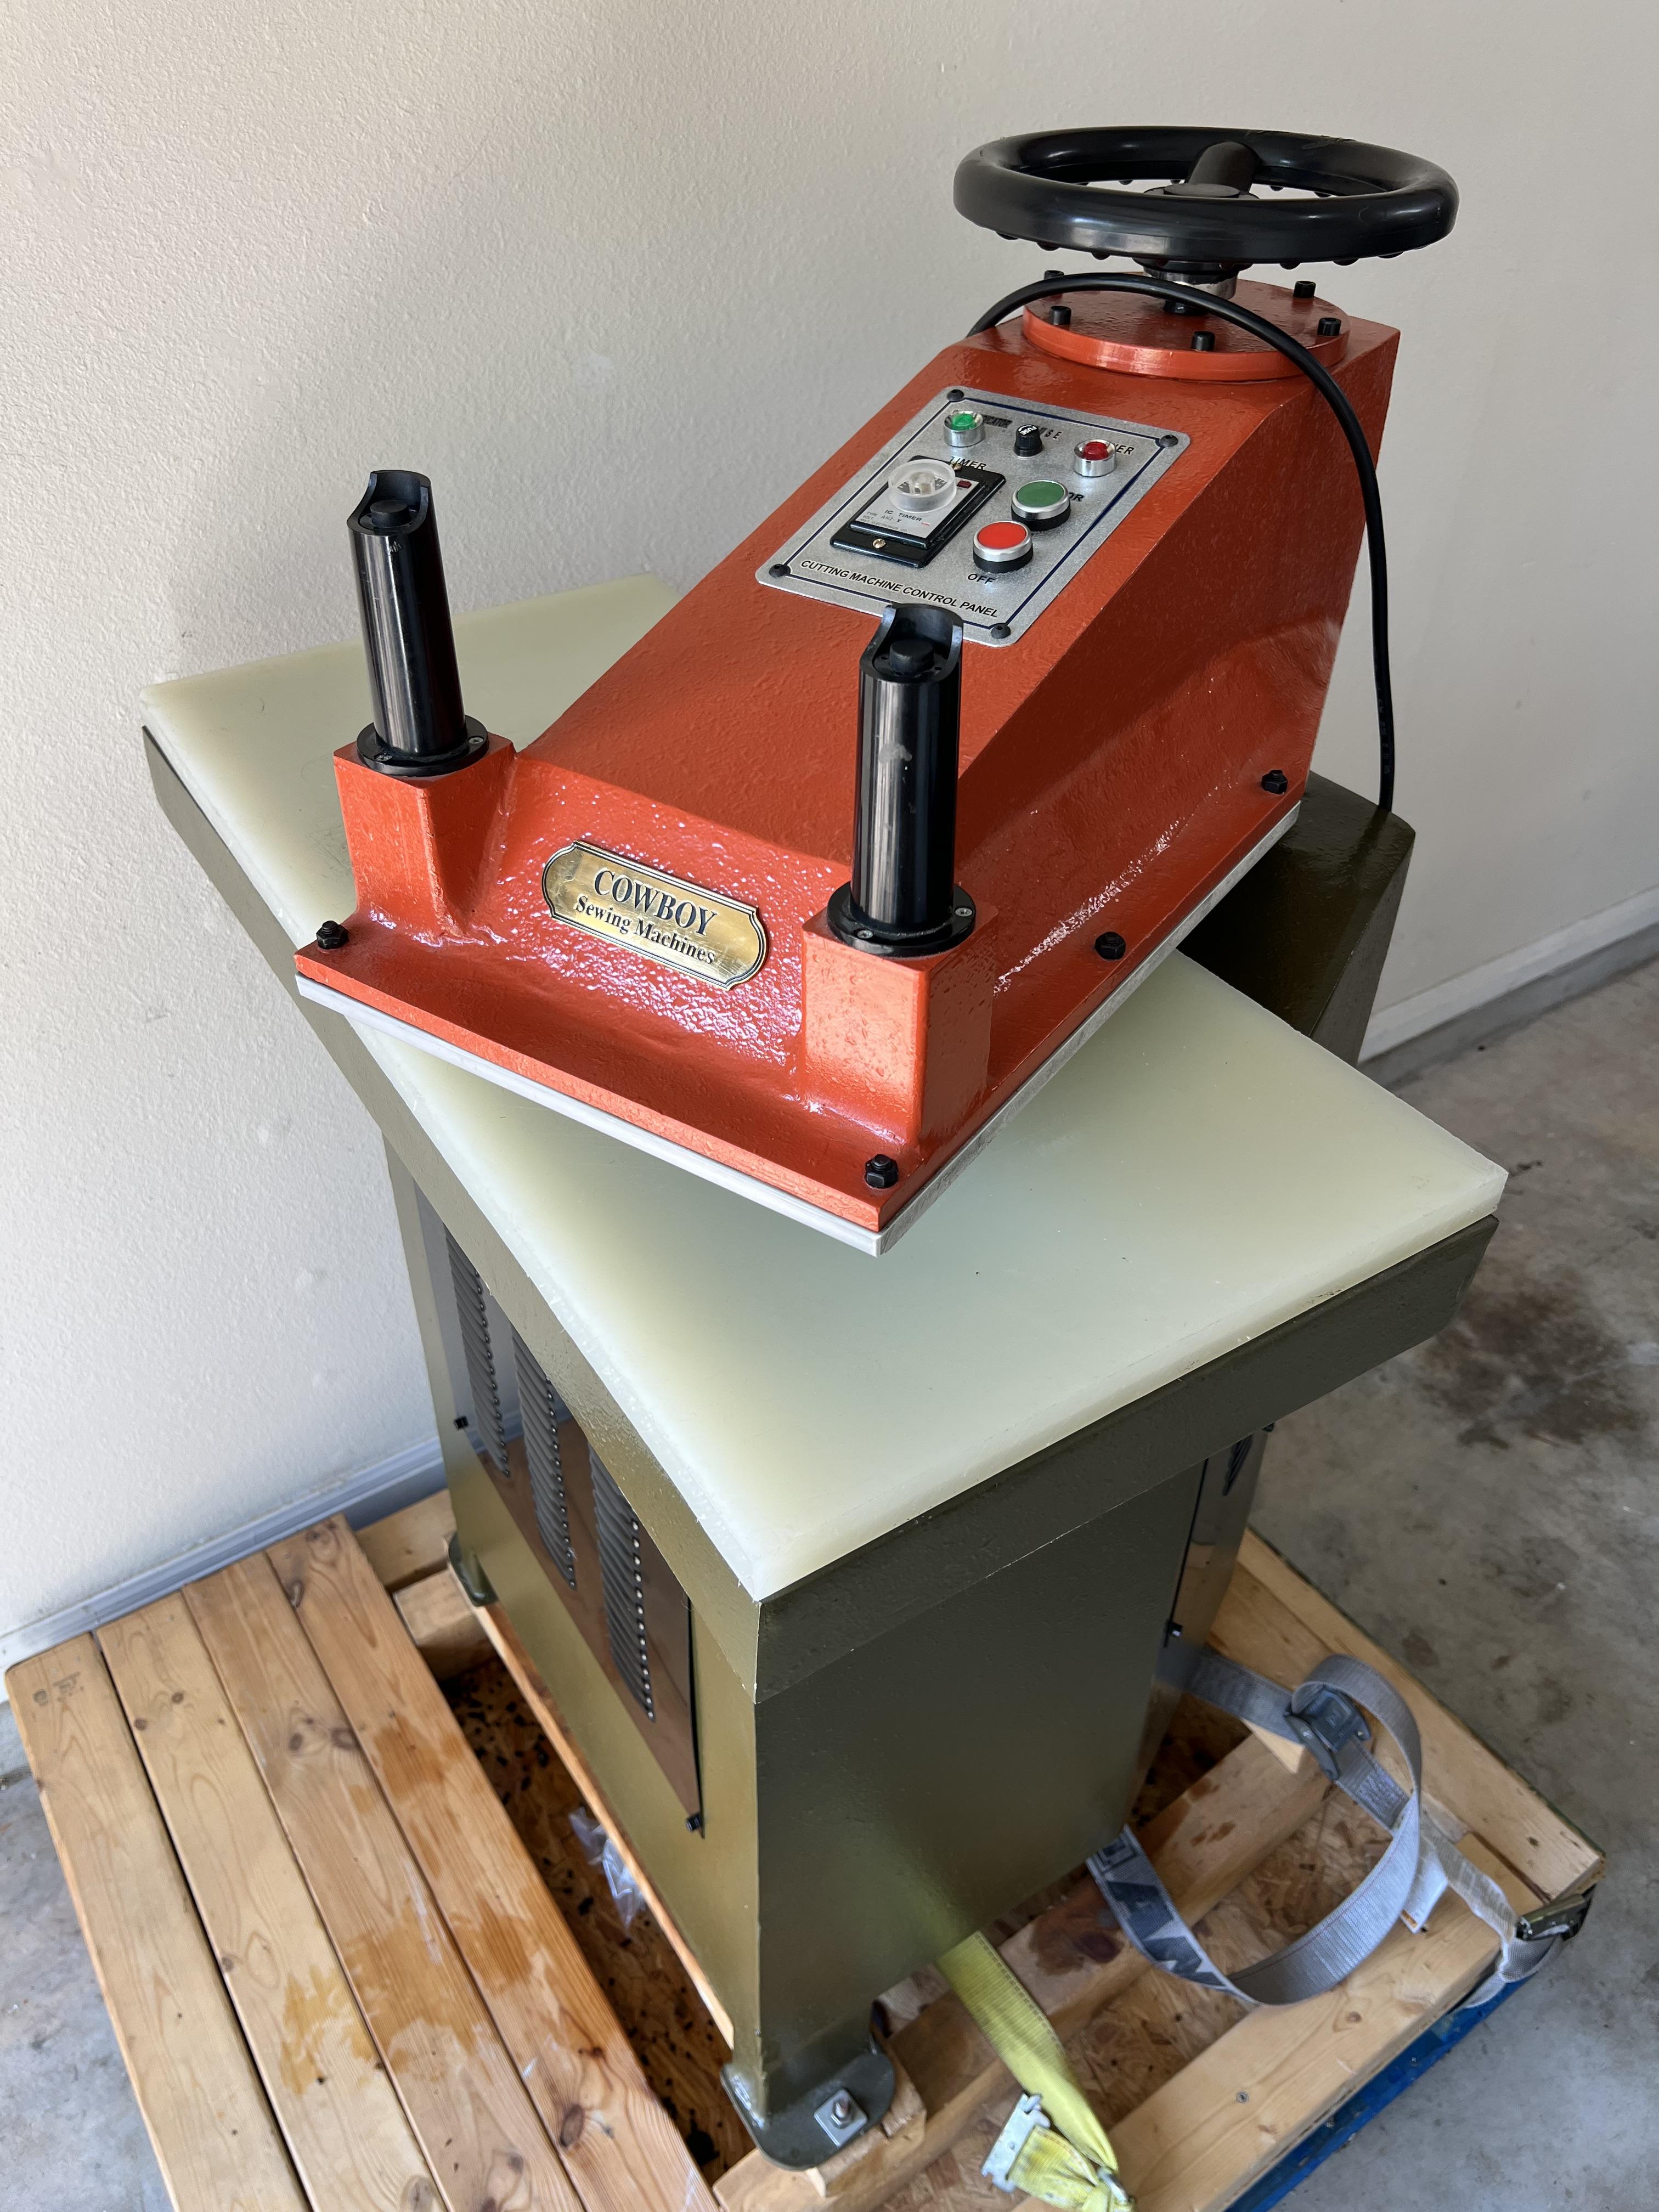


-
Hello, I have already searched this forum and none of what I found helped, I also posted this here under sewing if one needs to be deleted feel free. I am running a JUKI 1541s, when I insert a new bobbin and rotate the hand wheel the needle will pick up the bobbin thread. Once I start sewing it will no longer pick up the bobbin thread, just leaves a nice row of empty holes and the thread in the needle is frayed like crazy. When I take the plate off so I can see the hook and turn the hand wheel it seems to work fine, the hook picks up the thread every time. I have re-threaded the machine, changed the needle (135x16 size 23), lubricated the machine including the bobbin and hook, checked the hook timing and spacing, the hook is turning so its not clutch issue. The needle is in the correct way, I am holding the thread for the first few stitches, I have played with both upper and lower tension. Any ideas? So frustrated!!!!! Could it be the needle is to big? I am currently running Mandala bonded Nylon #138 with a #23 needle. I have ordered smaller needles, but could that be the issue?
-
-
Sunstar 380BL, could anyone help me with threading this machine, its used of course, and the manual is not clear on proper threading. Thanks!
-
Thank you @Dwight for taking the time to explain how it was done. 😃 Now that you describe it, I can see how it was done that way. Like you say, a lot of work but it looks beautiful.
-
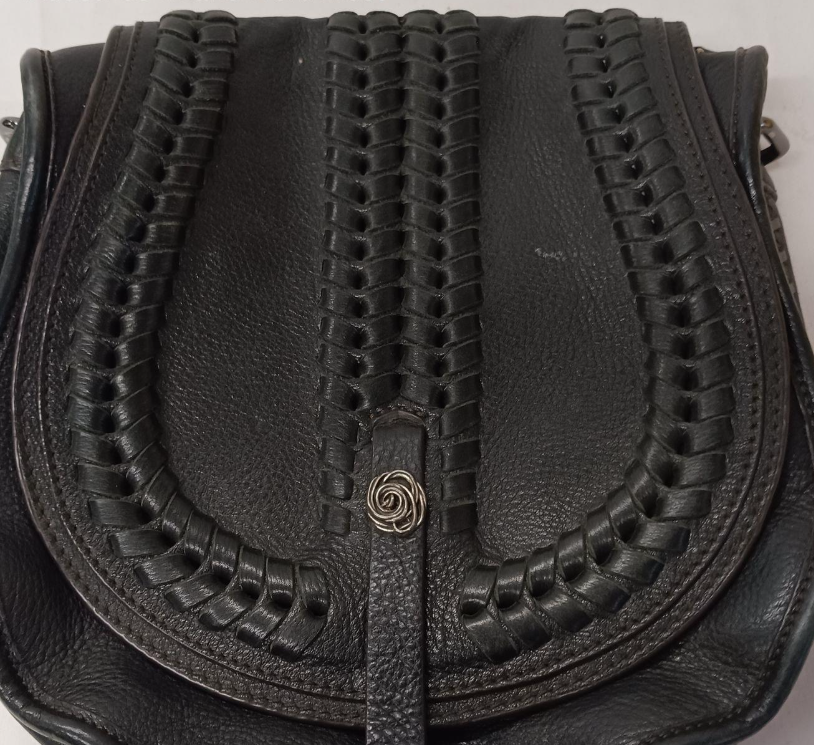
It is actually not weaving . . . there is a piece of leather over the front cover. . . with edge stitching The exterior layer of the front cover has a series of round holes making up the center of the design . . . and an off spaced set of slits . . . the leather comes up out of the center . . . over to the edge slit . . . back to the center . . . etc . . . until it is all done. The place where the little concho is . . . has a filler under it . . . and the leather strips just go in and out the same type holes on the edge of it. Actually a rather unique design . . . have never seen that before. After it was all done . . . I would think he probably made some kind of press mold that would allow it to be thoroughly wetted . . . and the press mold laid on top of it . . . let it dry . . . to get the depth around those stitches . . . and then contact cemented to the actual flap of the purse. Personally . . . I like it . . . but it is certainly one long piece of work. May God bless, Dwight
-
 Haitham joined the community
 -
Hi all I got a paffaf sewing machine with 240 V motor & air compressor is there any quick solution to operate it other than pull new electrical lines from the main panel Thanks
-
If you want a kit, you can get them on Amazon but if you will be making leather repairs frequently, if might make more sense to buy the basic items like Chuck says. The items in kits are fine for hobbyists but I think you will need better quality for your customers. For items like sheaths, Tiger or Rhino thread should work. The ones on Amazon you cannot depend on if the brand is unproven and unknown. For cutting, your box cutter is fine but change the blades if you are cutting any leather to repair. I know that you are a bladesmith so you might find it more convenient to get a leather knife and sharpen it a needed. Needles, John James, for finishing, Tokonole for the edges, Resolene, Supershene, Aussies and any others you might come across, for finishing the rest of the sheath. Search on this site. You will find plenty of information about them. If you have a leather store like Tandy's near by, you could go there. Their staff is sometimes very helpful although do come here and confirm what they say. Some of them try to push the products they carry even if not as good as others! Incidentally, to search on this site, use the following on google: Site:leatherworker.net search term Hope that helps a bit.
-
I found this pattern online and would like to learn how to do the pattern on the front flap. What type of weaving is it? I would appreciate any information.
-
So is the long groove of the needle facing the front?Do you have a manual for it?
-

New pistol, new holster
chuck123wapati replied to Thadrick's topic in Gun Holsters, Rifle Slings and Knife Sheathes
-
 R. Hopkins joined the community
 -
 Hi AlZilla, Thanks for the tip! I am not sure this option existed when I was on this forum last--Its been several years! Much Appreciated, ~Only
 -
 Tenoh 3 joined the community
 -
 I would like to leave a huge shout out to Ryan Neel at, Neel Saddlery and Harness 12712 South Ave #5 North Lima, Ohio 44452 330-549-9904 I purchased a cowboy 3200 from a family member about a year ago and was struggling with the initial setup because he had passed and nobody knew about the changes he had made. Ryan helped me out even knowing I had not purchased it from him. Well today, 8/8/25, he spent the better part of 3 hours on the phone with me, AFTER he had closed, knowing I had an anniversary gift project due in 3 days, and my machine suddenly decided to act up. I was afraid either the hook was bad or it had gone out of time. He went through the whole thing with me via photo exchange and his step by step method of diagnosing and adjusting until he got it going. Turns out the roller of the primary tension had gummed up while setting since its last use. I would never have thought to check that specific item. But between my pics and his questions he narrowed it down to that and then went through all the settings until its now throwing perfect stitches again. He really got my bacon out of the fire, and I will do my business with him until I sew no more. You should too. Customer service is a lost art and we need to support anyone that still goes the extra mile to help someone in a bind. Thanx Again, Ryan