All Activity
- Past hour
-

Singer 211 U166A walking foot problem
friquant replied to NowhereMan01's topic in Leather Sewing Machines
I believe you are on the right course. Here is a parts manual for a similar machine that seems helpful to understand the pieces: https://www.manualslib.com/manual/153942/Singer-211a165aa.html?page=15#manual The following page has descriptions of each part. The way I'm interpreting is that each of those three fat screws on the end has a spring underneath it. Together, those three screws through their respective springs provide pressure to the plate that has a detent for the ball. Someone may have screwed those adjusting screws all the way in, not knowing they were adjustment screws.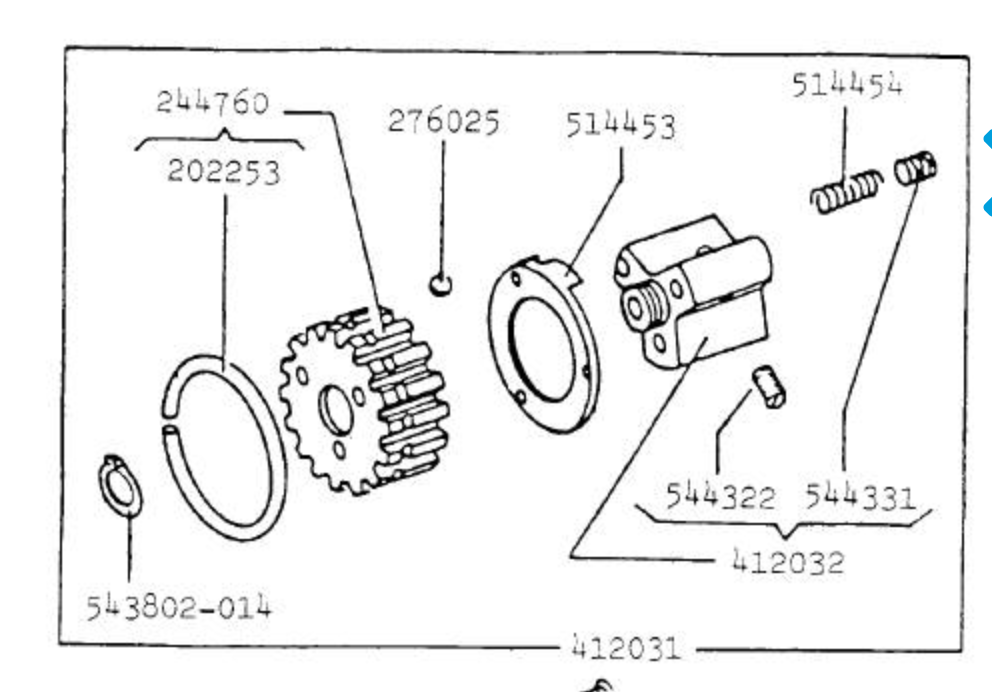
-

Hand-cast solid Brass Buckles from a small foundry
Mulesaw replied to Origibelts's topic in Suppliers
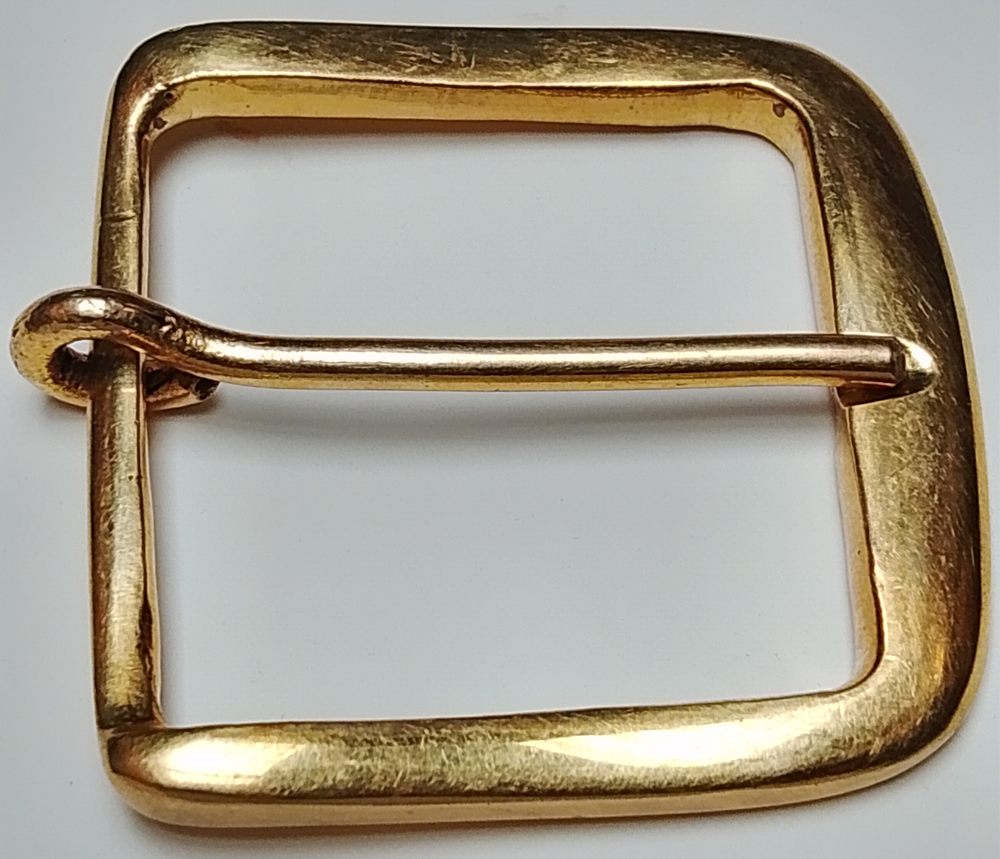
Hi John G Welcome to the forum. To me the most important points are: Strength/solidity Size Design/style Finish to me is part of the style, and I normally prefer just a regular brass finish like the one in your picture, alternatively it could be silver coloured, but I prefer no "bling" on my buckles. Prize is not especially important since I don't make 1000 belts, and compared to the time invested in making a nice belt, the prize for a buckle is only of secondary importance. But I guess that if you run a regular production of belts, it is of more importance. I like the small "dip" wehre the prong of the buckle nests. That is a nice touch in my opinion. Depending on what type of product I am making, I use either "normal buckles" like the one in your picture, or "roller buckles" or "center bar buckles" For belts I prefer sizes 1.25" and 1.5" (30mm and 38-40mm). Brgds Jonas -
Hi everyone, My name is John, I’m writing from Nairobi, Kenya. I’ve been fascinated with leatherwork and metal casting for a while, and recently started experimenting with sand-casting solid brass buckles and hardware in a small foundry and workshop. I’m still at the beginning of this journey, but my goal is to create strong, character-filled pieces that makers can use in belts and straps. Along the way, I’m also hoping to learn more about what leatherworkers actually look for in their hardware — things like finishes, dimensions, or styles that make your work easier. Outside of casting, I enjoy exploring traditional crafts and finding ways to combine them. I came across leatherworker and I’m looking forward to being part of the community, learning from you all, and (hopefully) contributing something useful as I go. Thanks for having me! — John M. near Nairobi, Kenya
- Today
-
Hi everyone, I’m new here and just getting started with a small project I’ve been working on for some time: hand-cast solid brass buckles and hardware. I run a small foundry and workshop near Nairobi, Kenya, where I make each buckle in small batches using traditional sand casting. Right now I’m at the stage of introducing these pieces and learning what makers actually look for in their hardware. Strength and authenticity are my focus, but I’d love to hear what you value most — sizing, finish, style, or price point. Here’s a look at what I’ve made so far: https://origibelts.com/collections/wholesale Any thoughts or feedback would be really appreciated as I start this journey. Thanks for letting me be part of the community. Sincerely, John G. Origibelts – Nairobi, Kenya

-
Welcome, haappy to share Thanks. Yep I am over in Cote Nord Quebec, we are neighbours
-
 HEYSONG joined the community
 -
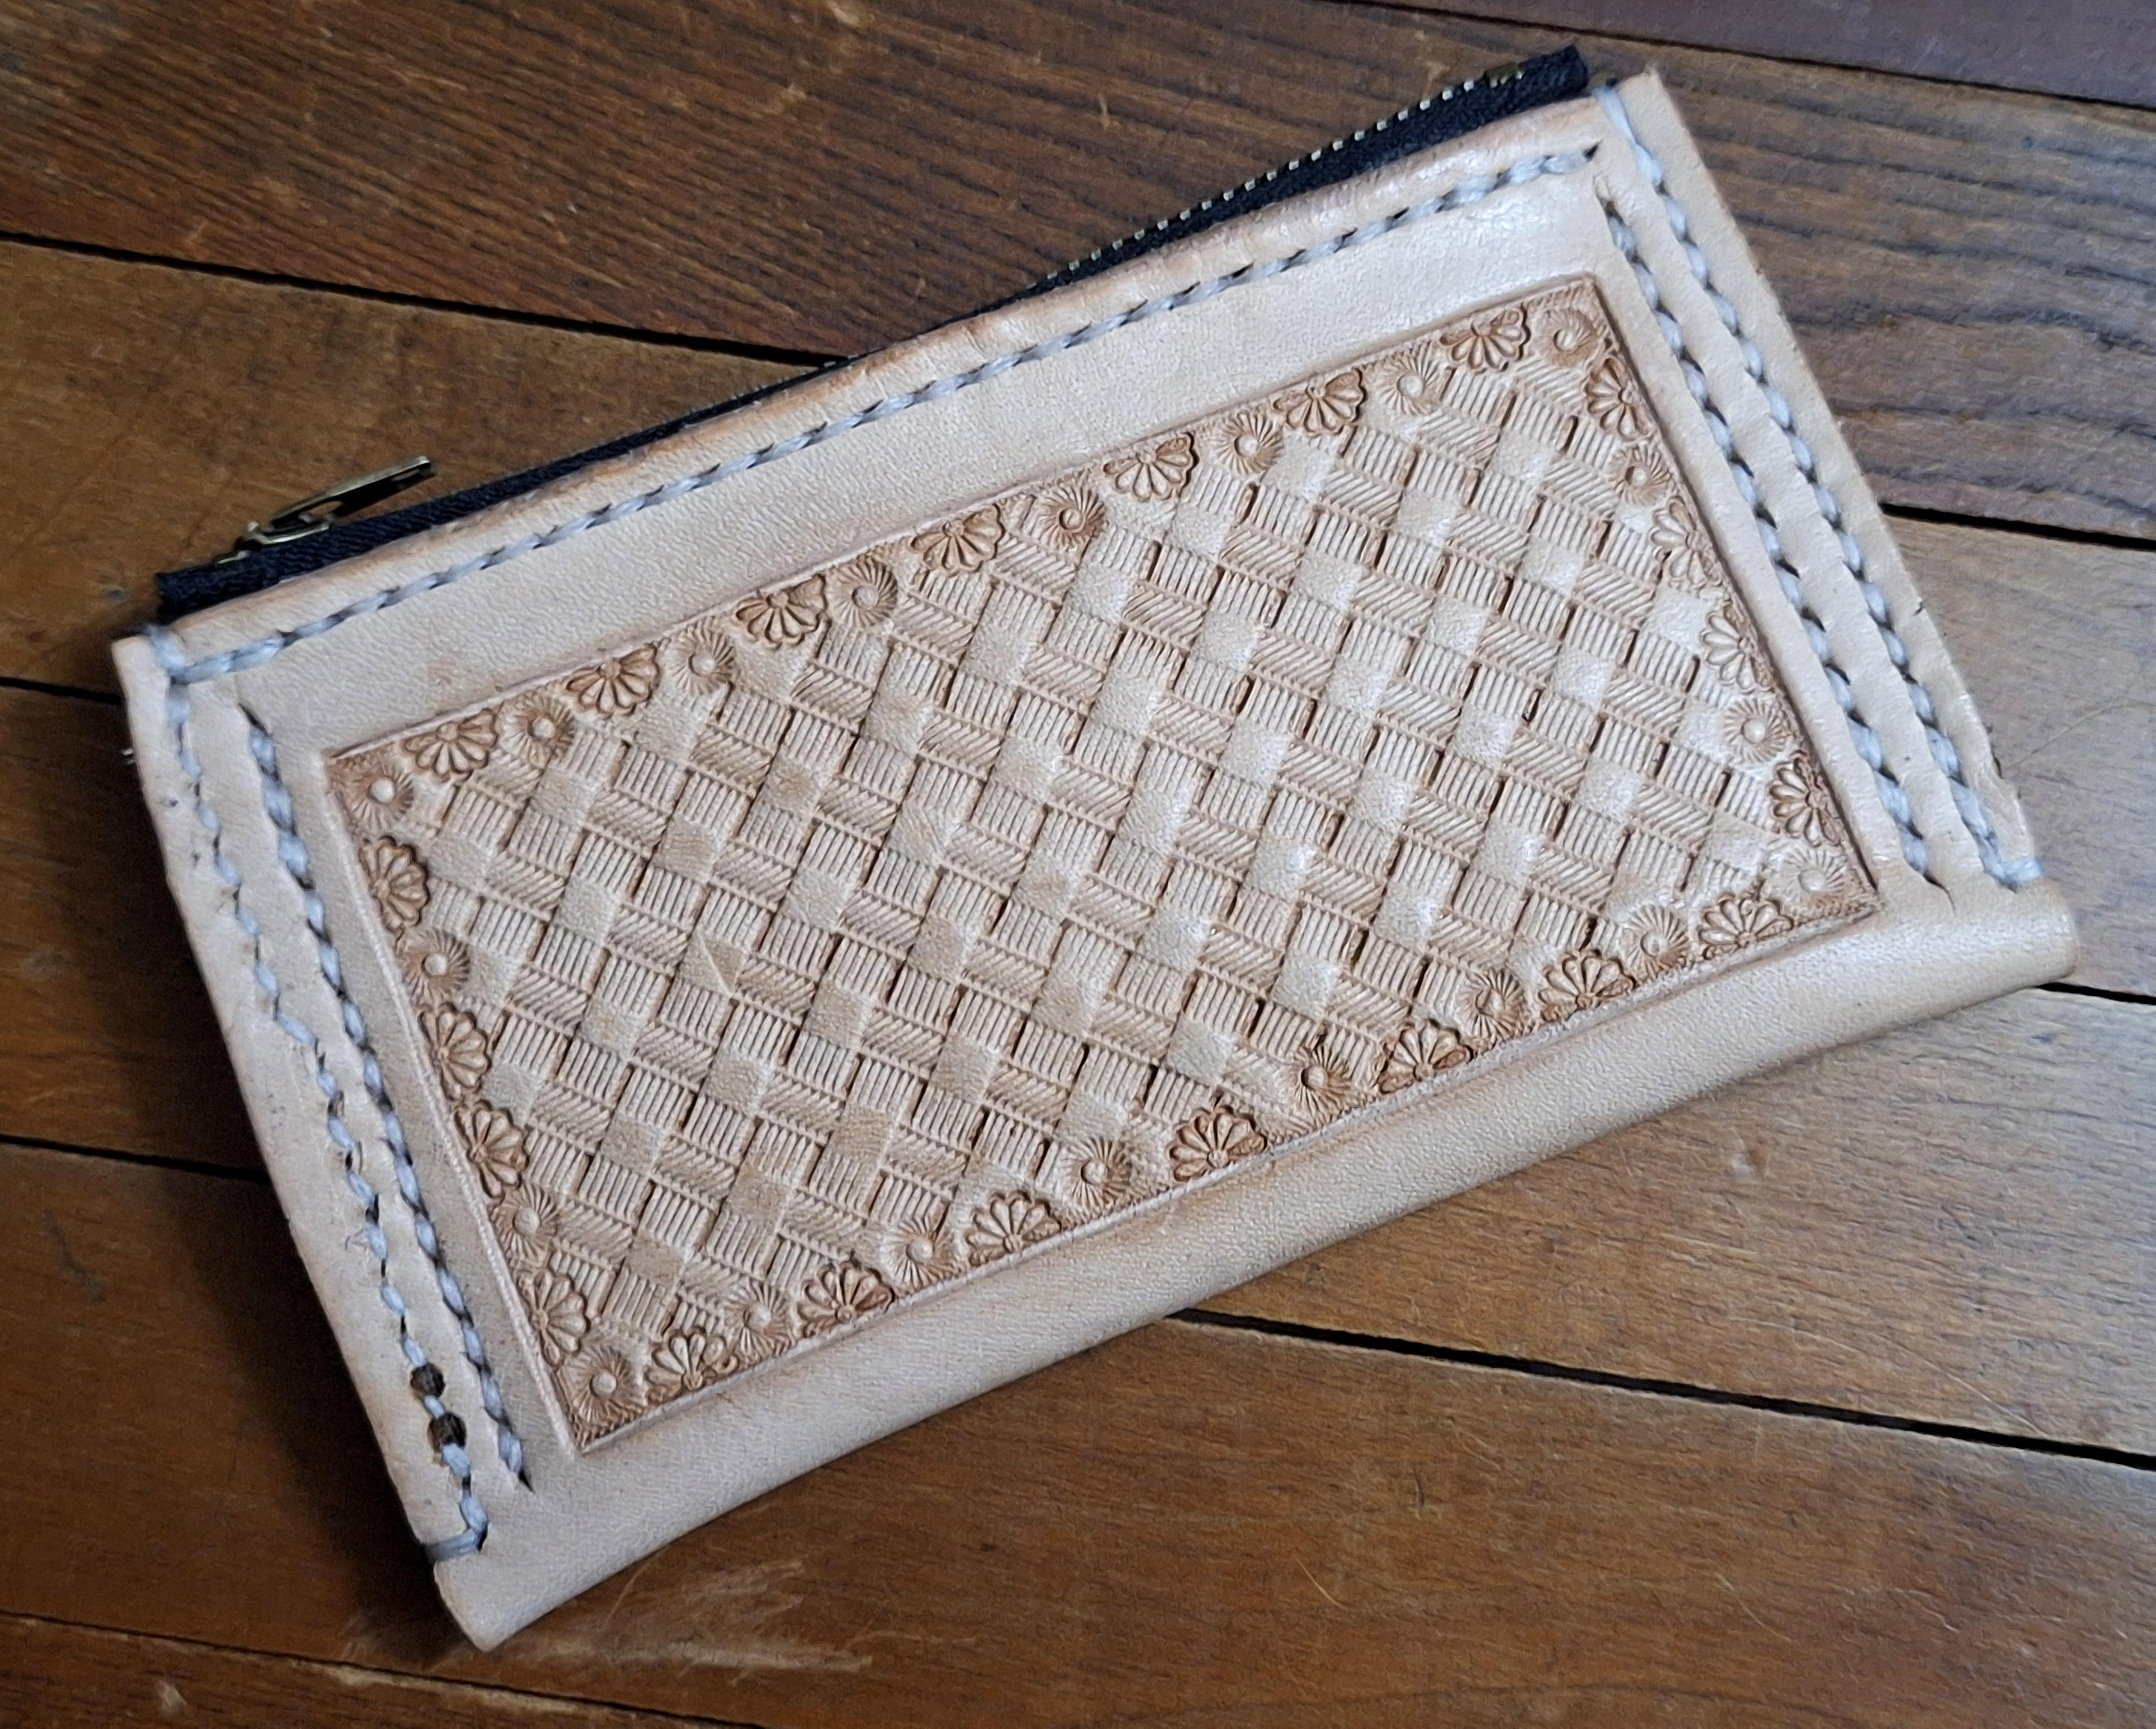
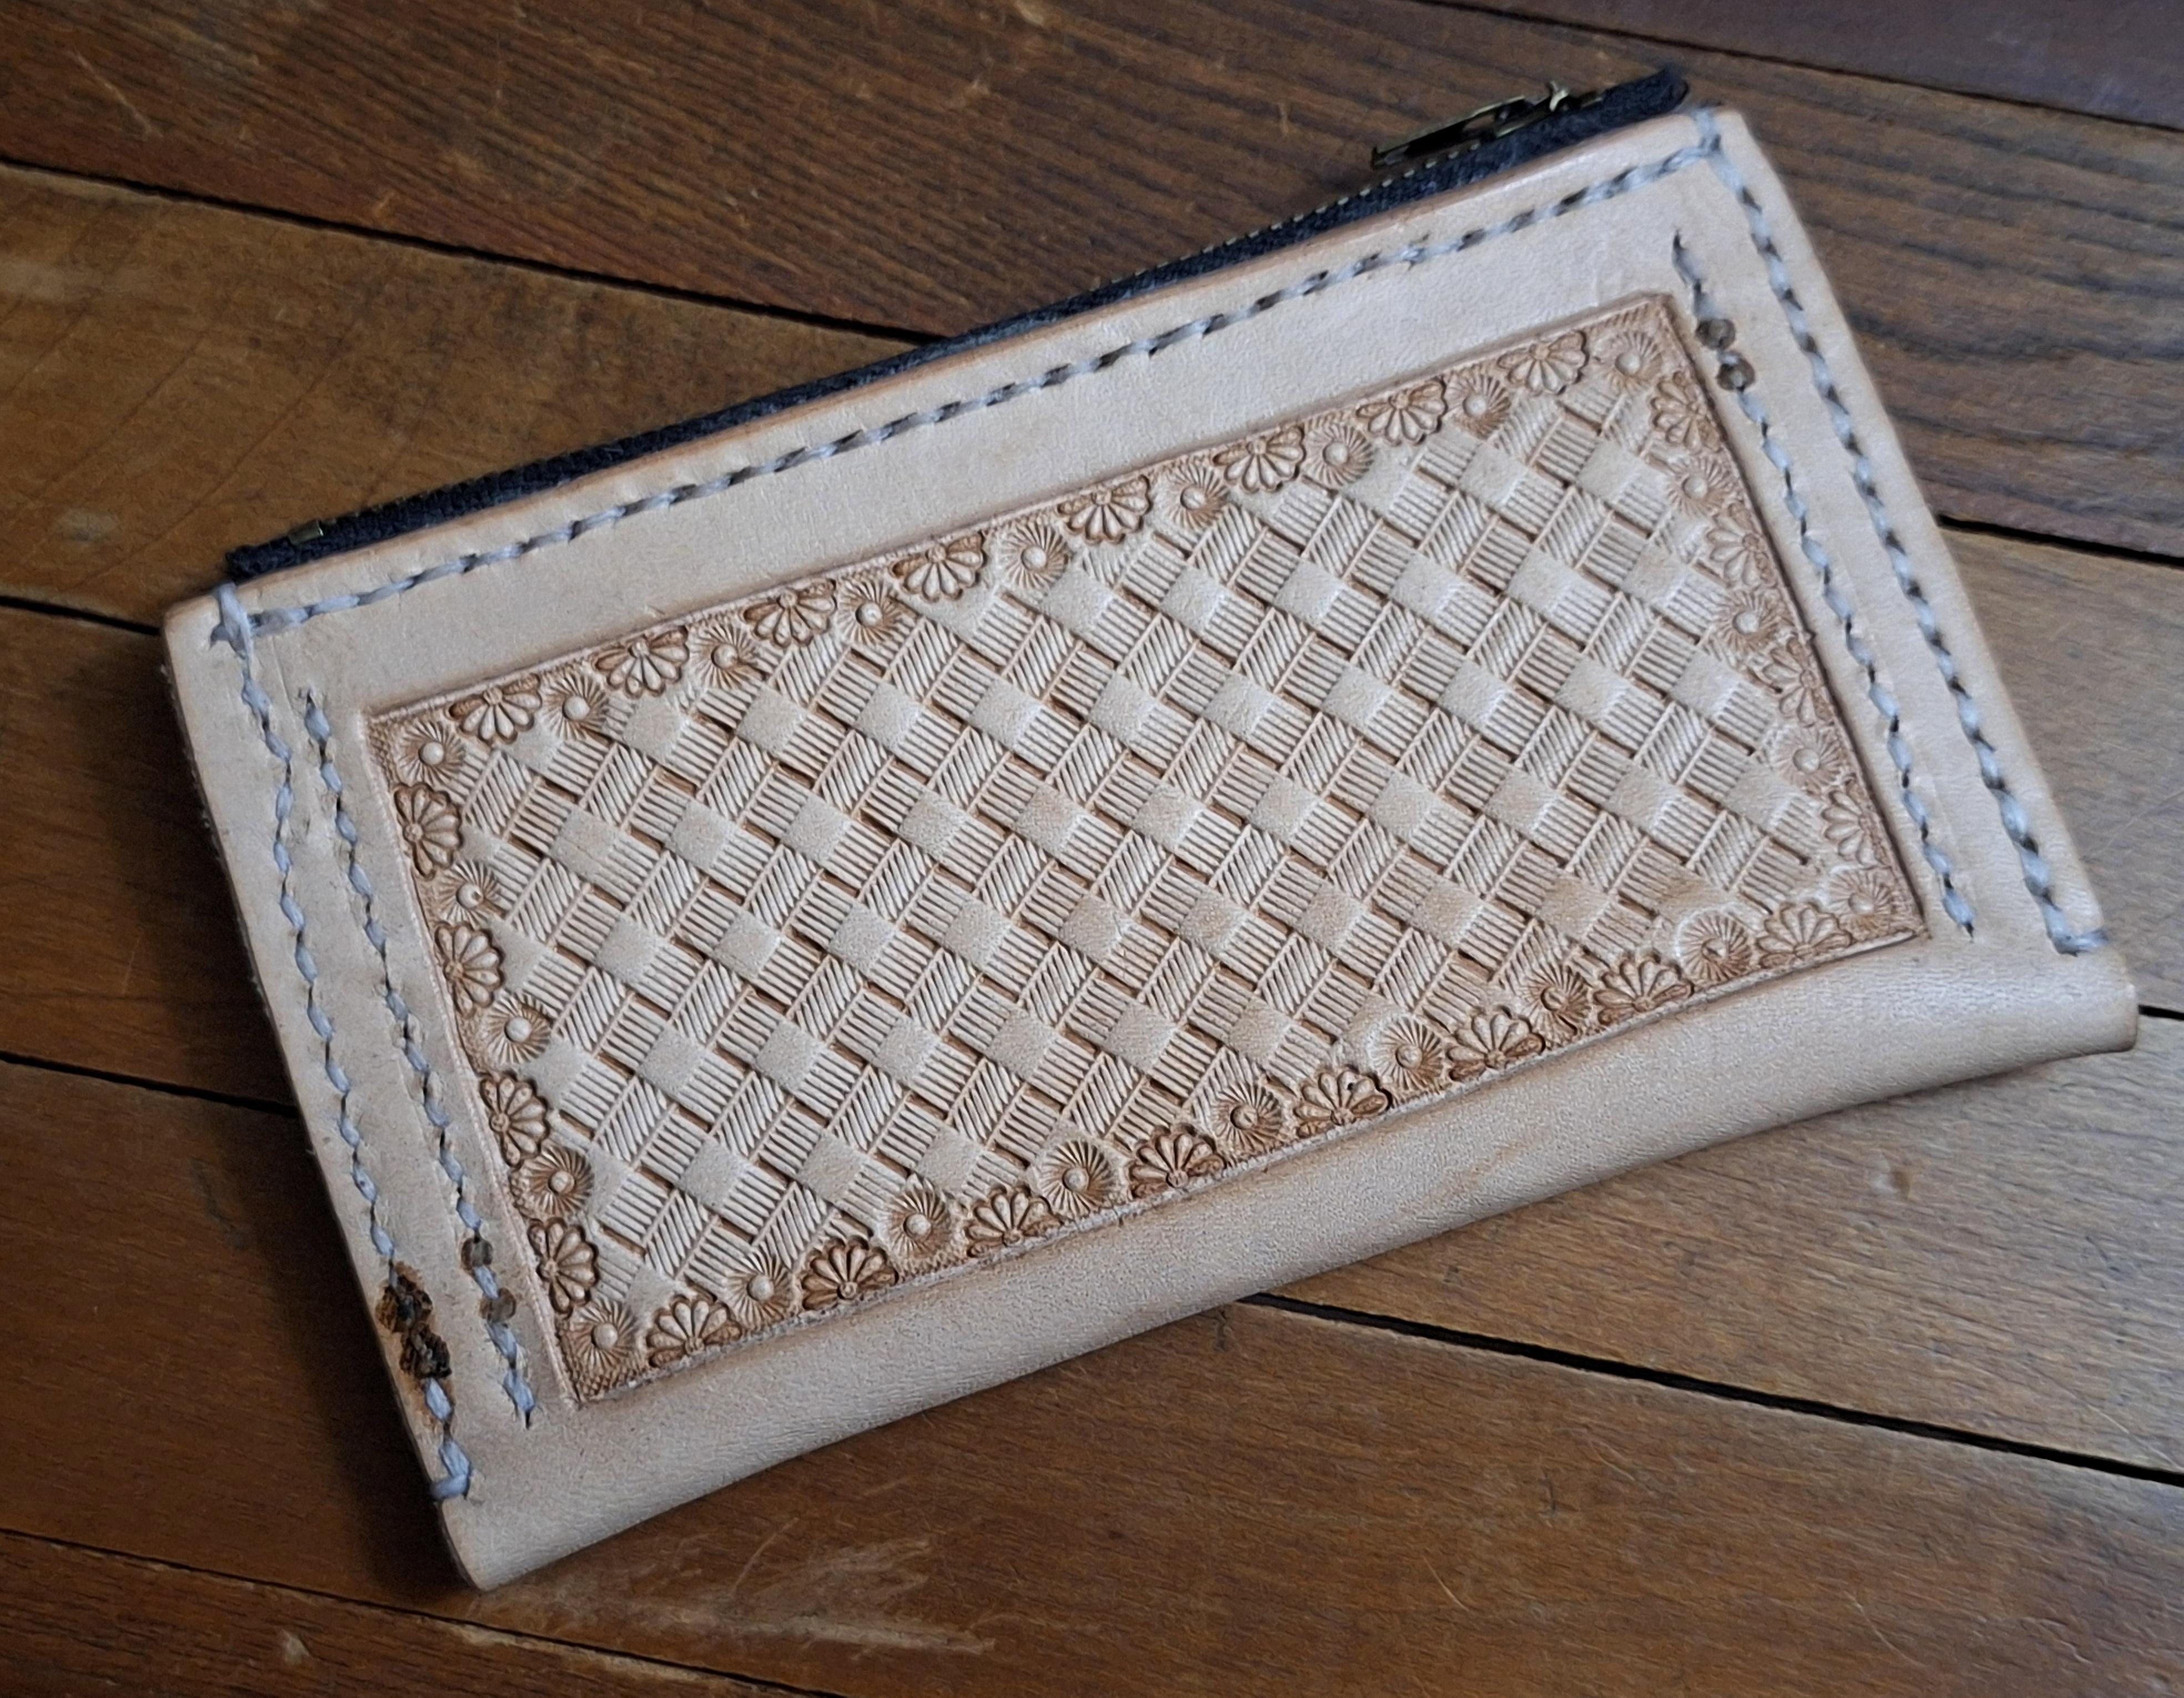
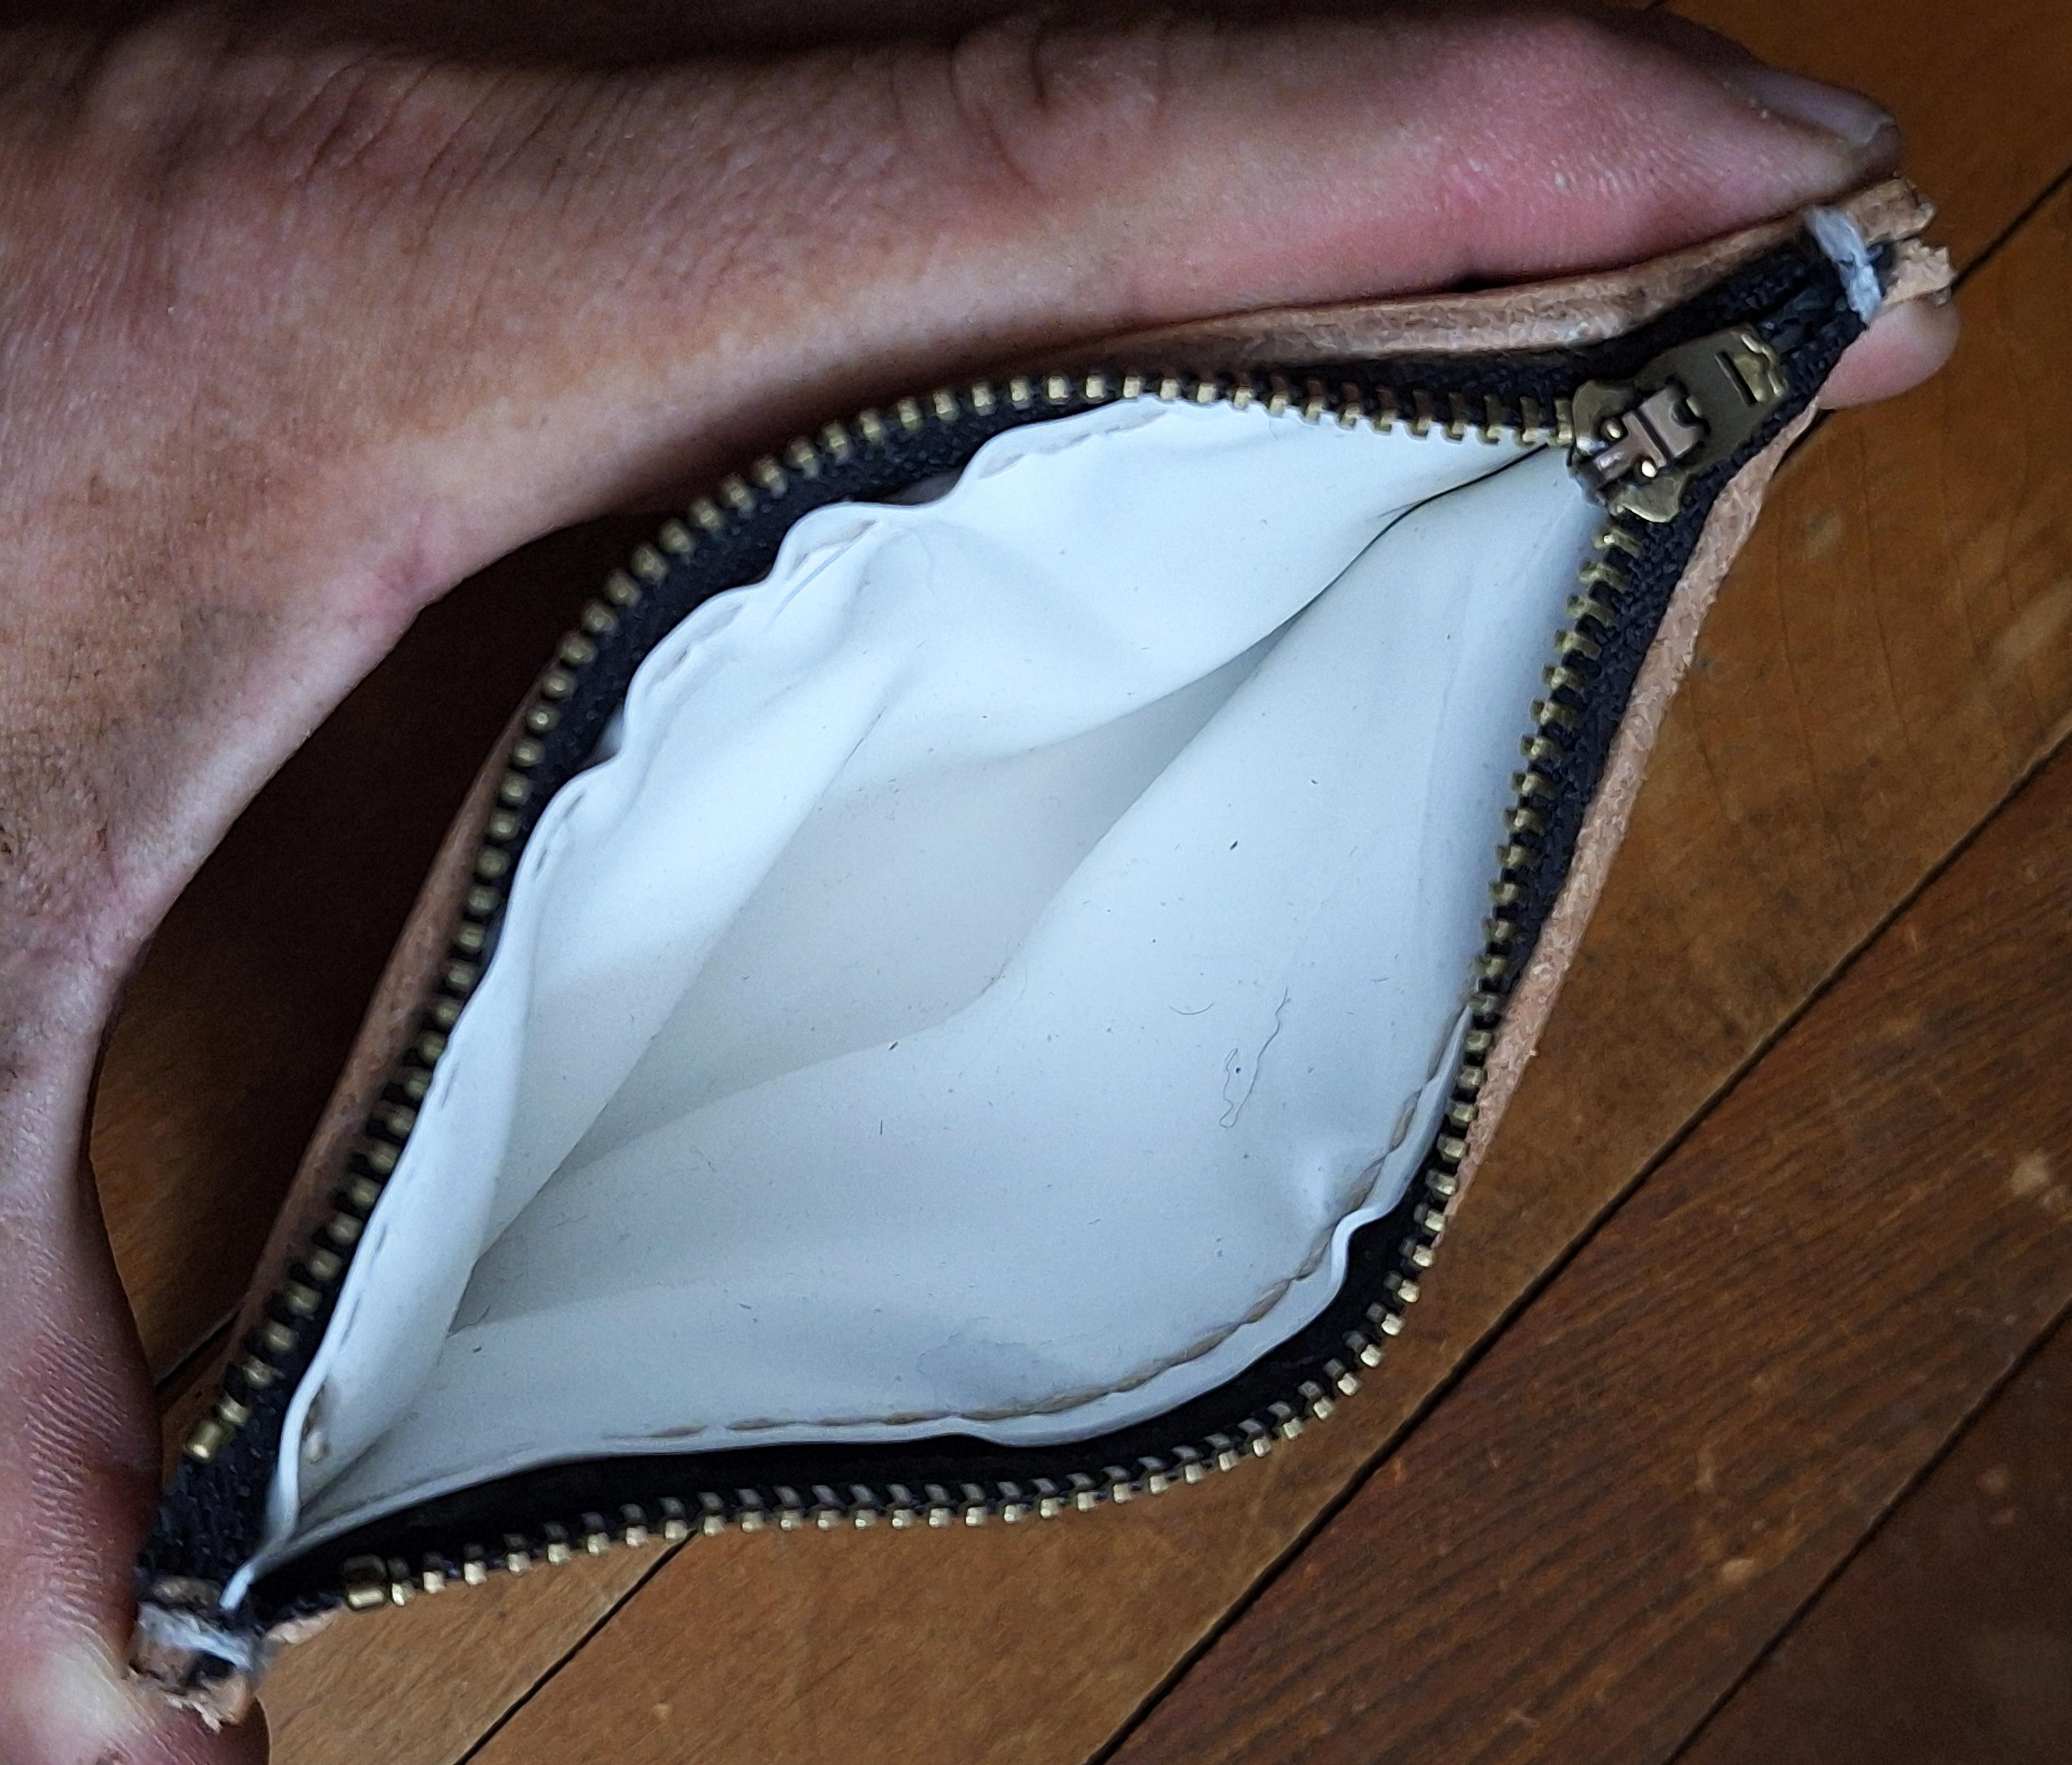
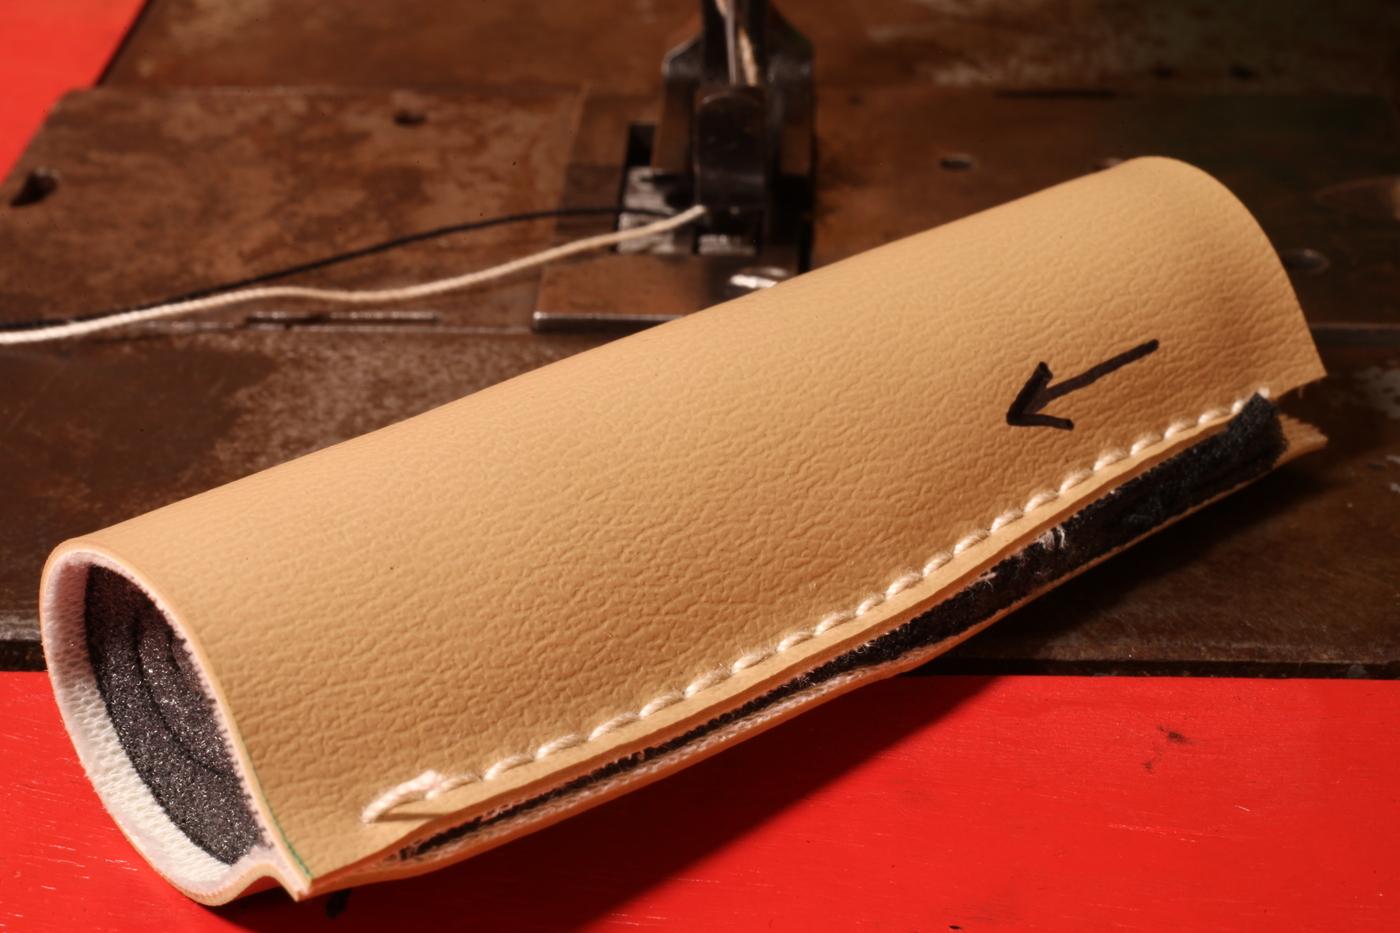
Nice tooling, what did you decide to use for the liner?
-
Saying well done to you is getting tiresome. Do something wrong for God's sake man.
-
 mictian999 joined the community
 -
The wallet looks great! My projects used to separate on the edges as well until I started really paying attention to sanding. Now I buy one of those square sanding blocks that are kinda squishy and wrap sandpaper around it. The block has way too course a grit for my taste. The give in the block lets it sand a rounded profile on the edge complimenting the edge beveler. I used to go up to around 400 but I still didn’t get edges I was happy with so I started going to 1000 grit. 600 as mentioned before is probably good, I was just frustrated with my edges and bought 400, 1000, and 1500 grit one day and just stuck with the 1000.
-
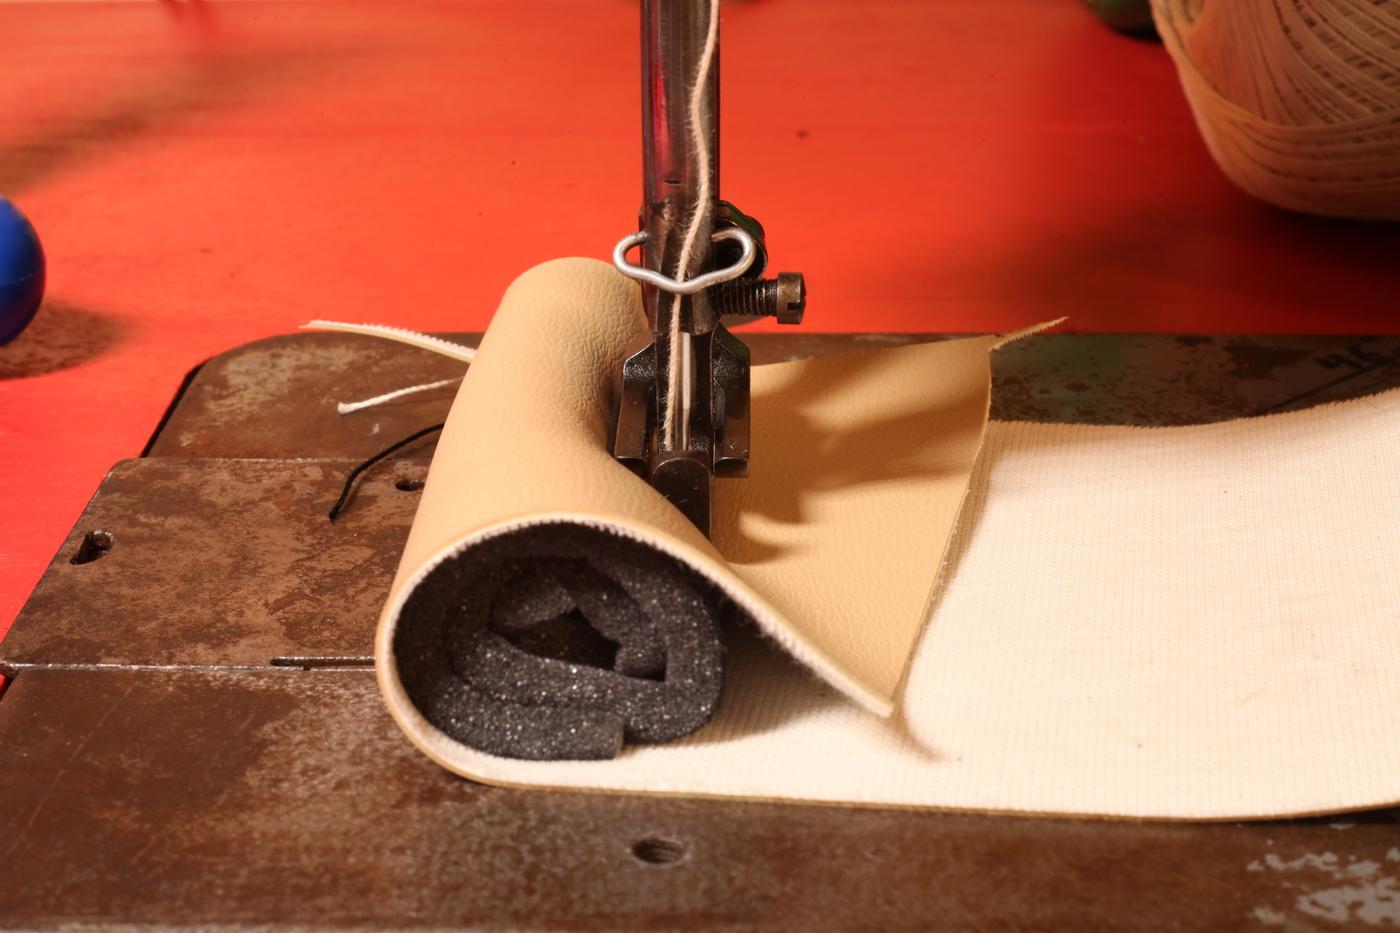
Wanted a tobacco pouch, the catch was finding the proper liner to keep the moisture in and maintain flavor. Had to hand sew due to the one piece design. The zipper wasn't possible to seperate causing the issue, plus working on a way to hold it together while using the pricking irons my line wobble. Will try it out and think of ways to improve the process.
-

Singer 211 U166A walking foot problem
NowhereMan01 replied to NowhereMan01's topic in Leather Sewing Machines
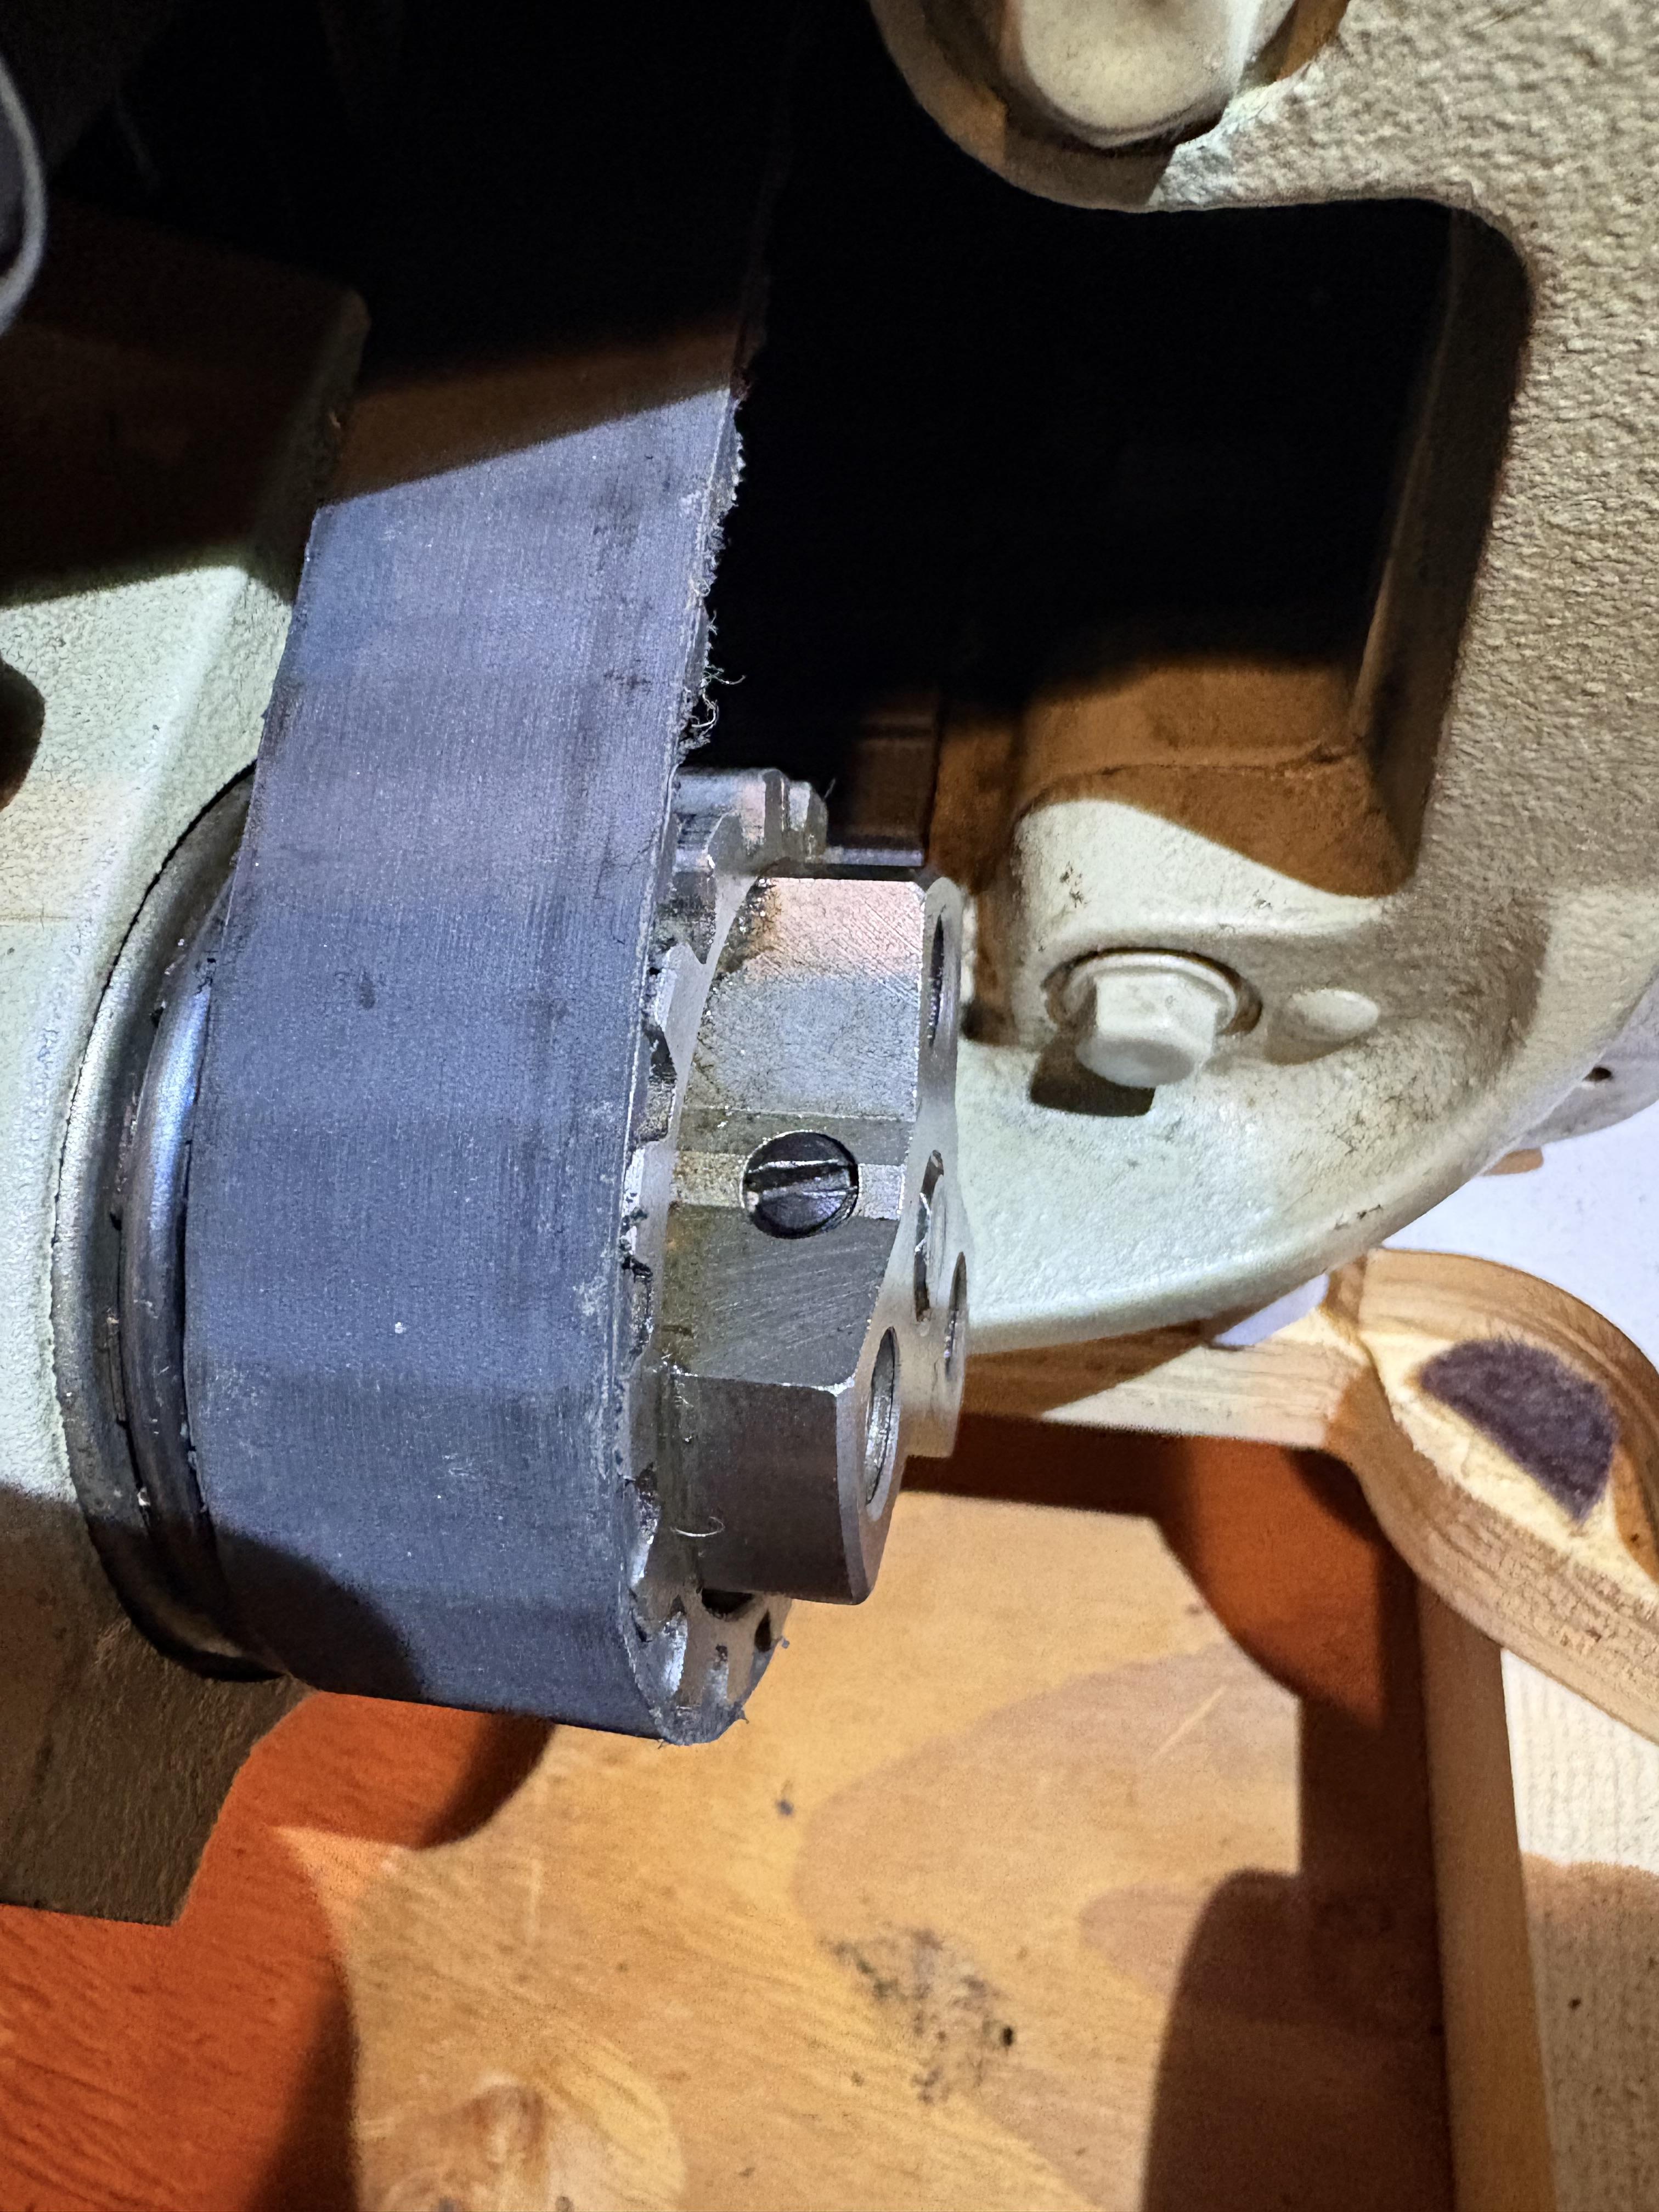
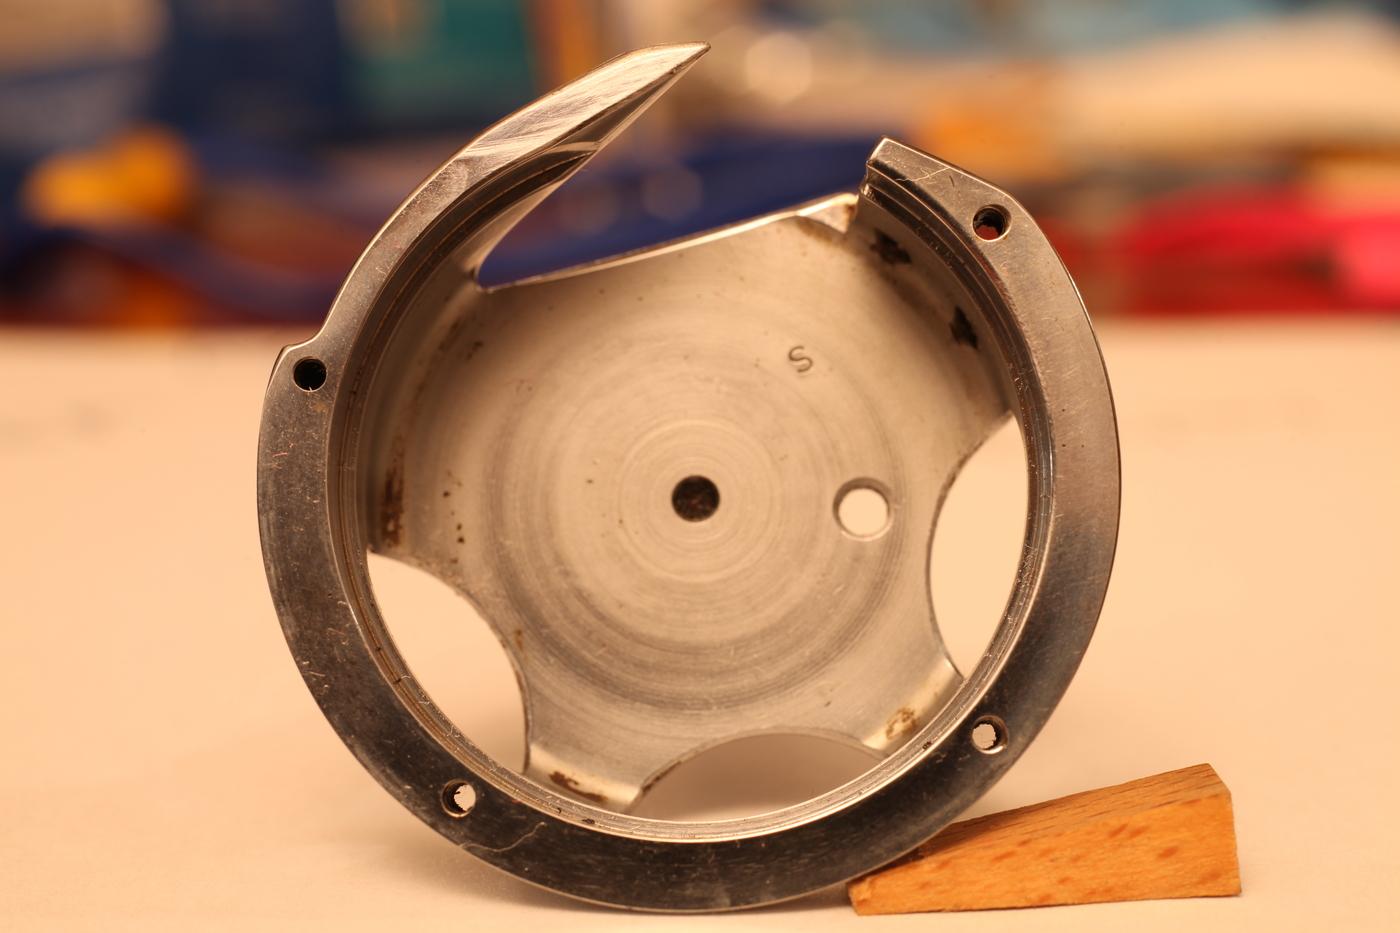
I will post a new-and-improved video of the bobbin, but I've been trying to figure out the safety clutch, and there does not seem to be much info on this particular style online, and I don't see it discussed in the manual. The 3 attached pictures show the 2 set screws and an end view. I assume that the 3 screws in the end view determine the force needed to disengage. The only picture of these in the manual (Fig. 65) shows them flush with the end, but on my machine they are turned all the way in. If my assumption is correct, I think I'll experiment with different settings to get a better feel for the disengagement/re-engagement.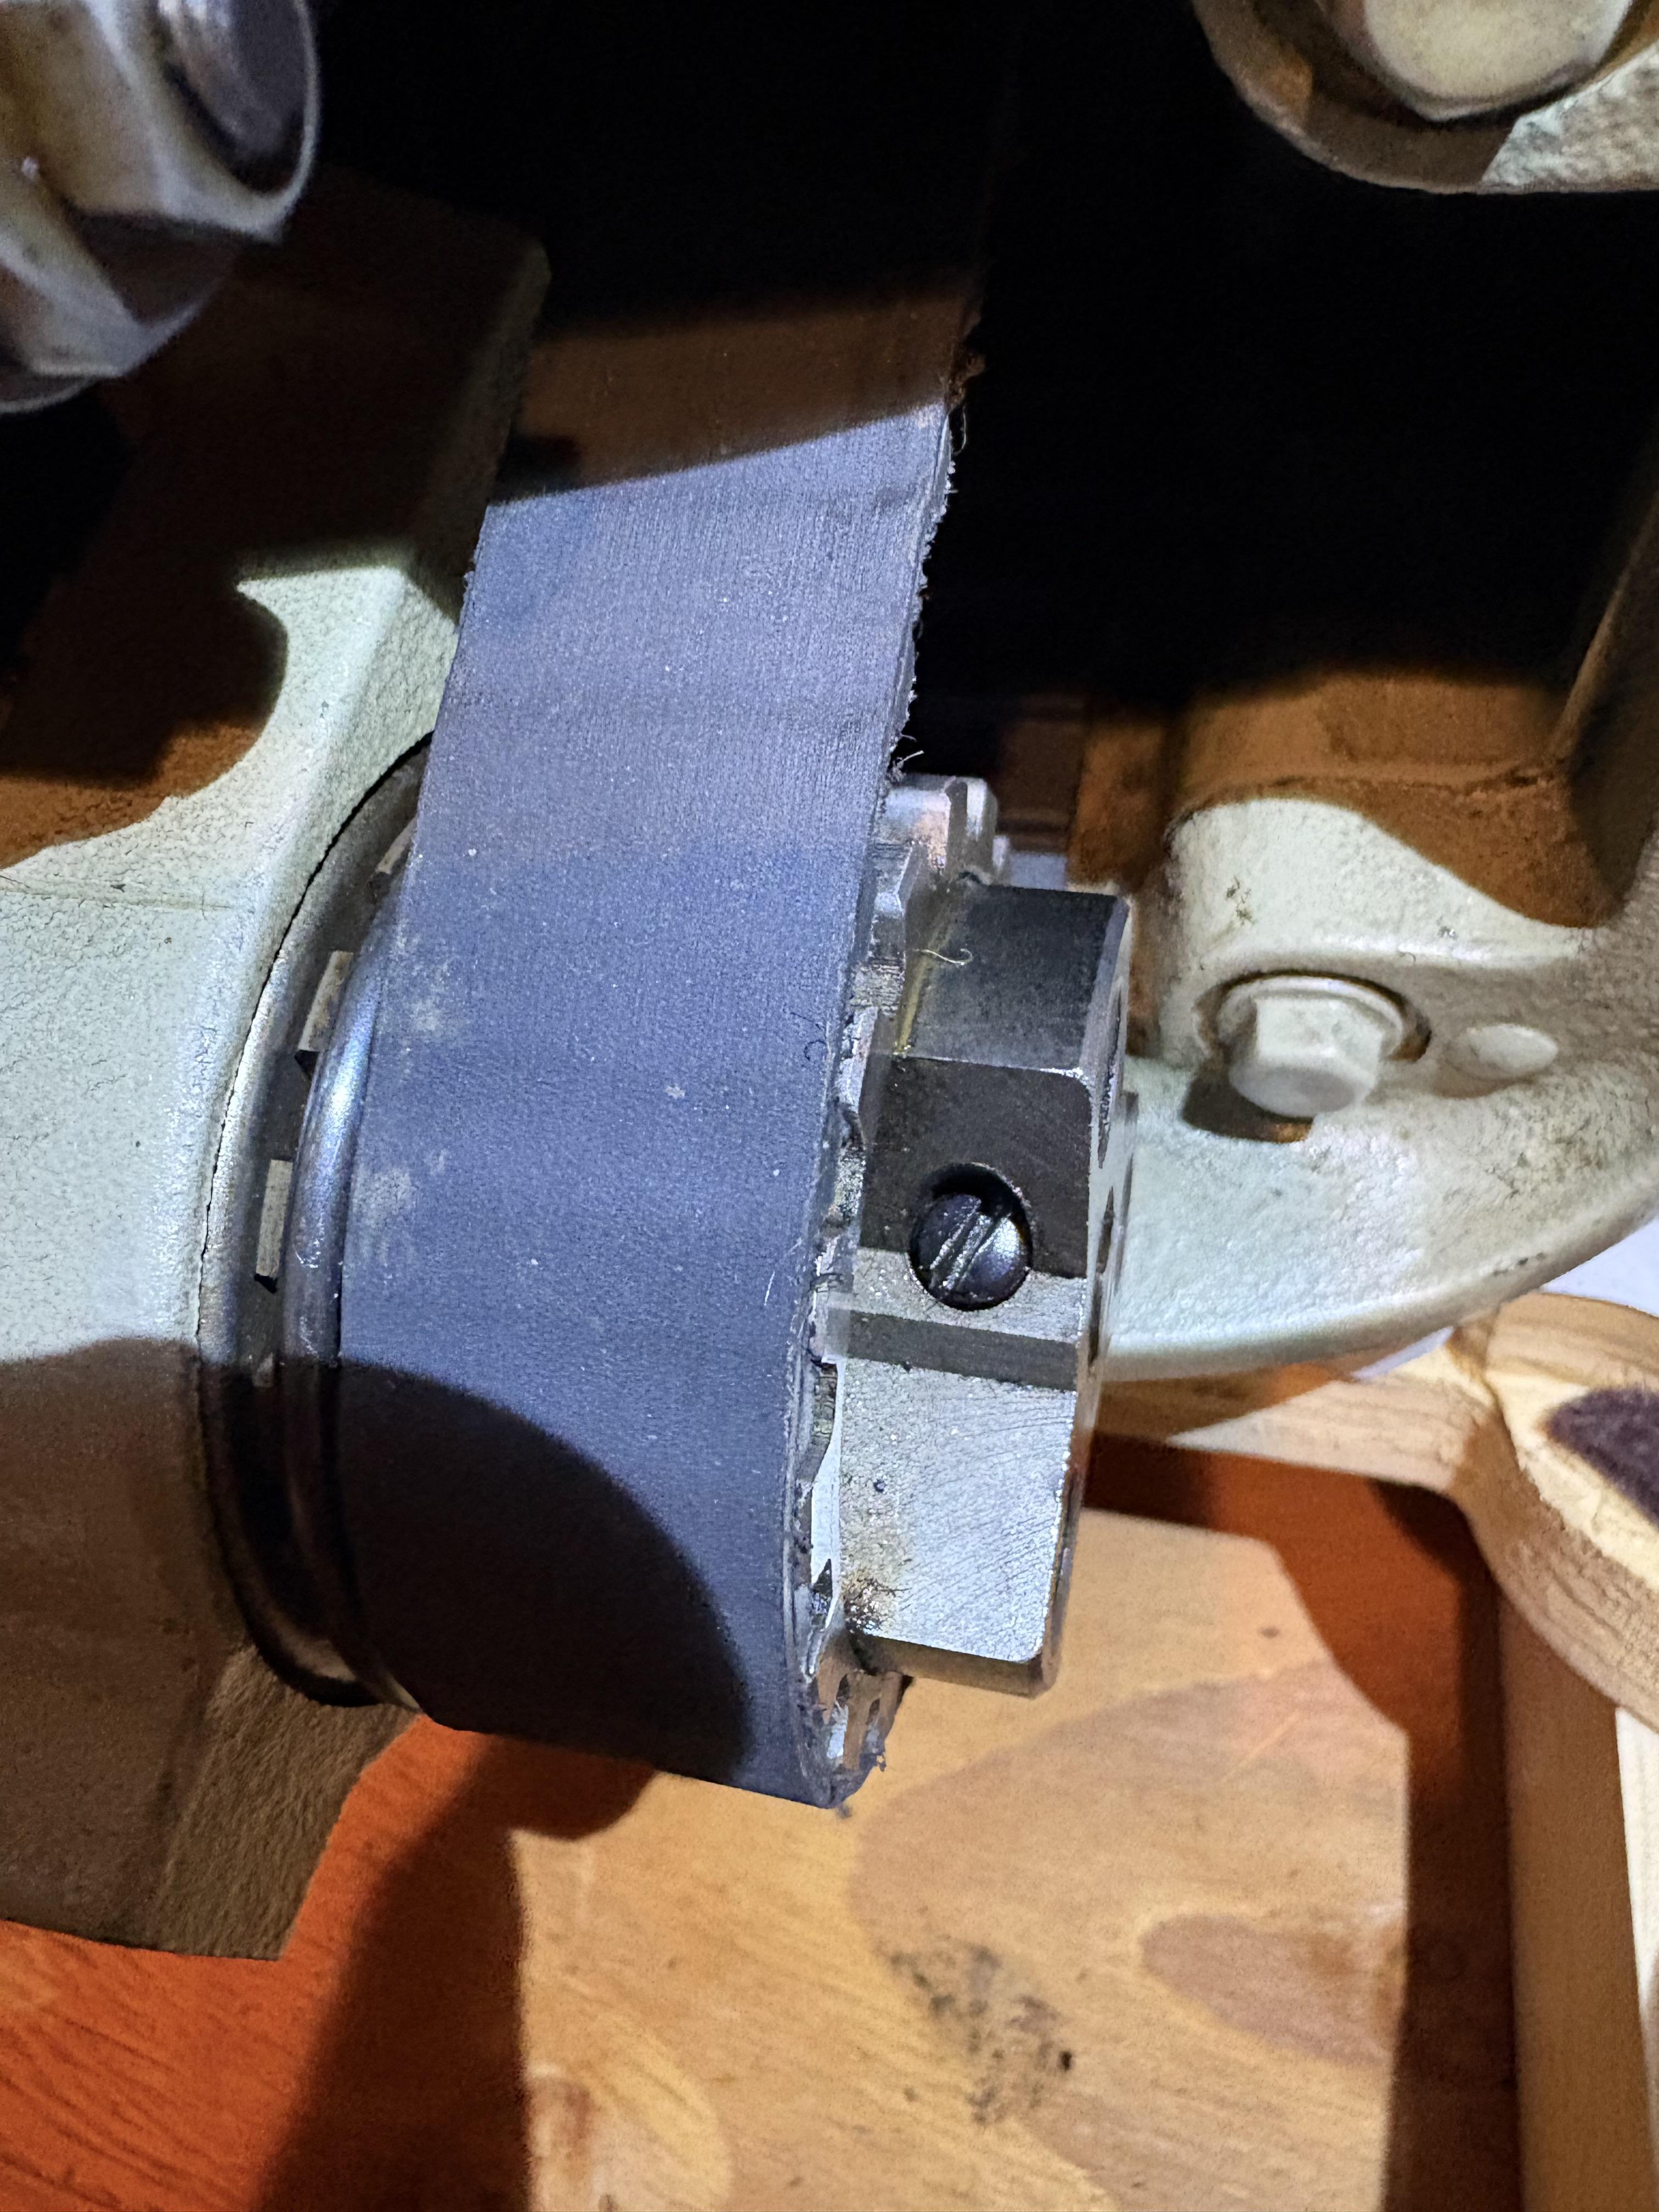

-
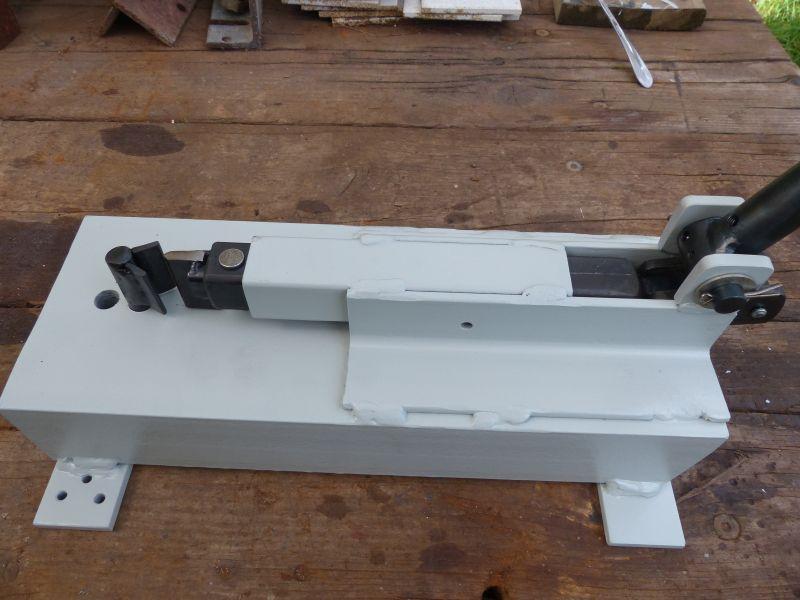
It finally warmed up enough to paint it so I'm calling it finished. I can now see how to make a better one, a bit smaller and neater.
-
So far so good! Here is an example of the type of stitching that would make it skip like crazy before. That is, stitching a puffy thing with the puff mostly on the opposite side from the hook. (I suspect this is in part because there is some play in the rock bar bushings.) But it nailed every stitch this time
-
Nicely done article, your products are natural and sold in CAD funds. kgg
-
Thanks for taking time to respond. I am on my next project, will definitely apply these techniques.
-
 iamclaus joined the community
 - Yesterday
-
 Riq joined the community
 -
 diefreeco joined the community
 -
Sounds good thanks !
-
I did get the hook back in the machine, but it's not adjusted yet. I need to bend the hook's needle guard so it doesn't protrude out so far, now that the hook has been filed. I have not figured out a good way to adjust needle guards. I've seen people use a screwdriver as a pry bar, pressing against the machine head. I've done that in the past, but it felt clunky. Not finding something good to press against today, so may need a custom tool. Or maybe pry against the feed dog support 🤷♂️

-
How does it work after sharpening?
-
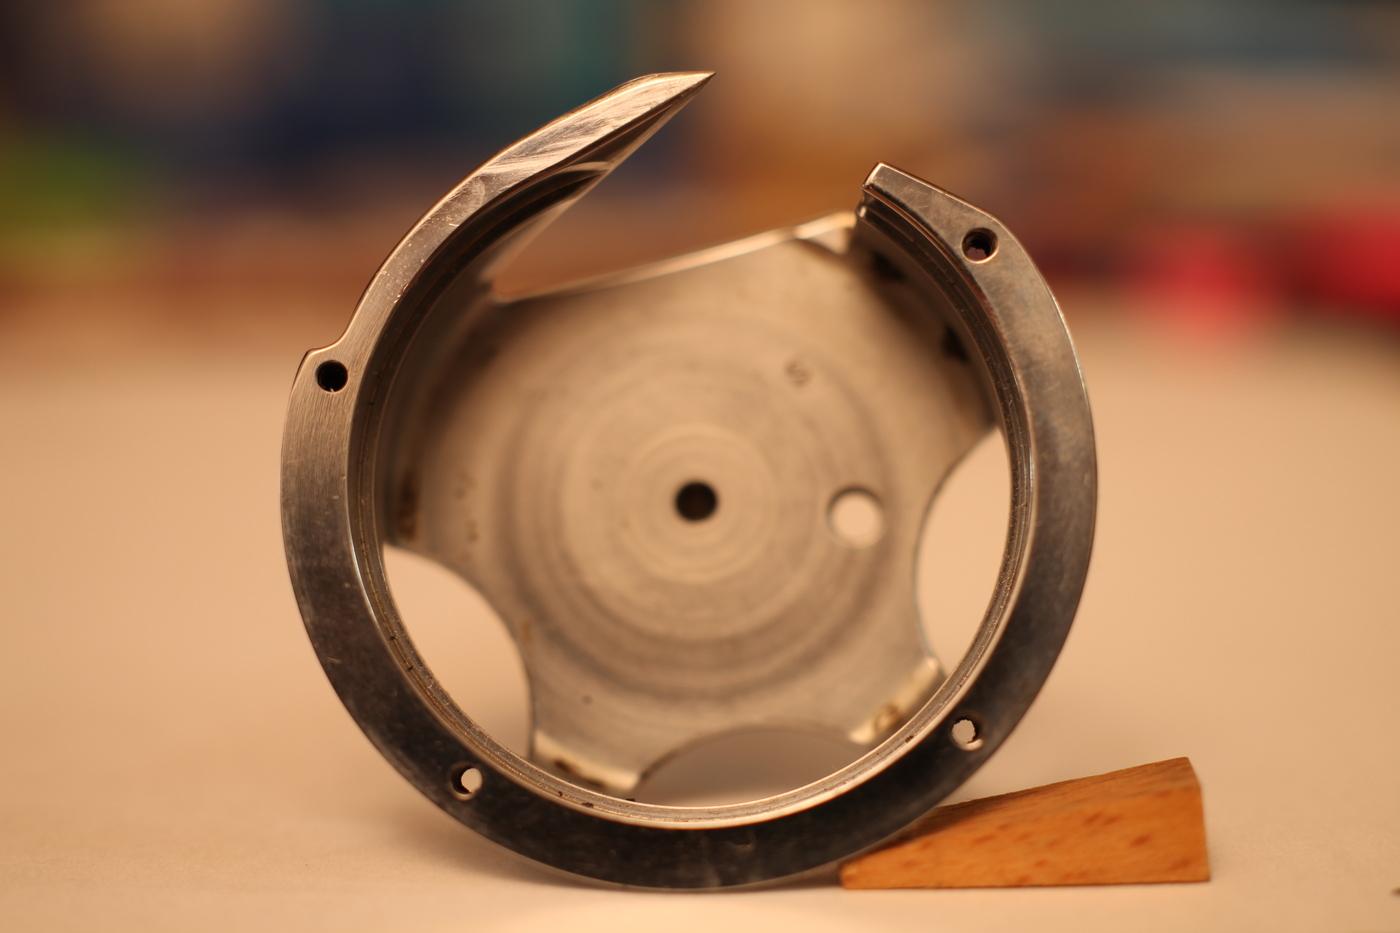
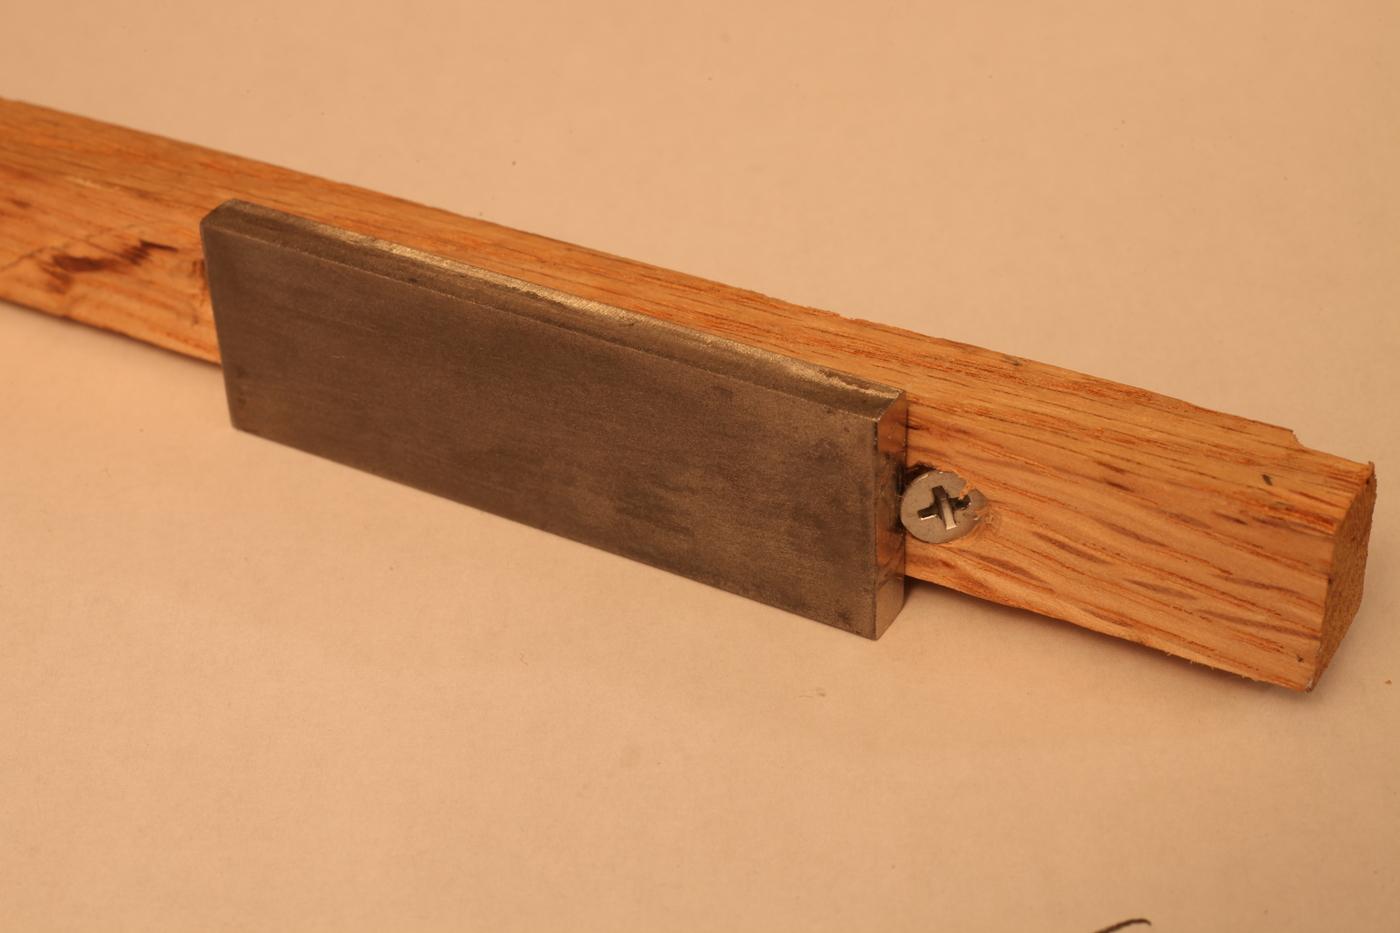
Here is the after photo: I can see now that the camera is not looking directly down the hook axis. Oh well..at least the before and after shots got the same treatment 🤷♂️ I faced the inside and outside edges of the hook using a diamond sharpening stone. Stone is 25x75x6 millimeters, on a 320mm stick of oak.
-
Considering that I couldn't find much for references, I agree that sharpening a hook is uncommon. I'm satisfied with the hook-to-needle timing, and I want a sharp hook with useful angles. So here we go... Here's the before photo, so you can see how rounded the tip of this hook is. Also note that the hook tip is positioned directly above the center of the hook in this photo, so you can imagine the arc swung by the hook as it intercepts the thread/needle.
-
I may be wrong (I have limited experience on machines), but I don't think sharpening the hook is common practice. I would think that the hook/needle interaction is more a matter of timing. Perhaps someone more knowledgeable will chime in.
-

Pfaff 491 roller foot pressure
Constabulary replied to LorenaLynn's topic in Leather Sewing Machines
You asked that before: -
Thank you for that. 🙂
-
 Charlotte 58 joined the community
 -
needle two small for 138 thread, Go to a 140/#22. glenn
-

spring flowers and good food
Handstitched replied to chuck123wapati's topic in All About Us and Off Topic
Seeing your burb makes me think of my landys. 'sigh' . I have 3 of them Your burb looks so good btw 👍 Atm I am ' resource rich and time poor' , that's my latest catch phrase . There's so many things I'd love to do but no time to do them , including playing with my 'toys' . Yeh , that barby works great 👍 It's Fathers Day here in Oz on Sunday, 7th September. So I'll be doing a roast lamb and vegies, and with champers😋 I got him a Vincent Black Shadow motorcycle model, for fathers day , like the one he had in the uk , and I once rode in ( the side car ) when I was a baby. I sat on mums lap. It was all black with red leather interior, I still remember how it looked and smelt, i don't know how I remember that, i just do, that's weird. HS -
Something that's new if you are coming from domestic sewing machines is that you have to hold the top thread when you start a seam. Here's what I do: Move the takeup lever to the highest position. (Otherwise the takeup lever will steal the top thread from you when you commence stitching) Insert material under presser foot Lower presser foot Hold top thread in place while you make your first two or three stitches, then you can release the top thread At the end of your seam, again move the takeup lever to the highest position to set the last stitch before you remove the material Sometimes instead of merely holding the top thread in place, I actually preload the top thread until the thread check spring deflects, then hold in that position to start the seam. If you choose to do this advanced option, because your middle presser has an open cutout on the right side you will need to have the top thread going down under your middle presser foot and out the the left. (My middle presser has a full round hole so I can pull mine any direction without deflecting the needle)