ClayB
-
Posts
2,063 -
Joined
-
Last visited
Content Type
Profiles
Forums
Events
Blogs
Gallery
Store
Everything posted by ClayB
-

A couple items
ClayB replied to The Major's topic in Purses, Wallets, Belts and Miscellaneous Pocket Items
Hi Major, Thank for sharing the pictures. I agree on the color of the masonic one. Don't care for the yellow that much. I do like the way you used two sizes of seeders on the flower. That's kind of cool and I hope I remember to try that sometime. Your decorative cuts could use a little work, so could mine! I was sitting next to a lady at a class in Sheridan one time that showed me how to do them really easily, but as soon as the class was over, I forgot how she did it. Someone here that is good at them should give us some hints. I like the indian. The scrolls are nice, but to me it's a little distracting where the stems just reappear on the other side of some of them. I think it would look better if a stem continued on behind the big scrolls. This coming from someone that cant draw floral patterns. You always do nice stuff, thanks for sharing the pictures. Clay -
Just wanted to let everyone know that the December issue of Paul's newsletter and his latest free online tutorial is out. It's a little late, but it's worth the wait. This month Paul is talking about modeling tools. He also goes into tracing patterns and dealing with those dotted lines. If you haven't checked out Paul's lessons before, you really owe it to yourself to take some time and do it. I think these are some of the best instruction for carving that you are going to find anywhere, and he gives a lot of his information away for FREE!! There is advertising in his newsletter for the lessons he has available for sale too. I have most of his lessons, and if you are serious about becoming a better carver, I recommend you getting all of the lessons he sells. You can see his free online lessons by going to his site Painting Cow Be sure to check out the past lessons if you haven't and save them to your computer for future reference.
-
Holy.............um...........Cow! I dont know what else to say. You do AWESOME stuff and I'm really glad you share your pictures with us. That really is amazing.
-
Hey Mike, Nice job on that vase. Back when I was learning to do her flowers, I thought I'd like to do one of those vases sometime too. Your picture reminded me again. I guess I should add that to my list. Thanks for sharing the picture. Hope you'll post more now.
-
It's hard to imagine that pattern on the right being out of leather. Do you have a picture of the finished pillow? That's really neat and I'd like to see more. Welcome to the forum. Thanks for sharing pictures of your wife's work. I'll be looking forward to seeing more. Clay
-
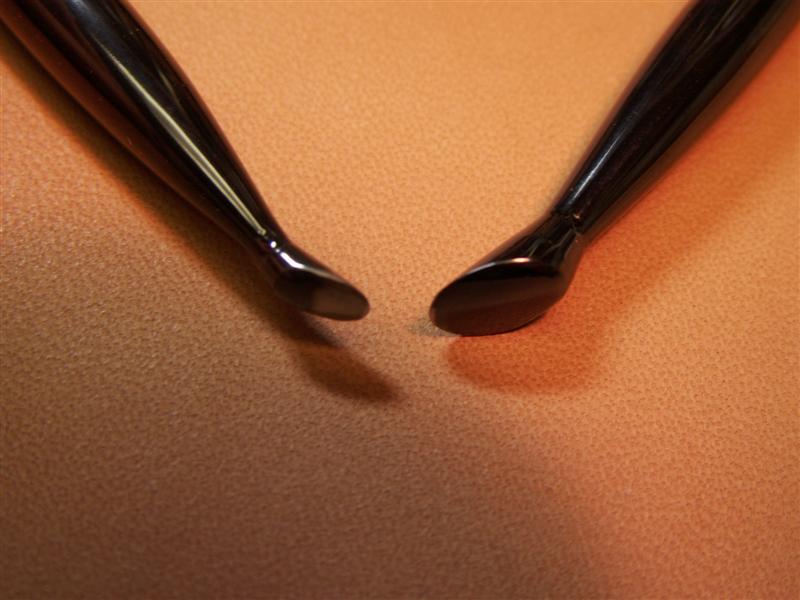
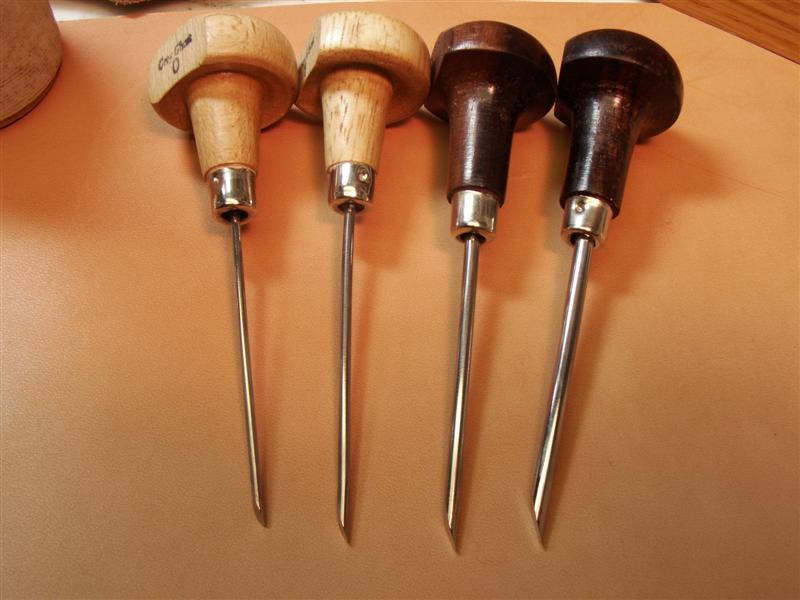
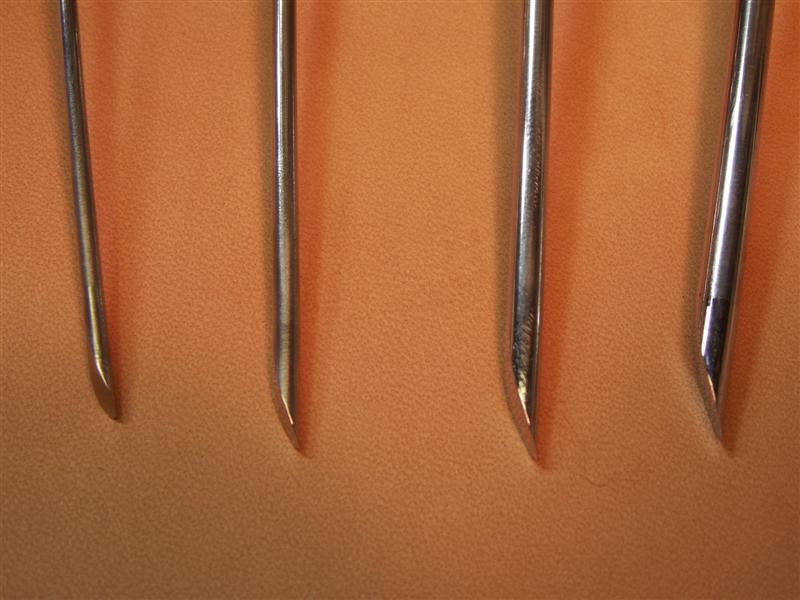
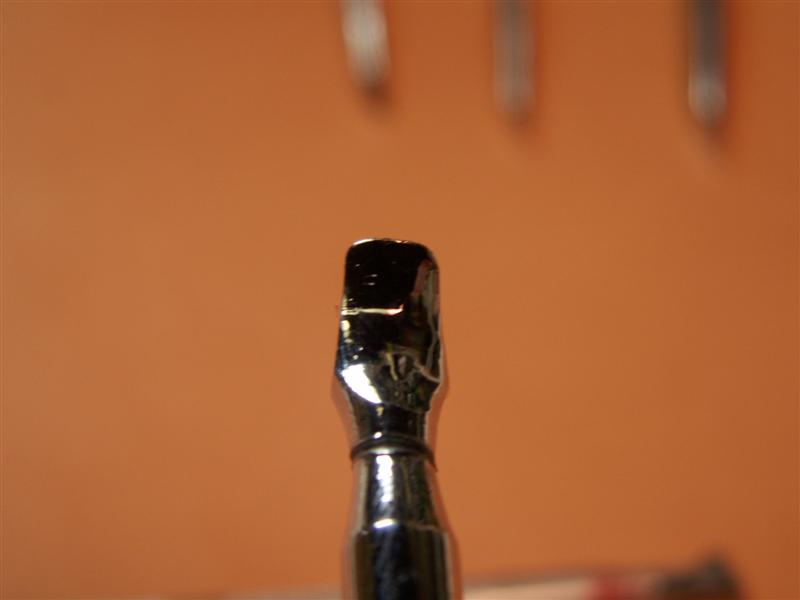
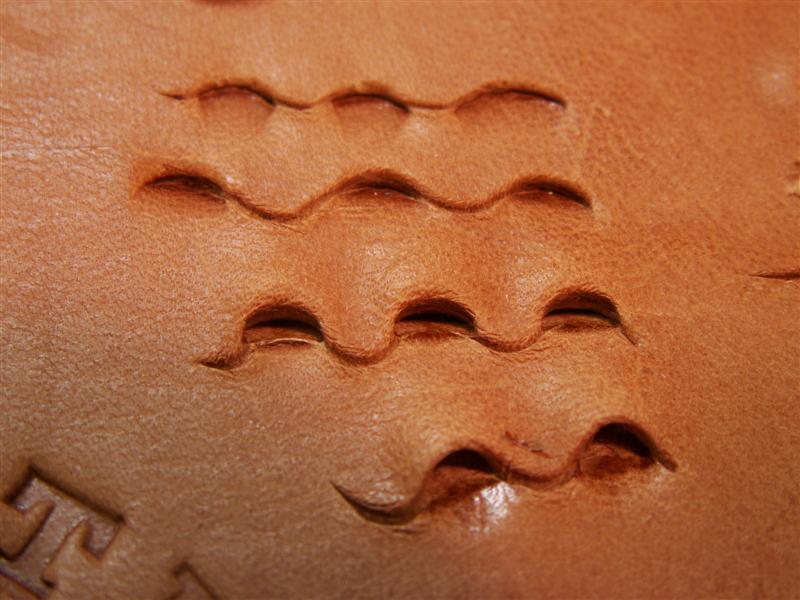
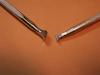
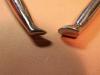
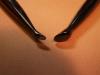
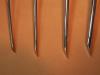
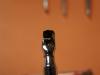
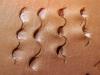
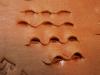
I got around to taking some pictures of the different tools that you can use to undercut. The first are Craftool undercut bevelers. These have sort of a square end with rounded corners. They end is blunt and doesn't really cut into the leather. They come in two sizes and work best for striaght lines. The next are Barry King petal lifters. These have more of a rounded end and it is really blunt. I think the main use for them is on the inside curves on flower petals. It pushes the leather up in these areas and gives it sort of a ridge. The next are Bob Beard sharp angle undercut bevelers (I think that's what he calls them) These have a really steep angle and are pretty sharp. I like them for the inside curves on oak leaves and things like that. They really cut into the leather and make a higher ridge than Barry's do. If you aren't careful they go right through the leather and into your marble underneath it. Then there are Jeff Mosby's pro petal tools. I have 4 sizes, he may have more. These are REALLY sharp! The will go into the leather as far as you want and when you lift up on them while they are in the leather, you can get a really nice ridge. Here I have used each tool. From left to right, Craftool undercut beveler, Barry King, Bob Beard, Pro Petal And from top to bottom, Craftool, Barry King, Bob Beard, Pro Petal. I find I use the pro petal tools the most for the effects that I like. I have several different makes of pro petal, Craftool, Osborne, Mosby. I think that Norm Lynds also makes them. Clay

-
Use mine all the time too. I got mine directly from Peter. If you need an email address, let me know. I am not sure what they cost these days either.
-
They are both smooth, one is just a bigger than the other. I had pictures of the different undercut bevelers, pro petals, and petal lifters. I'll look and see if they are still on my computer somewhere. They all do sort of the same thing but in a different way.
-
Photo album and registration paper binder
ClayB replied to Elton Joorisity's topic in Books, Journals and Photo Albums
You sure made it worth the wait for them. Those are really nice! -
Marlon is right. You can tool on 2 ounce, but you probably don't want to start out with it. Are you just looking for something to practice on, or do you have a project in mind. That will help you decide what weight leather you want. Heavier leather will take deeper impressions, and you wont cut through it as easily. Thin leather is going to stretch a lot more when tooling on it, so you will want to attach it to something to keep if from stretching. I'd suggest 4-5 or 5-6, unless you have a specific project in mind that requires a certain weight of leather.
-
The poll wouldn't take my vote either. I would consider working for Tandy if I didn't have to reloctate, do book work, or deal with grumpy customers. If it weren't for Tandy, I would have never gotten into leather work, so I feel I owe them. I think they have some really great people working for them too. I hope they are around for a long time. People complain, and maybe they have a reason, but I think that Tandy is working on the problems. They are working on improving the Craftool line. They came up with new dyes and finishes that will be legal to use in the future. I have been using the Eco Flow dyes and the more I play with them, the more I like them. They also now have some better quality leather. It costs more, but it's there if you want it. I just ordered a side of it from Clay Miller at the Rapid City Store and hope to get to try it out this weekend. I don't think anyone that works for Tandy has anything to be embarrassed about. If there was a store near me, I would be really temtped to see if they'd hire me. Tandy has an advertisement in the last issue of the Leather Crafters and Saddlers Journal saying they are now hiring. To apply, contact Tandy at storeops@leatherfactory.com
-
I think at one time they made attachments that allowed you to set snaps and rivets etc. with it too, but I don't think they are still available.
-
Mike, The Leather Craftsman was one of the former names of what is now the Leather Crafters and Saddlers Journal. I think they have copyright on all the old magazines. Maybe they also printed copies of the book you are referring too? You might send an email off to the Journal and find out from them if they have that copyright and if they do, give you permission to make a copy.
-
Personally, I really like leather that is painted well. There are people that can do it well, and I keep trying. It's been one of the hardest things for me to learn and I think most people tend to over do it. I have messed up some pretty decent carvings trying to color them, but I think that's the price of learning. I'd send you to some websites that show examples of really well done color, but last time I sent a link, some people felt the need to tear the persons work apart here on the forum. I really like natural leather too, so the decision to use color is up to the artist.
-
Well said Art!
-
Thanks Vera, I really wish people would stop it with that "master" thing though. I just do this for fun! I really would love to get the chane to hang out in your shop someday and watch you guys work. You make some really great stuff and I'd love to see how you do it. I printed out a big picture of a lion face off one of your earlier posts and someday I am going to try and see if I can make it turn out anything like you did. My hats off to you too! Clay
-
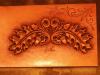
Hi Azmal, I think your carving looks good and I like the color. As for what to call it, Paul Burnett it doing a series of leather carving lesson he call Victorian Style and I think that's probably where this would fit in (if it needs a label) With that kind of a pattern, I am not sure what more you can do to it unless you want to emboss it or add hair, but you probably don't. The only suggestion I woud make it to spend a little more time cleaning things up with a modeling tool. Make sure all the edges are rounded over and all the bevel marks are smooth. You can do a lot of little finesse things with the modeler that will make your carvings look more finished (even though most people will probably never notice them) Your work is always amazing!! Can't wait to see this one finished.
-
you can view Barry's catalog online at Montanaleather.com
-
My "Arty" leather collars and such...
ClayB replied to Tina's topic in Collars, Cuffs, Leashes and Leads
Tina, You are at the right place to learn saddle making too. I think Bruce said he is going to take pictures as he goes on his next one. I think one of the saddle makers on here has a blog too that shows some of the steps he goes through. While I was learning to build saddles, I took step by step pictures of each one because it was easier than taking notes. At one time we were going to post them on here, but I am a little intimidated by the REAL saddle makers on the forum. You can see them if you click on the link to my pictures at the bottom of my posts. You keep telling us how you do what you do and we'll be happy to help teach you what we know too. Clay -
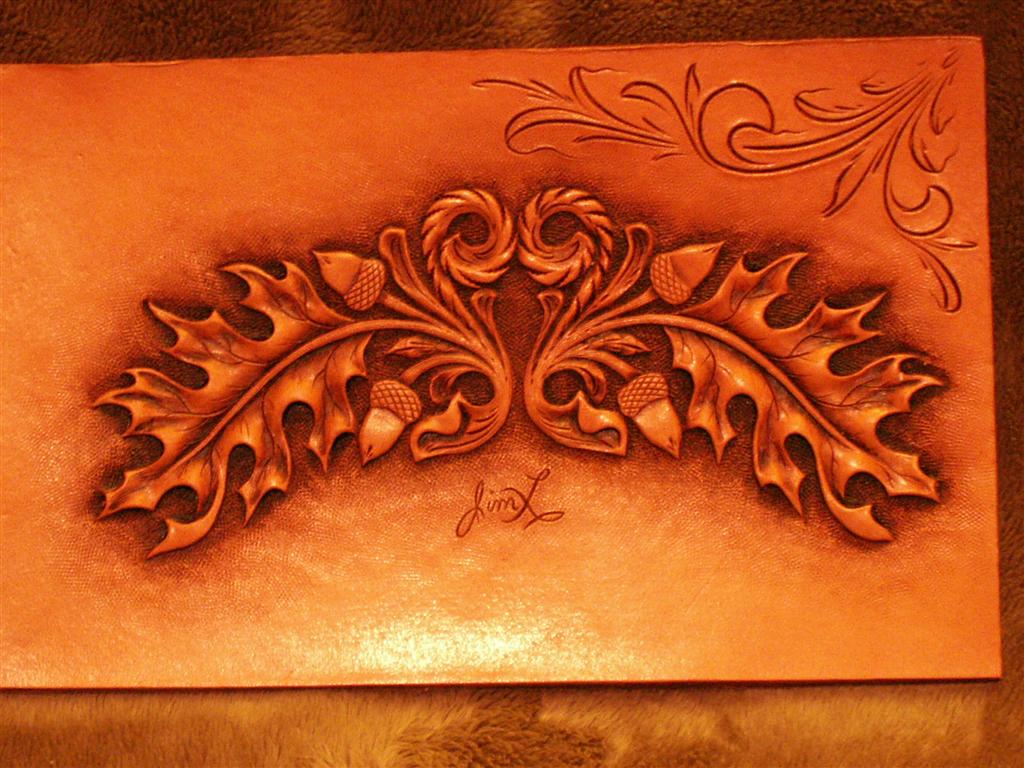
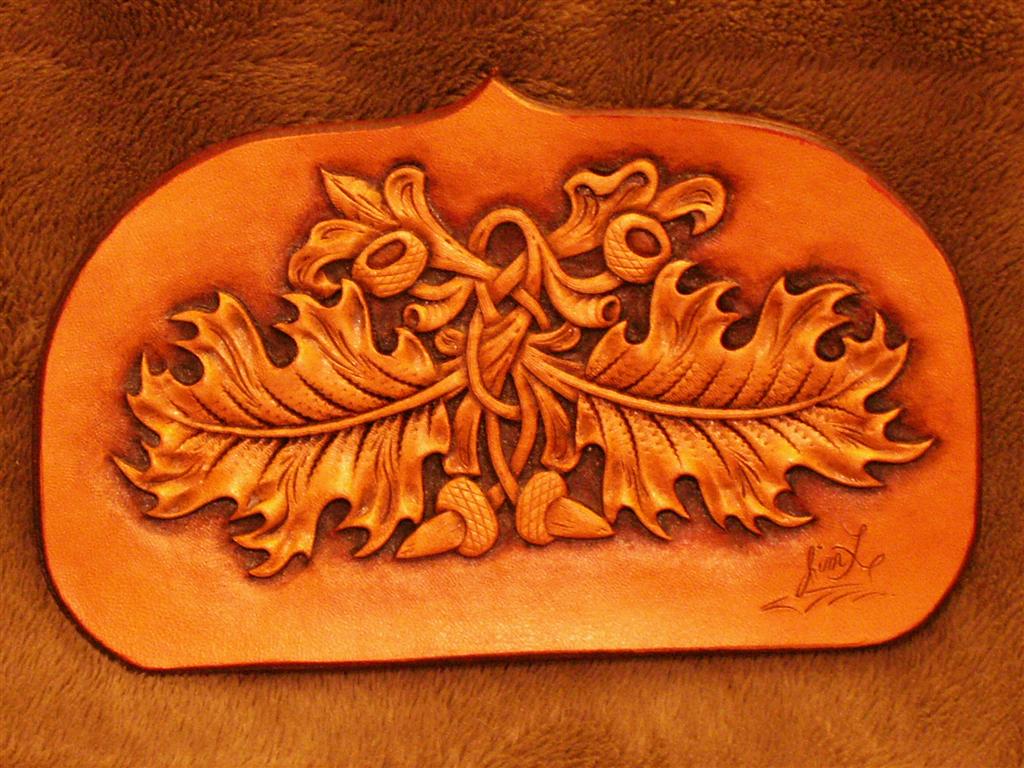
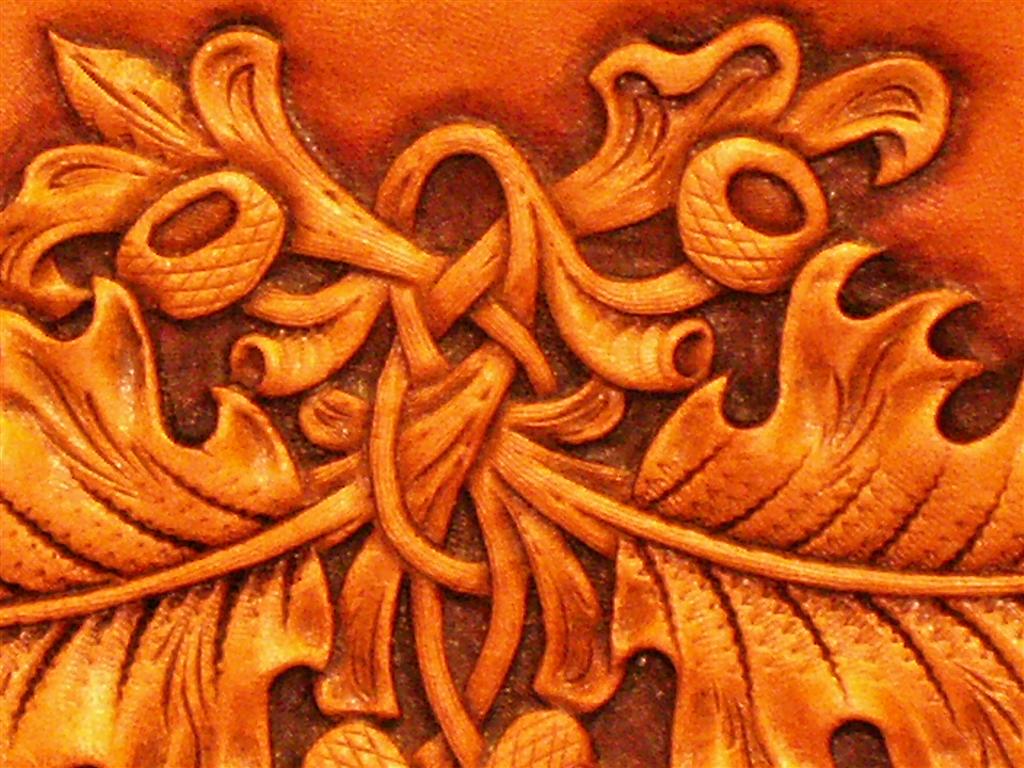
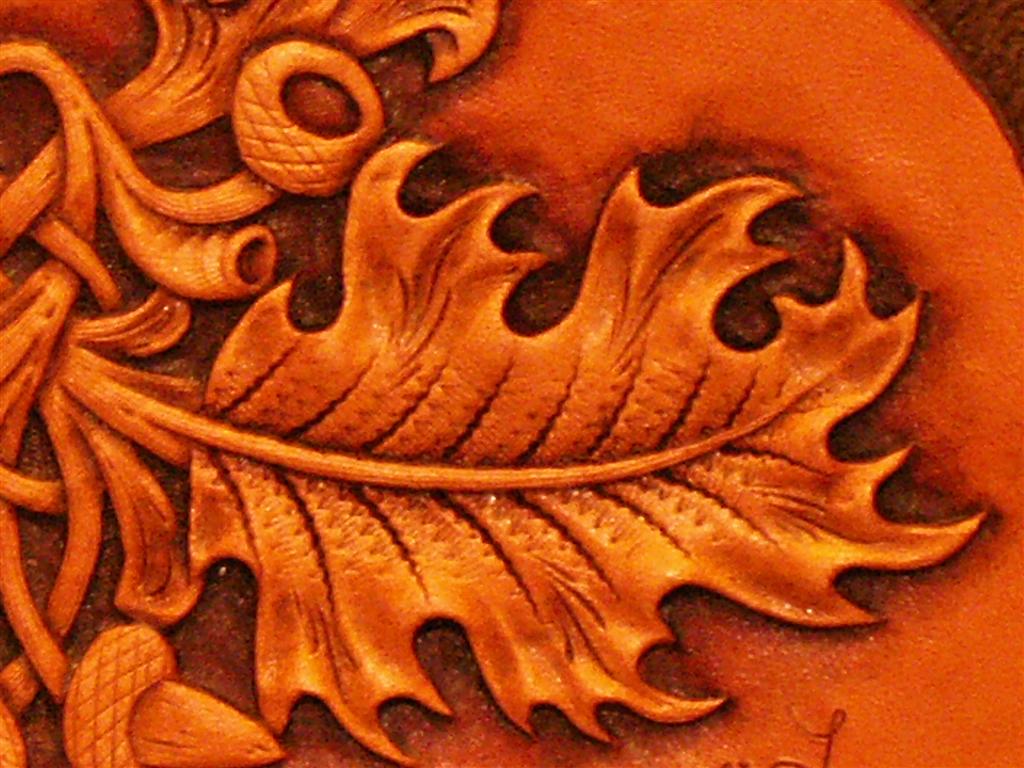
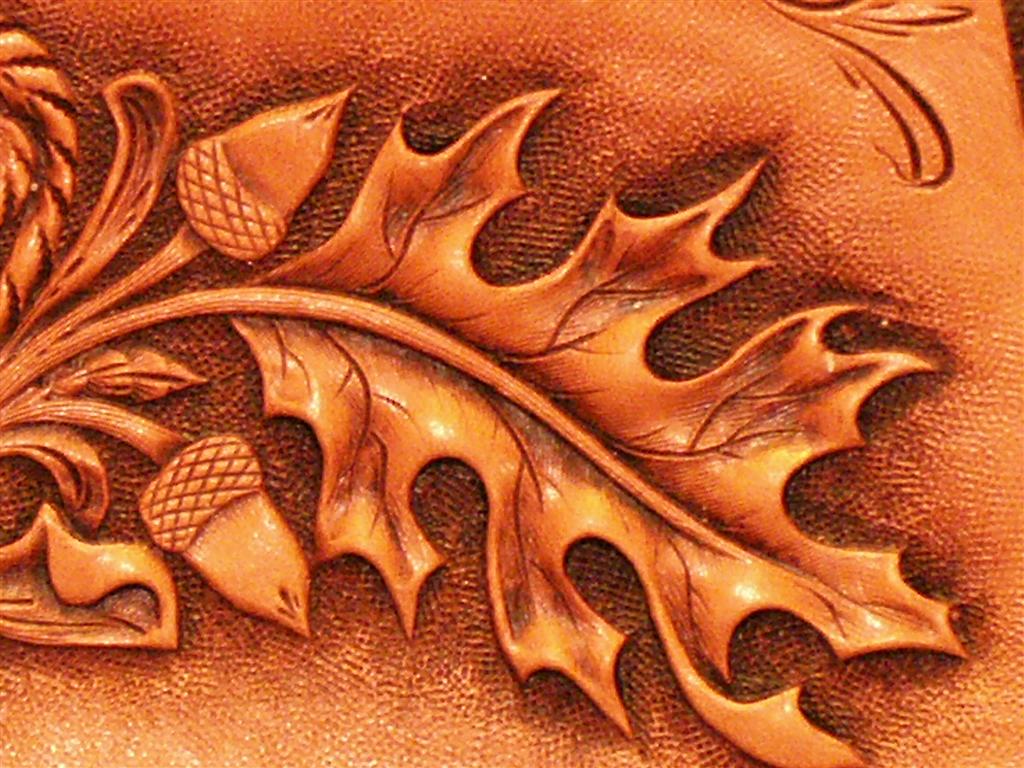
Leatherworker.net held it's first ever carving contest in December of 2007. It wasn't a competition where entries were judged against each other, but was intended to show how many different ways a single subject, in this case an oak leaf, could be carved. Participants could choose any pattern for an oak leaf they like from books or draw their own. They could then carve this pattern in any way they like. We had 21 participants who submitted 31 different entries. These entries definately show a lot of variety, imagination, and skill, and our first contest was a big success. I would like to thank everyone that participated in this contest. The timing of the contest right before Christmas made it a little difficult for a lot of people. Jim Linnell of Tandy Leather Factory donated some prizes to be given to participants who's names were drawn from a hat. The prizes consisted of some of Tandy's new line of modeling tools and tracing stylus as well as a couple of their older version of stylus. The names drawn for the prizes were Bruce Johnson, Regis G, Craftsman827, and Leatherbum. On behalf of all of us at Leatherworker.net, I would like to thank Jim for this donation and his support. Jim also sent me 2 examples of how he carves oak leaves to share with our membership. These carvings from Jim show us all what can be achieved with LOTS of practice and attention to detail. Check out Jim's website Elktracks to see more of his work. We are looking forward to having more contests here at Leatherworker.net. Both Paul Burnett and Silva Fox have offered to donate prizes for upcoming contests. We'll keep you posted as soon as the next contest decided on.


-
RONALD GEORGE EDWARDS, Who died at the Cairns Base Hospital Saturday 5 January 2008, After a battle with a long illness. Aged 77. RON EDWARDS Ron Edwards was born in Geelong, Vic, 10 October 1930. He began his Art training at the Gordon Institute of Technology, Geelong, Victoria and completed it at Swinburne Technical College (now University), Melbourne. He founded what was to be the Rams Skull Press in 1950. ACHIEVMENTS. He achieved - Diploma of Art - Art of the Book, Swinburne Art School, Melbourne, 1949. Diploma of Illustration, Swinburne Art School, Melbourne, 1959. Diploma of Art & Design, Swinburne University of Technology 1997, and D Univ (Sut) 2000. He was a Lecturer in Art, Swinburne Institute of Technology 1955-56. He began a study of Eastern calligraphy and brush painting in 1977. Received lessons from Pang Shou-yi in China in 1978. Studied calligraphy in Hiwasa, Japan, in 1983 under 82 year old Yukie Hamguchi and Naoko Kobe, a noted teacher in Tokushima prefecture. He worked with anthropologist Charles Mountford 1960-65 on a survey of Aboriginal rock art in north Queensland. Editor of the folklore journal National Folk 1966-1971 Had an exhibition of his paintings in the Cairns Regional Gallery during February and March 2001 President of the Australian Folklore Society 1984-Jan 2008 President of the Australian Whipmakers and Plaiters Association. Oct 1985-Jan 2008. AWARDS. Awarded The Australian Folk Trust Fellowship 1985 Was a semi-finalist in BHP's 1988 Bicentennial Award for the Pursuit of Excellence. Nominated in the category of Literature for his contributions to Australian folklore and crafts. Awarded Order of Australia Medal (OAM) in 1992. Awarded Advance Australia Foundation Award in 1995. Awarded Australian Folk Trust Citation 1997. Awarded a Doctorate, honoris causa, by Swinburne University, Melbourne. 2000. WRITING AND PUBLISHING. Has written 25 major books on Australian folklore, also a number of books on Indigenous music, bush crafts, leatherwork, Asian subjects and assorted subjects, Currently has 130 books in print. Ron has been the Director and mainstay of the Rams Skull Press since 1952 and during that time until now has written, illustrated and published in excess of 300 books and scholarly papers. He has published a few books for other people, and illustrated some books for other authors and publishers. He has travelled widely throughout the outback collecting material for his paintings and for books. His major books include Australian Folksong (12 volumes), Bush Crafts, Volumes 1 to10, The Big Book of Australian Folksong, Traditional Torres Strait Island Cooking, Some Songs from the Torres Strait, and a series of small books resulting from workshops at the various communities.
-
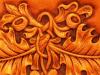
L'Bum, I am not sure what numbers I used, but I tried to match up the impressions and here's what should work. Veiner 708. You should also be able to use 409, 412, 417 or any on that order. I like the ones that are narrower and flatter. For the cams, I used an 831 to end the spiral on the scroll, but any cam that fits the curve of the spiral will work. On the edge of the scroll I used a 433. Again, a lot of different ones will work. Just make sure with either the veiners or cams you tilt the tools and just make impressions with one edge. Then in the large leaf, opposite the veiner, I used a C432 cam. Dont go buy a bunch of new tools if just because you dont have the same numbers though. See if the ones you have will work first.
-
Guess I better do a really good job on the how to part of this, huh? Thanks all of you for the nice comments. I'll try not to disappoint anyone. For years and years, all I did was carve other peoples patterns and finally started trying to come up with some original (or mostly original) stuff, and it has been working out pretty good. I have sort of a team of consultants that I run things past once in awhile when I get stuck. Kate, (the amazing forum fixer) Kathy (Yaklady) Charlie, and Dale have been a lot of help, and they have great imaginations. Caroline, I stretch from the backside of the leather. Try just wetting the part you want to stretch, leaving the rest of the face dry, or at least drier than the nose. Then you might want to stretch it in steps. Stretch as far as it goes easily, then let it dry. Then re-wet it again, stretch some more. You might have to do that a few times. It also depends on your leather. Some just stretches more easily. When I have a picture I want a lot of stretch from, I choose an area closer to the belly of the hide to cut it out from. The piece I did this buffalo on was way down on the belly and really stretched easily. That part of the hide, you couldn't have used for making anything out of that required strength, but for pictures, or for your masks, I think it works really good. Clay
-
Pigs are the Yak Lady's specialty. Maybe she can carve up a flying pig for ya all.
-
Thanks Ken, but really, I am still learning and feel like I have a long ways to go. This picture is embossed. The leather was pushed out from the back side. Then the cavity that was formed is filled with putty made from ground up leather and rubber cement. The buffalo is also cut loose on from the background from the tip of the nose to the back of the hump. Then that area is filled with putty too, giving the picture even more depth. The hard part then is trying to hide the putty by giving it the same texture as the carved leather. Then if you can paint it right, it's hard to tell the putty from the leather. Jan Schoonover is the master at that. Check out his website at sculpturedleather.com When I get this done, I should have a very in depth step by step to show and it should answer most any questions you have about this technique. Clay