Goldshot Ron
-
Posts
406 -
Joined
-
Last visited
Content Type
Profiles
Forums
Events
Blogs
Gallery
Store
Everything posted by Goldshot Ron
-

"quick Lock Buckle"? - Need Help There Please
Goldshot Ron replied to Aurelie's topic in Saddle and Tack Accessory Items
Thor, I've never soldered silver, so I don't know if it would be practicable to try. 25b I'll try McMasters. Weaver's has small square loops, but no small box loop stock. I figured I could cut down a box loop leaving a flange at the bottom and the loop for the buckle piece. We'll see. Thanks guys. Ron -
"quick Lock Buckle"? - Need Help There Please
Goldshot Ron replied to Aurelie's topic in Saddle and Tack Accessory Items
Attached is a photo of the item that I am trying to find. I had an idea of fabricating something out of a long box slide; however, I haven't found any of those small enough (1/2"x1/2"x1"). The only box slides that I found were 1inch square (too big). Thanks for the suggestions. Ron PS the photo is a repair job sitting on the bench. Separate from my search.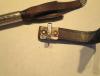
-
"quick Lock Buckle"? - Need Help There Please
Goldshot Ron replied to Aurelie's topic in Saddle and Tack Accessory Items
Geneva, thanks for the reply. I was hoping not to have to spend hours trying to make something that I could buy for the price of a cup of coffee. But, I guess sometimes you have to admit defeat. Thanks, Ron -
"quick Lock Buckle"? - Need Help There Please
Goldshot Ron replied to Aurelie's topic in Saddle and Tack Accessory Items
Well, no one has commented on this topic for a while, but I would also like to know where someone can find the metal loop piece that the attachment strap goes through. I've repaired these headstalls before, and have always managed to make them work. However, I have a customer that wants me to build them a headstall with brass box loops, and brass tips on the 3/8" strap that goes through the loop. I figure I can use a hat band tip, but the box requires a flange on the bottom that is riveted through the bottom strap of the headstall. The loop is flat and wider than a plain wire loop, and can be engraved with a design. Someone out there has had to have to come across a source somewhere. I've checked many web sites (Hansen's, Montana Silver, etc.) but no luck. Ron -
Randy, Your questions are a little confusing since you've made two saddles already. Don't oil anything until you've finished everything and are ready to put everything together. Everyone has their own sequence of construction, and it sounds like you haven't found yours yet. First, I fit up my skirts and block them (don't cut the bottom of them yet). Second, I install my seat. Next, I cover my horn and cap (this will vary from maker to maker). Anyway you get the picture. After you install your rigging and determine lug positions, you may have to punch a slot through your rigging plates so that the lugs can be pulled up tight and lay flat. This is okay since you can't tack them on until the rigging is attached. Don't line your skirts until you have checked your rigging drop, seat jockey, and general symmetry of the saddle. If everything looks good, now cut the bottom of your skirts to match your pattern, and put the final touches on them (stamping, etc.). It sounds funny, but I start making my skirts first thing, but don't finish them until most of the rest of the saddle is complete. This is what works for me. Ron
-
Randy, I only mentioned the seat pocket because it was taught to me by Al Gould, the saddle instructor for the Leather Show in Prescott, to position the riders center of gravity over the stirrups. The seat pocket should be approximately between the stirrup leather grooves on the bars and the front of the cantle starting point. Also, I purchased Cary Schwarz's cd for saddle making steps, and even though I like his work and style, Watt's cd is easier to follow. I don't think I have any tapes, CDs, or books that really give a lot of attention on how to really lay in a comfortable seat and it's placement. I think that's a technique the maker has to perfect. Ron
-
Randy, Your latest work looks good. The design looks clean, and your stamping looks good and thought out well. To reduce weight a smaller diameter horn and smaller cap. I didn't see the type of stirrup leather buckles you used, but Superior buckles are a feeewww ounces less than Blevins. One feature I think you may need to work on is your seat. It appears that your center of gravity is just a little too far back, and the slope moving up to your hand hole appears a little steep. Keep up the excellent work. Ron
-
Vintage Charro Saddle
Goldshot Ron replied to Wenny's topic in Saddle Identification, Restoration & Repair
Thanks for sharing. The end results looks good. -
Randy, I can't answer your question. Tan Kote is recommended for saddles because it doesn't seal the leather like other products. The Tan Kote is used as a resist prior to antiquing; yet, allows for added oiling of the leather after dying if you want. If you use a resist such as Leather sheen, Resolene, or RTC oil will not be absorbed into the leather as well. I experimented with this technique prior to building and tooling the saddle, and found that it gave me better results; however, if making a tooled calendar cover or decorative item, the other resists give you better antiquing results. Ron
-
Who's Who In Saddle Trees? First Saddle?
Goldshot Ron replied to Slickhorn's topic in Saddle Construction
I've used Timberline and Bowden, and feel that they are acceptably made. Sunny Felkins I've heard makes well made trees in the mid-priced trees. You will see Billy Cook trees on Ebay, and I question the quality of these trees and if they are actually Billy Cook made trees. Also, I recommend not buying any trees, no matter who may have made them off of Ebay. I've purchased a few just to have trees to try on horses to determine fit and size; not one of them would I use to build a saddle (all junk). I basically build saddles and repair tack as a hobby. But, for me it has become more of a creative outlet. Unlike oil painting or woodworking, I can throw one of my saddles on my horse and ride off into the sunset. Also, if you get into tooling leather, heck, you'll have more money spent on stamps, swivel knives, and mauls than most of your saddle making tools. Ron -
Randy, I would raise the front rigging plate up to your line on the pattern, but don't make your latigo cut any higher, or trim just a little. Then I would lower the rear dee so that the turnback of the flank billet will be just below the skirt. The skirts look fine as far as I can see from your photos. Wasn't this saddle for your wife? You might want to reduce your skirt length to 28 inches. If you trim at your stitch line, you will have the original line show, but only just a little. You can divert the eye from seeing this if you make a border line parallel to your stitch line, and no one but you will see it (the old stitch line cut). Your Cheyenne roll looks good. You could reduce it a little to reduce weight. Also, check the placement of your flank dee, to make sure it isn't back too far. Just a 1/2 inch does make a visual difference. Ron
-
Rigging Plates Over Or Under Swell Cover
Goldshot Ron replied to rktaylor's topic in Saddle Construction
Randy, Jeremiah Watt installs his rigging after the swell cover is installed, who's to argue with him? However, I install my rigging prior to the swell cover, because that's the way I first learned. Now that I have a little more experience in saddle construction, here are my reasons for installing the rigging before the swell cover: it is easier to line up the rigging in the position that you want, you can run the front rigging plates higher up the swell without fear of it showing after the seat is installed, and you can skive the rigging plates easier to get a good smooth fit without degrading the strength of the plates (these areas will be covered by the swell cover). I have a saddle with flatplate rigging that was made before 1945. The rigging has never had to be repaired, and the rigging was installed prior to the swell cover. One last thought about saddles; all you need on a saddle is a good tree, and well made and aligned rigging. I feel that you can align the rigging better with less stuff already on the tree. Ron -
Good question. I'd like to know the different ways that people do this also. I've never seen any postings of this process, and I question the way that I do it. Hope someone comments.
-
Randy, I'd be glad to share the dying technique that I used. First, after tooling, I lightly oil the leather with neats foot oil, and let it absorb into the leather. Next I block dye the edges with dark brown oil dye. To do this, I use a dry/hard cellulous sponge (palm size) covered with a clean cotton cloth (old tee shirt). I apply the along the bottom edge of the sponge (about 1' wide strip), and blot off most of the dye on the flesh side of some scrap leather. Test on scrap to make sure the sponge isn't still too loaded with dye, it needs to be almost empty of dye (seems wasteful, but that's how it works). Gently in a circular motion wipe the sponge from the edge inward to where you want the dye pattern to end. DON'T push too hard, and be patient. I try to make my pattern look like clouds on the leather. When the block dye is dry, wipe with a paper towel or sherling to remove foreign particles. Apply at least two coats of Tan kote to the project. Let dry thoroughly. The final step is to apply antique acrylic stain to the entire project (only the piece that you are working on at this time), and using a damp closed cell sponge (the type you wash cars with) wipe off the excess stain down to the color that you are trying to achieve. Rinse out the sponge frequently, and wring out well. When the project is dry, buff with sherling or a soft cloth to remove any lent and application particles from the leather. I like the affect that this process offers, and it sets off the dyed and burnished edges. Also, it covers any mistakes or bleed over when dying the edges. Hope this helps, Ron
-
Keyston Bros. Saddle?
Goldshot Ron replied to Curiosities's topic in Saddle Identification, Restoration & Repair
Many years ago I managed to find a phone number for Keyston Brothers in Nevada, Reno area. If I remember, they were not the actual saddle maker, but would contract for items with their name on them. The early saddles they sold were well made (the one I worked on was made in 1940 era). The saddle posted here was probably made in the 1960's. I would say that the worth is around $100. Do a phone number search and see if they are still around. The lady I talked with was very helpful, and she was able to pull up an old catalog off the computer with the saddle that I had. The saddle that Big Sioux posted was one with their old logo on it. It would interesting to know more of their history. Ron -
2 Worns Saddles I Would Like To Restore.
Goldshot Ron replied to Patrice's topic in Saddle Construction
I have to agree that restoring these saddles won't be much of a learning experience, except in what not to do when building a saddle. The materials needed to restore these saddles will be more than the saddles will ever be worth. I took an old saddle apart once to use as a demonstration saddle to show people the different components of a saddle. I found that it had a plastic seat strainer, and that the swell was broken prior to being covered at the factory. So they just nailed the broken swell back together. It was a good example of what not to buy when purchasing a saddle. If you have friends with horses, offer to clean their saddles for them. This will give you an opportunity to work on different saddles, and see how they are built and what went into their construction. Ron -
My mistakes are used for practice tooling, and eventually end up in the trash. I've torn pieces off of my work days after completing just because I kept thinking about the screw-up. I have a couple of customers that go through my trash when they visit. So not to feel wasteful, I toss practice pieces in the trash before they arrive. Let one man's trash be another man's treasure.
-
Starting Construction On A Barrel Saddle
Goldshot Ron replied to rktaylor's topic in Saddle Construction
Randy, I'd keep the measurements that you are using, because after blocking the skirts you'll see that the front and the back clearance will no longer be 2 inches. Also, I've found that if you make the rear of the pattern straight instead of curved inward, you'll have leather to make adjustments later. Remember, you can always remove leather, but it's hard to add leather where needed. The location of your ring needs to be determined before cutting your skirts. Presently, it looks like your ring would be set further back than 3/4s. What I do is set my poster board under the bars, mark my full rigging location on the poster board and tree, and mark my desired rigging location, place the ring where I want it, then draw the shape of the bottom line of the skirt. Oltoot lost me with his description of the upper part of the skirt; but, I agree with him that a two piece top is easier than a one piece top. Also, to reduce weight you don't need to use fillers around the rear of the skirts. I see that you've started your seat risers. What width will your stirrup leathers be? Your front riser looks like it comes down too far. Whose ground seat installation instructions are you using? Since there are many techniques, I don't want step in it, before knowing the plan. Good luck, Ron -
Billy, The leather I used was the retanned saddle skirting that was a special for Steve Siegel who used to have Siegel of California. It had a couple of rawhide spots around the rump, but so will H.O. The color was produced by oiling after tooling, applying resist, then applying Fiebing's Antique Acrylic saddle tan. I've also used their chestnut skirting on a couple of saddles, and I really like how it comes out. When tooled the design pops out quite well. My only complaint has been that delivery isn't real quick from the East Coast to the West Coast. Ron
-
Joel, Thanks for your kind words. I find the hidden cantle stitch easier than the stitching showing on both sides. The depth of the tooling is enhanced by the antiquing. I have several mallets and mauls that I use. Which one I use is determined by the arthritis pane in my elbow at the time. I must pass on that there is a CD by Cary Schwarz that gives some tips on flower tooling and using petal lifters and shaders. Ron
-
Randy, I once took a saddle class from Al Gould (saddle maker in Clovis, CA) and we were discussing reducing weight in saddles. He said that we are reducing weight by ounces of materials to reduce pounds when finished. Most of the light weight saddles that I have repaired had cheap light weight trees, narrow stirrup leathers, cheaply padded seats, and narrow forks. It's hard to build our type of saddle and live with these cheap components; and, if you figure out how, please share. Trees, since I'm still learning the trade and don't want to waste money, I basically use trees from Bowden and Timberline. They don't use staples to hold down the rawhide, the rawhide is nicely applied, and most of the time the trees are square. And, I recommend LaPorte and Chicago Stock Yard trees for composite trees. They help to reduce weight since the ground seat is already part of the tree, and doesn't feel too bad sitting on it bare (saddle that is). That's my two cents on trees. Two inch wide stirrup leathers also reduce weight. When I reduce width in leathers, I usually use harness leather instead of skirting. It's firmer and tanned with more oil to holdup better. But, it's not worth buying a side for only two leathers. Check out this site for past posts on inskirt rigs, I believe there are quite a few posts with photos. Good luck, oh yeah, if you find the secret for keeping the Mrs. happy, I'd like info on that also. Ron
-
Thanks guys for the kind words. Randy, to answer your question, I didn't want to mess this project up. Other than the fenders, I practiced tooling each pattern before actually stamping the saddle pieces. Then, each piece had to be oiled, blocked dyed, resist applied and antiqued. As I've mentioned in other posts, some pieces had to be redone because I didn't like the results, or they just didn't fit after completing them. Heck, the stirrups alone took me over three weeks. I used Bob Klenda's tap pattern, and the results did work the first time (a first for any paper pattern that I've ever used). Oh yeah, this saddle has an all leather ground seat, rawhide covered stirrups, and drop ring rigging set at about (+/_) 7/8ths. position. I hoped to capture the early California Vaquero Style but using modern measurements. Thanks again, Ron
-
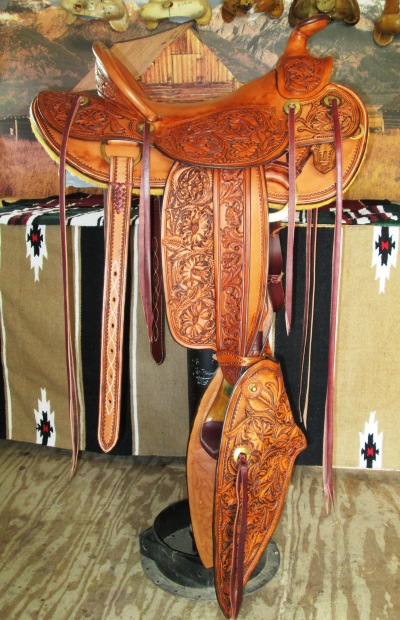
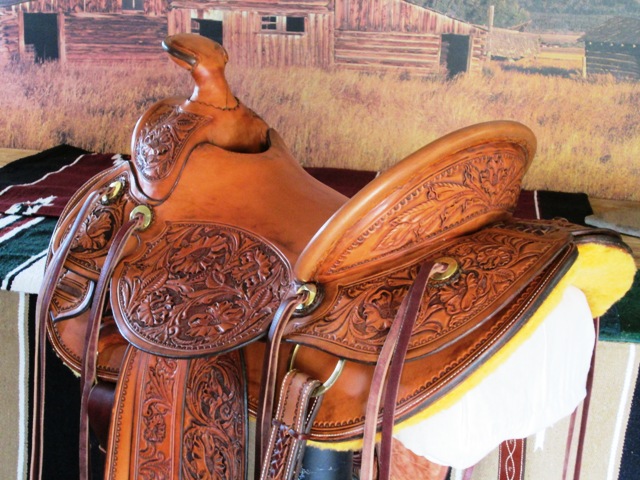
I've commented on other folks work, so I thought I'd better put my money where my mouth is. It's been about a year and a half to complete this saddle. The first three months was planning and design, starting with the saddle bags. The tree is a Butch Casidy style built by Timberline, and the leather was W&C.
-
First, is this your design or a copy? The flow looks good, and your stems are well balanced. There are a couple of ways to approach your weaknesses: stamping and swivel knife technique. Swivel knife technique is more difficult, so I won't tackle that. Your stamping may be easier to improve because you need a few more stamps that will improve your stamping. First, you need to bring out your flower centers by using a lined shader moving outward from the centers edge into the petal. Another stamp that will enhance your work are lifters. They are used to lift up the leather on petals to create depth. And, one final note is your backgrounding. It doesn't seem uniform (muddy looking). I don't know if it's your stamp, or if you're not letting your leather case well enough. Your work is looking good, and will improve with practice. Ron
-
Ron, It looks good, especially for your first, wouldn't have known it if you didn't mention it. Not much to critique since you've mentioned most items; and, that's mostly in your mind. I do have one suggestion, and it's only the way I do it. I've found that if you reverse the way you put on your horn wrap, you'll center the wrap on the front of the fork better, so that when setting the saddle on the fork and horn, it protects the front of the fork cover better. By this I mean, take your wrap forward and around into the hand hole instead of going through the hand hole first. Also, as straight forward as rear jockeys appear (like no brainer as far as construction) they can be a real pain to get them centered and looking in proportion to the rest of the saddle. I've had on occasion to make three sets of jockeys until I got what I wanted. Can't wait to see your next creation, Ron