

Goldshot Ron
-
Posts
405 -
Joined
-
Last visited
Content Type
Profiles
Forums
Events
Blogs
Gallery
Store
Everything posted by Goldshot Ron
-
Your machine is painted the same color as mine. The fellow that I bought mine from was rebuilding a second Landis 3.
-
Received my polyester thread order, but haven't set it up yet. Miles at Campbell/Randall also mentioned to pull the thread off the spool from the side, not spiraling upward as the new machines. Haven't tried that yet either. The serial number of this machine is 10786, last patent number was Nov. 28, 1911. Short history that I was told about machine: I purchased it from a fellow in Cuba, NM, who purchased it from Sheridan Leather when they closed, and they had purchased it from the King Estate. The machine has covered more ground than I have in my life; oh wait, it is around 109 years old, I still have time. Thanks for the info. Sioux.
-
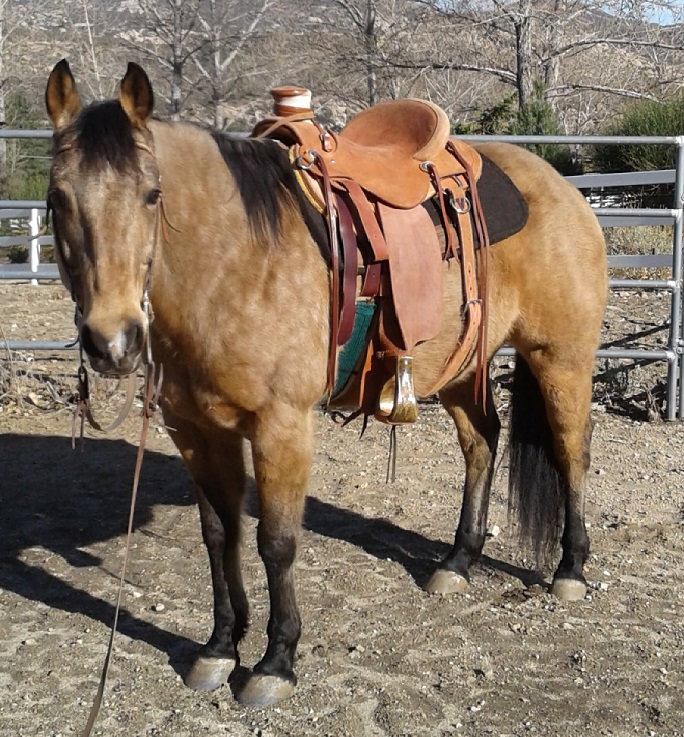
Talked with Randall/Campbell today. Miles suggested that the thread brake blocks may be dirty or worn. He also said what I have heard before, to change from bonded nylon to polyester thread. The saga continues. Also, see photo one: what does this adjustment bolt do?
.thumb.jpg.7a5b7afc608ec76a5d7bda2e8dac3592.jpg)

-
OK, thanks for the advice. I'll check the blocks. I am only testing on single ply 12/13 oz., I'll try two pieces. At least, I've oiled everything for the first time in a while.
-
I'll check the top tension assembly; however, it seems tight. I'm not quite sure how to really change anything in that upper configuration of blocks and wheels.
-
John, Photos would be nice if possible. I've done a few seats, and each one was different. Also, I usually hand stitch to line up the original holes on repairs. What type of padding are you using? How large is the padded area: full, half-seat, or insert? Ron
-
I have read most of the Landis 3 topics that I could remember reading in the past, and I have not found my solution. By playing with the machine, I have learned a lot, but cannot solve my issue. The problem started with the machine skipping stitches. Cleaned and oiled machine, changed thread, adjusted bobbin and still failure. After not using the machine for a year or more, I decided while social distancing I'd fix the darn machine. Problem: top thread does not tension around bobbin thread. There are loops hanging below the leather, and the machine bobbin shuttle hangs up due to the loose thread. The bobbin threads out easily, but the top tension doesn't pull the knot into the leather; thus a large loop forms. All of this happens within 3 cycles of the hook and awl. Any Landis experts out there? Called Campbell-Randall, but just left a message, maybe they are social distancing also. Ron
-

English stirrup leather buckle - unusual?
Goldshot Ron replied to Xanthoria's topic in Saddle and Tack Accessory Items
How are these attached to a saddle? Does the stirrup go through the loop with the buckle, and the fixed loop go on the saddle's leather hanger; or visa-versa? -
I don't have anything to offer, but, what piece are you holding? It looks like the stirrup end of the fender. Or, is it the top part of the fender, and the leathers are actually cut inline with the fender so there is no connection between the two, just one piece fender going into the stirrup leathers. I just can't see from your photo. Just wondering, Ron.
-
As blue62 mentioned, after recovering the horn, you wrap the horn. After, installing the wrap, you won't see the metal horn. Any of the horn wing leather left, can be tucked down into the horn hole and flattened under the swell cover. How you secure the cap filler piece depends on the style of horn. I am assuming that blue62 has drilled holes through the horn cap to install the rivets. Ron
-
The photos you posted appear to be at the rigging plate and the rigging appears to be inskirt. These seams need to be resewn. This is done after removing the sheepskin (fleece). A cleaning solution that I use on oily-dirty saddles is made of: water, ammonia, and Ivory dish soap. I don't remember the measurements; but, mix just a few drops of soap (you don't want alot of suds) and ammonia to the smell test (smell it, but doesn't knock you out). This will remove the oily dirt and sweat. Also, a plastic putty knife can be used to scrape off this layer of gunk. Rinse well. Once the top grain is rubbed off, there are no tricks to bring it back. The photos appear that the saddle is well used, and you can't make it look new. You didn't list the makers name of the saddle, and that would help for further analysis. Hope this gives you some different ideas.
-
Second saddle, second place!
Goldshot Ron replied to Rolandranch's topic in Saddle & Tack Maker Gallery
Well Ryan, if your saddle is No. 2, I would hate to compete against No. 1. For only your second saddle, it looks amazing. Your tooling looks well planned, and your swivel knife work is great. Tooling the back of the cantle is difficult at best, but you nailed it. I like how you stitched the flank cinch billet buckle holes; makes it look professional. The three judges are talented saddle makers, and you can trust what they said to be really good advice. Keep up the good work. Ron -
What did you determine for tree size using the card system? I have no experience with the Dennis Lane System. Since many mules have shorter backs than horses, you may consider using Arab measurements. Another possibility would be to consider using a composite tree; like Chicago Stock Yards. I've build on one of their trees, and it went quite well. I feel your concern about doing the best you can, and what you make will be used. I suggest calling Timberline, Randy is the owner, and see what he says. Quality makes a very well made tree, and I do like their rawhide covering.
-
Randy, I'm not very good at this, but maybe you can succeed. Take a Dremel Tool and modify the stamp yourself. I've made my own geometric stamps and I've modified some round stamps. If it doesn't work, you are only out the Dremel cost and the cost of the practice stamp. Both items may equal the cost of one really good stamp. One of the best stamps for BW impressions that I have is Lonnie Height's (forgive spelling). Hidecrafter stamp impressions are also good for an inexpressive stamp, but their shanks bend over time. I'm on my 3rd. HC- BW, but the impression can't be beat. Anyway, I hope what you can find out there works for you. Good Luck. Ron
-
Dusty, I suggest you to change your title for this discussion, or start a new one that would have the title like "Building my First Mule Saddle". I think you would receive more advice, and easier for some of us (old farts) to follow. Ron
-
Well Dusty, This is always said to first timers on this site, pick up Vol. 1 of Stohlman's Saddle Encyclopedia. Read it cover to cover a couple of times. This will give you the basics and then some. His books only teach you how to do all leather groundseats, so his methods are somewhat dated compared to today's saddles. Search through this forum for saddle making and you'll find almost everything you will want to know. There are two tree makers that I suggest for information, solid trees, price, and quick service: Bowden Saddle Trees (Anthony, TX) and Timberline (Vernal, Utah). There are a whole bunch more that make great trees, and the prices only go UP. One last consideration you need to know (if you haven't thought of it) is rigging type and placement. Stohlman doesn't quite cover that, but I have photos of mule rigging that I have installed that might give you ideas. Old Toot on this site will be around to help also (a lot of knowledge there). Randy above is a saddle maker who participates in saddle making contests; he'll help too. Well, good luck and keep in touch.
-
Dusty, Are you building a western saddle or English style? Do you want to be a traditionalist maker or innovative? Traditional western saddle makers use an awl with a diamond shaped blade for making the stitching holes and waxed hand stitching thread. Tools you will need: a stitch line groover, an overstitch wheel (I use a 6 spi but some use 7 or 8 spi). The type of thread used traditionally is linen (6 cords), but I use 5 cord polyester. If using a machine, I use 346 with 277 bobbin nylon. Everyone does things differently, but I wouldn't recommend using chisels for sewing a saddle. Easy stitchers (a brand name) could be used, but the thread they use is too light for a saddle (I believe it's thread is 3 cord lightly waxed). Building a saddle is exciting, nerve racking, enjoyable, and frustrating. Hope this helps some. There are plenty more saddle makers here to help you along. Ron
-
Finished my first saddle!
Goldshot Ron replied to Rolandranch's topic in Saddle & Tack Maker Gallery
Ryan, We posted at the same time, and I just read your reply. On the rear skirts here is what I do: make a large shot bag about 12 to 14 inches long by 4 inches wide. Dampen your skirts when blocking and put the saddle on your stand with the shot bag under the skirts behind the bars. Use you draw down strap to pull down the bars into the skirts. This simulates the butt of the horse and how the saddle would fit the horse. This trick can be used in final assembly also. (The draw down strap would be behind the cantle) It rises the skirts and draws down the rear jockeys at the same time. (The shot bag comes in handy when laying out patterns and weighting drying glued pieces.) Ron -
Finished my first saddle!
Goldshot Ron replied to Rolandranch's topic in Saddle & Tack Maker Gallery
Ryan, I think your saddle looks top notch. Your tooling design looks balanced, and the impressions look good. At your age, you'll be a master in 20 or so years. And, still young enough to use your tack. I have to second what Randy mentioned. Dyed edges should be on all the edges, even the skirts. The edge of the wool (fleece) needs to be trimmed more; this is important if you enter any contests (Prescott Leather Show is coming up ya know). It's a real "no...no" if the rear of the bars show, so take Randy's critique seriously. The handhole is a little small, like Randy mentioned; it may not matter too much on a kid's saddle, but real important (to me) on a working saddle. And finally, your cantle binding appears to be low in the seat. It could rub a sore on the rear of the rider. Try to keep the binding recessed above the cantle (or actually in line with the seat contour). In one of the issues of LCand SJ, Bob Klenda has an article about rawhide cantle bindings that I feel can be pertinent when installing a leather binding on a straight-up seat. You've come a long way in the past years. Keep up the good work. Hey, the saddle stand looks trick also. Ron -
OK Clay...here's how I would start. Cut and install stirrup leather plugs to fit your desired leather's width. Use short tacks only long enough to hold plugs. Long tacks make it hard to remove plugs when finished. Remember to allow for the desired forward swing that you want. Next, you'll have to install risers along your plugs to allow ground seat to bridge over the plugs. As you can see, there are dimples in the fiberglass seat. The first ground seat layer will be skived to smooth out the seat, and contour it to your desire. I hope this helps. Since it is your first saddle, there are many ways to build a saddle; and, who really knows which way is best. Every time I repair a saddle, I see different ways to reach the same end result. Some good, some bad, and some I just can't figure out how they work. One last thing, where you have marked 3/4; that may be too far back to allow for smooth leg action. Ron
-
I would recommend making spacers for your leather slots as Stohlman shows in his Saddle Encyclopedia. Since this is your first saddle, I think that this would help in alignment of your leathers and less chance of cutting the fiberglass on the bars. I've never treated a fiberglass seat any different than a metal strainer. Also, I've used the same process on a La Porte tree as described in the Stohlman book. A photo of the tree would help for people to offer suggestions, so that we are all on the same page. Ron
-
Transferring Floral Pattern on Swells
Goldshot Ron replied to rktaylor's topic in Saddle Construction
Randy, It came out very nice. The symmetry came out quite well. I laugh, but we all need practice to get better. That's what it is all about. Good luck in the Boot and Saddle Show. -
Timing issues Adler 267 flat bed machine
Goldshot Ron replied to AndyM's topic in Leather Sewing Machines
Check out You Tube for issues and setting timing. I suffer your problem with mine all the time. You will need some good screwdrivers, very short one and a long one (also, a set of mini screwdrivers, Stanley type). Get a good magnet to pick up dropped screws, and you will drop one or two; and, a good light and possibly a magnifying glass if your eyes are older like mine. Originally, it would take me 2-3 hours to adjust and set the timing, but now I can do it in about 45 minutes. Also, remove your hook assembly, and clean and oil this area. Again, you can see how to do this on You Tube. Good Luck -
Transferring Floral Pattern on Swells
Goldshot Ron replied to rktaylor's topic in Saddle Construction
Randy, I forgot tap offs. I think Saddle Bags said what I was trying to say. If you use transfer paper, don't draw all the stems and leaves on your pattern. First, you may not see them when if comes to cutting in, and, (like I often do, I scratch my head and wonder what I was thinking) when I make a cut and realize that wasn't what I was thinking. The neat thing about tap offs, is that you can lightly tap one where you might think it would look good, and erase it if it doesn't. Anyway, swells are a challenge, and the only way to get good is to try. Hey you are close to the TCAA hall, and hope you get er done for Wichita Falls show. Ron -
Transferring Floral Pattern on Swells
Goldshot Ron replied to rktaylor's topic in Saddle Construction
Randy, In the first photo, I can see your welt, and your pattern appears to fit around the welt. The second photo it appears that the pattern hits the welt. It has been years since I tooled any swells; but the lesson I learned was to keep it simple. Here's what I suggest: envision that your flower stem starts down by the bars and goes counter clock wise so that it ends on the seat side. Your pattern starts like I suggest, but confuses me at the base of the bud area in the first photo. The second photo appears that you turned your pattern over, and it doesn't appear to fit over the welt. Anyway, practice on scrap first. That was my mistake when I first did swells. I went full tilt doing my finished cover and lived with the results. BIG MISTAKE for me. Good Luck, Ron
.jpg.896660838806600e55b67800e200bdde.jpg)
