Goldshot Ron
-
Posts
405 -
Joined
-
Last visited
Content Type
Profiles
Forums
Events
Blogs
Gallery
Store
Everything posted by Goldshot Ron
-
In ebay, search for Atherton. They may come up from time to time. I use a no. 5 and no. 6. The blades are usually well used. It is a tool that I only use for shaping seats, and it is just another tool to have in your chest of tools. I bought mine off of ebay. Also, don't pay over $35-$40; they aren't really all that useful. Ron
-
What is the barrel diameter and length from tip of blade up to the saddle? I am not familiar with Beard's sk, is it length adjustable? Thanks, Ron
-
Randy, Too long can be shortened: too short means "damn, cut another strap". An experience packer friend of mine prefers conways on the britchin' strap instead of roller buckles; so this is an area left to a person's choice. I have also seen spiders with just one big ring and no leather between it and the pack animal. Hope all is well, and that it is warming up in OK. Ron
-
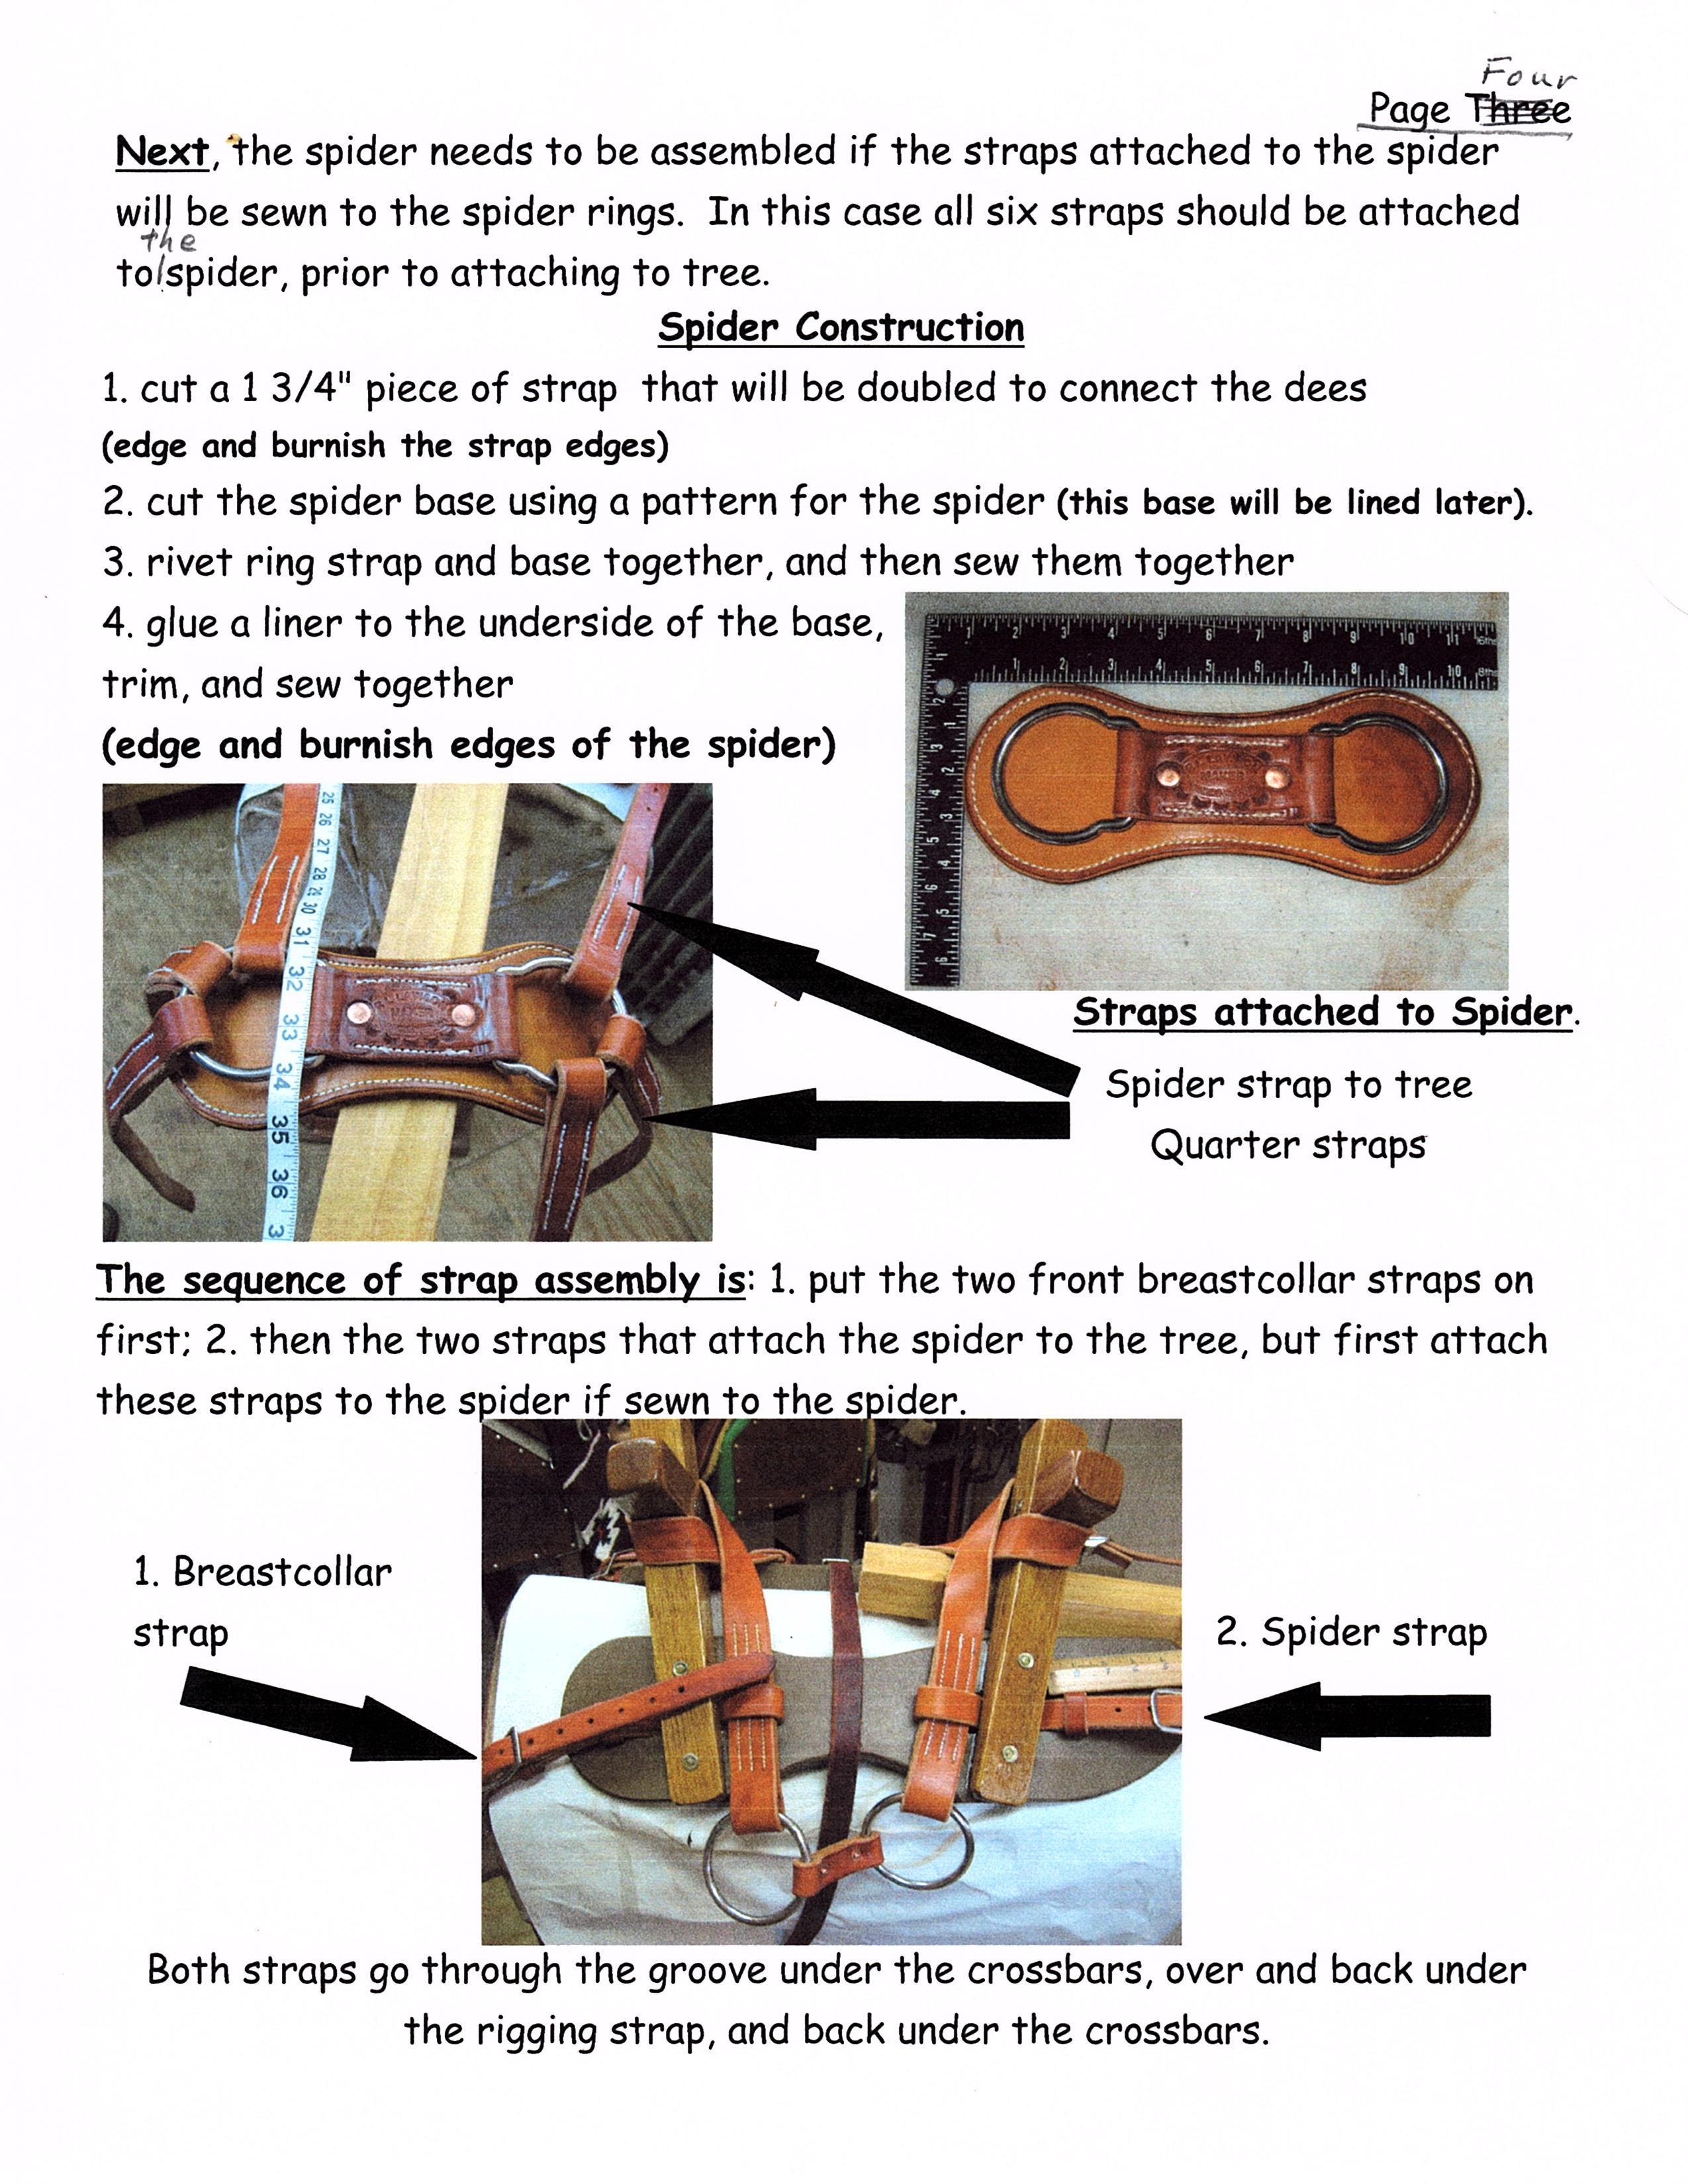
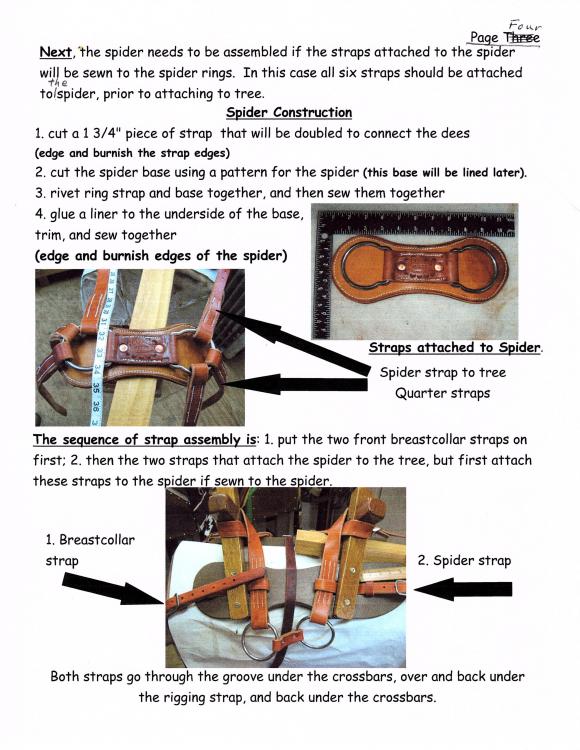
Randy, Attached are 2 pages from my "pack saddle instructions". I hope they give you some ideas. My model for these was from a retired outfitter and guide who ran a pack string in the Sierra Nevada range, and built his own equipment.
-
Randy, I just saw your post. The spider up on the rump would work better turned with the dees going across not parallel. I am looking for some photos to posts that will give you some extra ideas. Ron
-
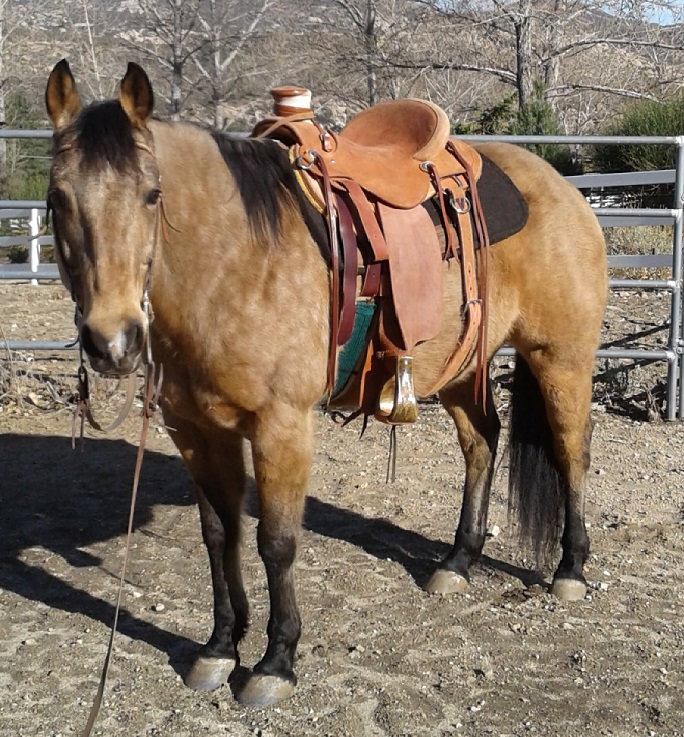
Shelly, Very attractive saddle. Questions: conchos from Mincer, do you order directly from them? Design and measurements for the breast collar in your upper photos, are you willing to share your pattern? One last question: from where do you order your W&C skirting? Thanks for any information you can offer. Keep up the good work. Ron
-
Randy, I had to look hard to give you any advice. It looks good and well executed. I've braided a flank billet once, and will not do it again. I like to make mine with a loop end for easy disassembly. Also, I recommend sewing around the buckle holes on the billets for a figure 8 design. This makes them less likely to rip out if caught on something. It sounds like you made this for a customer, I'm pretty sure they'll love it. One last item, I just finished putting new strings on an old custom saddle and used the same holes for everything, the damn rear jockeys still didn't come out looking correct. They never are as easy as one might think; it takes 3 hands and then some. Good going, Ron
-

Reining Chaps with filigree
Goldshot Ron replied to FrenchMich's topic in Saddle and Tack Accessory Items
Like the design...I'm copying them. Beautiful horse head. A lot of work went in to these. -
Ron, You ended by saying the rear cinch isn't often as tight as it should be, and that was going to be my comment in regards to the rear of the saddle off the back of the horse. I laugh when someone rides around with the rear cinch so loose, a horse could get the hind leg caught in it. Anyway, you make a good point Ron about a roping saddle or a saddle's intended use and the placement of the rear cinch dee.
-
Good job Ryan. Your tooling looks real good, and the design of the saddle looks clean. How did you do the Roland Saddlery, and I'd like to see how you installed the flank cinch dee.
-
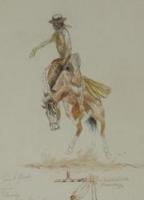
The "rule of thumb" for the placement of the flank cinch ring is center of the lowest point of the rear of the bars. So, the location will change depending on the design of the bars. There are always other factors to consider: fender design width, seat ear location, and the length of the horses belly. A larger and longer body horse could have the flank cinch further back, whereas a short bodied horse wouldn't. Based on this rule of thumb, the cinch ring location in your demo photos would be a little too far forward. Remember, the top photos were from a different era, and slightly different horse conformation from today's horses. Good Luck, Ron
-
Rob, The saddle looks good. I like your skirts and Cheyanne Roll. My main comment is your fender and stirrup design. Have you used this pattern before? and how did it work if you have? The exposed leather appears that it may pinch the inside of the rider's leg. Also, the location of your front jockey/swell screw seems a little too low; this may interfere with the stirrup leathers when cinching up (limiting the throw of your stirrup over the seat). Please share the tree maker and tree size with us. Ron
-
I started out with the basic 12x16 Tuff Shed, one window on the front and the door on the other front corner. I had to go with this size due to the County and their permits. I chose this design to save money. I later installed 3 more windows, electric, insulation, interior walls and an extended roof in the front for a porch. I have a 4x8 cutting table, a 2.5x8 foot work bench, 3 sewing machines, a Weaver manual clicker and 3 saddle stands. It's tight, but workable. Hope this gives you some information for your future workshop. Ron
-
I started out using blue cut tacks and ringshank. I now use 2d and 3d SS like Randy. However, for final assembly where the nail doesn't show, I now use 1 1/4 drywall or decking screws. The blue cut are ok for temporary holding and under the seat where 1 inch nails may be too long. Also, I use no. 10-1.5 ss and ss collar washers for the swell screws and no. 10-1.24 ss for ringing plates. Ron.
-
How do you feel about this attempt Randy? Your left wrap around looks good. Once you finish the cap off, I think it'll look good.
-
Randy, Stohlman's pattern for their horns was a "v" style. What I have found for a straight up dally horn is to make your pattern with the wings more straight out to the cap. I don't use dish soap for lubrication of my chinaman, I use a lot of the white saddle soap on it. I also start forming my cover around the post to set the form of the leather. When satisfied, I unwrap and use Elmer's white glue on the flesh side of the leather and rewrap. I'll use my chinaman strap several times during this process; each time pulling the tacks and pulling out more slack out of the wings until I'm satisfied. I have gotten carried away and burnished the post leather by doing this, but like Josh said, if it's going to be wrapped with an inner tube no one will see it. Also, the white glue will clean off of the grain side with no problem. Back to the horn cap; I like mine to have a convex look on top, so I skive only the edges, and not the whole filler piece. I'm still trying to prefect this method, so I'm no expert. Good luck.
-
Randy, Could you take a photo of the back side also, and post it? Also, are you telling us ALL the steps you are taking. If you are doing it Oltoots way, it should come out just fine. For a torquing tool, I've used hammer handles, but my favorite tool is and old phillips screwdriver (don't know the size, but about 12" long) that I use also as a steel for sharpening my knives. Oh yeah, I suggest using a lighter weight filler on your horn cap. It reduces the bulky look of your horn. Ron
-
Check out YouTube to envision the process; however, I didn't see a real good presentation that is complete. If you don't have a drawdown stand, you'll need a stand that allows you to use your broom stick to weight down the stirrup leathers while they dry. Note: if blevens style buckles are used, the buckle pins should start out facing inward with the tail of the leathers wrapped around the stirrup bold. If the pins are mounted outward and the tail hangs free, you'll have to change the pin plate. Wet the buckle end of the leathers well, and dampen the fender some after twisting the leathers. This will lessen stain lines and allow the fender to also contour to fit the rider's leg better. Let's start here, and we'll tackle the tying of of the 1/2 saddle string later. Ron
-
My needle catches the top tread and pulls it down, the shuttle makes its pass downward and back up. During this movement, there is (what I call a stutter step) movement of the needle slightly upward; this should allow for the release of the top thread. IT doesn't release, and the shuttle is stopped by the thread still attached to the needle. At this point I cannot figure out any more ways to adjust the machine to properly release the thread from the needle. The problem has to be something simple that I am too blind to see.
-
Just wondering, did anyone ever hear back from nickyhorses? Since there was no contact phone number or email, it's hard to determine if this is a legit request.
-
Randy, Your saddle looks good. I like that it is not all roughout. Your seat looks smooth and the bead line looks good. It balances the tooling. I'm not going to offer any suggestions because everyone has a different reason for what they attempted than I. How long does it take to get a Swanke tree? I've heard many good comments about his trees. Is this a commission saddle? I'm waiting to see number 10. Ron
-
Next chapter, same saga....I purchased some polyester thread from Campbell Randall. Still having problems. After hours of trail and error, I have the problem down to the needle. The needle isn't releasing the top thread after the bobbin is shuttled through the loop. I have cleaned, oiled and adjusted everything in the shuttle/needle assembly. I had purchased a pack of needles and awls from Weaver a few years ago. They are tagged for Landis 3, so I hope they are correct. Any more suggestions from the experts? Thanks, Ron
-
Randy, I always leave the fenders attached, and fold them into the fleece under the saddle. I take the stirrups off and wrap them in scrap fleece, or cover with wrapping paper. I usually make a fleece boot to cover the horn. An UPS store is helpful when shipping also. Just make sure that the weight marking on the box is sufficiently heavy enough for your saddle. Great that you're shipping your saddles. Ron
-
I just have to chime in...Ken, you almost offended me. If I had to rely on real cow working horsemen (and horsegals), I'd never have work. They use grandpa's saddle: ripped, torn, and held together with baling twine, shoestrings, and super glue. One guy had a set of bulldog taps with a baseball size hole in the toe from the brush. He wondered if I could glue some scrap leather to cover the hole. Anyway, Dirty Dusty, you can cover the swell with rawhide if that is the look you want. I agree with Sioux, a lighter thickness will work easier. However, if you are going to stamp it, practice on the gauge leather that will work best for you. One last thing, if I recall, Stohlman lines his cantle backs, then covers it. I don't think this is necessary if using a heavier leather, but not too fleshy (belly area that may be too fleshy) because the glue won't stick well. Good Luck
-
Well guys, I had to look at my receipt for the machine.I bought my machine from Russ Jones in Aztec, NM. He has a little company called CRJ Ventures. Nice fellow.