TheCyberwolfe
-
Posts
166 -
Joined
-
Last visited
Content Type
Profiles
Forums
Events
Blogs
Gallery
Store
Everything posted by TheCyberwolfe
-
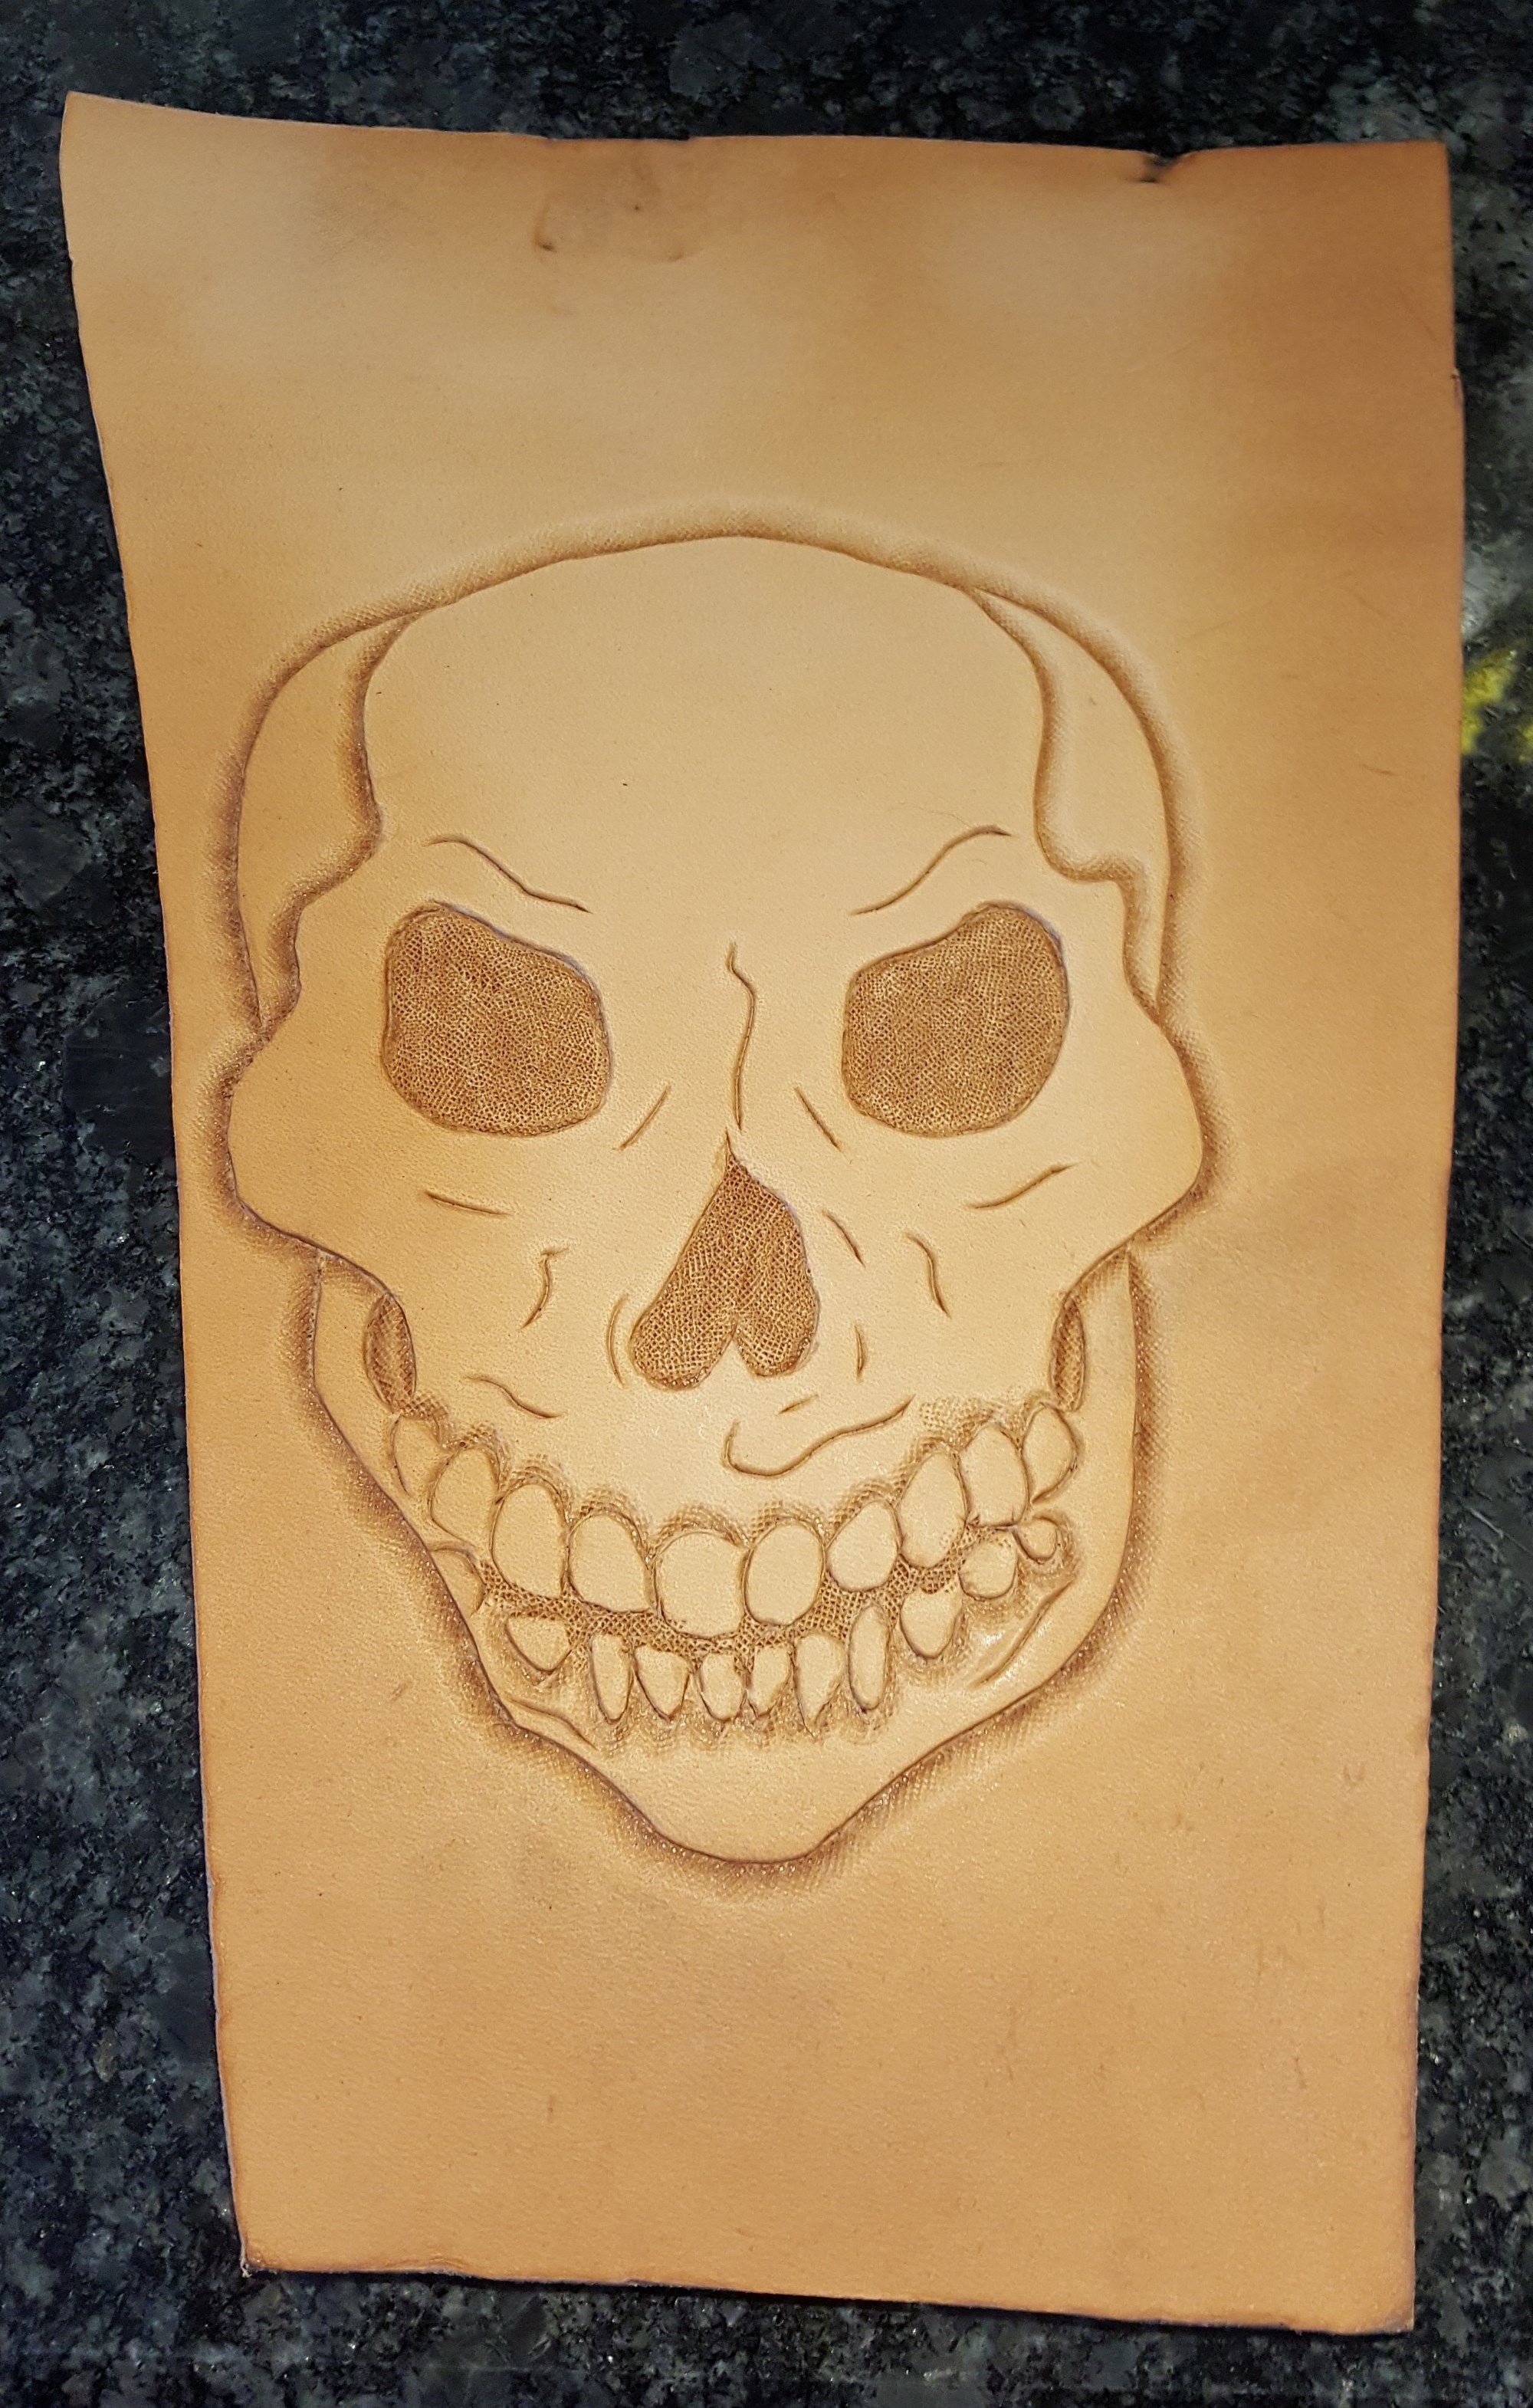
Al Stohlman's "The Art of Making Leather Cases Vol. 2" has a pattern with similar welts, it's a bowling ball case. Page 87 is where the stuff specific to the welts starts. His method is to end the dart with a punched hole, and fill it in with a fat welt.
-
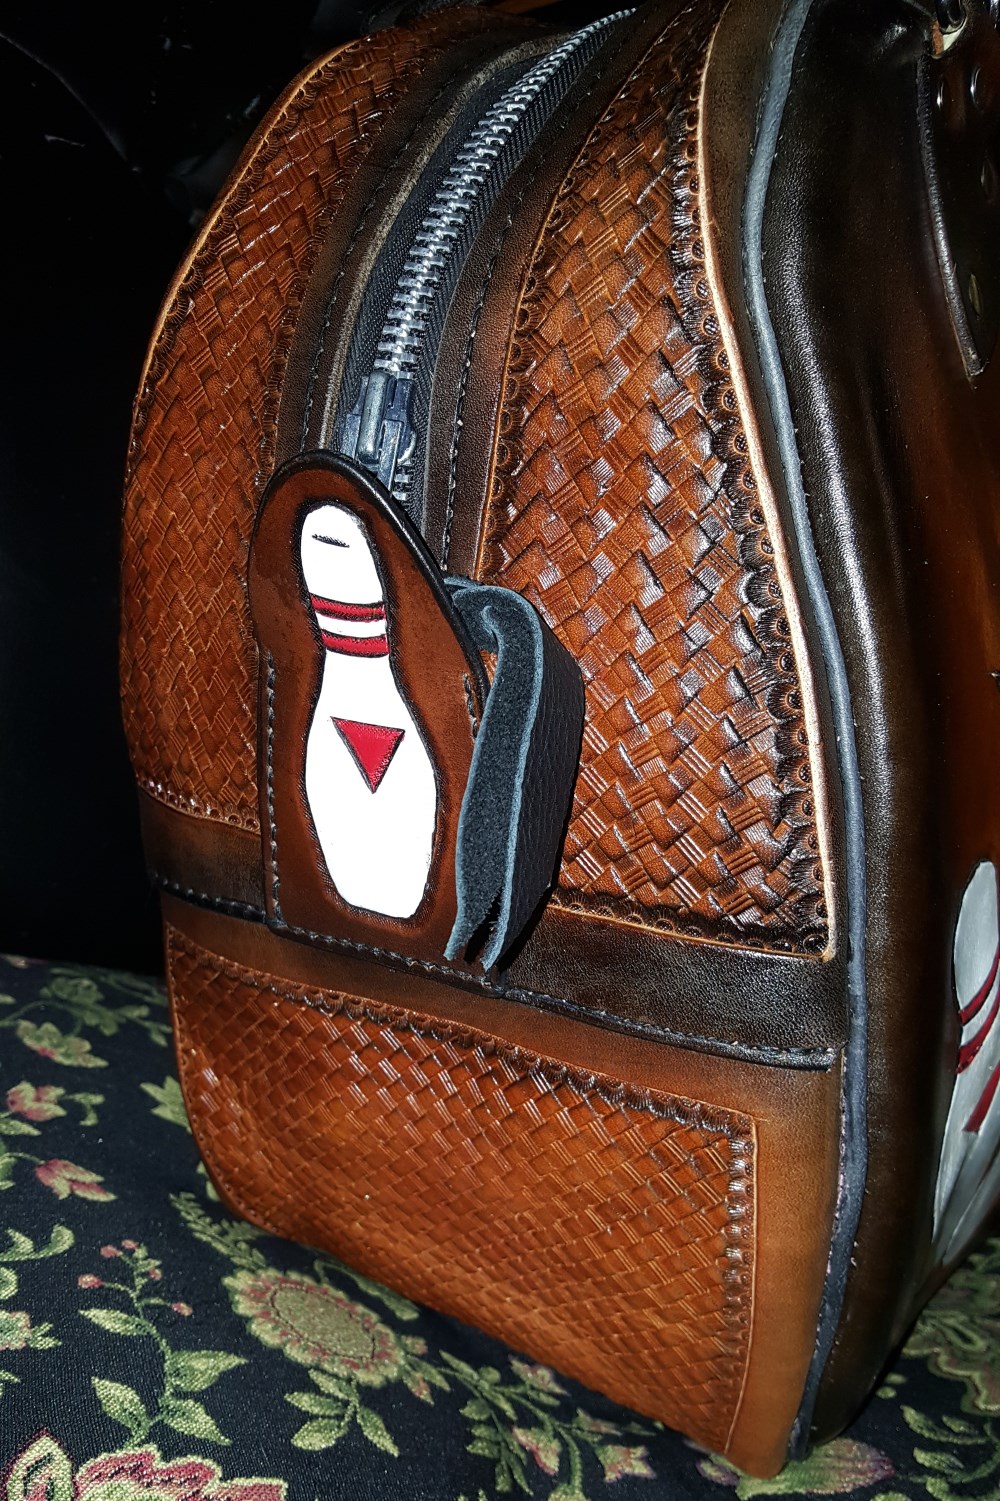
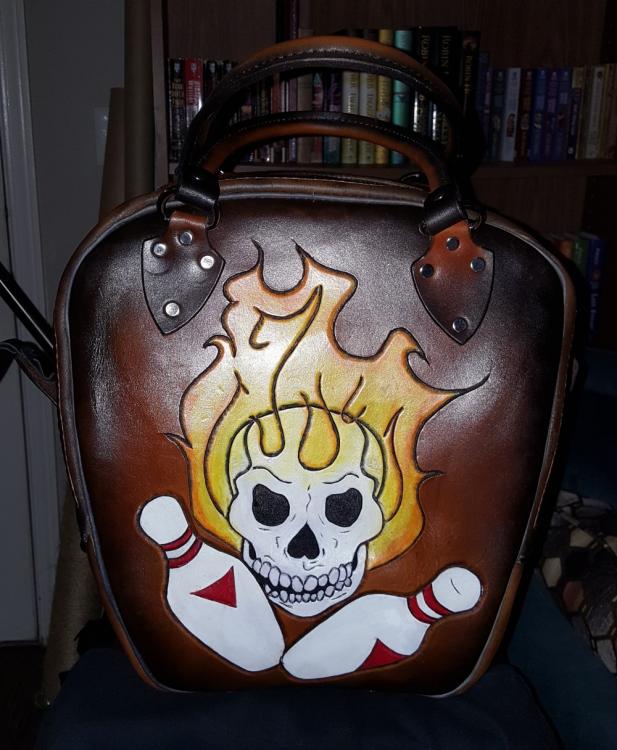
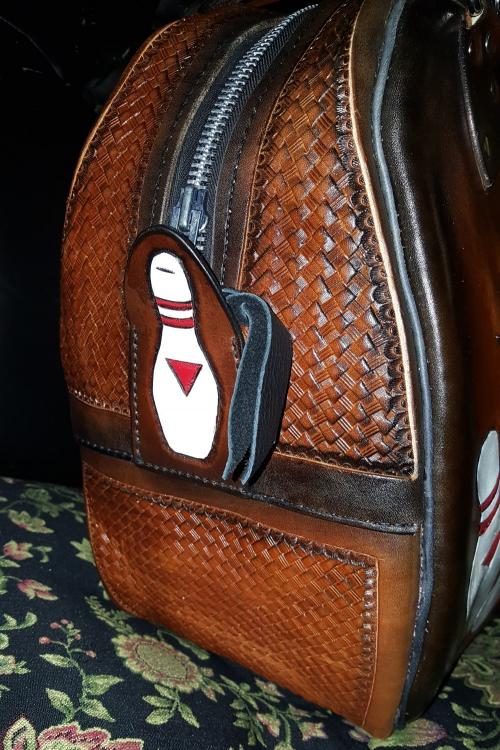
 Folks, I'd like you to meet Frank. Many years ago, a buddy dragged me onto his office's bowling team after one of their original members bailed on them, and one of the perks of joining the league was getting my own custom-drilled bowling ball. Ever since, I've had the ball sitting in the closet in a ratty old backpack as a means of carting it around. This has gotten exceedingly more boring as time wore on, so I decided to build something better. Luckily enough for me, Tandy released one of their old bag patterns a while back, so I didn't have to engineer the thing from scratch. For the design I turned to my more-artisticly-talented daughter, and requested something suitably 50's Rockabilly, which seemed like a solid choice. Full assembly was actually pretty simple, once I finally convinced myself to do it the hard way (the pattern pack is designed for simple lacing), but the hard way involved sewing it together inside-out and then inverting it when complete. I'm here to tell you that the toughest fight I've been in these past 25 years has been today's job of turning a bag made from 7/8 oz Herman Oak right-side-out. The cats heard some new words while Frank and I wrestled him back onto the outside of the bag. Got a new use out of my stitching horse - used it to push up the middle while I pulled down the top. For those of you who may be interested in the full tale of the construction and the things I learned, feel free to head over to my leather blog for the three-part series: Bowling Bag Part I Bowling Bag Part II Bowling Bag Part III Otherwise, here's a few pics of Frank
-
Shield 9 pancake
TheCyberwolfe replied to mikesherman's topic in Gun Holsters, Rifle Slings and Knife Sheathes
I was watching a video from another maker who mentioned something about Glocks: When you get done molding in the ejection port, pull the gun back out and then push that bit back out with your finger. Glock ejection ports are deep, and if you leave them fully molded in like that, the gun can hang up on it and makes for a difficult draw. -
It would appear that what you have bought is a suede, not a top-grain leather like that which is normally used by folks here. If that's what it is, yeah, it's never going to burnish and you'll want an edge paint like the one you linked. If you don't want to buy a filetuese, then edge paint is a process of layers - apply a coat, sand it smooth, apply another coat and repeat until you have the edge you want. I don't know how well it will work with the leather you have here, or how long it will last on something that's just glued together instead of stitched along the length. Experiment and post your findings!
-
getting the 2 different veg tanned color pieces to match
TheCyberwolfe replied to beltbuckles's topic in How Do I Do That?
If you want a very close color match for undyed leather, it all has to come from the same hide since each cow will have a slightly different color just like people do. This is where owning a leather splitter comes in handy, so you can take a thick hide and split down certain sections as needed. If you go the conditioner/oil and sunlight exposure route, be aware that you may get the pieces to match to start with, but age and additional exposure will darken the leather further, and each piece will likely darken at different rates so some months down the road the pieces likely won't match again. Leaving a project natural is always an experiment in aging and color change. -
Vegetable tanned watch strap lining and sweat?
TheCyberwolfe replied to doingmahresearch's topic in How Do I Do That?
I used plain veg to line this one, and the second pic is one year later. Not sure what caused the splotch. I don't show folks the inside, so I'm not really concerned.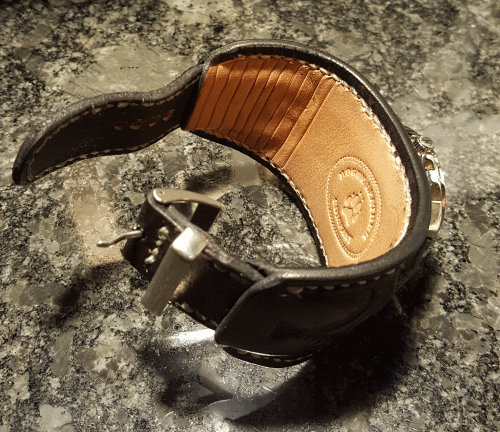

-
Egyptian Leather on Etsy sells 5-packs of JJ needles, and Ritza thread in both full spools and sample lengths. They're in Washington State USA and their page doesn't mention international shipping, but Canada shouldn't be a big deal. https://www.etsy.com/shop/EgyptianLeather
-
Minor correction, that would be Egyptian Leather, on Etsy apparently I just tracked them down. Ritza 25 Tiger Thread by EgyptianLeather on Etsy
-
Sunglasses Case
TheCyberwolfe replied to andrewsejlv's topic in Purses, Wallets, Belts and Miscellaneous Pocket Items
I'm with Sofaspud - I made a pocket case for my computering glasses and used a spare lens cloth as the liner to prevent scratches. -
Bench Burnisher vs Drill Press Burnisher
TheCyberwolfe replied to Yeldarb's topic in Leatherwork Conversation
Bench grinder types generally spin faster, which means they build up heat in the workpiece faster and therefore allow you to do your edging faster than a drill press. So, if yours is a professional shop concentrating on output, then the grinder type is probably a better investment. If you're doing this for fun and maybe just some side profit, maybe you need the versatility of a single tool that can be an edger and a drill press. -
Some folks like the idea of a contrasting edge color, but using a different color of dye may get odd results due to the way leather soaks up fluids. Edge Coat isn't a dye as such, it's more of a paint, and is designed to stick to the surface rather than soak in. It also dries to a kind of rubbery consistency, and if you have a very steady hand, you might be able to get away with not doing anything else to the edge, so it can save time in production. It also resists wear a little better than a standard edge, so something that's going to get rubbed or bashed around a lot may benefit from it. Belt edges are a good example, since pulling them through the belt loops and through the buckle wears on the edge after a while.
-
Groover tool question (new to leatherwork)
TheCyberwolfe replied to ERen89's topic in How Do I Do That?
It's true that a skilled craftsman can make even crappy tools work for them, but someone new to the trade like yourself I would really recommend you get a better tool so that later on when you think you're good enough to buy better tools you don't have to re-learn how to do it without compensating for poor quality tools. -
I think the general rule seems to be "don't buy leather from Tandy". Every time I go in there, the best hide I can find is still only a low-B grade.
-
The thing to remember is that the molding process is going to stretch the leather, which will probably distort your tooling. If you're a stickler for straight lines, build solid molds and tool it while it's being formed. If a little stretch here or there isn't going to make a difference on the finished design, then maybe you can tool it first. Your mileage WILL vary, on each and every piece of leather Be sure to test your theories.
-
You'll probably need a combination of both - that side may not come with a clean straight edge, so you'll need to make one with your trusty rotary cutter and a long straightedge. (I recommend clamping that edge down, I tend to slip on long cuts). After that, those little wooden strap cutters do an amazingly good job for such an inexpensive tool. The trick is making sure you set the thickness of the leather properly at the blade end of the cross-piece so the leather doesn't try to roll up on you.
-
Weaver Leather has a pretty broad selection of belt blanks if you're doing one-offs or small quantities, and their prices beat Panhandle's - about $10 a belt. Quality is very good - they run it through a strap edger for you, so it just needs a little bit of light sanding before finishing the edges. I've bought three so far in different orders, and they've all been very good. They stamp very well and take dye in evenly. Springfield sells what they call a "Belt Bend" for $159 that's good for between 16-18 belts, which works out to under $10 per belt for materials. It's a Premium grade Hermann Oak.
-
Using a dremel to skive leather?
TheCyberwolfe replied to strathmoredesigns's topic in How Do I Do That?
I went down to Harbor Freight a while back and bought a buffing wheel and a set of sanding drums that range in size from about 1" up to 4" in diameter. They mount right on the arbor and use common sandpaper rolls for refills, so I can use any grit paper I need. It works well for thinning larger sections evenly without excessive tool marks, and the largest drum is pretty good for sanding edges prior to finishing. For strap ends and other small bits I typically use a knife though, since it's right there on the bench vs. going out to the shed where my sander is. As with any leather knife, trick #1 is making sure the skiver is wicked sharp, and then you're better off going for multiple shallow passes rather than a complete skive in one pass. -
some of my leather work
TheCyberwolfe replied to Jack142's topic in Purses, Wallets, Belts and Miscellaneous Pocket Items
That's one piece of advice I keep hearing and never quite pay enough attention to: _light coats of dye_. Don't get impatient, and like 'Mutt says, walk away after the first coat and come back tomorrow for the second (if it needs it). Unless, of course, you're using black dye - then you do want to saturate it. But still walk away after that first coat and give it time to soak in. -
Dart Carrying Case
TheCyberwolfe replied to Bob Blea's topic in Purses, Wallets, Belts and Miscellaneous Pocket Items
I would just assume that the darts would always have a tip attached, and make that bottom pocket enclosed. Make loops like on a gun belt for the barrels, and then have a flap that lays over the top sort of like you do with a tool roll. The other option would be to build it with the hinge at the top rather than the side, similar to this screwdriver case I made.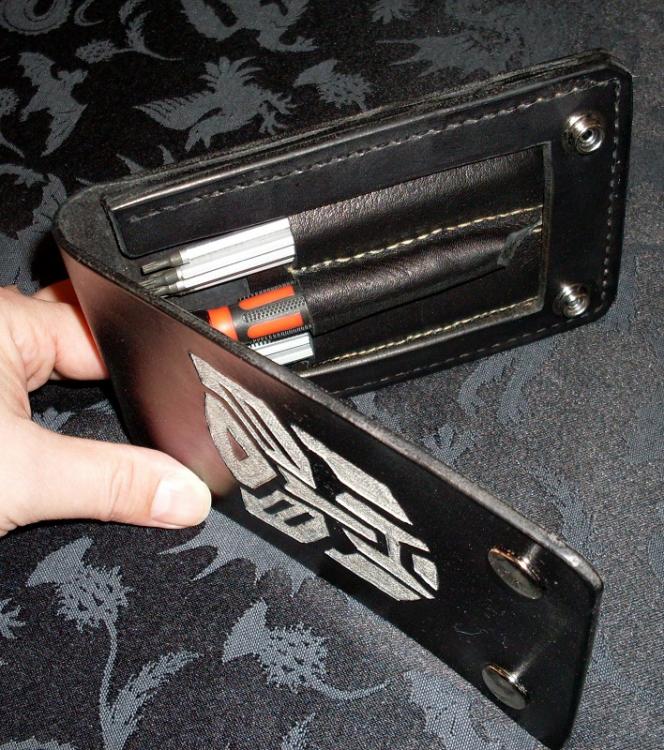
-
I think I'm with Matt S on this one - while it's nice to be able to make use of the leather you have on-hand, you may be better off just buying the thickness you need for the project rather than trying to split down thicker stock.
-
The sharpest thing you can get your hands on. After that, it depends on how small an area you need to cut. Denny over at SLC recommends using a straight punch or chisel (or maybe a sharpened flat-blade screwdriver) as a way of avoiding those little fuzzy fibers you sometimes get even with the sharpest knife. Then there's laser cutters...
-
Question on punching holes with a hole punch
TheCyberwolfe replied to Windrider30's topic in How Do I Do That?
Then there's the lazy man's solution - the Point 2 Point divider: http://www.garrettwade.com/point-2-point.html Pick the number of holes you want, stretch it out until it covers the distance you want, and voila! No crazy fractions to worry about. -
I like to have the fit be just snug before setting - you should feel the cap snap into place and have it snug against the leather. On those longer rivets, as long as the hole isn't too big and you keep things lined up, you'll be OK.
-
Take a piece of heavy paper or a chunk of manila folder and use it like a washer around the rivet when you're setting it. Pull it out when you're done, and the rivet won't be so tight on the leather and will allow for movement.
-
Colt's got it - a little soap, dry it, buff it with some carnauba cream. I ran into this with one of my early projects, before I switched to oil-based dyes. Here's a link to that post from my blog. http://www.rogueleather.com/2009/07/trouble-with-dye/