Tree Reaper
-
Posts
1,870 -
Joined
-
Last visited
Content Type
Profiles
Forums
Events
Blogs
Gallery
Store
Everything posted by Tree Reaper
-
 What kind of metal is the stencil? You might be able to use earth magnets on the back side. You could cut out the shape of the butterfly in thin wood and clamp it over the stencil. If it's bleeding you might have to seal it, paint and then reseal or use several lighter coats. I'm using green masking tape but I wouldn't stick it to the grain side of the leather.
 -
I started using a trigger gauge to see what the exact tension was top and bottom without guessing. It gets me close then I can increase or decrease the tension just slightly for different thickness in leather.
-
Leather Perforation, Not Many Answers Out There
Tree Reaper replied to tparrish's topic in How Do I Do That?
Did you try buying it? http://www.hiriar.com/en/others/131-perforated-leather.html -
Jan; I would buy a zipper the approximate length and cut it to fit. The zipper is stitched to the back side of the material during assembly which is inside out and then the pouch is turned right side out. Glue the zipper in place so it stays there while you stitch it.
-
They might be exclusive to their snaps as they measure 15 or 17mm, the caps I have are just over 10mm. These may not work after all. Here's another set for 10mm https://grommetmart.com/product/76/spring-snap-dies.html
-
This place offers dies with a 3/8 shank. http://www.assuntastore.com/Die-Sets-for-Spring-Style-Metal-Snaps-p32.html
-
These are going over the rubber grips?
-
Weaver Master Tool Little Wonder Dies For Tandy Hand Press
Tree Reaper replied to indynusp's topic in Leather Tools
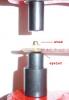
Glen; I've been looking at Ohio dies and the top die will will fit the Tandy press with the 1425 adapter but the bottom die is much larger and would have to be turned down to fit. That's doable but if any of the bottom dies have an internal spring it will prevent them from being turned down to 3/8. The other option is to use the 1233 base on top of the Tandy press and the Ohio 1271 grommet dies.
-
Stitched or braided seam? Is this a straight grip?
-
It will depend on whether you want to see a seam or not .
-
I called the store and the manager pulled a set of dies from the store and we discussed the issue, I said I thought I had it figured out but didn't want to take the chance of breaking anything and he said if I did he would come good for it. RIGHT ON! This may help the next victim
-
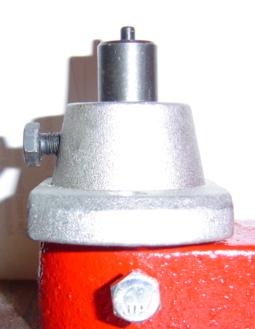
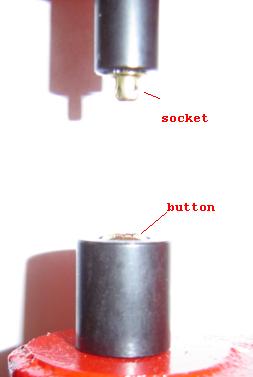
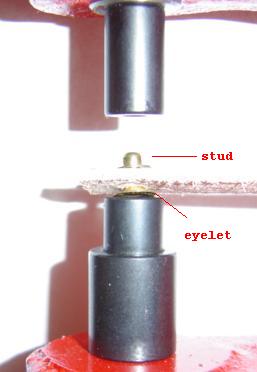
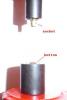
I have a Tandy hand press with a set of dies for Segma snaps but no instructions. I think I have the cap dies on the right figured out but I'm not certain about the male side which I think is the set on the left. The male end might sit in the hole on one die and I'm not sure if the stud side fits on or inside the other die? Thanks. Kevin.
-
Did you ever try contact and clamps?
-
They look good Rosi, nice match! You can always use paint on the edge.
-
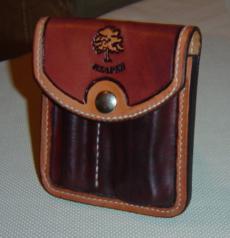
Crazy Horse Leather Tote
Tree Reaper replied to Sam Made's topic in Purses, Wallets, Belts and Miscellaneous Pocket Items
Well done Sam, looks very good. -
Anyone selling long flange grommets for thicker material? I'm looking for #0 with a 9/32 flange instead of the standard 3/16.
-
Try a search for round head rivets, these have a smaller head.
-
Thanks for the tip Treybecca; I'll test it out first and can always switch to the acrylic paint.
-
Cutting Leather At Angle To Create Retention Lip On Pouch?
Tree Reaper replied to Roger J's topic in How Do I Do That?
You can put it on edge and cut it with a band saw. -
A moisture meter might help you. http://www.amazon.com/General-Tools-Instruments-MMD4E-Moisture/dp/B00275F5O2/ref=sr_1_1?ie=UTF8&qid=1397350946&sr=8-1&keywords=moisture+meter Once you get the level that works the best you can always duplicate it with the meter. I'm not certain it will work but it might.
-
From the album: Tree Reaper
knife and fire starter -

From the album: Tree Reaper
knife and fire starter -
Thread Breaking While Stitching.
Tree Reaper replied to Tree Reaper's topic in Leather Sewing Machines
Depending on what it is as in how many stitches involved. For a belt I would pick up the stitches, melt the ends on the back side and continue stitching starting in pre stitched holes once I fixed the problem. For smaller items I'll use the machine needle as a awl to keep the holes the same and then hand stitch. -
I just wanted to mention my thread was breaking at the needle several inches into a project I was working on and it seems to be the check spring that controls the thread going up to the arm. It had tension but seemed to be sluggish at the stop. I tightened the spring a little and haven't had any more issues.
-
How Do I Load Up The Bobbin (New Machine)
Tree Reaper replied to Flattracker's topic in Leather Sewing Machines
The needle will go up and down while the bobbin loads. You can remove the thread from the needle and wind the bobbin or let it wind while you sew.