Tree Reaper
-
Posts
1,870 -
Joined
-
Last visited
Content Type
Profiles
Forums
Events
Blogs
Gallery
Store
Everything posted by Tree Reaper
-
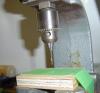
The problem using a press is the leather will stick to the needle unlike a sewing machine that uses a foot to hold the leather down while the needle raises out of the leather. It can be a pain unless you develop something mechanical to hold the leather down.
-
Offer a custom cover to protect it, more business for you!
-
 With penetrating dyes?
 -
Probably JB Weld around the rivet if I was doing it.
-
Some New Cases
Tree Reaper replied to strudell's topic in Purses, Wallets, Belts and Miscellaneous Pocket Items
Nice work strudell, thanks for posting the pictures. -
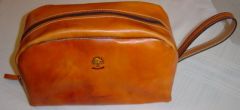
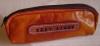
From the album: Tree Reaper
Leather shoe bag -
I would prefer glue over a rivet.
-
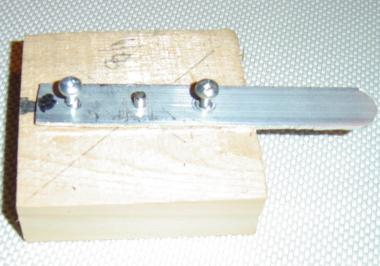
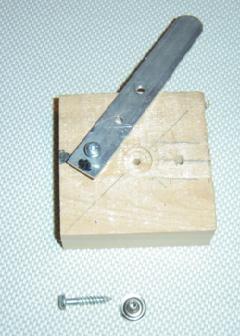
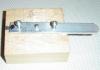
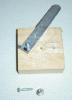
I don't like trimming either but this jig I made makes it easier when I have to. I use a drill bit to trim the post down and it works quite well.
-
Self Tanning Beaver Tails?
Tree Reaper replied to Mudruck's topic in Exotics, Reptiles, Furs and others
I've chrome tanned beaver tails and with the proper chemicals it takes about a week. Check Van Dykes Taxidermy to see what they have for kits. -
If you are doing any amount of leather work you'll need all sizes. Get the longest posts you can with line 24 snaps and you can always cut them down but the best idea is to get some of every size.
-
Weaver Master Tool Little Wonder Dies For Tandy Hand Press
Tree Reaper replied to indynusp's topic in Leather Tools
That is good news, I'll be buying dies from them as well. I just tried to get a set of 5/16 eyelet dies from Tandy and they are discontinued. I need a set of dies for 7/16 double cap rivets and they don't have that either. I'm sorry I bought the Tandy press because getting the dies has been problematic. -
Leather Perforation, Not Many Answers Out There
Tree Reaper replied to tparrish's topic in How Do I Do That?
Garrett has that service and they may even have the leather you want. It looks like they can perforate thinner leather. http://www.garrettleather.com/content/pages/services -
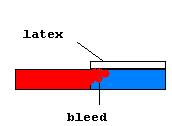
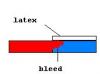
How does the latex prevent the dye from bleeding over and then up from the side?
-
There are a few out there https://www.etsy.com/ca/listing/104281757/50-pcsblack-star-round-rivets-studs?ref=market I've bought conchos from Springfield http://springfieldleather.com/27775/Concho%2CStar%2CSm%2CGold-Blk%2C3-8%22/
-
I'd do that on a scroll saw.
-
It's more apt to be the dye didn't penetrate fully. The tanning process is probably completed through pH testing and you wouldn't see it.
-
I believe the problem to be the bleeding which is bound to happen with penetrating dye. The only sure cure I'm aware of is a sealing process on the entire surface to prevent the bleeding. Careful hand brushing will work. Spraying several very light coats may work or switching over to a water based dye that won't penetrate.
-
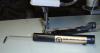
In that case it should be a straight grip. I would make a paper or card stock template to fit the grip, trace that pattern onto leather, space and punch the holes and lace it over the grip. For security you can apply a little glue to the leather and the grip.
-
Leather Perforation, Not Many Answers Out There
Tree Reaper replied to tparrish's topic in How Do I Do That?
How thick is your leather? -
I sand the finished edge and only glue up to 1/8- 3/16" so when you turn the leather back outside you don't see any glue or stitches. If there is a trace of glue you can remove it with an eraser.
-
I use contact cement, line the edges up and follow the edge of the leather with the foot on my machine. If you stay on the edge and use that for a guide your stitches will be straight.
-
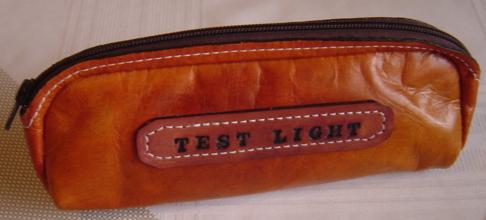
You shouldn't see any stitches when the seam is inside. The only stitches you see here are the stitches for the zipper.
-
Tom; I've used Frog tape on leather and it doesn't adhere well, it may work well for painting trim in a house but I wouldn't recommend it for leather work.
-
Right now the top tension is at 14 oz. outside the needle and the bobbin tension is at 2 lbs. on my Cowboy 4500 using a RCBS trigger pull gauge. I just use this for a starting point but it seems to get me in the ball park. Judging by these numbers the bobbin tension is roughly twice the top tension.
-
I wouldn't want to put tape on the grain side and risk damage from the glue on the tape. You would have to go over where the tape was with denatured alcohol after or seal it before placing the tape. You could cut a hole in card stock, tape or glue the card stock on top of the stencil and secure the card stock with tape outside of the leather then use weights close to the edge of the stencil when painting.