Tree Reaper
-
Posts
1,870 -
Joined
-
Last visited
Content Type
Profiles
Forums
Events
Blogs
Gallery
Store
Everything posted by Tree Reaper
-
The flesh side would get glued to the flesh side.
-
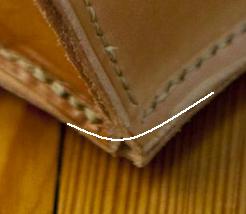
It looks like they just rounded the corner.

-
The stitch is too far away to pull the pieces together. You could drop some crazy glue in the hole and clamp it tight, maybe consider a rivet if there's enough room for one.
-
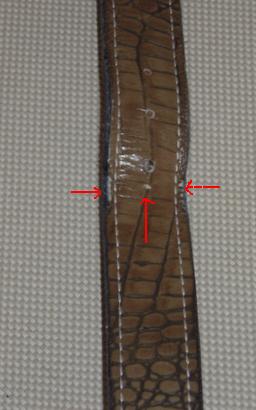
I checked the buckle for a rough spot but it's clean. This stuff makes a nice belt but it won't be much good if it wears that quick under a buckle.

-
How wide is that impression?
-
I made a belt with gator on cow and within a week it has worn through under the buckle. Is anyone else having this problem? It is advertised as belt leather but I won't be using it again.
-
Butt Stitching With Straight Awl Blade
Tree Reaper replied to JakeDiebolt's topic in How Do I Do That?
I just heat up a straight needle and bend the end. -
Butt Stitching With Straight Awl Blade
Tree Reaper replied to JakeDiebolt's topic in How Do I Do That?
You can use a straight awl to make your holes but it helps to use a curved needle to complete the stitch. I'll make the holes then put the pieces together and stitch with a curved needle. -
Butt Stitching With Straight Awl Blade
Tree Reaper replied to JakeDiebolt's topic in How Do I Do That?
I'm assuming you can't get at both sides when stitching? What is the application, how thick is the leather? http://farm4.staticflickr.com/3429/3208004209_3be7f99fd3_o.jpg -
Butt Stitching With Straight Awl Blade
Tree Reaper replied to JakeDiebolt's topic in How Do I Do That?
Are these pieces inline with each other or perpendicular? -
Importing Headknife Into Australia
Tree Reaper replied to silverback's topic in Leatherwork Conversation
I can't see it being a problem if it's in your luggage but a quick call to customs will tell you for sure. It's considered a category 6 weapon. Your embassy might be another place to try. http://www.france.embassy.gov.au/pari/home.html -
How Would You Sew This And What Machine
Tree Reaper replied to Barlaam1's topic in Leather Sewing Machines
You could likely sew that with a hand stitching awl for a lot less than 6k. -
A picture would help.
-
Belt Pouch With Flower
Tree Reaper replied to Jarek S4's topic in Purses, Wallets, Belts and Miscellaneous Pocket Items
OK, now that I look at it again, it appears that the edge was left plain and not dyed. -
Belt Pouch With Flower
Tree Reaper replied to Jarek S4's topic in Purses, Wallets, Belts and Miscellaneous Pocket Items
You did a great job on the molding, the snap may cause you some grief, if the leather softens up you'll have a difficult time snapping it unless the case is full of something solid. I like the flap to cover the pouch mouth completely to keep rain and other debris out, this one appears to be open on the sides. The only other thing I would consider changing is the belt loops, something more streamlined . Is the back two layers? Over all it looks good. -
If you just left it screwed to plywood it would stay flat.
-
Go for it!
-
No problem, it's likely nobody else including myself has done it. I have wet formed using the oven so I have a rough idea. Check it at twenty minutes to see how warm it is and go from there. I'm guessing 20-30 minutes but no more than 30.
-
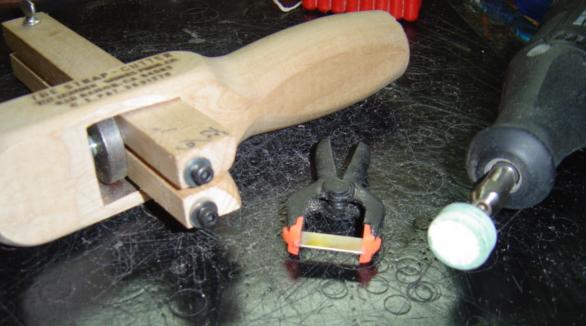
If you put a soldering iron on each end of the blade while it rest on the plastic jaws and then alternate from side to side the blade will melt into the jaw and it will stay in place when you sharpen it.
-
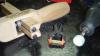
If you are tired of those dull strap cutter blades I have come up with a way of sharpening those tiny blades. A mini spring clamp holds the blade and the felt wheel on a dremel will make them razor sharp again so they can be used again and again instead of being tossed out after cutting a couple of straps. Change those pesky little slot head screws out for 6/32 by 1 inch long hex head screws and use a 7/64 wrench to work the screws.
-
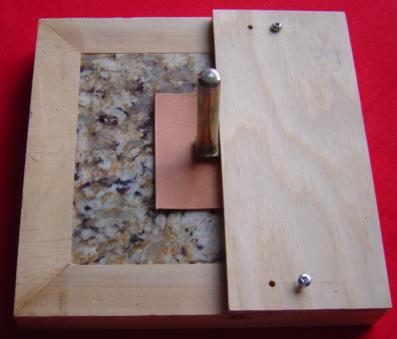
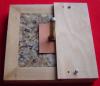
Anything you can attach a fence to will work. I made a wooden frame and use a piece of plywood for a fence. The leather goes under the fence and the stamp is placed against the edge of the fence when stamping.
-
The lowest setting for 25-30 minutes should work but you might want to screw it to a piece of plywood.
-
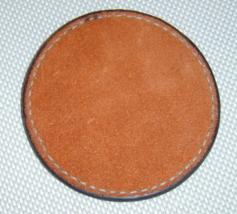
Dye,sheen,mink oil,sno-seal. Sometimes I'll use tan cote between the dye and the sheen. The suede is glued to the back, trimmed and then stitched. The final step is to burnish the edge.
-
Depending on the size to be stretched. You can build a frame and use rope through holes in the hide or buy clamps made for that purpose. I would suggest a Mechanical Advantage to increase the pulling force.
-
I haven't worked with Roo hide but hides are usually wet and then stretched and allowed to dry in a stretched condition.