Bluesman
-
Posts
616 -
Joined
-
Last visited
Content Type
Profiles
Forums
Events
Blogs
Gallery
Everything posted by Bluesman
-
Outstanding. The big lace really makes it. What did you use for a bottle?
-
Your carving and design is crazy good. When can I come for a lesson? One nice piece.............
-
Thanks Ken, I need all the instruction i can get. great job.
-
Cobra Inlay Dog Collar
Bluesman replied to LeatherLegion's topic in Collars, Cuffs, Leashes and Leads
That is really nice. The colors are great. how did you do the upholstery trim? I like the whole look, please post more pictures. -
The Next Victim! Vintage Tele Wrap And Tool!
Bluesman replied to chancey77's topic in Musical Instruments
Insane. We need to party. -
Hello Laban and welcome to LW. Your work is very nice. Finding this place will be your inspiration. Several things happen here. Your skill level improves as your wallet becomes thinner. The amount of experts and craftsmen on here is mind boggling. Again welcome. Jon
-
http://www.conchos.c...ap-conchos.html
-
Need Some Help.
Bluesman replied to MattyBoy's topic in Gun Holsters, Rifle Slings and Knife Sheathes
From the pictures it looks like the gun in "A" was twisted in the holster and then molded. The Gun in "B" was left flat and molded. I would guess you accomplish this in the molding stage. So you choose what yoy want after you complete the holster assembly. -
Thanks. I think I got it.
-
I think your right. That's what I was being led to believe. So the formula should be. Buckle tip to Favorite hole + 3 1/4" for flap + 5" for two holes and tip = Blank. How's this sound?
-
No, I'm measuring from the buckle end, to the hole. That way I include the buckle that is being used. It shouldn't be this difficult. But then again I really get thick soemtimes on the easy stuff.
-
The Next Victim! Vintage Tele Wrap And Tool!
Bluesman replied to chancey77's topic in Musical Instruments
Great VId, and nice chops on that guy. Sounds great!!!!!!!!!! Now, how is it that Segal uses a tech that lives in Finland? Or do you ship you stuff back to him in the States? I'm assuming that was the Tele lined into the King direct, no pedals? -
I have made several belts and like the outcome, but they come up a bit short, in length. I have been measuring from the buckle end to the favorite hole and then add in 3 1/4" for the buckle flap and then 3" for the final belt tounge end. Exp. 36" Buckle to Hole + 3 1/4" + 3" = 42 1/4" Blank. Did this on three belts and ended up switching owners to get them right. Can somebody please share with me a tried and true method. I also make my belts from 8/9 oz with a 2/3 oz liner. This makes them thicker than most belts folks are used to. How does this affect the overall final length and should it be compensated for? Thanks, Jon
-
The Next Victim! Vintage Tele Wrap And Tool!
Bluesman replied to chancey77's topic in Musical Instruments
Okay buyin the fat strings, especially the 56 top.....................BOOM, BOOM. Now what did you use for pickups and what what was the ohm reading? Understand the bridge to wood setup. Now, maybe you need to haul this to the States so we can properly kick it through a Fullertone. All hand wired tube GOODNESSSSSSSSSSSSSSSS!!!!!!!!!!!!!!!!!!!!!!!!!!!!!!!!!!!!!!!!! Wait.......................Your buddy Hot Rodded an Original NO CASTER!!!!!!!!!!!!!!!!!!!!!!!! Tell me NOOOOOOOOOOOOO. If so WTF was he thinking. Please tell me NOOOOOOOOOOOO -
The Next Victim! Vintage Tele Wrap And Tool!
Bluesman replied to chancey77's topic in Musical Instruments
Dude, not buying the " no tone loss" The wood is a major contributor to the tone equation. Now some really hot pickups, fat strings, like .011-054, high action and we may be talkin some serious bark. However you did a kick job. Gonna have to put that on the list. Way cool. -
Picked up the floral carving DVD from a member here and was totally blown away. It is a two DVD set and I finished viewing the first one, yesterday. I really got my monies worth. He goes over little items that when you hear it and see it you go, that's cool. If you ever get a chance or can afford a new set get it. He starts with tools and knives, sharpening, casing, cutting and then onto block and basket weave border stamping, as well as how to price your work. Then he gets into the actual floral carving. His use of tools is incredible. When you see how and why he does what he does you begin to understand how the shading and 3D illusions are acheived. This will enhance your carving 20 fold. Now onto DVD #2. Jon
-
Nice job. I really like the finish. did you antique the figure and dye the background? Very clean look. Great job. Jon
-
Great job Ed. but, how does the Bible fit in there? Looks to me like the flaps to accept the book covers are backwards. or am I missing something? Jon
-
I have the BK push beveler. Short learning curve, but is great for borders. You won't use anything else if you get one.
-
$$$$$ please, send PM
-
The Next Victim! Vintage Tele Wrap And Tool!
Bluesman replied to chancey77's topic in Musical Instruments
Yup, no more anal cowboy. Broke back mountain is gone -
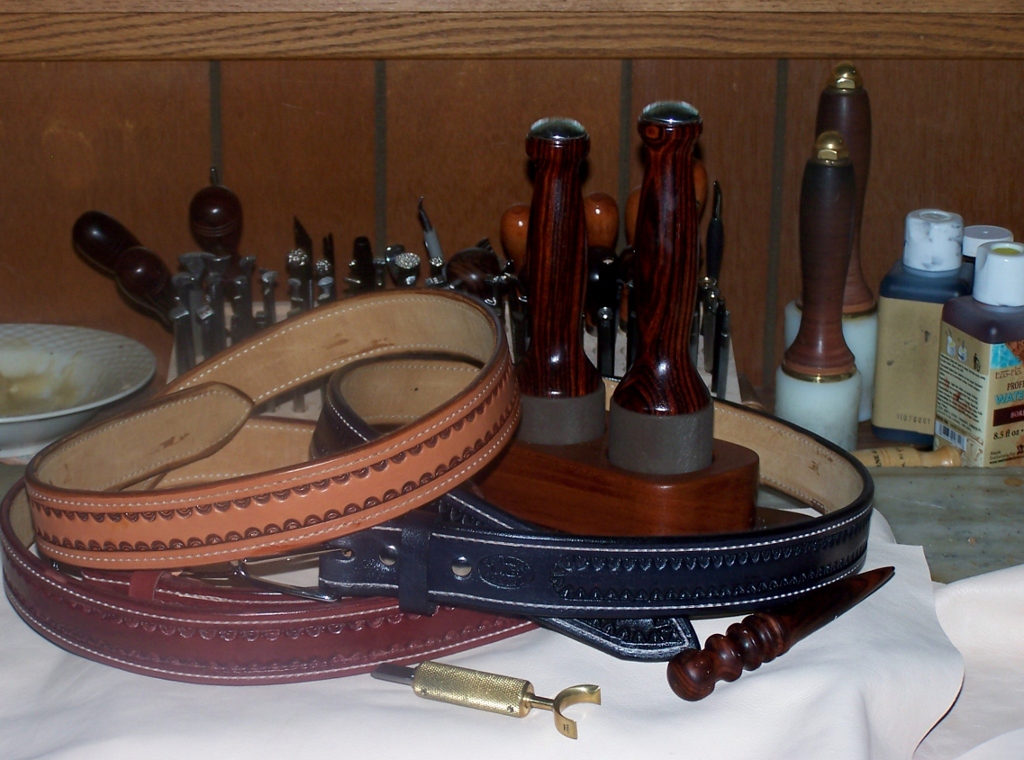
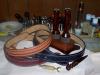
Made up 3 new belts this past week and finished them last night. I used the Tandy Pro waterstain/dye on the black and the burgandy. A standard Sheriden finish on the brown. I had zero rub off on the black. It really worked well. I used resolene over the top. It started to move the stain, but careful application kept everything in place. I really like how they turned out. Will punch holes when I fit them to the new owners. As always critiques welcome. Jon
-
Floral/basket Stamped Photo Album
Bluesman replied to Double U Leather's topic in Books, Journals and Photo Albums
The layout is exceptional. I really like your use of beaded borders. Fantastic, as always. -
Wicket And Craig Leather
Bluesman replied to Abram's topic in Gun Holsters, Rifle Slings and Knife Sheathes
My first side from them was Standard. No going back. Nice stuff. -
Luke, I really like the simplicity of that strap. Excellant work, as always. Did you use a beader blade on that.