bruce johnson
-
Posts
4,401 -
Joined
-
Last visited
Content Type
Profiles
Forums
Events
Blogs
Gallery
Store
Everything posted by bruce johnson
-
Judy, Cool looking lid. I'll bet the crystals really light it up when it is all together. I like the 2 row border pattern you did around the conchos too. Different look. Rope cans are one of my favorite orders. I usually manage to move them up the line. I do quite a lot of inlays too. Hide is always popular. Exotics are fun too. I have some beaver tail I am going to inlay on one. Where are you getting that color can at? I mostly use the Smith Bros cans, but have a few that like those lighter ones. Do you make any goat string cans? They are pretty popular too. Some girls are carrying the goat cans as purses and I have source that has a mirror in the lid and a plastic pocket for a cosmetic case. If you want to trade some patterns let me know. Good job.
-
My general rule of thumb for skirts is 3" behind the back bar tip and 1-1/2" in front of the front bar tip. NOW be aware. some cutting trees due to longer seats will have longer bars. You may need to shorten that up. I have made some with 1-1/2" off the back, and had to just almost overlap my rear jockeys flush with the skirt backs. Some I have doen with the mother hubbard rear housing sttiched down to the skirt too. Also you need to allow some relief in the back of the skirts along the spine, especially with long skirts. Either build that into your cutting pattern so you get some rise, or don't lace the skirts together past the bar tips. If you have the jockeys to the edge and down tight, that can bind too. As far as rigging, it needs to not interfere with forward stirrup swing. Some cutting trainers will like to get their feet up into the flats and spur one around when schooling. Horse are also trained when"my feet go forward, you better be hunting the ground and getting back". Some are rigged with skirt riggings, others use a dropped dee pattern with relief for stirrup swing. Not many cutters seem to like a flate plate, thinking is it interferes with close contact. Most of the cuttng saddles seem to be rigged full double or 7/8 at furthest back. Because of the leverage factor of 200# people pushing on a 4" horn sitting on a tall fork and sliding forward, I think there is some leverage action similar to a calf roping saddle. Back cinches need to be pulled snug. On a normal saddle I usually position the front edge of my back dee at the point of the cantle or a smidgen back. On a cutter or calf roping saddle, I move them back a little further, maybe 1-1/4 to 1-1/2" from the point. It helps to anchor things down. Most calf ropers use a wider back cinch (up to 8" center) and this allows some room for that. Cutters like a little extra room to spur the horse and not the back cinch finishing up a sweep or jumping out across the pen. My experience anyway.
-
Nick, Thanks for the nudge, it will be a lot more searchable to have it here for the future. Ben (gtwister09) listed this in the other other thread. No More Tears Quick Casing Formula 1/2 cup Lexol 1-1/2 Cups distilled or filtered water 1 tablespoon Johnson's No More Tears Baby Shampoo 1 tablespoon Listerine
-
Pete, It was in a thread started by Randy. He saw Pete Gorrell demonstrate it at the Columbine Guild meeting. Pete I think watered, then applied the lexol and then rubbed in baby shampoo. Ben then shared a formula he was given several years ago. I usually case with ProCarve. It penetrates well and quickly. It has surfactant to help the penetration and an additive to discourage mold growth. Mold is an issue for some people in cased leather. I had it in my old shop, not a problem since I have moved. Most all of the casing solution formulas contain some sort of surfactant - dish soap, Amway product, ag chemical surfactants. etc. Some have tannery oils. taxidermy oils, glycerine, etc. About as many formulas as people using them. There is a heck of a lot of casing done with just plain old water too. Some people case with water, then use saddle soap as a top dressing. It makes the knife glide easier according to some, and holds the moisture in the leather better due to slower evaporation. I have done that a fair amount too. I mixed up some of Ben's Baby Shampoo formula (w/o listerine), and have now used a quart of it in the last few days. My comparison for now vs. Procarve. Most done side by side. I never had a kick about ProCarve. Procarve penetrates faster. For things I am molding, it will penetrate and get the job done faster. For carving, a few things I have noted. The swivel knife work was a little easier with the shampoo mix. The burnishing color was the same or better, and the piece held its case longer with the shampoo. Both basket stamped about the same. My wife preferred the basket stamping and flowers carved with the shampoo mix. She could pick them right out. Reason is that the lexol probably gave it more "color". They all oiled up pretty similar. Pieces that I cased but did not use were interesting. Once they had dried out, the Procarve piece was stiffer than it was before. The shampoo cased piece was about as flexible as before. I think a guy could recase with the shampoo mix and be OK. Many have said in the past if they have a piece dry, they add lexol if they have to recase. This mix does that. A few bits of background. These were all 7/8 to skirting weight. I case all my tooling leather at least overnight. I have not quick-cased and carved anything of that weight for several years. I like the long casing better. All of these were cased the same length of time. I don't antique much. If I do, it is over a resist anyway. Previous experience with saddle soap is that it repels my letter dye. If I am not dyeing, I like the saddle soap on big pieces - I can do a briefcase front and not recase. It will be interesting to compare the shampoo alone vs. saddlesoap on a big piece. My experience.
-
Luis, That is also known as a shoemaker's stitch. Basically a slit is cut into the leather and the stitch line is in that channel. When the sewing is done, the line is glued and closed up, and tapped closed. The slit can be made with several tools. Stohlman showed using a round knife I think. There are actual specialized tools made to cut that slit easier and more repeatably. Most people use a tool called a channeler. There are several patterns, but I don't think anybody is making one now. Some cut a straight line (either vertically into the leather, or horizontally into the edge) and others cut an angled slit. There is one that rides the edge and cuts and angled slit (Eureka pattern channeler). I have a straight and an angled one, and am still not sure which one I like better. In know I cut a heck of a lot better slit with either channeler than I ever did in my failed attempts with a round knife. There are no doubt guys who have done a lot more of these than me, and they can probably give better detailed instructions than I can. It might be that a local shoe repair shop could give you a hands on lesson. This is one of those things I have watched 4 or 5 guys do, and none have done it the same.
-
A member PMd me earlier today about a procedural question on some award items they were finishing up, and it got me the thinking that we haven't visited this topic before. In the past I have made a fair amount of awards and some wholesale work. For at least a few years, my wholesale and awards items made up over half of my income. I made all the rookie mistakes. I charged based on comparisons, not based on materials and time. I made items that everybody else was doing. I stayed busy, and sometimes the custom orders that paid better were put off to get an order out. On the upside, I learned batching and production techniques, I learned a lot about making different things, and I justified better tools and equipment. I learned it is possible to work your butt off, and when you total it up, you have earned $1.17 an hour on an order. A few of my big lessons. When I got Bob Brenner's book and applied it, everything changed. Pricing went to materials and time. At that time shop rate was $30 and I charged $20 for the wholesale and award items. Material prices were marked up, miscellaneous costs accounted for, and it was non-negotiable to the bidder (me). Rates have since increased, BTW. I could justify the lower shop rate by the increased production - time savings due to batching, using the same tooling or lettering pattern, etc. I learned after a few times that non-typical awards do better. As a recipent of a lot of award items, you can only win so many spur straps, breast collars, and haybags. By the time you get to that level, you have a breast collar you like, you have a saddle that carried you there, and you don't need anymore spur straps or director chairs. I started doing some different items - magazine racks, shaving kits, photo albums, splint boot bags, cosmetic bags (the Arizona assoociations thought they were camcorder bags), leather covered picture frames, brief cases, etc. Two things in my favor. I wasn't competing pricewise with import breast collars stamped by whoever. These items were unique - not everyone was giving them out. That gave me a little more wiggleroom on pricing as time went on. I still did some of the regular stuff too - rope cans, rope bags, headstalls, and spur straps. Some associations just stay in the same vein. The advantages I see with the awards deal are a few. You get to make a lot of the same things. After you have done about a hundred leather covered picture frames, you know how to do it in your sleep. I have a flower I have carved blindfolded as a demo. You get some exposure too. I have never got a lot of referrals from awards items, but enough to make it worthwhile. The barrel racers and cattleman's associations are decent about generating some orders. Ropers never call for something else other than they drove over the ropecan and wonder if it has any warranty. You can get one big check all at once. That is cool. True story - I bought a Ferco 440 (borrowed the money for it) and found it was not the machine for me. Ron had an Adler 205 head for something like $600 more and trade heads. I wasn't sure where the money was coming from. Went to my first cowboy church that night. The preacher told me that "something good is going to happen to you because you came here tonight". I am home 5 minutes and woman from the Arizona is on the phone. She wants to order all their finals awards from me. I paid for the machine and had twice that in the bank in a month. With big orders you can pay off equipment in a hurry, then it starts paying you back quicker. Another advantage is that you get to meet some pretty cool people, and few jerks along the way. The disadvantages. You have to be disciplined. These things have time frames, and you have to deliver on time. Silver suppliers and material backorders can kill you sometimes - keep on it, and know alternate sources. Get your work done. The advantage of doing a lot of the same thing is also a disadvantage. You are like the second mule in the string - the scenery never changes. I do things in batches. Small things like checkbooks or planners I might do 10-20 at a time. Stamp them all, line them all, etc. Take time every so often and do something else to break it up. Bigger things like briefcases or rope bags I do 3 or 4. If you spend two weeks and you don't have anything totally finished, it wears on you. I did 30 of the tooled leather toilet lids in one month for a wholesale order, I didn't want to see those for a while. Another disadvantage is that you have a timeframe on these, and sometimes I have had to put off or refuse a custom order to keep on track with something that was paying less per hour. That will eat on you too. I don't do as much of the awards stuff as I used to. Part of it is me, I am not actively soliciting it as much. This past year it was about 10%, and custom wholesale orders were right at 15%. Not a significant part until I figure the steady cash flow from those deals. Those deals all came when I could afford the time. The wholesale orders are treated like custom. He takes an order for a custom item, I give him a price and he adds 20% or so, and I put it on the board. He is not inventoryng anything, but he is out there on the road, and setting up on the weekends. Unlike some other customers in the past, he wants my stamp on it. Some of the others sent me their makers stamp, and I respect that too. A kind of rambling experience, but I am interested in other makers' experiences with this line of work. Hopefully we can all learn something, make ourselves more profitable, and prevent some one else from some of the mistakes we made.
-

Monthly Floral Carving Challenge
bruce johnson replied to ClayB's topic in Special Events, Contests and Classes
Clay, I looked again. Those are not chatter marks, the chatter marks are on the petal ends on the other side, slightly out of focus. The lines are part of the checkering pattern, blown up they do radiate. This particular beveler has a lot of side to side rock to it, and that may have affected the way it took the checkering. Because of the rock, I have to walk it in smaller steps, but it also does a good job for certain areas. I also have a #2 that is pretty flat side to side. That is mostly what I use on tighter stemwork. -
Monthly Floral Carving Challenge
bruce johnson replied to ClayB's topic in Special Events, Contests and Classes
Clay, Pretty much the petals were beveled with a #2 checkered from Barry. (I am feeling shame, the radiating lines are actually chatter marks from the beveler walking). Interesting things the pics show when enlarged. I stood those bevelers up (to minimize the mashing down of the underlaying element I sometimes do) and actually tipped them towards me when I was beveling the overlaps. You can see that it pushed the points back even off the cut line on some of them. This leather is low shoulder and might be a factor too with a looser fiber allowing that. lesson learned. The veiners on the tips of the stickers is kind of a California thing, along with the matted background. Since this is a new post, I am going to add three more things I would change. 1) I would make the leaf smaller, I generally use the 2/3 size of the flower factor someone told me eons ago. 2) I would probably stick a flower bud in place of the other folded leaf on the right side there. 3) I would take a picture and blow it up, THAT really shows the mishits, off line cuts, and attempts to fix decorative cuts that looked cleaner and nicer before. . -
Osborne 127 edger... What size do you like?
bruce johnson replied to SCOUTER's topic in Leatherwork Conversation
Scouter, For general work and limited funds, buy every other size like a 1/3/5. Then if you find you need an inbetweener later, you will know. The numbers generally don't translate from one maker to another. I used to use the 127s. Randy is right about them. First, like most Osbornes, they are the makings a pretty decent tool. You will have to finish the edge when you get them. They are harder to sharpen than the more open designs. If you are not careful, each sharpening will make the blade angle higher and higher until they get pretty pushy. You need to take a fair amount of metal back on the bottom when you resharpen them to prevent this. Stropping down in that slot is best done with rouge on the edge of some hard carboard or leather. They are a step up from some other edgers for sure, but not an easy design to maintain. I had a set from Ron, and they were good. I have a couple sets of different patterns now from Jeremiah Watt. I have a couple bisonettes from Bob Douglas. I use them all for different needs. My wife does some of my edging. After using the 127s, she has never begrudged me trading up in edgers. -
Monthly Floral Carving Challenge
bruce johnson replied to ClayB's topic in Special Events, Contests and Classes
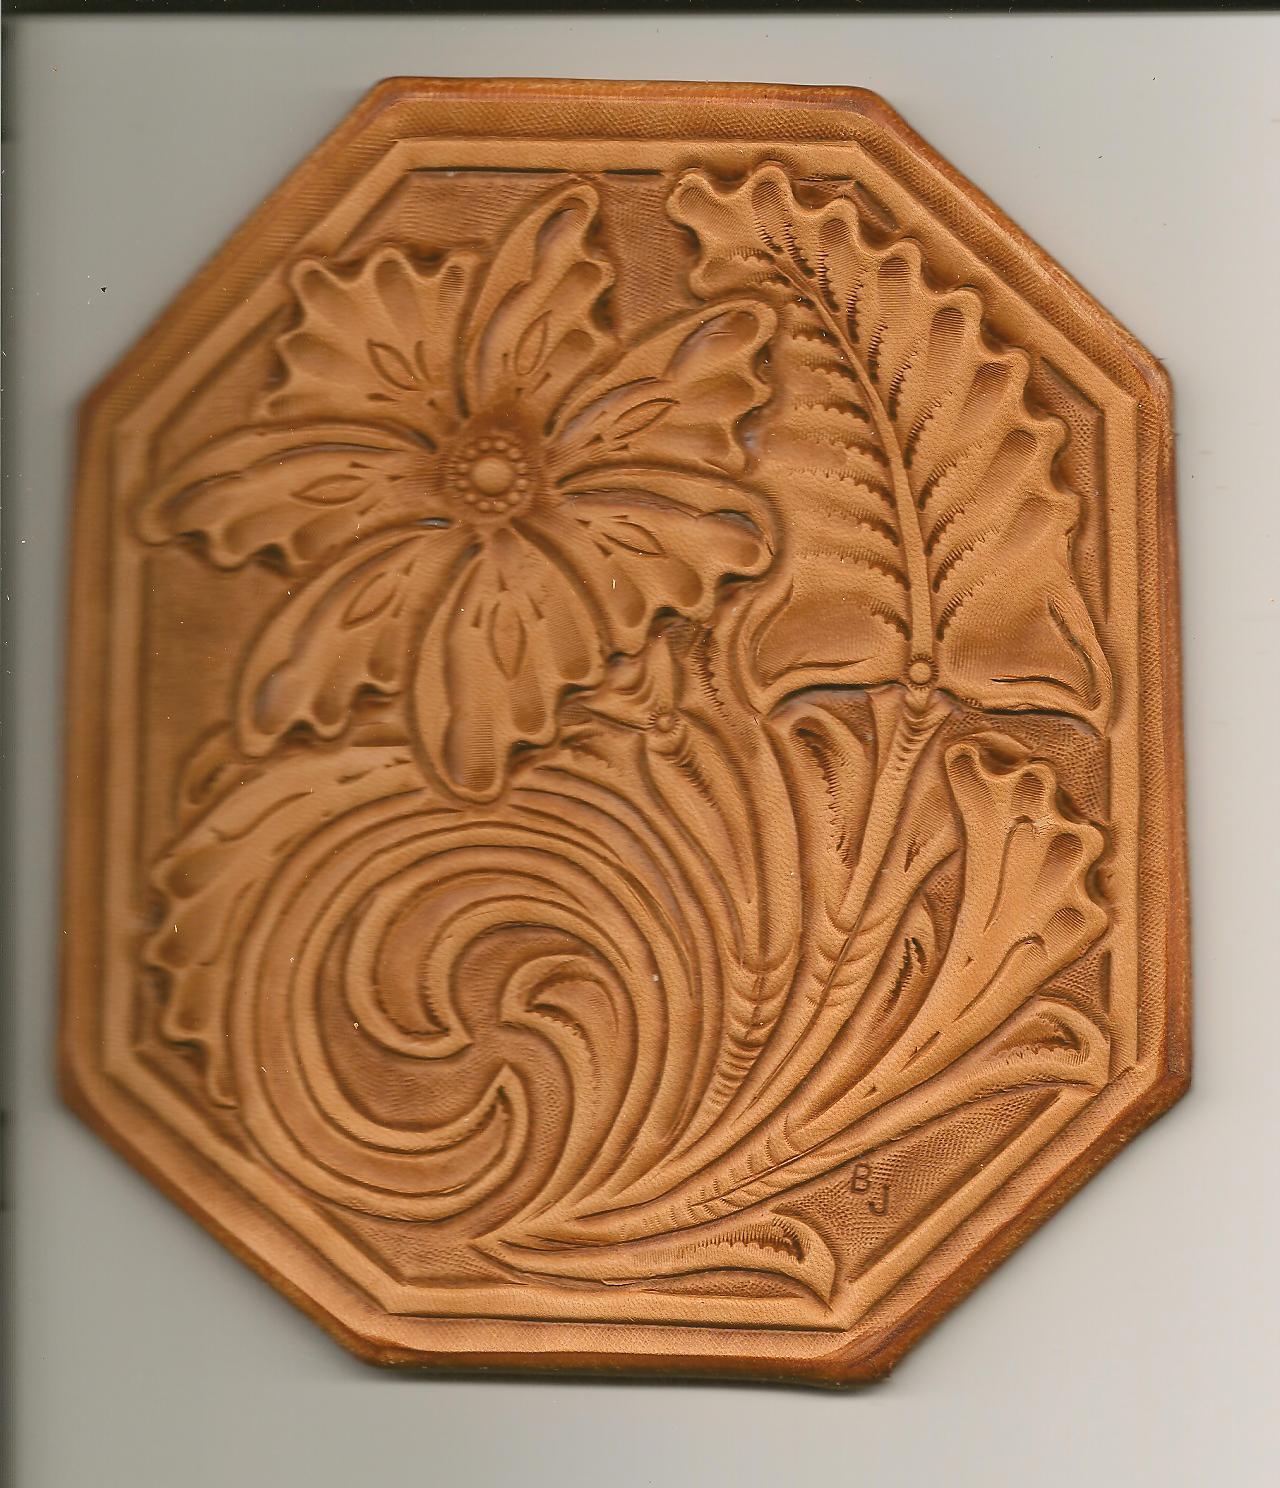
Update from Oakdale. Got up primed to do some repairs, and just couldn't get real exicted about breast collar drops at 4:30 am. I traced it off the pattern, and then changed it up a little for some flow and elements I like to use. Attaching a picture. BTW the case was done with Ben's Baby Shampoo/Lexol mix (w/o Listerine) last night and bagged. The scrap is a low shoulder piece of light skirting from my bargain bin. My three things I would improve: 1) I would put in a slight more separation between the scrollwork, flower element, and leaf elements. The stem work all runs together and looks a bit busy to me. Sometimes it works, sometimes it doesn't. 2). There are some mishits on the beveling, and some minor "flow to the point" on the stem work. 3). I would make more interesting decorative cuts on the leaf fold/stump looking things. They are just OK. Normally I would have made up a paper pattern, then a tracing pattern off that. This would have minimized my 3 improvement zones. What I did do was to visualize it in my mind, put the major elements down from tracing the page I printed off, and then fill in on the leather. I'm getting better at that, but still need to draw them out first when the money is up.
-
When I was using it, I bought it at about any hardware and lumber yards. It is sold as "Wood Bleach" crystals. And yes, the mix I used was 1 tbsp to 1qt. add the acid to the water and wear glasses, standard safety deal. It was recommended on another list a while back that once the action has happened to apply saddle soap to neutralize the acid. Haven't tried that, since I haven't used oxalic acid for a while.
-
Thoughts on fiberglass trees.
bruce johnson replied to Hidemechanic's topic in Saddle Supplies, Tools & Trees
GH, I have had that same talk with Pete, and sat in a few of his roundtables at the shows. I agree there is flex there in the fork relative to the bars. Even the thinner forked barrel saddels that have never had a calf hit the end of a rope may have a little gap between the back of the swell and the groundwork. It also stands to reason that the higher on the swells the ground work is attached, the more there is the gap. I have seen that for sure. We/ve all seen the loose nails there, or if it is screwed there, then the nail lumps in the cantle dish or along the bar channel where those nails have lifted a little due to flex. The fiberglass strainer stapled or tacked are just floating. The attachments pulled through long ago. The two piece strainer seats or all leather ground work are going to alow that slight movement more than a solid seat. I am more going to the notion of flex with the horse's movement concept in trees. I had a great revelation putting some bare cutting trees on my cutting bred horses a while back. Let's just say it wasn't pretty, some here have seen the pics. I have a bit of a background there. I was thinking along the lines of what I had accepted as "made sense". The higher thin forks and horns allowed flex in the tree (they don't to any degree). The thin bars will allow some degree of movement in the back. More tree flex in the bars comes from the 200# guy hanging in the stirrups than the movement of the horse. A little gap is a good thing under the middle of the bars to give the horse a place to "round up into when they drop their rear end and lift". One member here advised to me put a belly band around the tree and then turn my horse tightly. Therapists focus on arena performance horses for a reason. Arizona bars are a mixed thing - stirrup leather rub on the back edge of the leather, and an unsupported area behind that. These are some pretty widely held beliefs by some pretty acknowledged horsepeople. I have seriously questioned a lot of what I thought I knew in the last year, and the last 6 months especially. These forums havbe been pretty enlightening. -
Thoughts on fiberglass trees.
bruce johnson replied to Hidemechanic's topic in Saddle Supplies, Tools & Trees
Jon, The old fiberglass ones I see are usually Circle Y Connie Combs barrel racers. The trees were mostly made by Hadlock & Fox. The glass on those were not much more than painted cheesecloth. Still a rough texture, pretty much all over the tree. Many of those are 15-20 years and have had the use. They are usually not worth it to do any repairs now. They paid $500 for them and got their money's worth. The rawhided tress from the same vintage (some customers have a tack room full of them) are usually sound, unless they were in a wreck. The newer triple dipped epoxy replacement tree was also from H&F. Whole different cat here. It was a heavy smooth finish. Glassed in seat, and heavy coat of resin (triple dipped, so they say). It will turn a nail or chip out the coating, and instructions were that either predrill holes or use drywall screws in a gun. Since a lot the guys that build on these have yet to block many skirts up the way I do, the nail deal must not be an issue for them. I opted out of that job. I see the Dale Martins and Tod Slones for repairs, along with some of the others of that genre (Texas origin trophy saddles). The trend is more to the glassed trees. Obviously they are working for the guys using them. I get the flyers from some of the treemakers down there. Some guys talk about Lewis, Oxbow, and some of the others. Seems like most all of them are touting their glass trees, and guys are using them. The trees must be holding up. -
setting spots, what do you charge?
bruce johnson replied to Randy Cornelius's topic in Hardware and Accessories
Donnie, These are the hand spot setters. I think TLF sells them under the Stohlman name. Weavers have them. To show my age, I think mine came from Mast. Basically a larger tube to fit over the spot. Then there is a longer rod with a cupped end that slides within the collar. Put the spot into the end, the slight spring of the legs hold it, hit the long sliidng rod, and it drives it in. Same principle as the press, just a hand tool. They sell them in sets for the different sizes, or singly. I don't have a picture, but no doubt someone does. -
Thoughts on fiberglass trees.
bruce johnson replied to Hidemechanic's topic in Saddle Supplies, Tools & Trees
GH, I think a lot of this is going back to the quality and type of materials that are used. Obviously the fiberglass material and resins are better now than the 20 year old trees we see for repairs. I am not crazy about the dipped trees, but those southern guys seem to use them a lot, and their thick clubby bars. I see a fair amount of barrel saddles with the fiberglass trees. Most of the oldies are loose. The fiberglass has delaminated, and the forks and cantles are loose. Usually stapled construction to start with. They were price point saddles then, and so it is to be expected. The trees were made by one of the big production companies then, and still are. I am one that feels if your tree is flexing much with the movement of the horse, there is an issue. Even the cutting trees I had, thin narrow bars, high thin forks and 4" horns were pretty solid. I couldn't lay against them and make them flex. I could on the used ones after the bars were broken. Granted there is movement with a jerk, but that is where the inherent elasticity and return to memory shape of rawhide plays into it. The old fiberglass microfractured and the fibers separated from the resin, much like breaking an old fiberglass whip or fishing pole. I had a warranty replacement tree brought to me. It was a triple epoxy dipped. The maker proudly told me that it would take 5000# pounds of pressure with no deforming. The horse might deform before that, horseshoe nails pop, tendons tear, etc. They just warranted the tree. -
I wet it good. Then put a lot of twist into it, and secure while it dries. Usually I use binder clips, clamping 4-5 strands at a time. On the old posts, someone mentioned twisting and putting a small tack in the end of each strand as they dry. I know guys who spray with felt hat stiffener too. Haven't tried it yet.
-
Marlon, If it was the pages and pages of tools shown in ShopTalk, those were tools and equipment from the publisher, Dan Preston. He has a regular sort of tool sale from his finds. The website for ShopTalk is www.proleptic.net. It is not particularly updated. I tried to buy a tool shown in the magazine. It let me go all the way through the checkout, took all my info, and that was that. I printed off my receipt and waited for said tool to arrive. after a week I called to inquire on shipping. They told me the tool had been previously sold, but they have no way to pull each tool off or flag them as they were sold. Nothing will tell you that on the site. Lesson learned, just call them. Dr Dan also refers quite often to several other guys who refurbish old tools. Keith Pommer in Worthing, SD is one. The other is Bob Douglas in Sheridan, WY. Shoptalk had an article on Bob a while back. Neither of these guys maintain a website that I know of. I have talked to him once or twice, but not dealt with Keith. He has a good reputation, just didn't have what I was looking for at the time. I have a fair amount of used and some new tools from Bob. Good guy for me to deal with. I have been happy with everything I have got from him. I always get off the phone smarter than I was before when talking to these two guys.
-
Knowing if they're a Good Tree Maker
bruce johnson replied to ArtS's topic in Saddle Supplies, Tools & Trees
Cop out answer here first, Art. If they fit your horse on the bottom, and you can build on the top, they are a good tree. The worst tree maker can make a crude old rough looking tree to fit, and the best can make one that looks like fine furniture that doesn't.THat is really the bottom line. After that then we get to pick apart or praise their woodworking skills on top and their rawhiding or LineX spraying ability (or both now). About the only thing most of us can evaluate is the finish on a tree. Some gaps are going to happen with the best rawhiders sometimes. We worry about gapping, and then drill or screw right through the laced line sometimes. Not an issue for some pretty reputation makers whose work has stood the test of time. Rock is one of those things we all check. I have had a lot of discussion with some folks on rocking trees. Some is no doubt opinion, some probably not universally accepted, First off, it doesn't take much of a difference to give some rock. It can be from twisting, one bar pad being a bit wider than its mate, the cantle or fork not exactly square, etc. If it is from a bar being a bit wider, the bottom sits on the horse, not the edge. Those four points we are evaluating on our level surface probably should not contact the horse at the same time. If they do, there is not much relief built into the bar edges. . So the horse has 1/8" more bar width on one pad than the other. If the angles are the same and the bottom geometry is too, shouldn't matter. If that is the cause and we try to fix it by jumping on it or cranking on it, we are going to change the geometry of the bottom and introduce twist, a worse problem. Some companies fix rock by beating down just the high corner. If it from a twisted tree and differing angles, they haven't fixed anything, they just flattened the pivot point. It doesn't rock, but that doesn't make it right in this circumstance. If a tree is solidly put together and square in the wood, and the rawhide pulls it out of square, something loosened up. Did it twist, can they twist it back and it will be as solid? A lot of these are rhetorical, but food for thought. Trees rock for different reasons. Ideally they shouldn't, but when they do, it is not always bad. When they don't rock, it might be worse. After that we evaluate centering of the horn, cantle and forks even. Are the bars the same length? How can we measure bar angles? Are they really 90 degrees/93 degrees? Are they the same? Can I see one degree difference for one side to the other? These are all mechanical things that are not the easiest for the customer to evaluate. Are the bars exact mirror images or does one have more twist or rocker than its mate? Things that make an even bigger difference than rocking or lacing, we can't reliably or don't measure. Scary for me sometimes, I just have to have faith that the guy sticking the wood and rawhide together is doing their job. If I can see a problem, it is then a big problem, because the minor stuff is probably going to get by most of us. So I guess my bottom line is if I can put a tree on a horse like the customer rides and it sits acceptably, then it is a good tree. After that I have to decide if nylon vs rawhide lace, lumpy lace, abrupt cantle to bar transitions, staples vs nails, rawhide vs. whatever, or other factors are big or small to me. That is what seems to separate the treemakers bottom to top. I have to decide if I want to plug cantle transistions, rasp, Bondo, or just cover lumps, or order a tree from a maker whose work lets me forget that stuff. I think once we have a consistant way to communicate back geometry to the tree maker, and they can use it to fit the general type horse (not microfitting one horse usually), then we will be able to compare these other factors and their influence on our decison of tree maker. -
Betty, Many thanks for joining us here. also for advertising the book again. As Clay said, many of us refer to it. For a while it was hard to find where to refer people to who were looking of it. A good resource.
-
I tried this with some 100% felt a few years ago. Your mileage will vary, but I built up enough static electricity the first time to light up Las Vegas. Being a slow learner, I did it again to see if it was repeatable. It was. If it matters, I have rubber mats on the floor.
-
Doug, the stone feedwheel doesn't sharpen, it just feeds. It is kind of like that coarse side on the back side of the bench stones that you raely use except on the mower blade. The stone sharpening wheel inside is a whole different piece. I have not changed out from the steel wheel. It feeds the softer stuff as well. I am not sure of the advantages of the stone feedwheel other than old technology or price?? Maybe the stone surface is more easily redressed. The feedhweel on crank splitters, when they lose their bite, it takes a machinist.
-
Doug, Dave from Artisan can probably address the specifics of the NP 4, and what presser feet and feedwheels they can get better than I can. I test drove one of theirs at Wickenburg. It was the first time I had sat down at one. That is what opened my mind up to the possibilities of what it could do for my skiving of vegtan, althoough Jerry and ?? were more leaning towards telling me I needed to get the top and bottom feed machine. Good advice sure, but more $$$ than I had at the time (My wife had just visited Ron Edmond's booth and bought his hydraulic drawdown stand). They told me that the bottom feed would glaze, smoke, and not feed vegtan over about 4-5 oz. The top and bottom feed will do skirting. Same thing I was told by the guy who sells them on ebay on the $900 deal. The guys on the boot and shoemakers forum referred me to Arnold at Melanie. He was the first I heard of the steel feedwheel from. He told me that the vegtan also feeds better with presser feet with rollers. He set it up and ran some 8 oz though like nothing. Switched the wheel over to the new import model, and it did just as well. The wheel was harder to change on the import, one factor at the time. He had a bunch of new feet for the Fortuna. Obviously they went right on the Fortuna. On the import the pin that secured them was a bit short, the pin off the Fortuna on the import was a bit long, and they were slightly wobbly, but worked. The stock feet for the import were OK, but he didn't have the selection that he had in Fortuna. There are feet to do straight skives, channels, a channel and thin outer edge for a turned edge, all kinds of configurations. All in all, the Fortuna was just a handier buy for me. As far as ease of use. In a nutshell they run off a sewing machine motor. You step on the pedal (wide open is best) and they feed and do it all. Way easier to learn than a sewing machine. The angle of the skive is controlled by a thumbscrew setup that changes the pitch of the presser foot. The height is controlled by a thumbscrew set up on top. An adjustable guide fence controls how far in the piece rides under the presser foot. That can help control how far the skive is and the thickness of the finished edge. The knife has a sharpener that you dial the blade against a stone. Then there are dressing sticks that you use to take the burr off. About 10 minutes of playing with scraps will get you pretty far along. Arnold was doing pretty tight inside and outside curves in a single pass like nobody's business. When I change from one setting to another, I check with some scrap. Getting to where I am close by just eyeballing now. Takes me about a minute now to change a foot and set up a different skive. I don't use it every day, but I use it a bunch. It is fun to use.
-
Pete, I know there are guys that can tool something as thin as 1-1/2 oz, but I am not one of them. I use it for lining and pockets like you did. I normally touch it lightly with oil and then use an acrylic finish to seal it. I also have a wee bit of X-1 left, and it makes a nice finish coat for insides. I usually prefer the biscuit or wheat pig that TLF sells. One of my customers like the natural. Pretty sure it is a chrome tan, and I can use it as a back lining for checkbooks, wallets, and planners with no wrinkling. I ask for glazed pig when they have it, and they know what I mean. Sometimes they have had a nice copper color too. I haven't used that black or brown pig lining stuff for quite a while. The pig I get feels a little better to me than the mission grain. On the higher end albums and things I use vegtan goat to line with, a little more interesting texture than the commercial oak, more body than the lining pig. Again a little oil and acrylic finish to color and seal it.
-
Maeshin, Are you trying to cut some time of leather like chrome tan vs. something more firm like vegtan or latigo? If so, any of the draw gauges or strap cutters are going to have some drag, stretch the leather, bunch up, and do what you are saying happens. Luke's suggestion of the roller knife and mat is right on for those flexible leathers. You can make templates from firm cardboard, printers press blankets or other relatively stiff material to use as cutting guides. Roll the blade right along the edge. For the stiffer leathers, the wooden strap cutters or draw gauges are the easiest for me. I use razor blades in my wooden strap cutters. Cheap and pretty sharp to start with. I have found that the TLF ones are sharper and maintain their edges better than the Osborne bulk pack blades. For some really good ones, I go the platinum injector blades from the drug store. I use my wooden ones for the odd sizes. I have a few traditional draw gauges also, and the one associated "learning scar" on my knuckle most folks who use them can relate to. I use my old cavalry 6" for cutting blocks for reins. I have a wooden insert handled 4" also, both of those I put blades I got from Bob Douglas into. They are made by Bill Buchmann, and really are nice. Hold an edge and do the job. I had another draw gauge I was about to ebay away. One of the old local guys decided to take a liking to me. He told me he has gone to using utility knife blades in his. He only uses "Irwin" bimetal blades with the blue label. I haven't tried them in the other handles, but they fit exactly into my newer Osborne handle (keeping it now). I think a stropping would make them even better, but I am pretty impressed with them for now.
-
Saddle treemakers-sub topic
bruce johnson replied to Hidemechanic's topic in Saddle Supplies, Tools & Trees
Just when we think we know the players, someone else jumps in the pool. Now it was pointed out to me that there is a tree for sale on ebay from a guy in Cornelia, Georgia (My son and I used to watch pro wrestling from there). According to the description, this tree was made this month and covered this week. It was first covered with bedliner (tuffliner) and then rawhided. Couple things I see here, doesn't it take at least a week for rawhide to dry? The other thing is I can now add another category to my definition of "paranoid" - 1. a guy who wears a belt and suspenders at the same time & 2. a guy who bedliners and rawhides his tree. In all seriousness, the bedliner probably is no different than primering or varnishing a tree prior to rawhiding it.