


Halitech
-
Posts
1,229 -
Joined
-
Last visited
Content Type
Profiles
Forums
Events
Blogs
Gallery
Store
Everything posted by Halitech
-
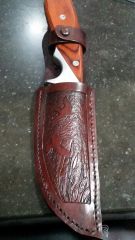
 looks good, the dye job on it all was nice and even and I love the baseball stitch on the blueprint case
 -
Coffee Sleeve - Bdvfd Version
Halitech replied to Halitech's topic in Purses, Wallets, Belts and Miscellaneous Pocket Items
after finishing my burnishing that cheryl pointed out I forgot to do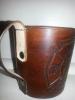
-
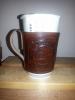
Did this up today as my old Fire Department is having their 100th anniversary. Made from 9oz leather with 6oz for the handle. Handle is sewn and riveted on. I used the applique lacing to put it together. Finished with Timber Brown dye and medium brown antique.

-
Waist Cincher Belt
Halitech replied to indidana's topic in Purses, Wallets, Belts and Miscellaneous Pocket Items
that is some real nice work. very good job for your first major project -
one thing to keep in mind is the cutting edge is bigger then everything else so you need to make sure the opening will allow you to put the axe in and take it out once it's all assembled. Don't ask why I bring this up, just take the word of advice
-
From the album: wallets
-
From the album: wallets
-
From the album: wallets
-
nice work Cheryl, skadi will look spiffy in that
-
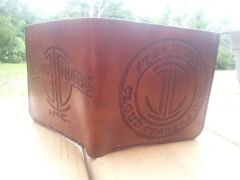
"batsuperman" Wallet
Halitech replied to Halitech's topic in Purses, Wallets, Belts and Miscellaneous Pocket Items
Thanks Cheryl lol @ Yin and yes, it's the Superman S inside the logo If you think that one's cool, hopefully you'll like the one I'm working on next -
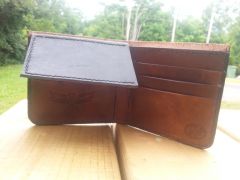
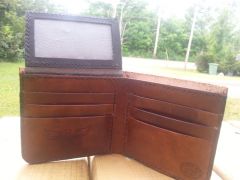
Latest wallet for a customer. 4oz veg tanned for the main part, 1.5oz for the fold out ID window. The logo was a bit of a bugger to tool but he's happy with it
-
From the album: wallets
-
From the album: wallets
-
15oz will be fairly stiff regardless of who made it. You can always cut it out, do your tooling then treat it with something like neatsfoot oil or EVOO to soften it. Something that thick would be ideal for a gun belt though where stiffness is desired.
-
ultimately you can do whatever you want with closures I think it looks good, bonus points if your initials are HR
-
with a lot of prayer
-
normally you only mark and punch from one side then use your awl to finish the holes.
-
Looks good. What kind of leather did you use and thicknesses? The end is different then most I've seen where they angle down the last 8-10 inches but that doesn't mean your design is wrong, just different
-
Pin them to the wall to look at and remind yourself to slow down and what not to do on the next ones?
-
 looks good but I would have rounded the point on the end a bit, you'll find it will get banged up a lot and it doesn't look like you burnished the edges at all
 -
overall looks good but on the last 4, your stitch length is a little long for my personal preference on an item of that size
-
very nice work. I really like the sunburst effect you did with it if it's a good seller then it can't be different in a bad way.
-
Most dyes, regardless of if you use water based or alcohol based, all remove moisture from the leather. The neatsfoot or olive oil replaces that moisture. If you check history, the US calvary used olive oil for years on their saddles and tack so it must be good. And yes, I use it on the flesh side. It seals it and helps smooth the backside down.
-
as Tom says, once you get your angle right, hold the groover in place and rotate your leather, it does make it easier then trying to move the groover around the corners
-
Usually I dye the leather, give it a coat of neatsfoot oil or olive oil and let that dry. Then depending on what it is, either supersheen, resolene or tankote. If it's a belt, guitar strap or rifle sling, I'll do the backside with snoproof unless I'm lining it.


