Halitech
-
Posts
1,229 -
Joined
-
Last visited
Content Type
Profiles
Forums
Events
Blogs
Gallery
Store
Everything posted by Halitech
-
Another Belt
Halitech replied to mpluc1's topic in Purses, Wallets, Belts and Miscellaneous Pocket Items
Overall it looks great. Looks like the tri-fold stamp lines up in each direction (something a lot of folks have issues with) and your letters are all in line however on the second pic, it looks like the C and S are farther away from the rest of CHAOS then the rest of the letters are. When doing rivets, I will mark one then use a tri-square to line up the other one so I get them straight. -
Looking For Help With Construction, How Do I Charge?
Halitech replied to tiltadornments's topic in How Do I Do That?
there are pros and cons to sourcing out your work and how to pay. If you pay by the hour, you'll get the quality but your labour rates are going to go up because they will take their time. If you pay by the piece, labour rates will stay the same but your quality could suffer because they will rush to finish so they make more money. It's a tricky line to walk -
personally I look at wrinkled leather as giving a product with character, something you won't find in off the shelf products you get at walmart et al.
-
Pretty sure due to the way chrome tanned leather is made, it won't accept dyes or stains except when it is tanned. I could be wrong though so if I am, someone will correct me. And I've never heard of chrome veg tanned leather, they are 2 totally different types of leather
-
Having made a fair number of these, I know roughly what your cost is and I sell mine for 65.00USD but I also use veg tanned for the exteriors and I do carving on them as well. I've had no problem selling at that price and people have actually commented after receiving them, that I should be charging more. The sweet spot is around 75.00-80.00 for a wallet, especially with carving on the outside and 6 card slots.
-
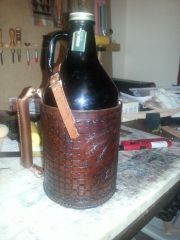 Kiwi, if the basic dimensions are the same for all of the 64oz growlers then start with a piece 16.5" x 7" 9oz leather. I made the bottom from 9oz as well but could probably go with 5-6oz. The bottom I wet molded to curve into the main body but if your butt sewing is better then mine, you could go flat and probably cut 1/2" from the over all height. I went with a buckle on the strap instead of a snap in case the height is different
 -
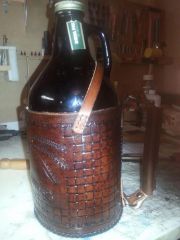
From the album: Beer Growler carry case
-
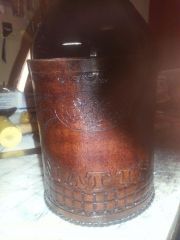
From the album: Beer Growler carry case
-
From the album: Beer Growler carry case
-
Credit Card Wallet
Halitech replied to Fordpkup's topic in Purses, Wallets, Belts and Miscellaneous Pocket Items
looks good. Only thing I'd do different is round the corners so they don't end up getting banged up as bad as a square corner will -
First Wallet Ever
Halitech replied to Varsil's topic in Purses, Wallets, Belts and Miscellaneous Pocket Items
Overall, good job. I would try and move the stitching out a little closer to the edge so you don't have so much wasted room. On the slots, as tugadude said, punch small holes to reduce the chance of tearing. Another thing you could try is instead of just cutting a single slot, punch holes then cut lines between the tops and bottoms of each hole so you have a little extra room to put the cards in. -
How To Prepare A Halter For Possible Rainy Conditions...
Halitech replied to thekid77's topic in How Do I Do That?
Use something like sno-proof on the flesh side. Use something like a hair dryer or heat gun to slightly warm up the leather, rub the sno-proof into it then go over it again with the heat gun to make it "soak" in. You can also use things like tan kote or resolene but I find they crack with bending -
Honestly it looks good. About the only thing I would do a little different is where you have what looks like 1/2" between the card slots is make each slot a little bigger to allow putting more cards in each slot easier. Beyond that, stitches look good, you stayed the same distance in from the edge, finish looks good.
-
once you figure it out, it's actually no more difficult then double loop lacing this really helped me http://www.kingsmerecrafts.com/page100.html
-
First Commissioned Dog Collar
Halitech replied to JerseyFirefighter's topic in Collars, Cuffs, Leashes and Leads
ok, they looked like rivets, that is why I was concerned as they will work loose over time but since they are chicago screws, shouldn't be an issue -
the cases could be a stamp for all of it but the armour, I'd say was grooved
-
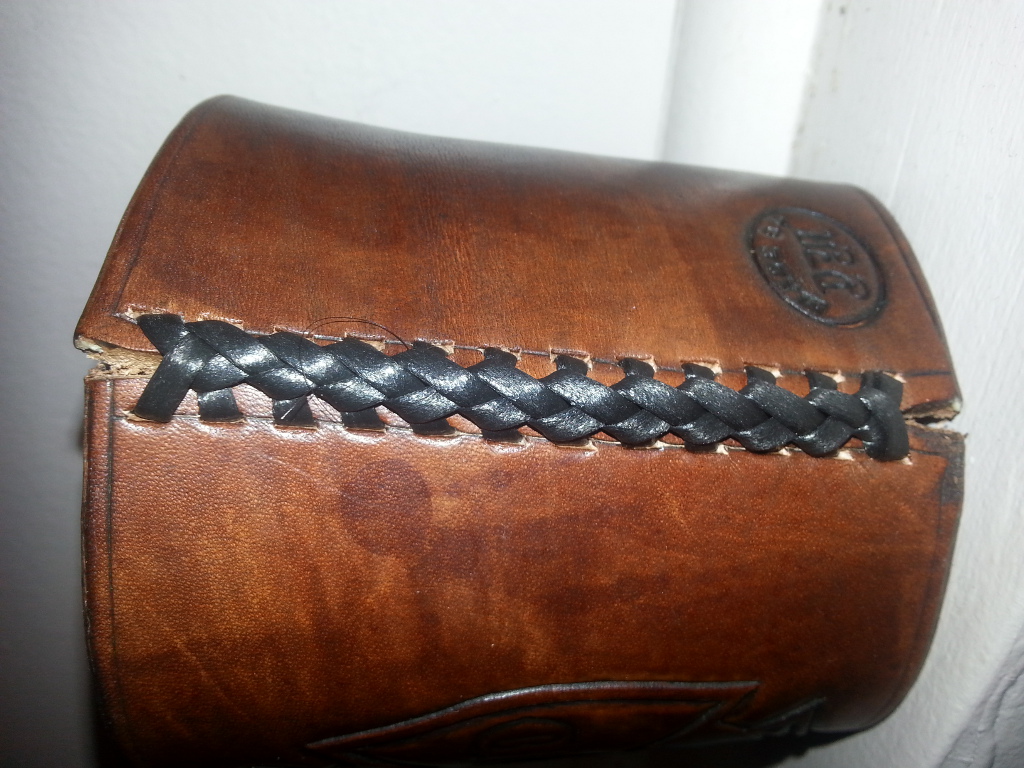
I've seen it done on roper (long) wallets with a snap but never pad attention to if they skipped holes or not so yes, it can be done, just not sure on the exact steps certainly you can, just go as far as you want then what I've done is slide the extra back in under the braid. Not sure if that's the proper way but it worked. I'd look at mexican round braid though myself, it "hugs" the edge better so it doesn't add as much width to the finished product
-
looks like just done with a groover to me, very carefully
-
First Commissioned Dog Collar
Halitech replied to JerseyFirefighter's topic in Collars, Cuffs, Leashes and Leads
very nice work. You can see where a few of the rivets are out of line but overall good job. My only concern is the d ring on the back. Where it's only on with 4 rivets, depending on the size and strength of the dog, a few good rushes and it could pull that off the main body of the collar. I would have either sewn it on or made that part as the main part with all the hardware and then added the backing with the domed rivets as a padding. Then you could have rolled the edges under the main body and hide the rivets. Just something to think about -
Guitar, Banjo, And Mandolin Straps Out This Week
Halitech replied to Chief31794's topic in Guitar Straps
very nice work as usual Chief I did have someone approach me to make a mandolin strap but never got back to me on color or anything so I let it go but I would like to add it to my offerings so any help would be appreciated -
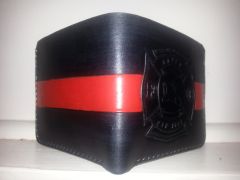
From the album: wallets
-
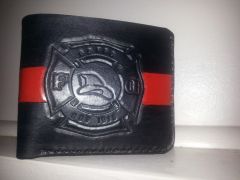
From the album: wallets
-
Yet Another Question Kind Of Stuck Need Some Ideas
Halitech replied to Windrider30's topic in How Do I Do That?
we might be able to give ideas if we knew more about what exactly you were trying to make -
Coffee Sleeve - Bdvfd Version
Halitech replied to Halitech's topic in Purses, Wallets, Belts and Miscellaneous Pocket Items
Here you go along with the instructions I used http://www.kingsmerecrafts.com/page112.html
-
Grey, with where he placed it, the billet will cover it anyway so not like it's really out where it's going to be seen. Even on the very last hole it looks like it should be hidden