


Halitech
-
Posts
1,229 -
Joined
-
Last visited
Content Type
Profiles
Forums
Events
Blogs
Gallery
Store
Everything posted by Halitech
-

-
nice work for your first project. and I've done the same, didn't realize it till I went to out it on my belt
-
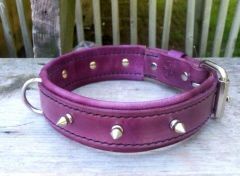
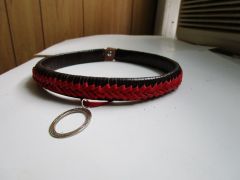
From the album: dog collar
-
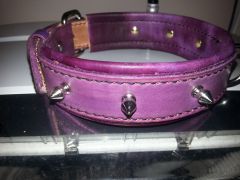
From the album: dog collar
© Halitech
-

From the album: dog collar
© Halitech
-
Thanks To Granpdpa, I'm Now Starting My Leather Journey
Halitech replied to JRDill's topic in Getting Started
There are some good tutorials in the How do I do that section. Finishing edges - http://leatherworker.net/forum/index.php?showtopic=18101 Casing Leather - http://leatherworker.net/forum/index.php?showtopic=19121 Making Belts - http://leatherworker.net/forum/index.php?showtopic=60344 The type of leather will depend on the answer to what I asked above, are you going to be tooling it or not? If you are tooling, your only option is veg tanned. -
Thanks To Granpdpa, I'm Now Starting My Leather Journey
Halitech replied to JRDill's topic in Getting Started
you definitely received a treasure there and I don't mean the money value. I would probably start first with deciding how you want to do your belts/wallets/straps and go from there. Will you be doing any tooling? Minimal? Lots? Then look at the different designs of each and decide on the style you want to go with for each. If you aren't tooling, then you need to decide on what kind of leather you want to use. If you decide you are going to be doing tooling, get some of the rounders and use those to practice different things on. Above all else, do lots of reading and practice and don't be afraid to post in the critique section for a second set of eyes to help find things you might miss -
Pocket Protector For Pants
Halitech replied to Manypawz's topic in Purses, Wallets, Belts and Miscellaneous Pocket Items
not to hijack your thread but since you asked me to post, here's mine -
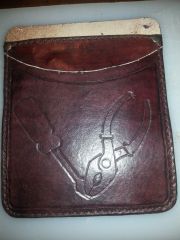
From the album: misc stuff
© Halitech
-
Pocket Protector For Pants
Halitech replied to Manypawz's topic in Purses, Wallets, Belts and Miscellaneous Pocket Items
well, I had some help from the back pocket on my jeans lol will do, not like it's going to be seen often but I'm tooling the front -
Pocket Protector For Pants
Halitech replied to Manypawz's topic in Purses, Wallets, Belts and Miscellaneous Pocket Items
I just started working out one based on your images and I was darn close. I went 5.25 wide, 5.5 high for the front piece and 6.25 for the back piece -
Pocket Protector For Pants
Halitech replied to Manypawz's topic in Purses, Wallets, Belts and Miscellaneous Pocket Items
Looks really good. Only thing I would have done different would be to put the top flap across the entire top so the rivets and sewing was holding it all together -
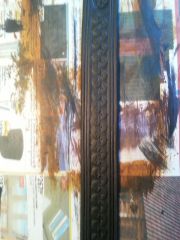
From the album: Belts
© Halitech
-
From the album: Belts
© Halitech
-
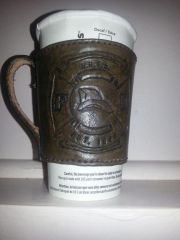
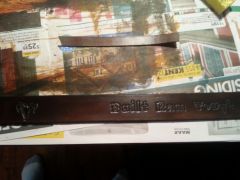
From the album: firefighter stuff
© Halitech
-

From the album: firefighter stuff
© halitech
-
I'll admit, I just have a dirty mind lol
-
I'm not sure but I've heard of other people using it so I would assume it can handle it. If not and he needs some help wet molding the leather on her, let me know, I'll be happy to help him out
-
I would hazard a guess that those are plates instead of letter stamps.
-
I know this will sound kinky but wrap her in saran wrap then duct tape. carefully cut it off then fill it up with expanding foam. Then use that to wet mold your leather. I agree with Bob though, might want to go heavier then 3oz for the cups
-
Getting A Feel For Clicker Services Needed.
Halitech replied to DoubleC's topic in Leatherwork Conversation
Only problem I see for me anyway, is the cost of shipping you the die and leather then paying to have it shipped back plus the time for shipping. Not saying that if you had a selection of dies available and I could buy the leather and have it shipped to you then just pay for shipping back to me that I wouldn't take advantage of it -
beautiful work
-
 nice work and definitely not something I'd want to try right now
 -
Man's Cuff, Goat, Veg Tanned And Roo Lace
Halitech replied to DoubleC's topic in Collars, Cuffs, Leashes and Leads
looks really nice, still say the mexican loop would have looked better but what do I know, I'm just a guy after all -
May Keep Making Stuff Challenge
Halitech replied to thefanninator's topic in Leatherwork Conversation
Congrats on the new house and baby, my condolences on no sleep for the rest of your life