


Halitech
-
Posts
1,229 -
Joined
-
Last visited
Content Type
Profiles
Forums
Events
Blogs
Gallery
Store
Everything posted by Halitech
-
Hidepounder (Bob Park) 2015 Al Stohlman Award Winner!
Halitech replied to silverwingit's topic in Leatherwork Conversation
Congrats Bob, your work is above outstanding and your willingness to help the rest of us out, makes you truly worthy of the award -
what I've done is only use very light pressure then lay it on a flat surface and run my burnisher over it to eliminate the mushroom
-
My First Holster
Halitech replied to TUFFENUFF's topic in Gun Holsters, Rifle Slings and Knife Sheathes
I agree with Otto, cut and then sand the edges so you get a more uniform edge then use a wing divider to get your stitches closer to the edge. They should be about 1/8" - 3/16" from the edge. Then once you have your stitching done, sand it lightly again and then burnish. -
More Bracelets
Halitech replied to Fordpkup's topic in Purses, Wallets, Belts and Miscellaneous Pocket Items
cool idea on using a small rivet for the primer on the shell, never would have thought of that -
If you have the room and access to one, get a small compressor and air brush for your resolene, you won't get any streaks that way
-
 carving and colors look great but I think I would have gone with 2 straps on the edges instead of just 1 in the middle
 -
Bifold Wallet For My Dad
Halitech replied to RStevenson's topic in Purses, Wallets, Belts and Miscellaneous Pocket Items
Very nice and I like the way you rounded the inside corners of the slots -
Bikini Handcuff Pouch
Halitech replied to kiwican's topic in Gun Holsters, Rifle Slings and Knife Sheathes
Nice work kiwi. Have to admit when I saw you posting about a bikini I wasn't sure what to think I was going to see lol -
If you can rub it off, even slightly, then to me it's something topside. I've never seen tan kote do that before
-
The tan kote should waterproof them. How long are you letting them dry between each step?
-
Vinegaroon is not a dye, it's actually a chemical reaction with the leather so it's not really something that is going to work well with just trying to get the top layer colored. And it should take close to a month for a batch of vinegaroon to really work well. And as Red Cent says, dunk it, wait only a few minutes then put it in the baking soda solution. If you let it sit for a day and it barely touched the surface, your vinegaroon wasn't ready to use. Vinegaroon shouldn't have much of a vinegar smell once it's ready to use.
-
When I make a sheath, I make a tracing of the blade itself then add 1/4" around it. Then I cut both the tracing of the blade and the 1/4" outside to use as my welt. I use the same piece as my outline for the front and back piece. In case you are talking about the thickness, I try and get a piece of leather that is the same thickness of the blade are its thickest point. In both cases, it helps hold the blade without being too tight in case the snap/button stud doesn't get closed here's the tutorial I use when making one http://www.knifenetwork.com/forum/showthread.php?t=41280
-
Breast Cancer Awareness Bracelet
Halitech replied to DoubleC's topic in Purses, Wallets, Belts and Miscellaneous Pocket Items
that is cool, very nice -
PM sent
-
Guitar Strap And A Folding Knife Sheath Out Today.
Halitech replied to Chief31794's topic in Guitar Straps
nice work Chief and interesting combo but if that's what they want, they should be happy with it -
From the album: wallets
-

From the album: wallets
-

From the album: wallets
-
I had that happen on a belt I was making for my mother, I was the middle letter in her name and I inadvertently turned it sideways. I made a pattern of 3 sideways I's and moved her name to the sides. She still doesn't know the difference lol
-
I've done the same thing myself but it does look cool and someone that has never done leatherwork wouldn't know the difference
-
From the album: wallets
-
From the album: wallets
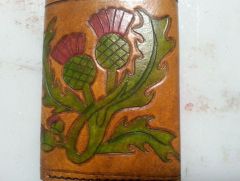
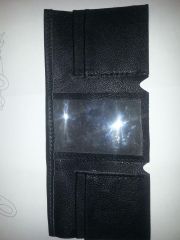
Part of a new tri-fold wallet design. Interior done with goatskin© Halitech
-
From the album: wallets
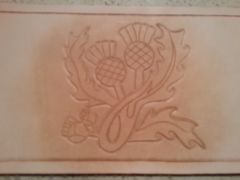
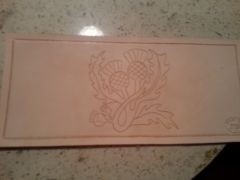
Part of a new tri-fold wallet design. Interior done with goatskin© Halitech
-
From the album: wallets
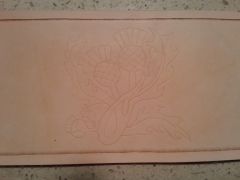
Part of a new tri-fold wallet design. Interior done with goatskin© Halitech
-
Bob, that probably does make more sense, I was told you could do it after to smooth it out. I guess it depends on how hard you press on it