pete
-
Posts
1,278 -
Joined
-
Last visited
Content Type
Profiles
Forums
Events
Blogs
Gallery
Store
Everything posted by pete
-
Beautiful work! How did you do the squares? Are they cut and double beveled or some sort of stamp? pete
-
Hilly- I don't know why you are having trouble. Are you pushing the awl through enough( both pieces) or just making a pinprick to mark the hole. I bought some egg eye harness needles in the 70's. I use them to sew lots of cases and covers(4/5-8/9 oz.) and haven't needed pliers to pull the needle. I do rub them with some 2000 grit sandpaper before I start though- makes them smoother.Some of them are actually rusty after 30+ years of non-use!!! pete ps- I have a CS Osborne from Hidecrafters. I just polished it up a bit on 2000 grit and I poke the hole all the way thorough- leaves plenty of room for the needle to pass
-

Money Cartridge Belt
pete replied to Warren's topic in Purses, Wallets, Belts and Miscellaneous Pocket Items
very nice and well worth the time. With what did you line it (wt., material, etc?) and what weight was the belt and lop material? pete -
Making veg tan more supple
pete replied to Chitin's topic in Dyes, Antiques, Stains, Glues, Waxes, Finishes and Conditioners.
bick's #4 pete -
Not sure. I'll get up there in a week or so, open it and take some close-ups for you. pete
-
Monthly Floral Carving Challenge
pete replied to ClayB's topic in Special Events, Contests and Classes
Great flower center. Where did you get it or did you make it? pete -
It is one piece of leather.If you want I can take more fotos of it next time I go to Springfield. I'll take close-ups of the inside and zipper attachment. pete
-
Beautiful work, as usual! I mentioned dry brush because I have been triny to paint with......paint! Acrylic paints. I would love a piece on dyes as they seem easier to get true colors with. I thinks that I am finished with "paint" as I hate the look anyway. I look forward to ANYTHING that you produce. pea-aire"
-
There is SO much talent here in the forum as SO little here at home! I can spend all day tracing Chan Geer flowers and Pete Gorrell patterns(they are really good tips by the way) but I can't for the life of me put a drop of dye or paint on a project that doesn't end up in the garbage!!!!!!! Would one of you talents PLEASE do a tutorial on how to paint or dye a simple flower or stem. All I end up with is purple and grey tones when I try to blend, say, a stem from dark green at the base to a light green/yellow tip. I have all of the A.S. and Peter Main books but I would love to see someone post a 4 or 5 frame tutorial on(dry brush) blending a simple piece so it looks semi-realistic. I'm ready to give up coloring all together and am tired of wasting my work. Thank you in advance pete
-
Get out the SUNGLASSES
pete replied to Elton Joorisity's topic in Clothing, Jackets, Vests and Chaps
Those are definite show stoppers! He'd better not tap off a dink or you will have them back in the shop for sale tomorrow! I rode at Cal Poly,San Luis Obispo but not well enough to sport that pair. For you golfers-Payne Stewart used to get ribbed about the plus fours(knickers) until they say him tee it up! pete -
Very possibly the most beautiful saddle and carving that I have ever seen. PLEASE post more of your work. respectfully, pete
-
luke- I was KIDDING. pete
-
I'll give you $18,000.00 for it........ oh wait... forget it.. I just bought a sewing machine
-
No- Peter doesn't wear rouge(I don't think) but if he does"it doesn't make him a bad person"(Rod Steiger;Illustrated Man) I just got his modelling tool yesterday. Fantastic is all I can say. My finishing work improved immediately. Not real cheap but definitely worth the price. I saw someone who bought white rouge(oxymoron?) and it was hard as a carp. I always thought it was hard as a rock naturally. One of you suggested they melt it with some olive oil. WOW! The stuff melts like butter when you put it into a hot pan. Took only a few seconds. I poured it into a dish and took it to my shop. It was almost hard again in 4-5 minutes. I did add a little oil and was able to make a paste though and it went on the business card backed by a paint stir stick really smoothly. Thanks for the suggestion Tess(I believe it was) pete
-
Monthly Floral Carving Challenge
pete replied to ClayB's topic in Special Events, Contests and Classes
TRACY_ You're and ANIMAL!!!! I LOVE the way that you used the thumbprints. Looks like you used a jack hammer on 15oz. leather. I mean it. I LOVE THE LOOK!!!!!! Gave me an idea for another project. thanks for the show by the way- how and with what did you finish it?? Color is great. pea-aire' -
REALLY nice job. Would you please take some close-ups of the seat tooling and the really neat border stamping on the side jockeys? Great job!! Bravo pete
-
A week or so ago someone went to a show and spoke to either Peter Main or Pete Gorrell about their casing procedure. They said that the person cased the leather then rubbed in Lexol and baby shampoo. Would the person who posted that please report as to their results. I'm hesitant about putting Lexol on a project(to keep it moist and easy to carve) if it is going to resist any additional water, change the absorption of antique, etc. Does it work ANY better than, say, carve- ease or any other casing solution? I BELIEVE that Bruce was the writer. pete
-
I like this one a lot better. pea-aire'
-
Monthly Floral Carving Challenge
pete replied to ClayB's topic in Special Events, Contests and Classes
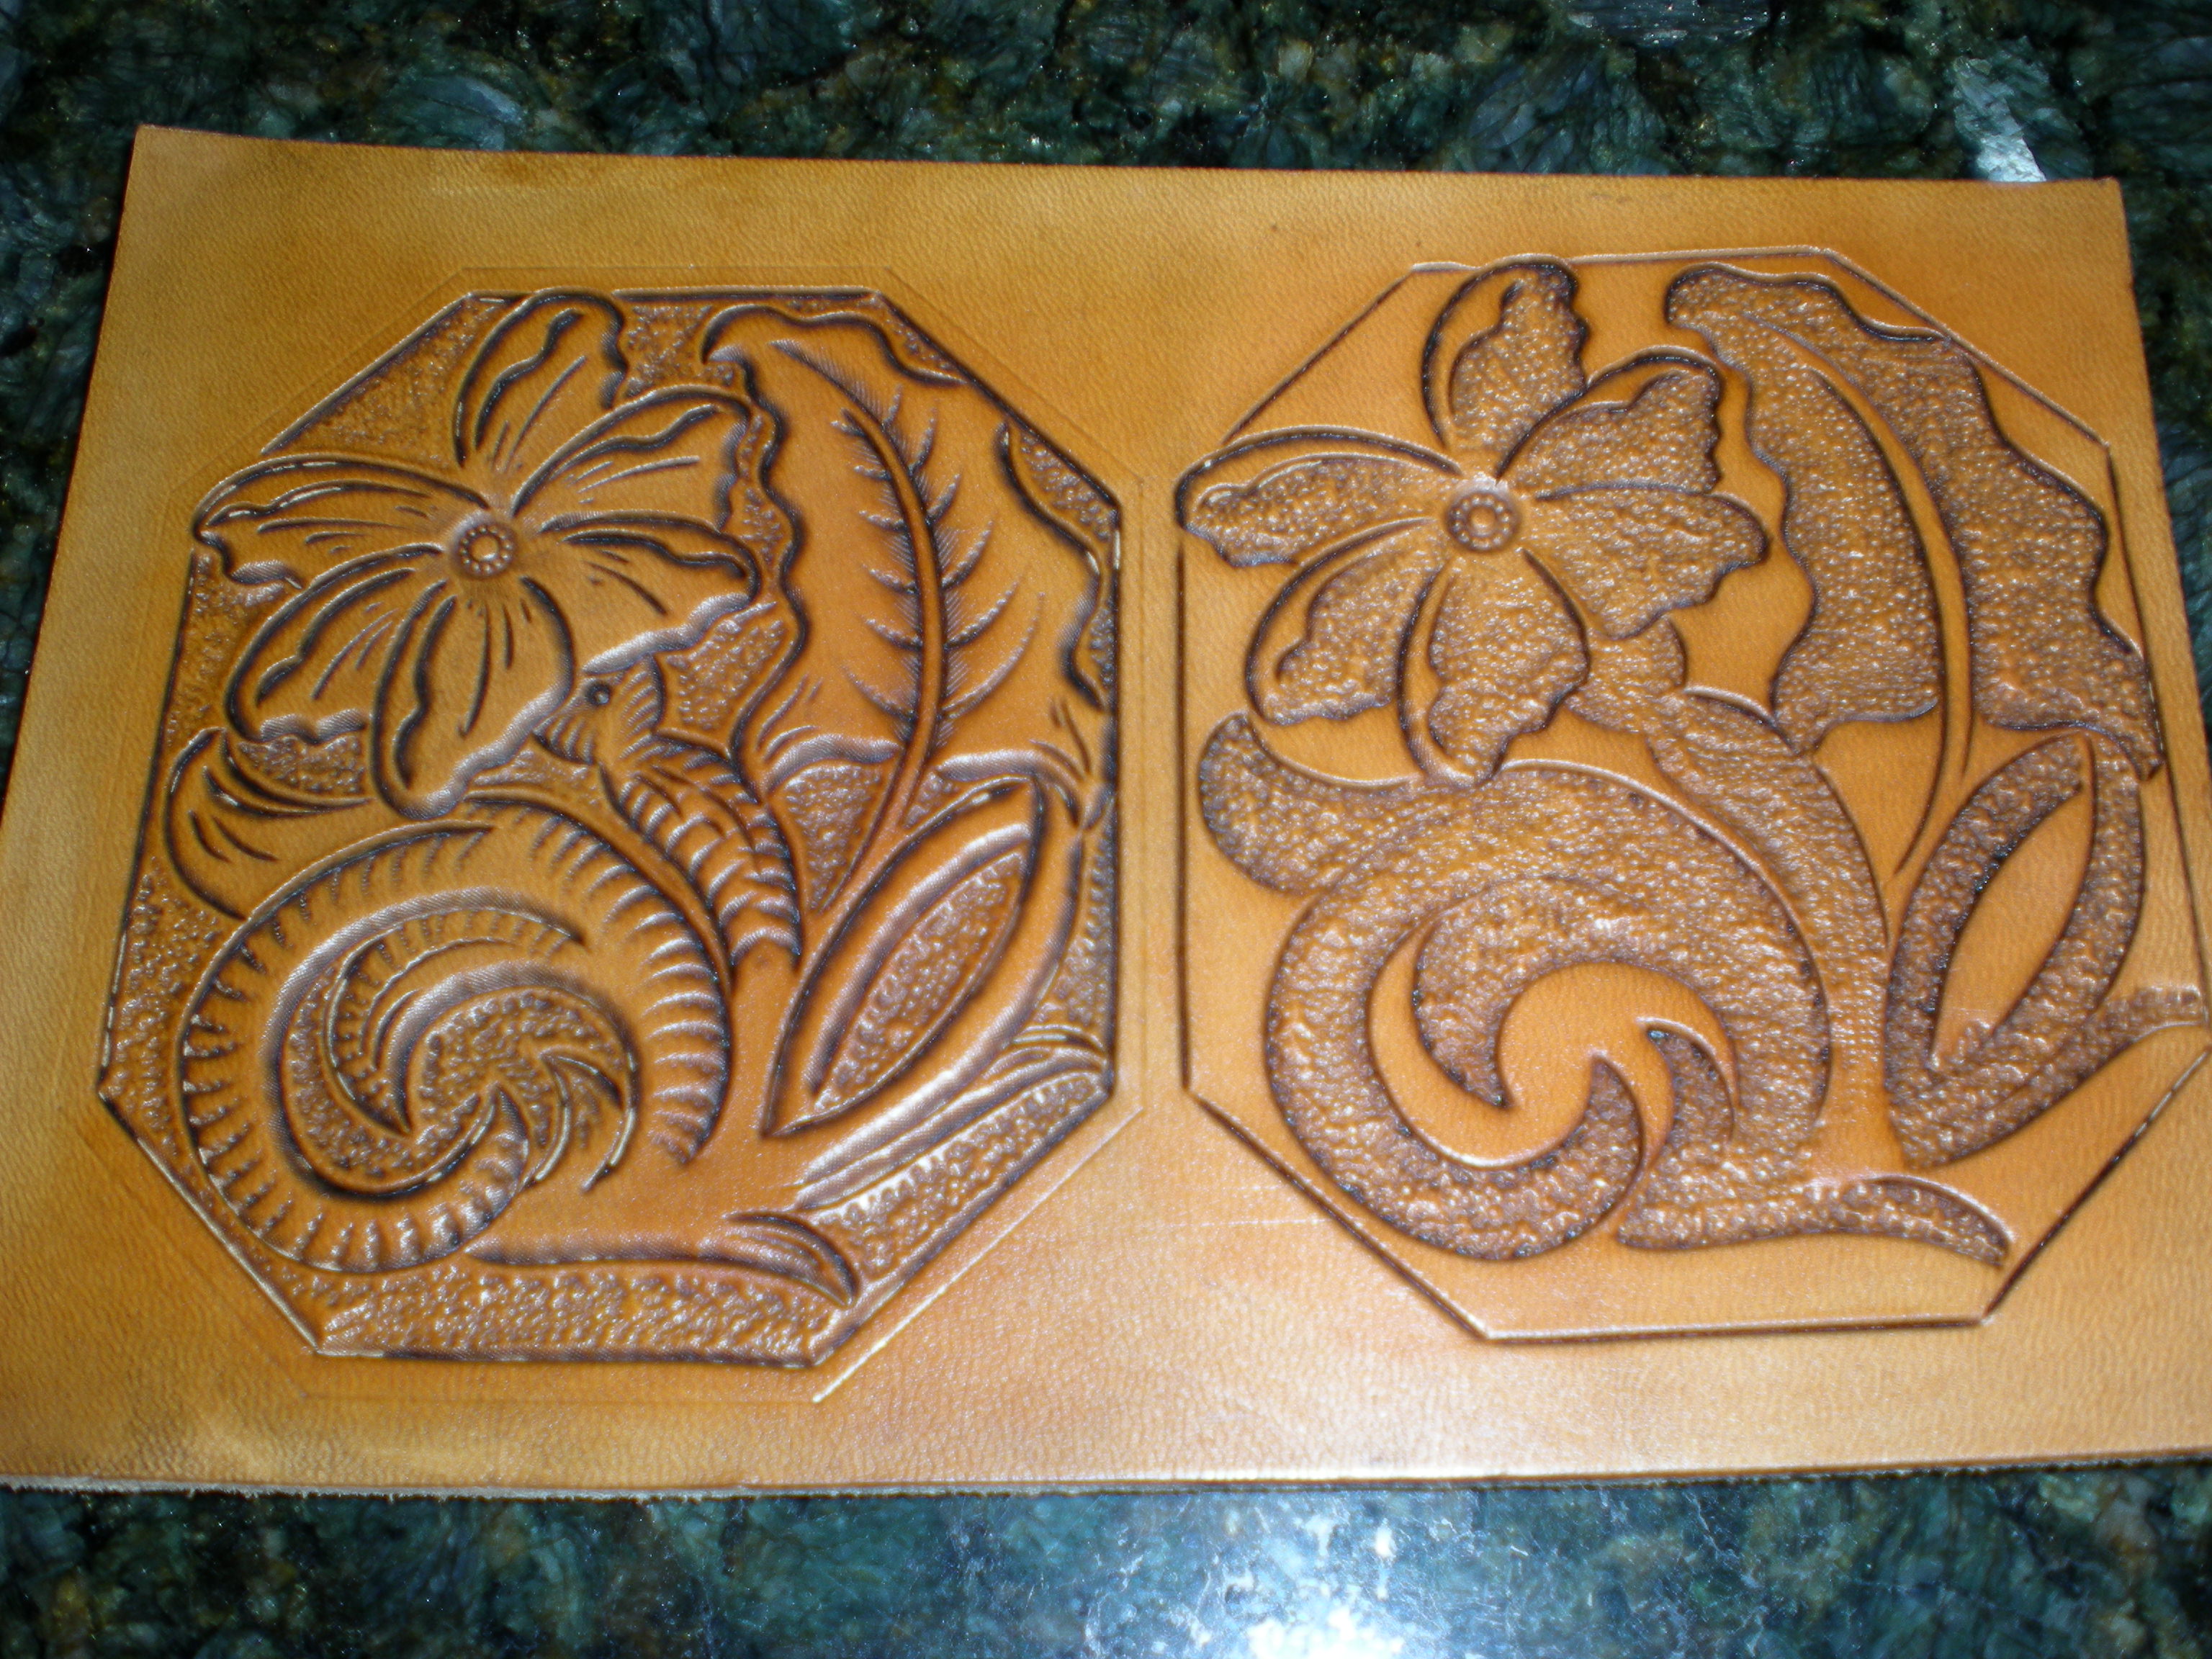
Thank you Tina! I really admire your work so your compliment is special! By the way- WHICH inverted did you like? If you look at the left one it is inverted too! I just don't know how to do it yet!!! pete -
Monthly Floral Carving Challenge
pete replied to ClayB's topic in Special Events, Contests and Classes
I thought when seeing the Yaklady picture that I could do something really neat. I first thought that I would do an inverted design and(something that I had never seen before) background the OUTSIDE of the design. I've never done inverted before and I was crosseyed afterwhile! All of my instincts told me to bevel the OTHER side. I finished the cutting , beveled the insides and promptly backgrounded the part I wanted natural! Oh well- my leather was large enough to do another next to it so I tried again. This time I did what I had in mind but I don't think that I like the effect. Oh well- It only took about an hour and a half to do it all. Hope SOMEONE likes it!
-
P.S. Never strop your swivel knife on the leather. ??????????WHAT???? explain please
-
It was so cold here this morning that I saw a dog stuck to a fire hydrant.
-
Really neat! Where did you get the cool letters? I LOVE the "stuff" in the middle of them. Could you post a close-up of them!? pete
-
I just got some 1.5oz "tooling" pigskin from a leather place today. It was kind of shocked as I had NO idea as to what to do with it. It was "titty pink" felt like shiny cardboard, etc. There was no way that I was going to waste time trying to tool it. Didn't know what to with it until I decided to make another checkbook. I didn't want to try to split the heck out of 6/oz for the pockets so I took the pigskin and glued it flesh to flesh. Perfect thickness. Works great and a neat feel/look. I was curious though- what do you folks use tooling pig skin or mission grain for? I bought some and tried to line a belt with it. the stuff doesn't stretch (I knew that) but unless I sewed the belt, it buckled after straightening it to put the tongue though the buckle and I had glued the heck out of it. Bo Riddle at Springfiled told me that lot's of customers like to line things with the Mission pig but do you all sew your pieces(unless it's a flat, non-bending project of course?) PS- I FOLDED the pigskin and used the folded edge for the top of the pockets. Got a real nice burnished edge- much better than trying to burnish 2 edges glued together. pete
-
Call Springfield Leather in MO. They have what you want(the old Hidecrafter checkered steep style) for $5.00 apiece. They always have them on the counter in a tool holder with other tools. Most of the time they are $1.99-$3.00 apiece. Call and ask. I have them(the PB series.) and they are all that I use. I ordered a Bob Beard steep beveler and paid a lot for it. I don't like it It doesn't have the sharp edge that the Hidecrafters do and tends to run out of the cut .