.jpg.d60258221c476480a6e073a8805645bb.jpg)

Wyowally
-
Posts
125 -
Joined
-
Last visited
Content Type
Profiles
Forums
Events
Blogs
Gallery
Store
Everything posted by Wyowally
-
Some rifle slings I made (part 2)
Wyowally replied to Garyak's topic in Gun Holsters, Rifle Slings and Knife Sheathes
Just amazing beautiful work! -
No skinny v-belt experience, but using the rough surface urethane drive belt material that you heat weld has worked well for me. If I screw one up I'm out about 50 cents..
-
Saddle Scabbard
Wyowally replied to dbusarow's topic in Gun Holsters, Rifle Slings and Knife Sheathes
He did really nice work on this. Everyone's experience, terrain and horses are different. I rode pretty far back in some pretty rough country and helped an outfitter friend for a number of years. All that called for carrying expensive rifles in scabbards, sometimes not knowing if the horse would act up or not. My only comments aren't about the superb workmanship, but more towards security and protection. - our preferred attachment method was on the off side, butt forward, scope on top. If the rifle has a long sling that won't shorten or tuck then there is always the chance of the rifle getting yanked out in thick timber. Scope up, because they aren't delicate but still vulnerable if the weight of the rifle is resting on it and the mounts. The fender over the scabbard. Rubbing the horse shouldn't happen. - we preferred wider attachment straps and I know the OP was just showing it on the horse. The straps hold the weight and though they are doubled only need to break in one spot. Even so, shorter straps attached to the cinch rings are stronger and more secure. Even good horses blow up, and if they do it without a rider with those long straps attached somewhere on the opposite side and rifle in the scabbard it is going to flop all over the place and likely come off. Also don't like seeing the front strap coming right across the neck, even if it is on top of the blanket/pad. I know it is a resurrected old thread. I also know that other people get by just fine with their methods. This is what worked reliably for us. -
Anti slip for shoulder strap / gun sling?
Wyowally replied to HavnerDesign's topic in How Do I Do That?
I horseback hunt and use a regular saddle scabbard when mounted. I tried but don't like any of the extra wide at the shouder slings because they make it harder to get the rifle in and out. I made up a sling with the leather slit sliding strap keeper and 1 1/4" wide strap. Then on the back side where it rides on my shoulder I attached two parallel strips of leather about 8" long - where others have put suede. The strips are rough side out and have a 3/8" gap between. They're attached with a single row of stitching. The theory being the edges of the strips will catch and hold from slipping better. They can twist a little, and the gap between can allow some of the coat or jacket fabric to go up between for a little more friction. Also added a thumb strap. Works OK so far, but haven't tested with different jackets. More pictures if anyone wants them.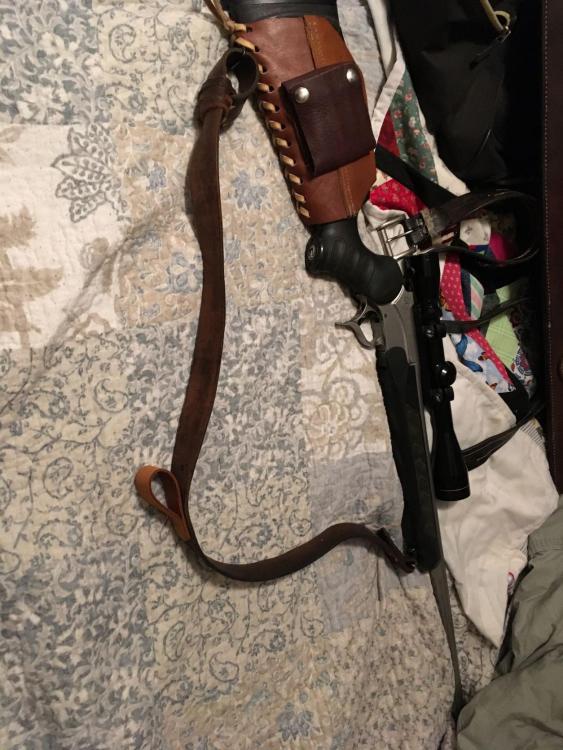
-
A 15-91 is a sought-after machine by the vintage Singer people with good reason. The direct drive motor is powerful. Instructions for complete motor rebuilds are out there for those who want to take it on. The question was does it draw power when just sitting there plugged in - no, it shouldn't, just like most other domestic pedal controlled machines. It COULD if there is a problem with the pedal, cords, or the light or motor wiring. If it does, I would suspect the pedal first. Power doesn't get to the motor except through the pedal. The way Singer designed their connectors makes it challenging to rewire and get correct, and you never know if Bubba worked on it and screwed something up.
-
Thanks, suzelle! I struggled mostly with setting and adjusting the eccentric on the main upper shift that adjusts foot lift and foot coordination. I even bought a new eccentric, because the function and adjustment was not clear from the information I could find. I did not need it as the original was OK but missing a couple screws. All good now.
-
Decals from singerdecals.com - not exactly as originals but from a set they sell for 'Singer 31-Monogram decals for commercial restorations". 20 bucks when I got them. And thanks! All my questions were answered here and on Uwe's videos.
-
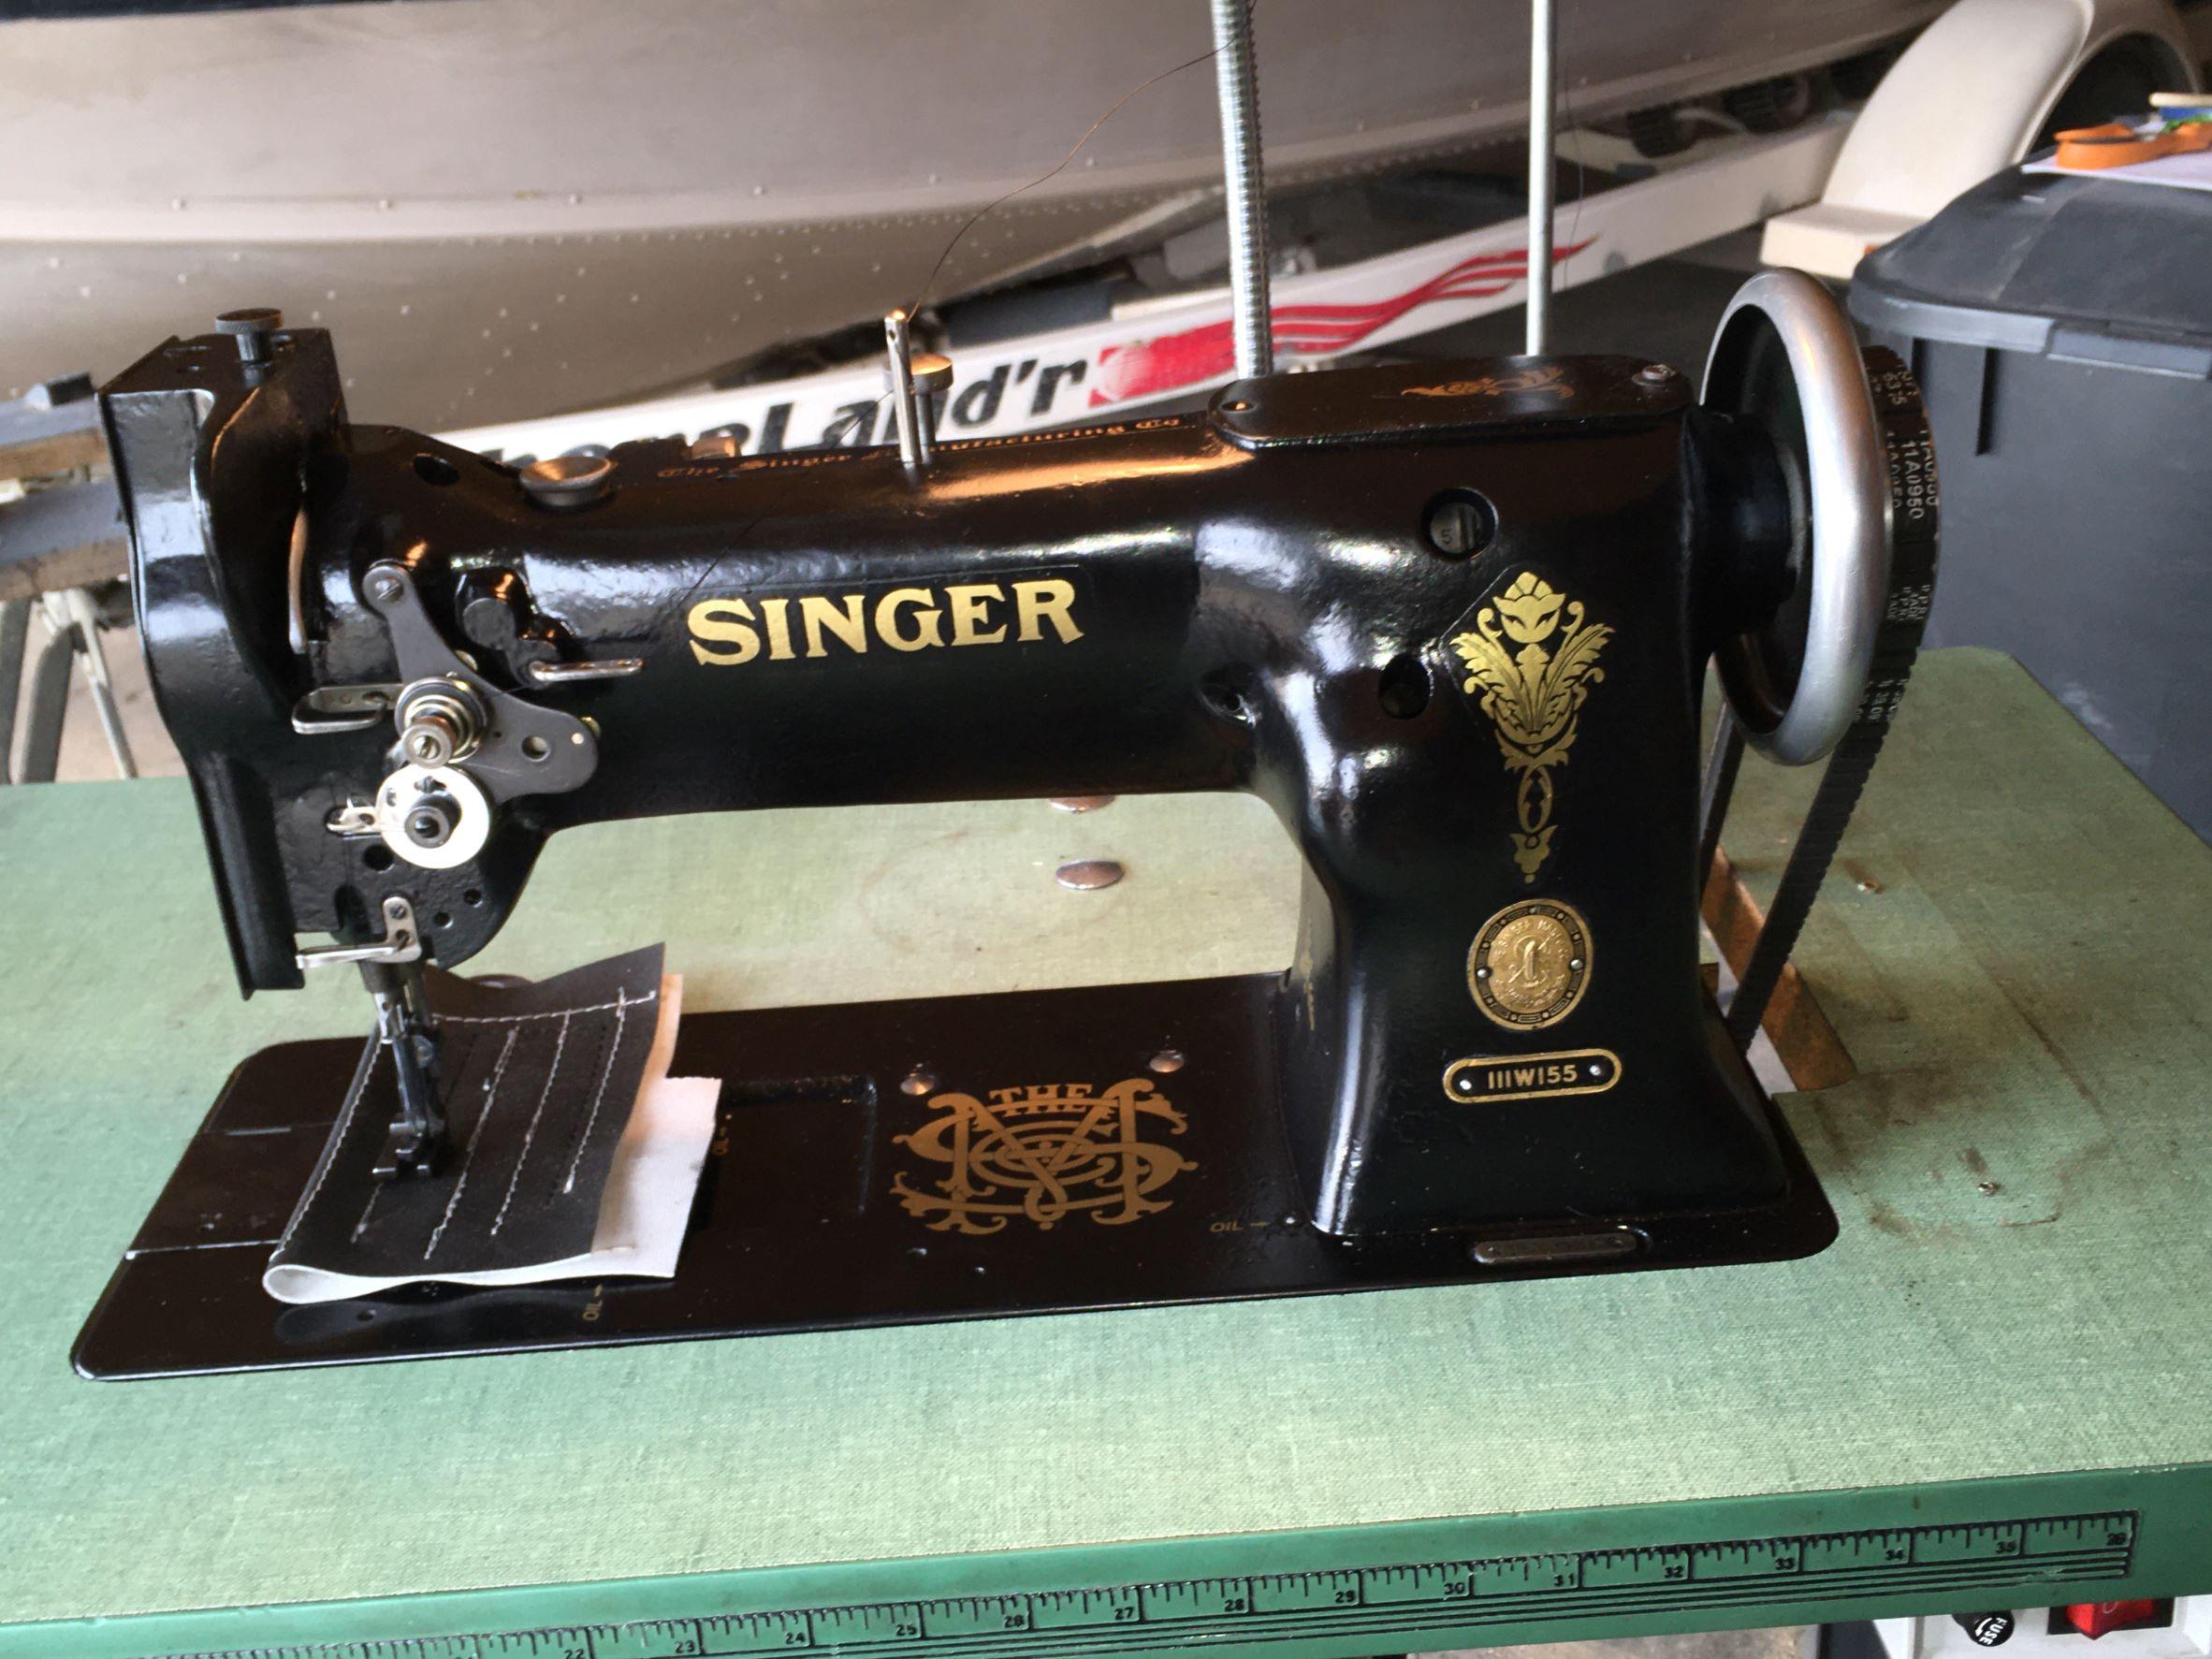
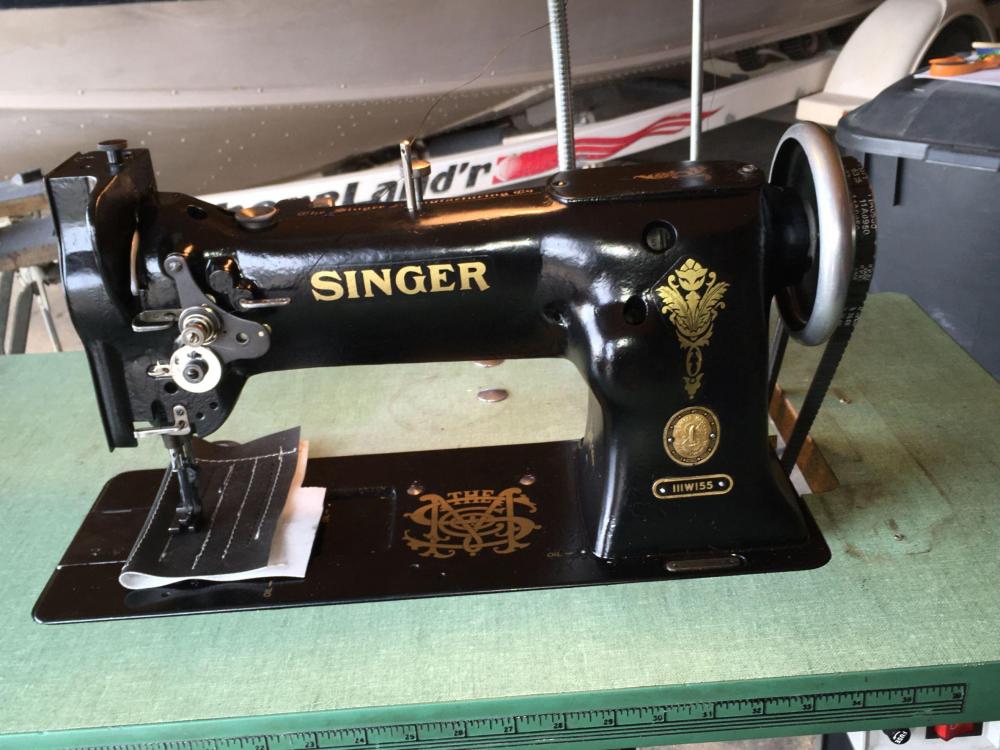
I found refurbishing my 111W155 a very rewarding project. Adjustments made sense and parts all robust. Resource documents are out there. I think you'll be happy with it and looking around for things to do with it!!
-
Glenn knows if anyone does......
-
I have seen some comments on brushed vs. brushless servos but have no experience. Not sure what the true differences are in terms of super slow speed running vs. torque. Some say brushless is the only way to go, yet my brushed CSM550-1 does everything I want on a Singer 111W155 without needing a speed reducer. I did go with a smaller motor pulley. YMMV
-
I only use the 2nd one on the left when I wind bobbins. Don't have to change settings for either one that way.
-
I know, but the truth is you are becoming an expert on your machine in particular! Just so you know, in case you didn't, there are about 5 military manuals floating around with various editions. A couple of them are better than others. I built a redneck knee lifting apparatus that works great, but don't recommend it. Bob, Wiz, or someone recommended one on here quite a while ago. It was advertised for a Juki I believe, but worked out good. I do suggest getting rid of (if yours has it) the lifter piece that goes down from the machine that has a little flat oval at the tip. One way or another, a system with a roller right at that point works smoother with less effort.
-
I'm enjoying following your experience with the 111W155 because it is very much like my own last year. Won't overload you or the forum with details, as most of them were posted here anyway. Just want to say I love the machine, it has been really worth it, and more than meets my needs. I even repainted it and installed new decals, because it is not leaving here. My most perplexing questions involved the internal feed lifting eccentric - to the point I bought a new one (not needed!) just so I could understand what it does and how it is supposed to work. Have fun!
-
I only learned recently that one of the advantages of brushless motors is they make considerably more low rpm torque than the brushed ones. Even so, the brushed servo I have on my 111w155 with 45mm pulley works well enough for me in terms of power and low speed running. I'm not sure what my machine pulley size is compared to yours, but it looks similar. My parts stores had the size and series belt like Wiz mentioned to you. I felt like I was the resident current expert also after going through my machine, but I am not. There are a couple of them here who are lightyears beyond me. I only need to run my servo on the 3rd setting on the dial to get what I want. I have pondered a reducer but the good ones cost more than my servo!
-
Clockwise it must go. I had all my timings and relationships out of whack, probably 180 degrees or half of a cycle. Thought I was stuck in reverse when I knew I had no reverse! Hope you get it figured out.
-
My attempt to enter the machine sewing world
Wyowally replied to Tio's topic in Leather Sewing Machines
If they started a forum for "first time attempts" yours would be one the better ones. I'm not sharing mine...... -
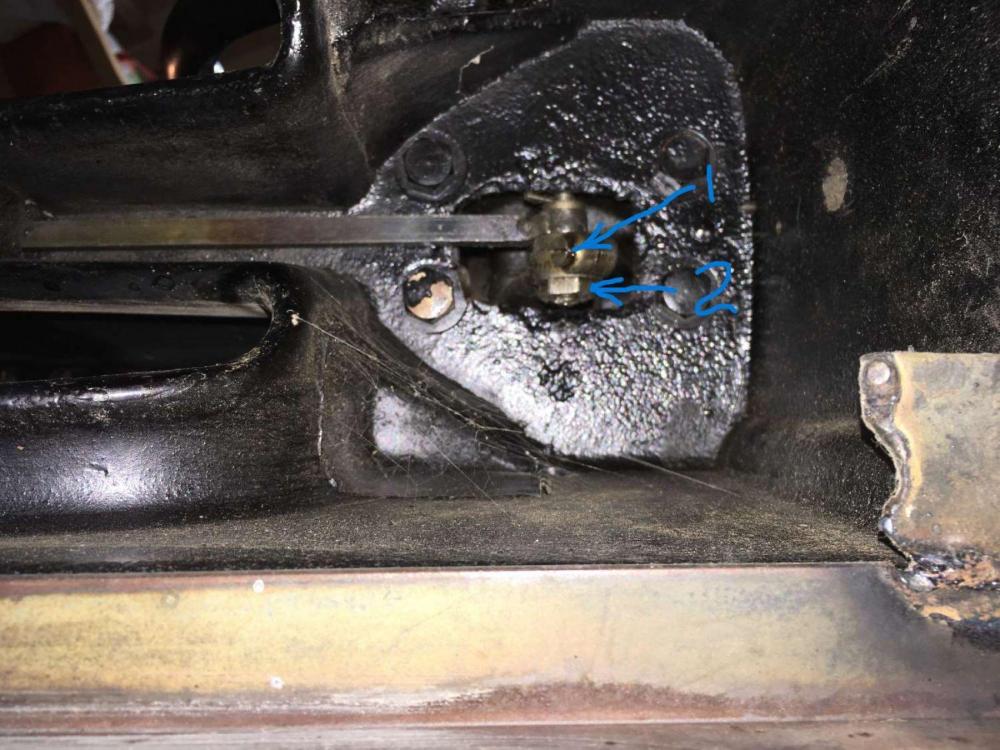
I had to learn about the timing adjustments underneath on the right side. On my back with extra lights to shine up in there. If I recall there is a pinch screw to loosen, then a screwdriver through an access hole on the back right side to rotate the screw freed up by the pinch screw. Our resident patcher expert ought to show up soon. Arrow 1 points to the pinch screw. Arrow 2 points at the nut that needs loosened. Then the screw can be turned from the back. Kind of an eccentric positioner if I remember right.
-
Almost every service manual I have shows very precise measurements for these settings. Some of the manufacturers made up some special tools and spacers, and they don't instruct us on anything except using those tools. I haven't been a jersey sewing person, more like Cordura and canvas for me. What I have seen when checking timing on the machines brought to me is needle eye-to-hook point being off. Sometimes that is hook rotation, but more often it is needle height. If the owner confesses about needle strikes or breakage I really suspect needle height. The little screws used to hold the needle bar in place are pretty wimpy on many machines - enough so I speculate about them being intentionally weak to help prevent damage from needle strikes.
-
I guess I'm not real concerned with scarf vs. no-scarf differences of 1/4 of a millimeter. I try to discover the adjustment procedure for each machine. I choose the needle I want to use and try it out, maybe watch the action and relationship hook to needle. I have not measured that gap in 4 or 5 years. I do use a tiny LED light and get where I can see things. I get the needle close without touching. It works. BTW, I helped a lady with a commercial long-arm quilting setup. That manufacturer in their own tuning videos, want the hook to just contact the needle so it makes a tick sound! Works for them, and it means to me that the hook just bumping isn't necessarily a bad thing. Nice info to know, but I will never use it.
-
If you're not familiar with our forum, you should know that you just heard from the recognized authority here for such things - Mr. Wizcrafts! No need to look further or wait for additional answers, IMHO.
-
Singer 111 going out of time consistently
Wyowally replied to Sugarkryptonite's topic in Leather Sewing Machines
The bobbin case opener is the common label in use for that j-hook shaped thingy. Page 15 in the USNavy manual (Wiz gave you in a link) describes exactly how I adjust it. Curious what manual you have Sugar? I just spent a half hour trying to find a number for the needle bar set screw (maybe a "clamping" screw) with no success yet. Many suppliers sell the needle bar with the thread guide and needle screw. Maybe one of the real experts can help. -
Singer 111 going out of time consistently
Wyowally replied to Sugarkryptonite's topic in Leather Sewing Machines
Great answer, Wiz! Every screw on mine was buggered a little, so fixed them up. I'd only suggest that the needle clamp screw can also get worn to where getting it truly snug is not easy or obvious. Fix if possible or replace is the way to go - needles can slip down or get pulled down when tight in material - like 3/8" thick stuff. The "little hook" must be the hook-shaped bobbin case opener. Those manuals explain adjusting it too. Amazing that a machine with adjustments close to spot on will run for years without issues! -
singer 111w155 Help with Singer 111w155
Wyowally replied to cynthiab's topic in Leather Sewing Machines
Cynthia, I acquired my 111W155 last spring, and posted a number of questions on here. Sometimes the answers take a day or two to show up, but I've gotten great advice. Some of the manuals from our armed services are pretty good. I have been part of a FB group "Vintage Industrial Sewing Machines". Several of those manuals are in their 'Files' section. Some of the best videos are on YT done by Uwe Grosse. He is also on this website. The Consew 225 is almost a direct clone and most of parts and adjustments are the same.The finger distance you asked about changes with rotation of the system, so needs to be adjusted accordingly. It is called the bobbin case opener lever. If you turn the handwheel towards you so that the square block the opener is screwed to has moved as far right as possible, with the screw loosened slightly you should be able to fit a couple thicknesses of paper right there where your arrow is pointing. Always turn it over by hand when adjusting this, you don't want it to bind up under power ever. Might need a little more or less adjustment after that. Hope that helps. The cog you asked about is confusing. It would help if you had a picture from a little farther out, but also the end view. The safety clutch is normally held tight to the shaft by one or two set screws, so it can't move to the side. The manuals and videos show that pretty well. -
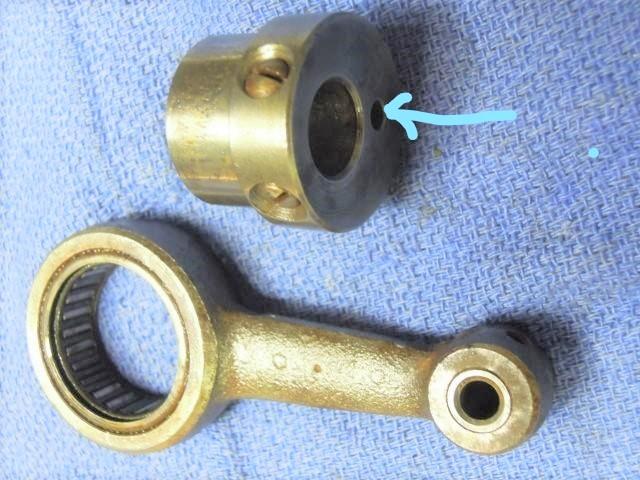
Maybe answered my questions this morning: One set screw is holding and looks like enough to do the job. The screw that locks the slide is sort of extra insurance, as mine doesn't want to move anyway. The dimple hole in the end may be a timing mark of some kind, but it would only show doing a complete assembly, it is hidden when all together. Placement on the driving shaft can be done by trial and error - too much one way or the other and one of the feet won't raise as much as the other. That should be done while adjusting the linkage travel of the rock shaft, either the pinch screw or the banana slot as all the lifting factors affect each other.
-
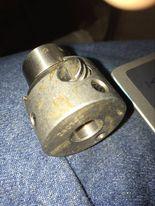
I'm still trying to figure out everything I don't know about the feed lifting eccentric on this 1956 model 111W155. It's not a showstopper, it's just bugging me. Machine is sewing pretty well, standard lift of both feet is about 5/16" when sewing. I took the liberty of copying a pic from another post showing the eccentric. I actually bought a replacement 240744 but not going to use it unless I just have to. The question for the group is: if the set screws that hold this on the driving shaft are loose, how is the eccentric set on the shaft? The picture has an arrow pointing to a shallow hole, and I'm thinking that has a purpose in timing and alignment. My original has one set screw remaining and the actual adjuster screw, but not the screw that locks the slide. Not sure if the screws on the new one are the same pitch. as they are allen head set screws and the originals were slotted. Added pic of my replacement, slightly different.