Uwe
-
Posts
2,220 -
Joined
-
Last visited
Content Type
Profiles
Forums
Events
Blogs
Gallery
Everything posted by Uwe
-
 Just a visual for after that Ebay auction expires:
-
Congratulations on your newfound machine bounty! The whole lot was worth exactly $500 a few days ago. You may get more for them individually if you market and present them properly. Tip: don't tell potential buyers you got the machines practically for free.
-
Information on Chandler C75/ or Mitsubishi LU-105
Uwe replied to simran's topic in Leather Sewing Machines
If that Chandler C-75 is indeed a Mitsubishi DU-105 with a Chandler badge stuck on it, then it would be a good candidate for $300, provided that all it needs are adjustments and wear parts. That design shares great deal with the Seiko LSW-8B (Consew 339RB) and those machines are workhorses in my experience. They survive decades of hard work outside their specs with little love and even less oil. If that Chandler C-75 is not a close relative of those machines mentioned above, I'd stay away simply because it's apparently as rare as a spotted pink elephant and you won't be able to find parts unless you know who actually manufactured that machine. I still want to see a picture of a Chandler C-75. -
Information on Chandler C75/ or Mitsubishi LU-105
Uwe replied to simran's topic in Leather Sewing Machines
Do you have any pictures of that Chandler C75? Nothing comes up online for that model (not for a Mitsubishi LU-105, either.) A single letter can make a big difference in those model names (DU or LU?) I'm just not sure which machine we're actually talking about here. -
All things Pfaff 145 (info, tidbits, maintenance, etc.)
Uwe replied to laether's topic in Leather Sewing Machines
Welcome to LW, Laether! Those Pfaff 145 are great machines and fairly easy to maintain. Here's a video I made recently about the safety clutch on the Pfaff 145 and 545: Here's a video that goes over the walking foot timing for the Pfaff 145/545 and many similar machines. And one about how to insert the bobbin on a Pfaff 145: -
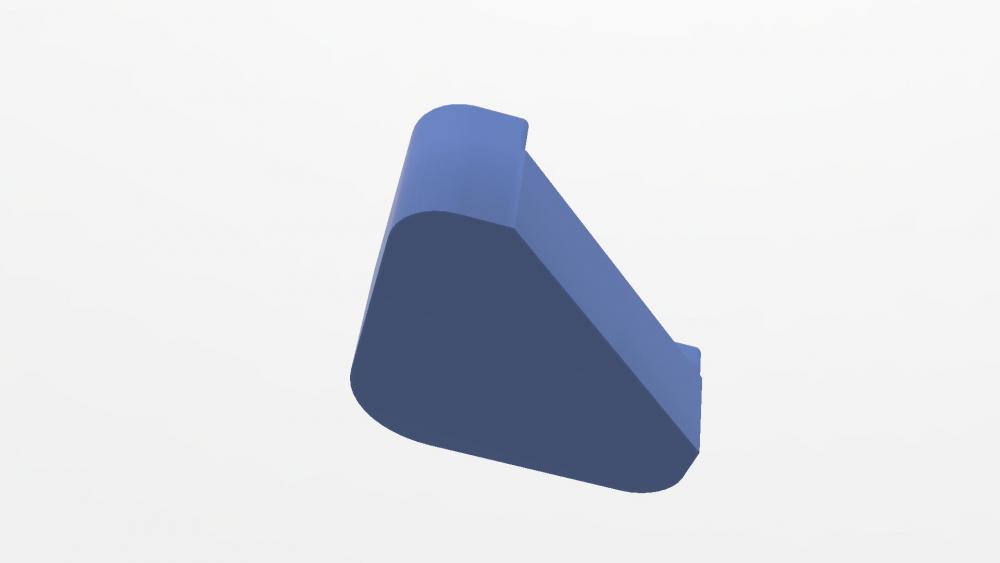
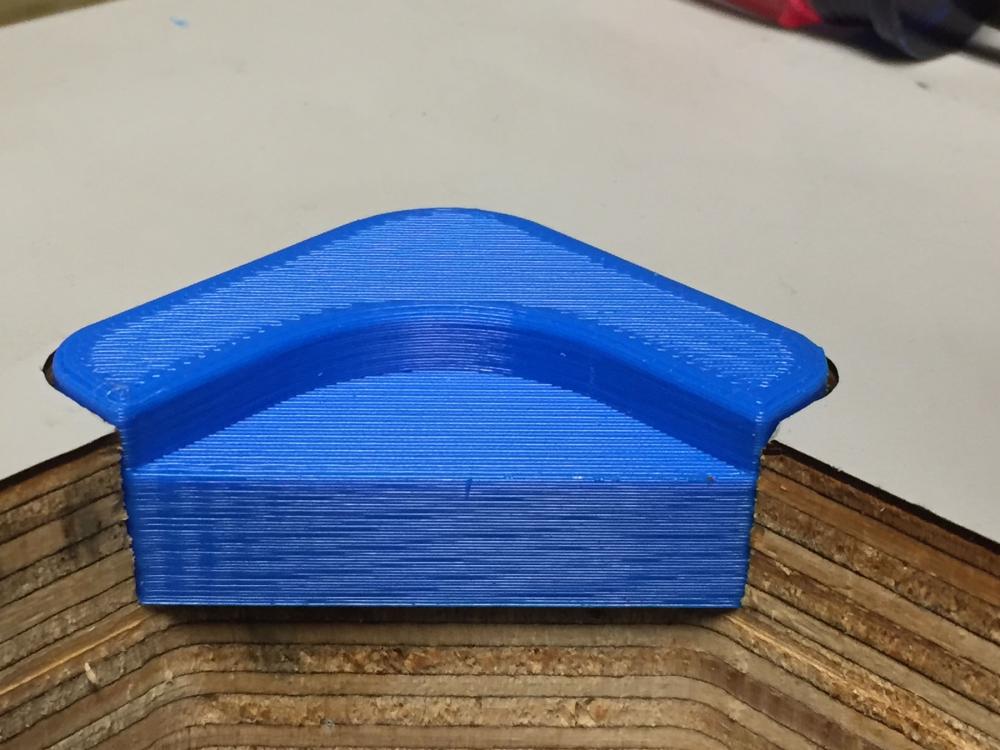
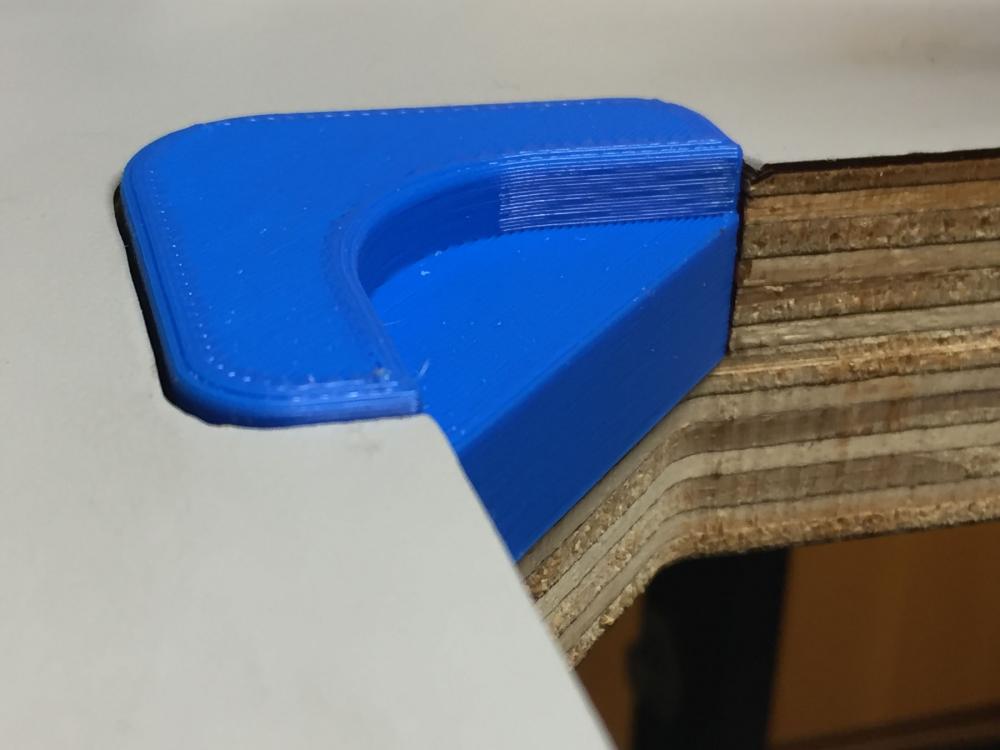
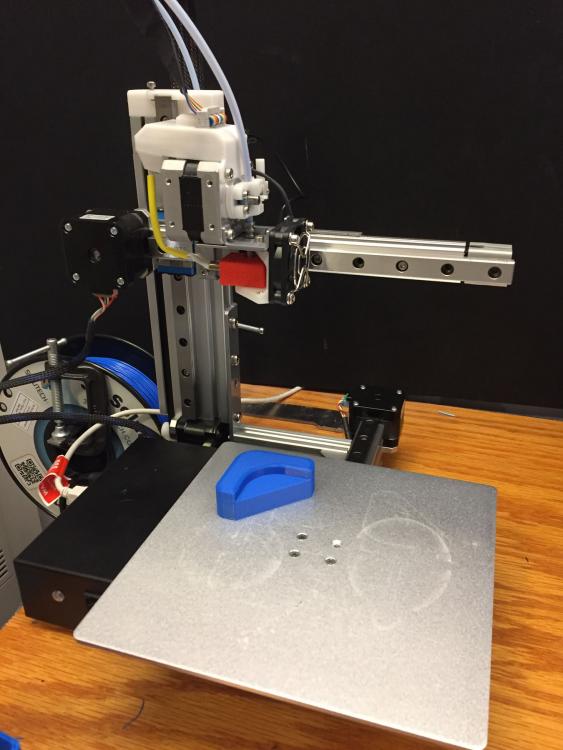
Show & Tell: 3-D printed corner supports for sewing table
Uwe replied to Uwe's topic in 3D Printers and Lasers
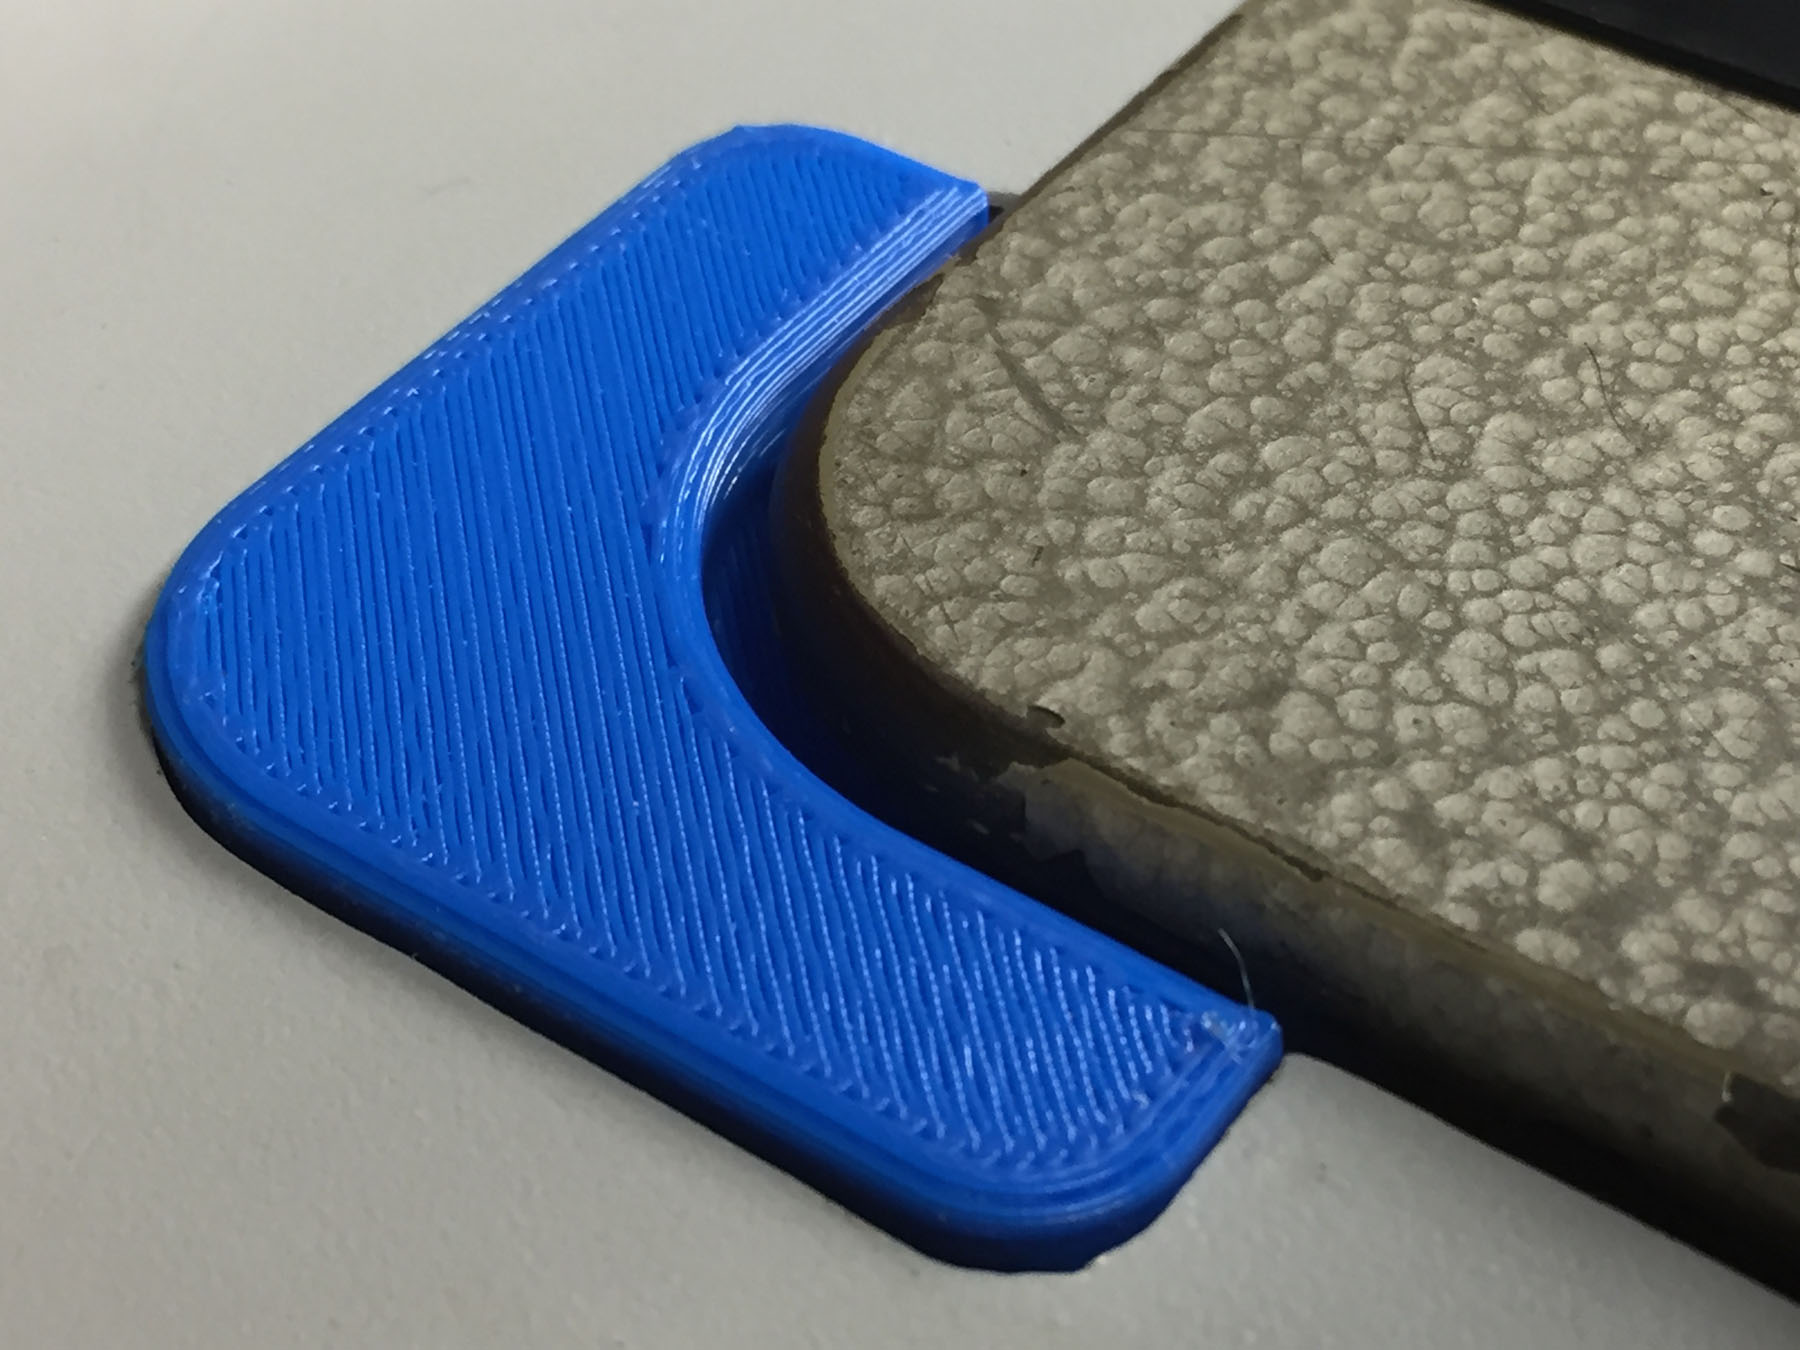
Material cost of the PLA filament was about $1 per part. Flexible rubber-like filament would cost about $4 per part and requires a heated base plate. @koreric75 Fusion 360 is a great industrial strength CAD program that you can use for free as a hobbyist or small business. It's a very powerful system with lots of features, but the learning curve is steep and long. You can sand, file, saw, drill and Dremel these parts like most plastics - if you go very slowly. Friction heat will melt the plastic again and gum up the tools. Machinability also depends how dense/solid you print the part - the inside can be nearly solid, or just a light, hollow lattice support structure.) These corner supports are almost solid plastic to make them strong. I had to file the first corner support a little because the outer radius wasn't quite right. I then adjusted the CAD model and the second part slid right in place. For this particular part, a wooden piece made with a router would have accomplished the same thing. @dikman GrabCAD is just the first CAD community I connected with. I had downloaded a few other sewing related models there and John Saunders of NYC-CNC had mentioned it on several occasions. I'll have to check out Thingyverse, too. @Constabulary It took about an hour to print per thingy. I'm not into guns but, yes, you can print mold dies for making various wet molded leather gear. @RockyAussie I'd have to sell quite few more sewing machines to make room and money for a bigger 3d printer, the next step up is ten times more expensive. I'll be busy making small parts for a while. -
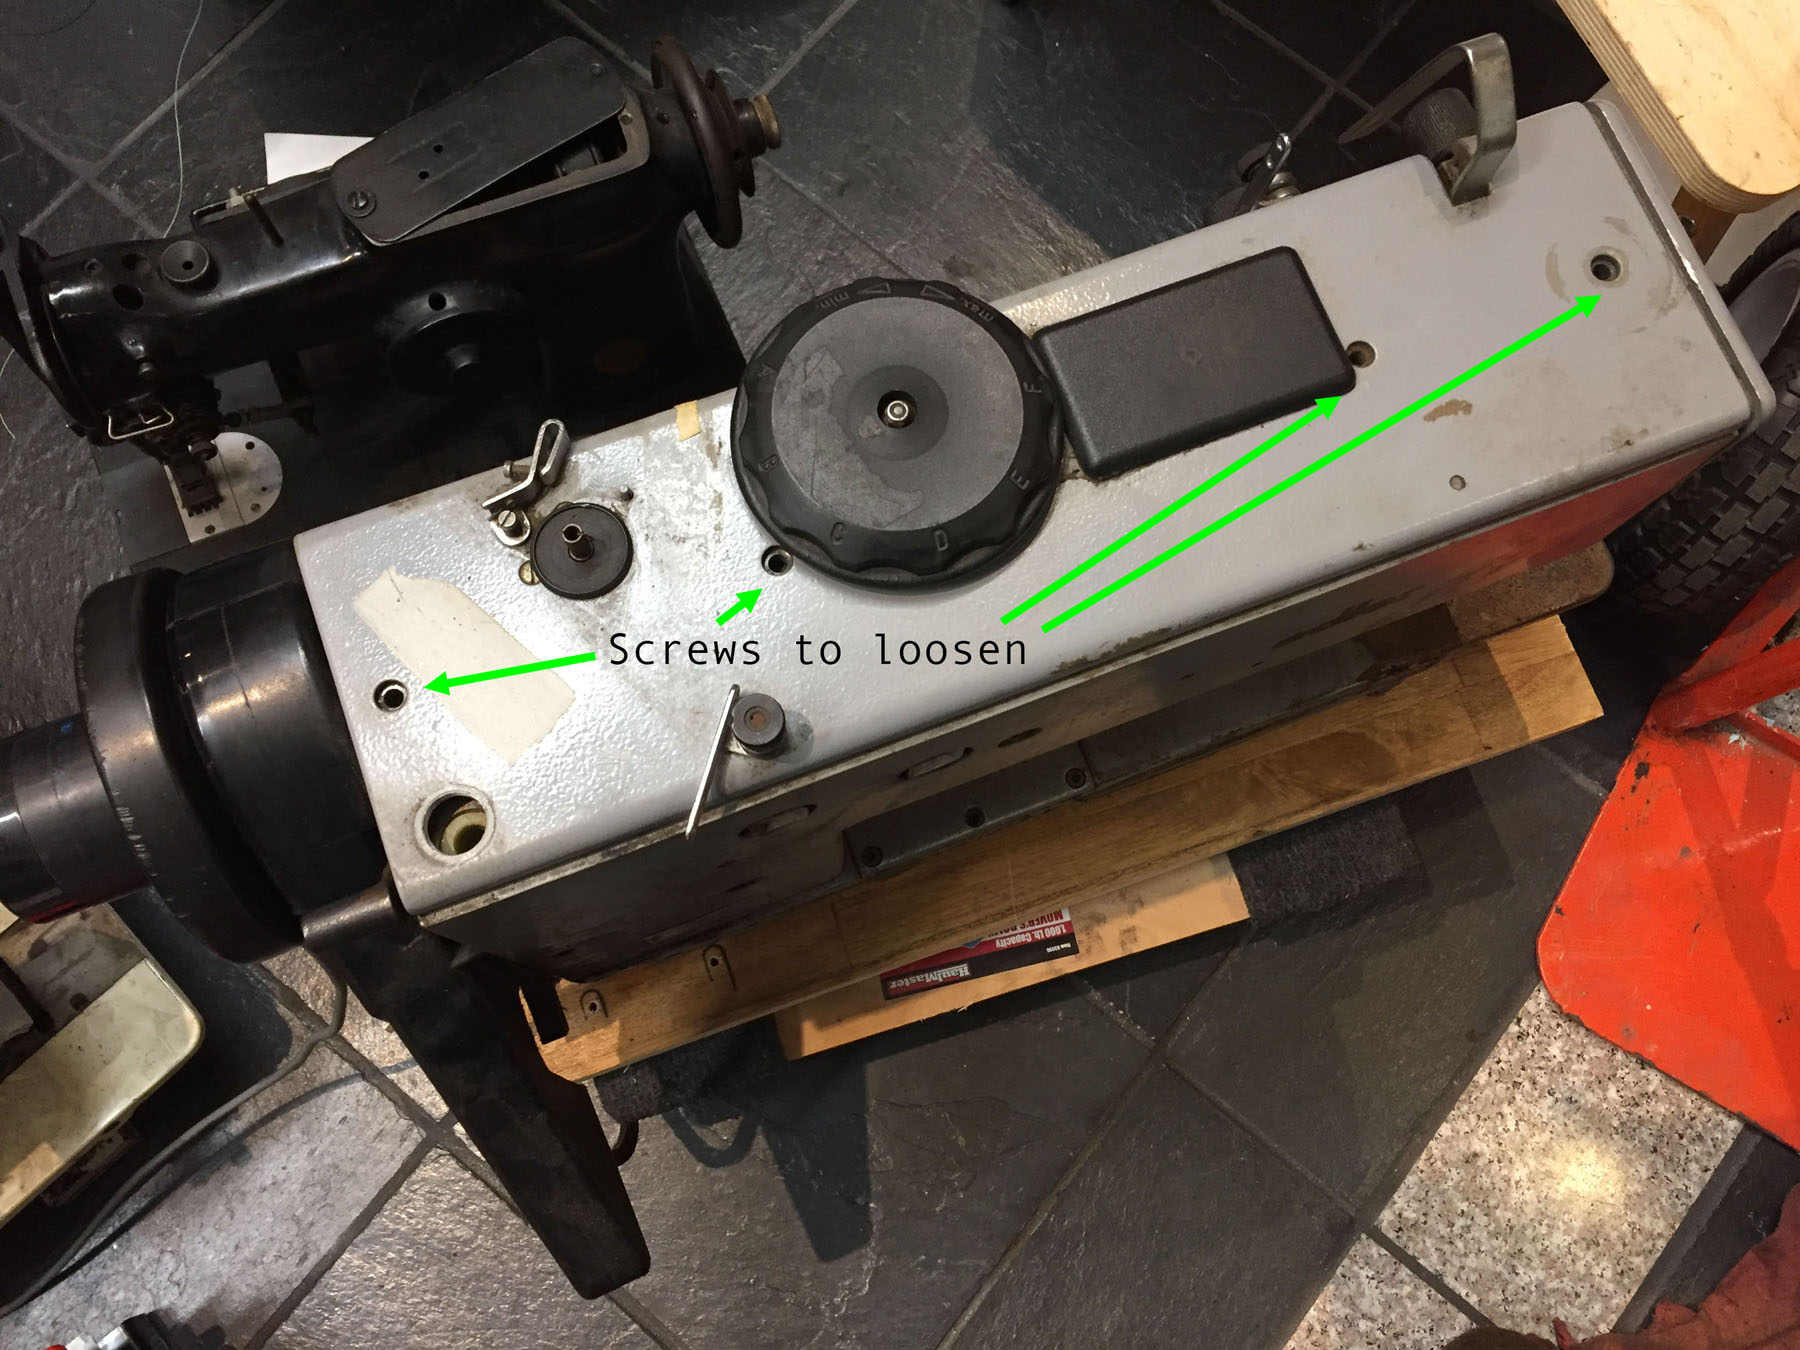
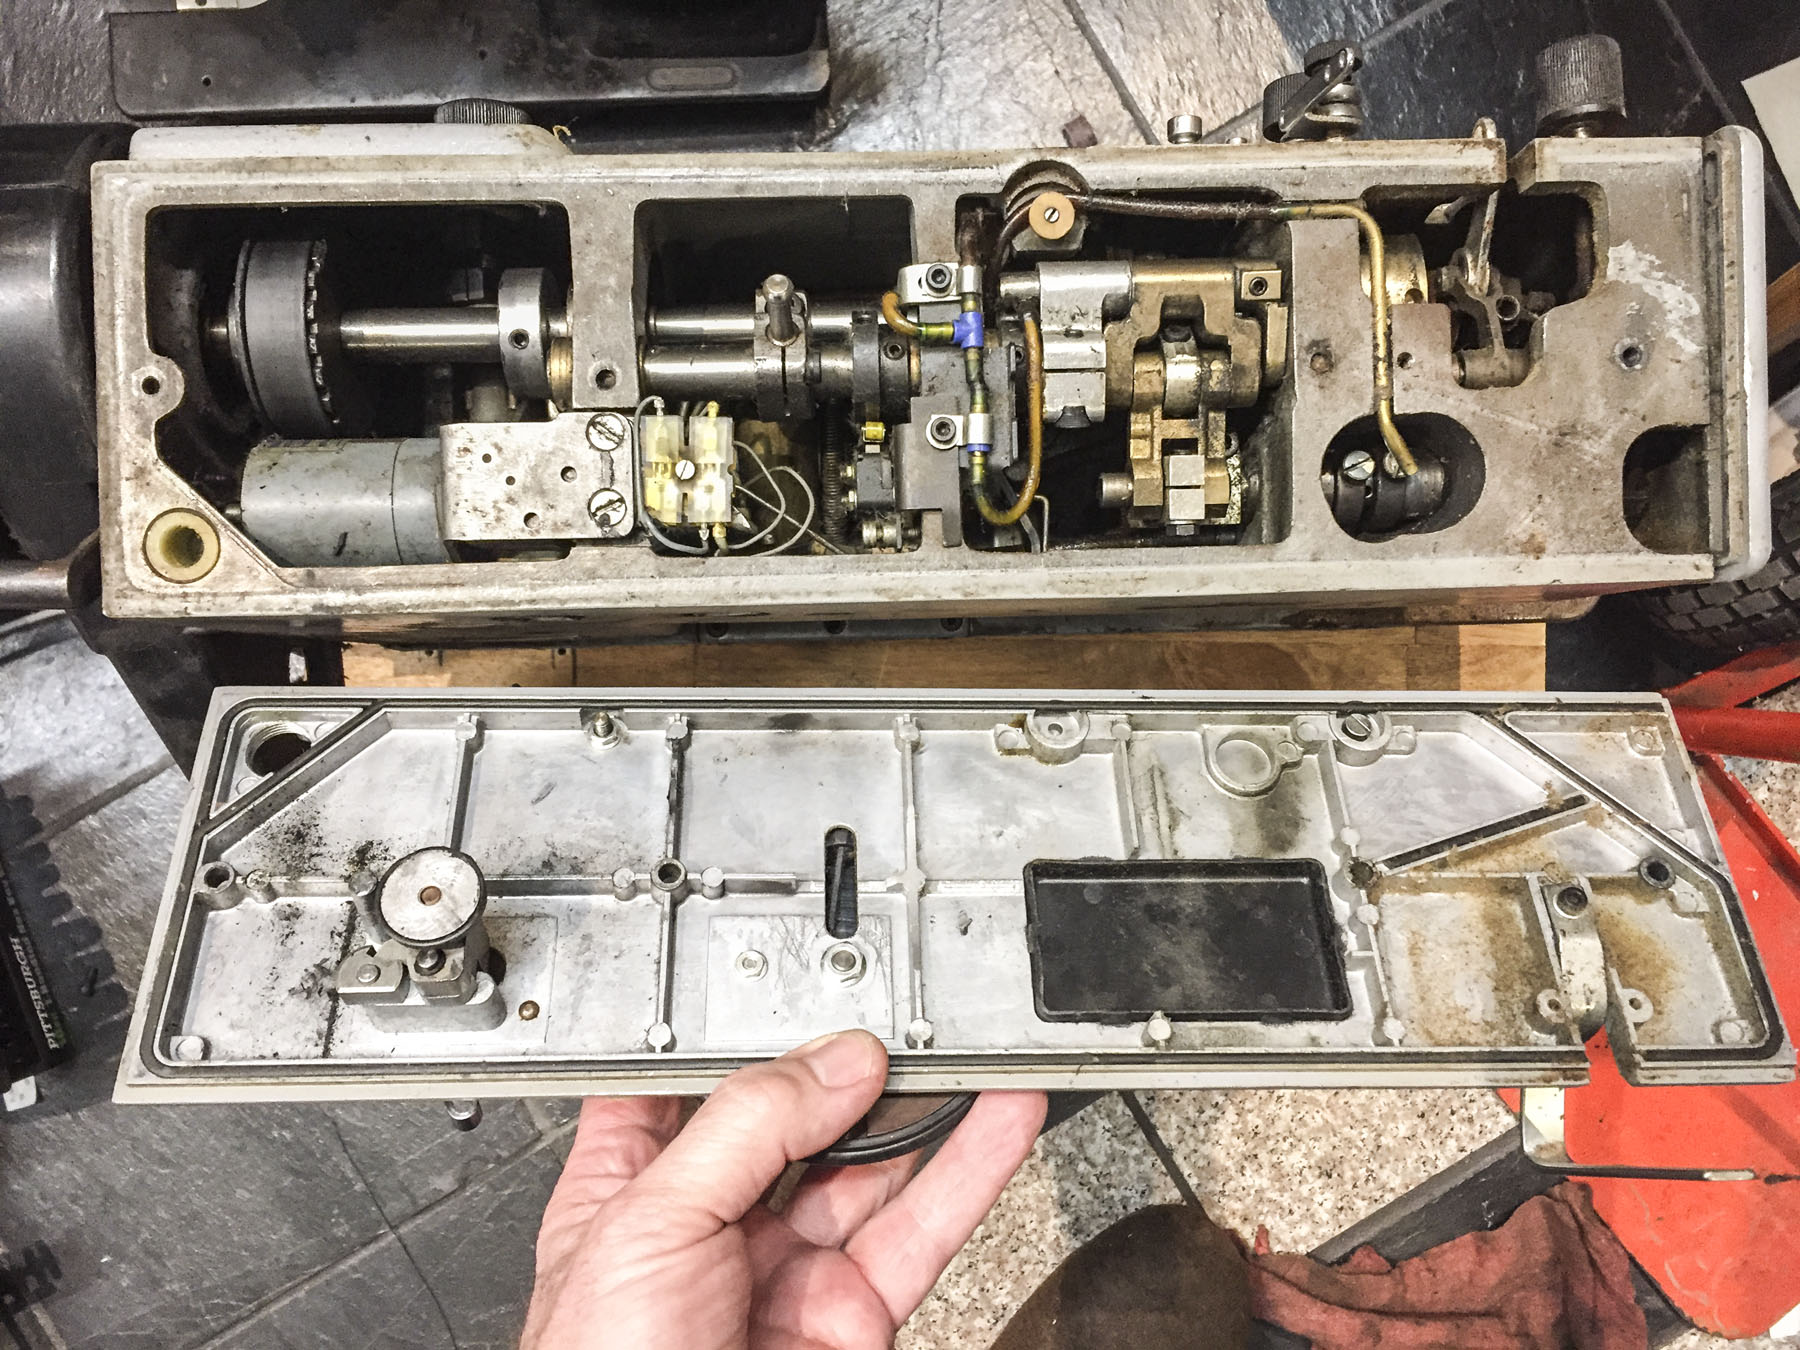
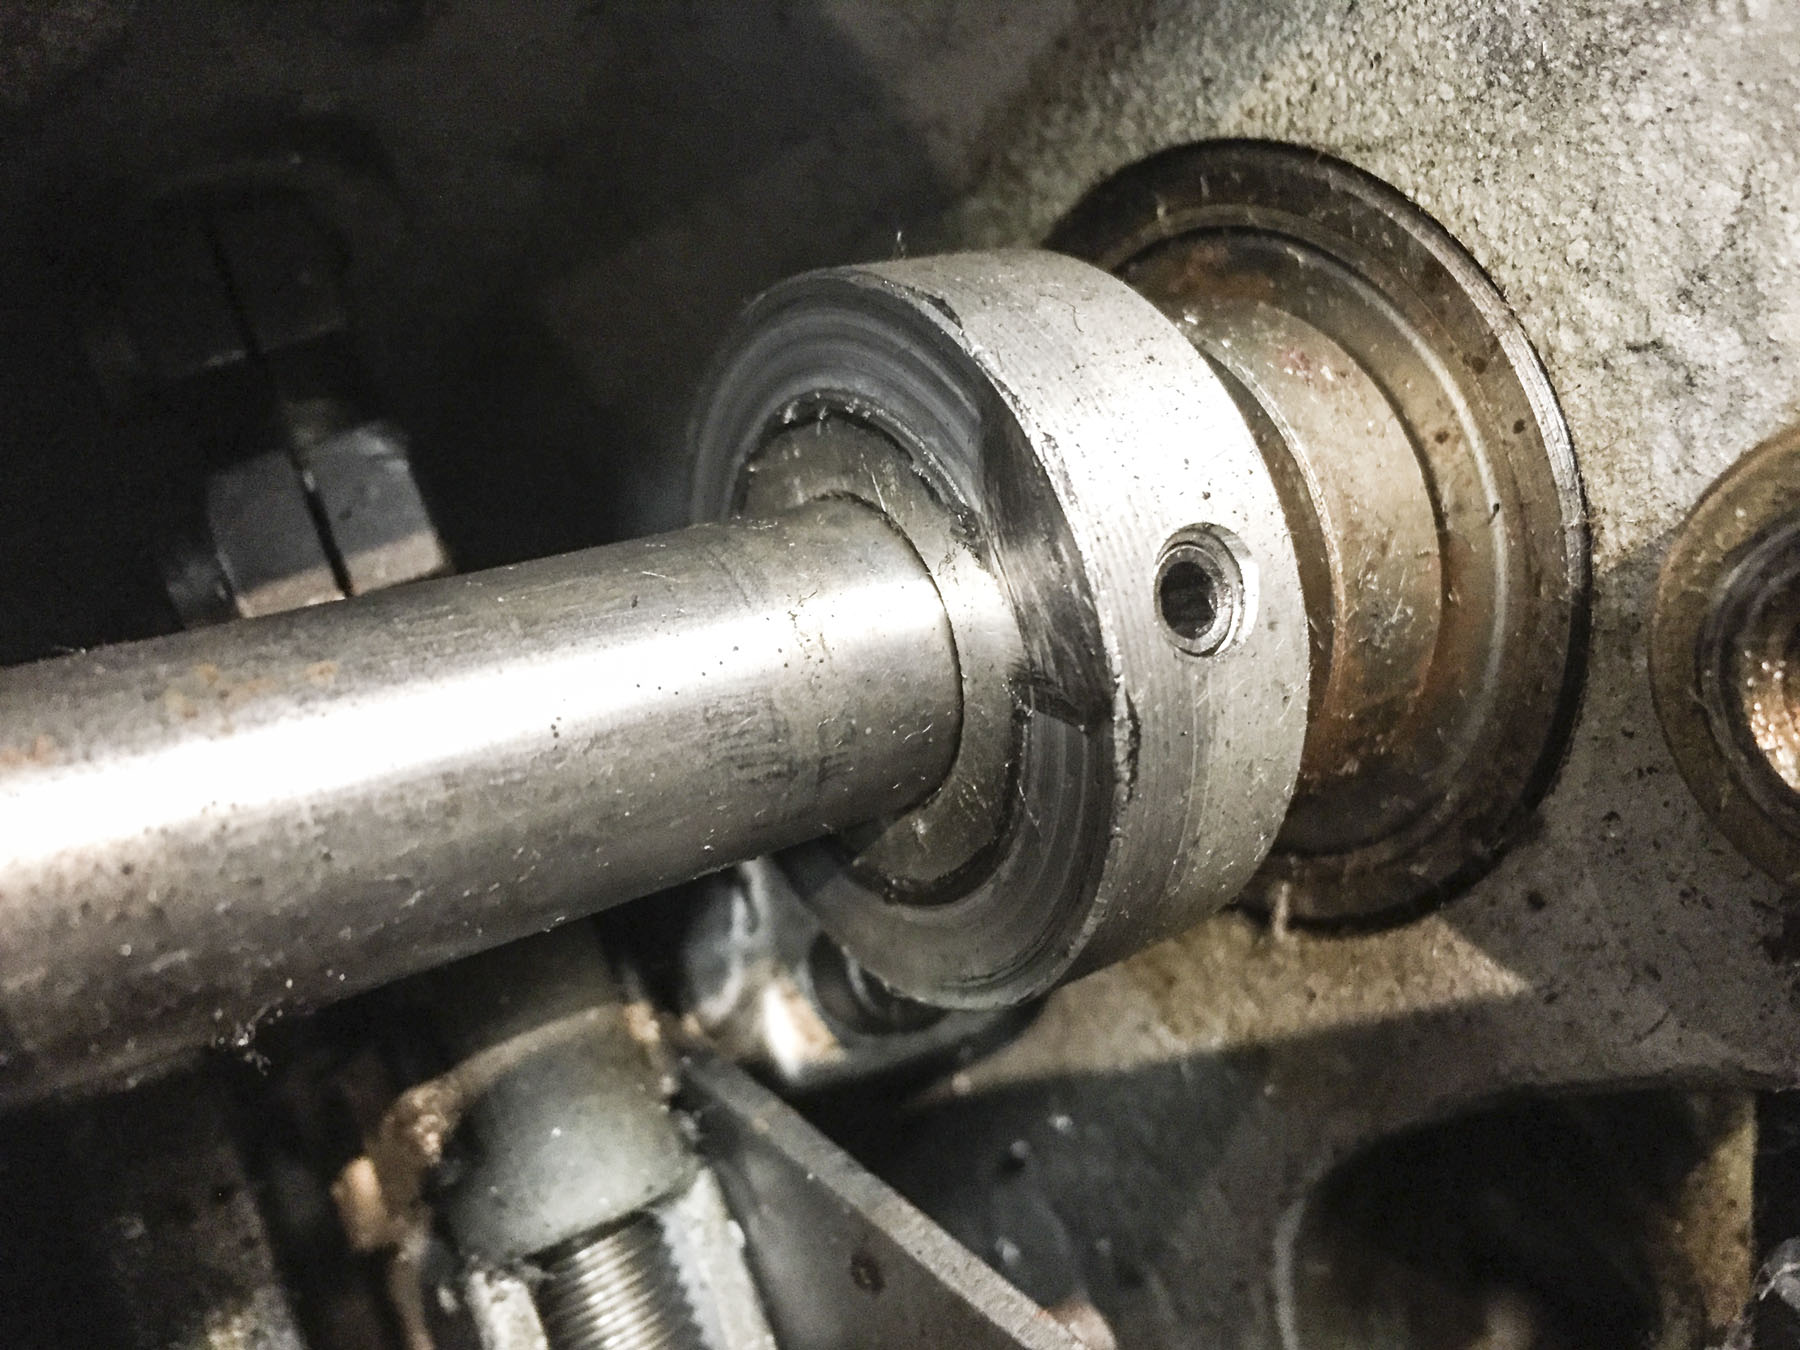
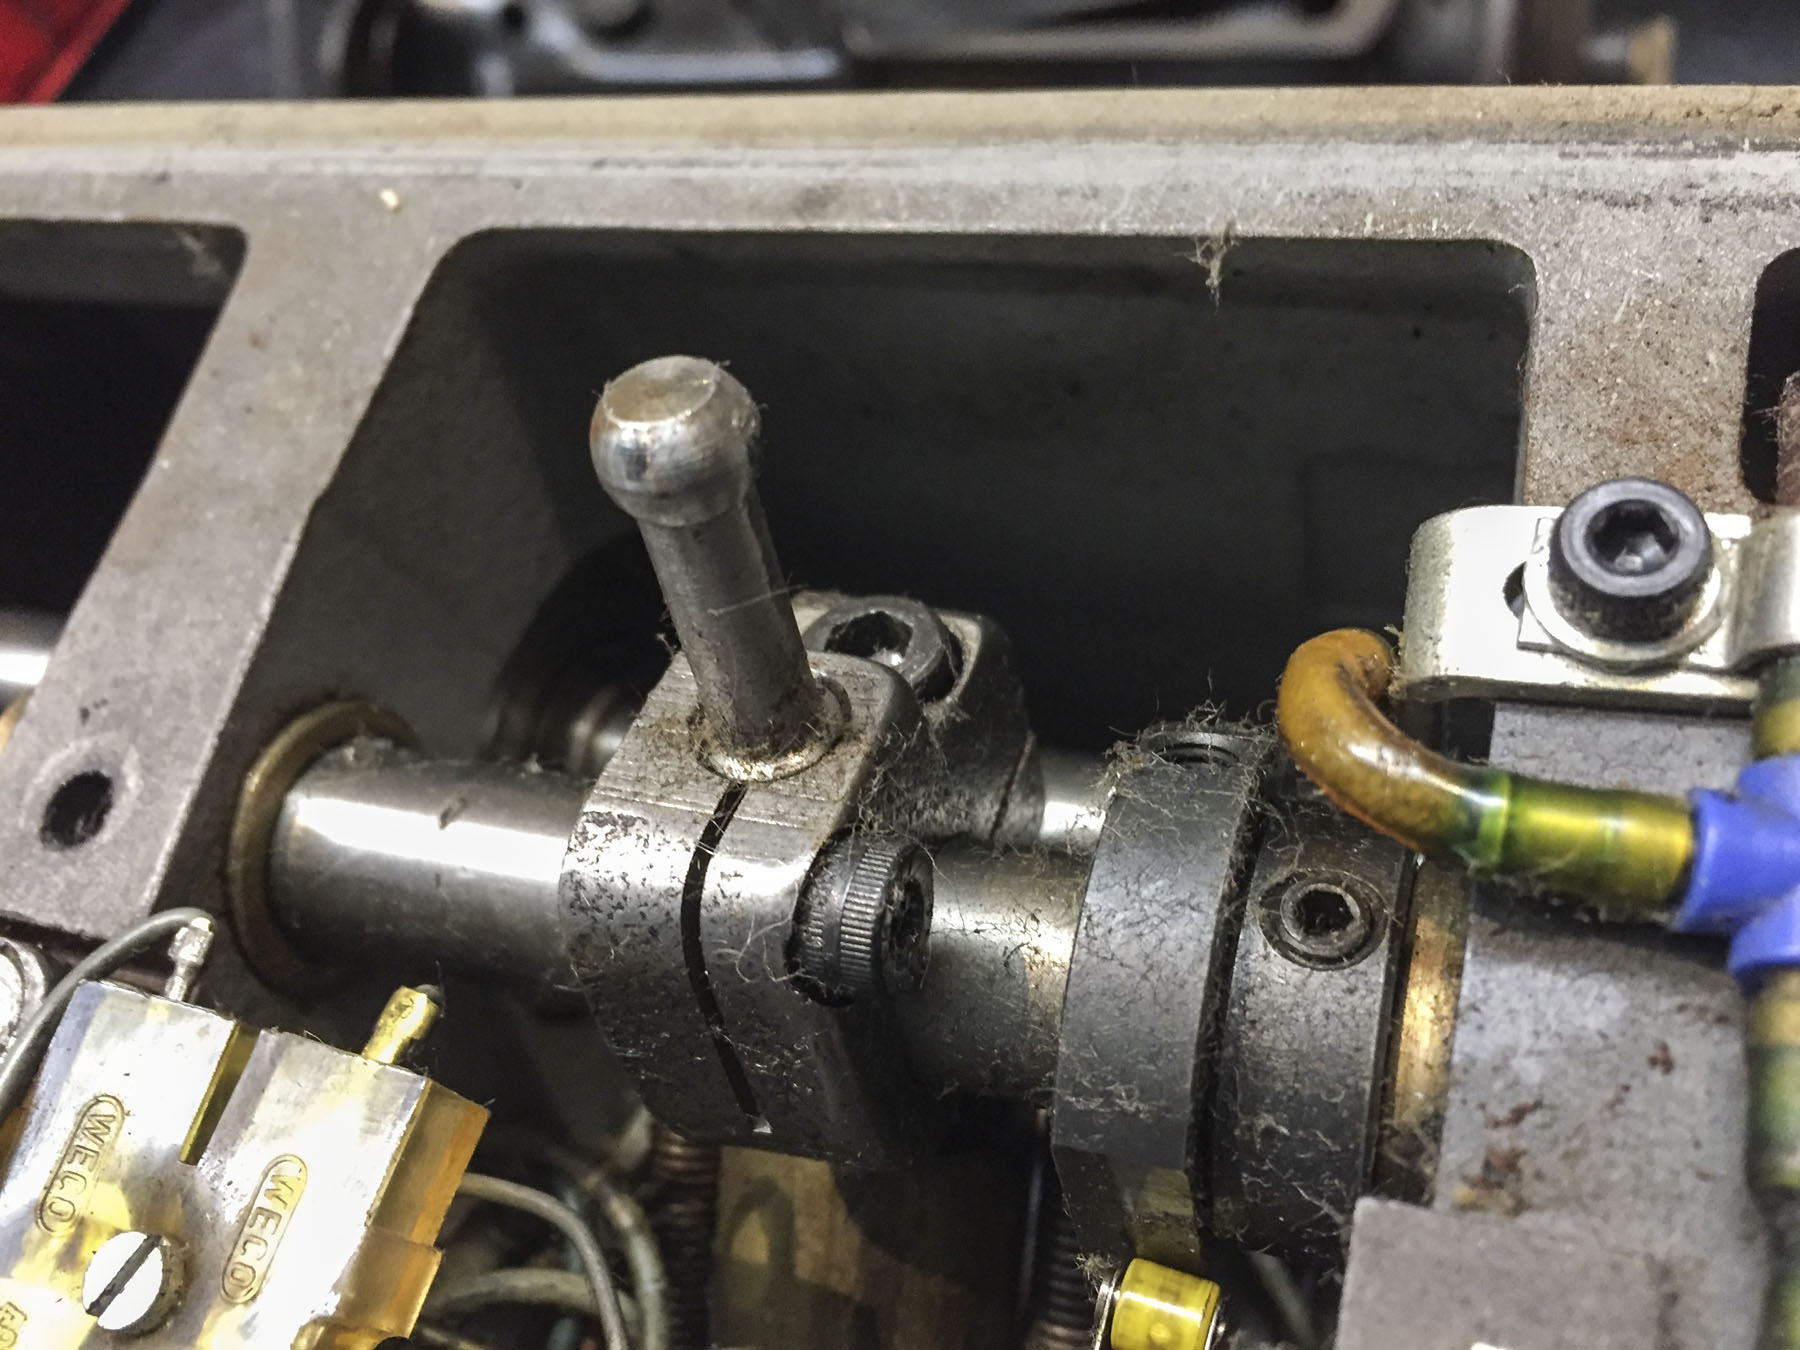
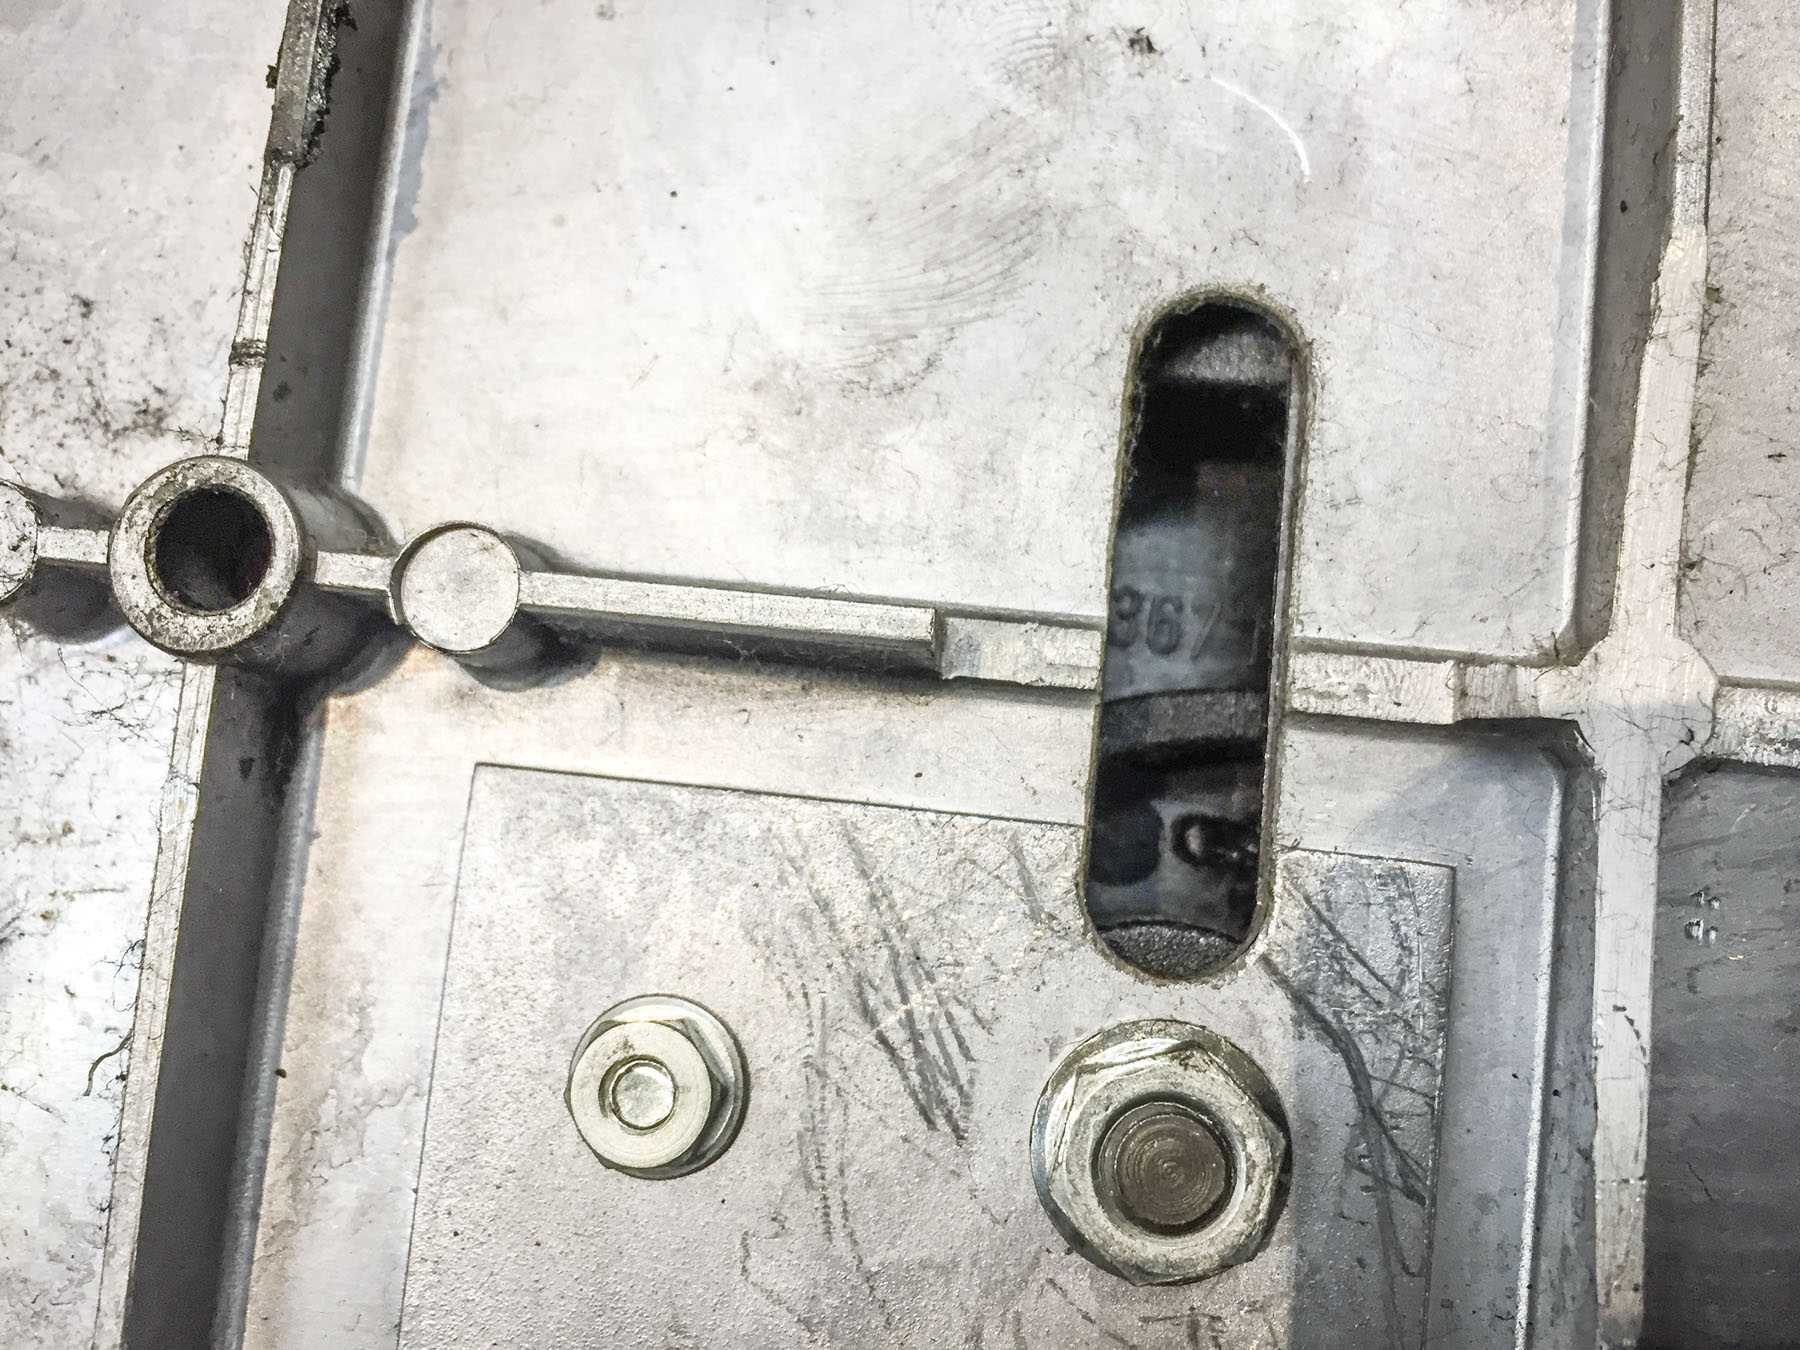
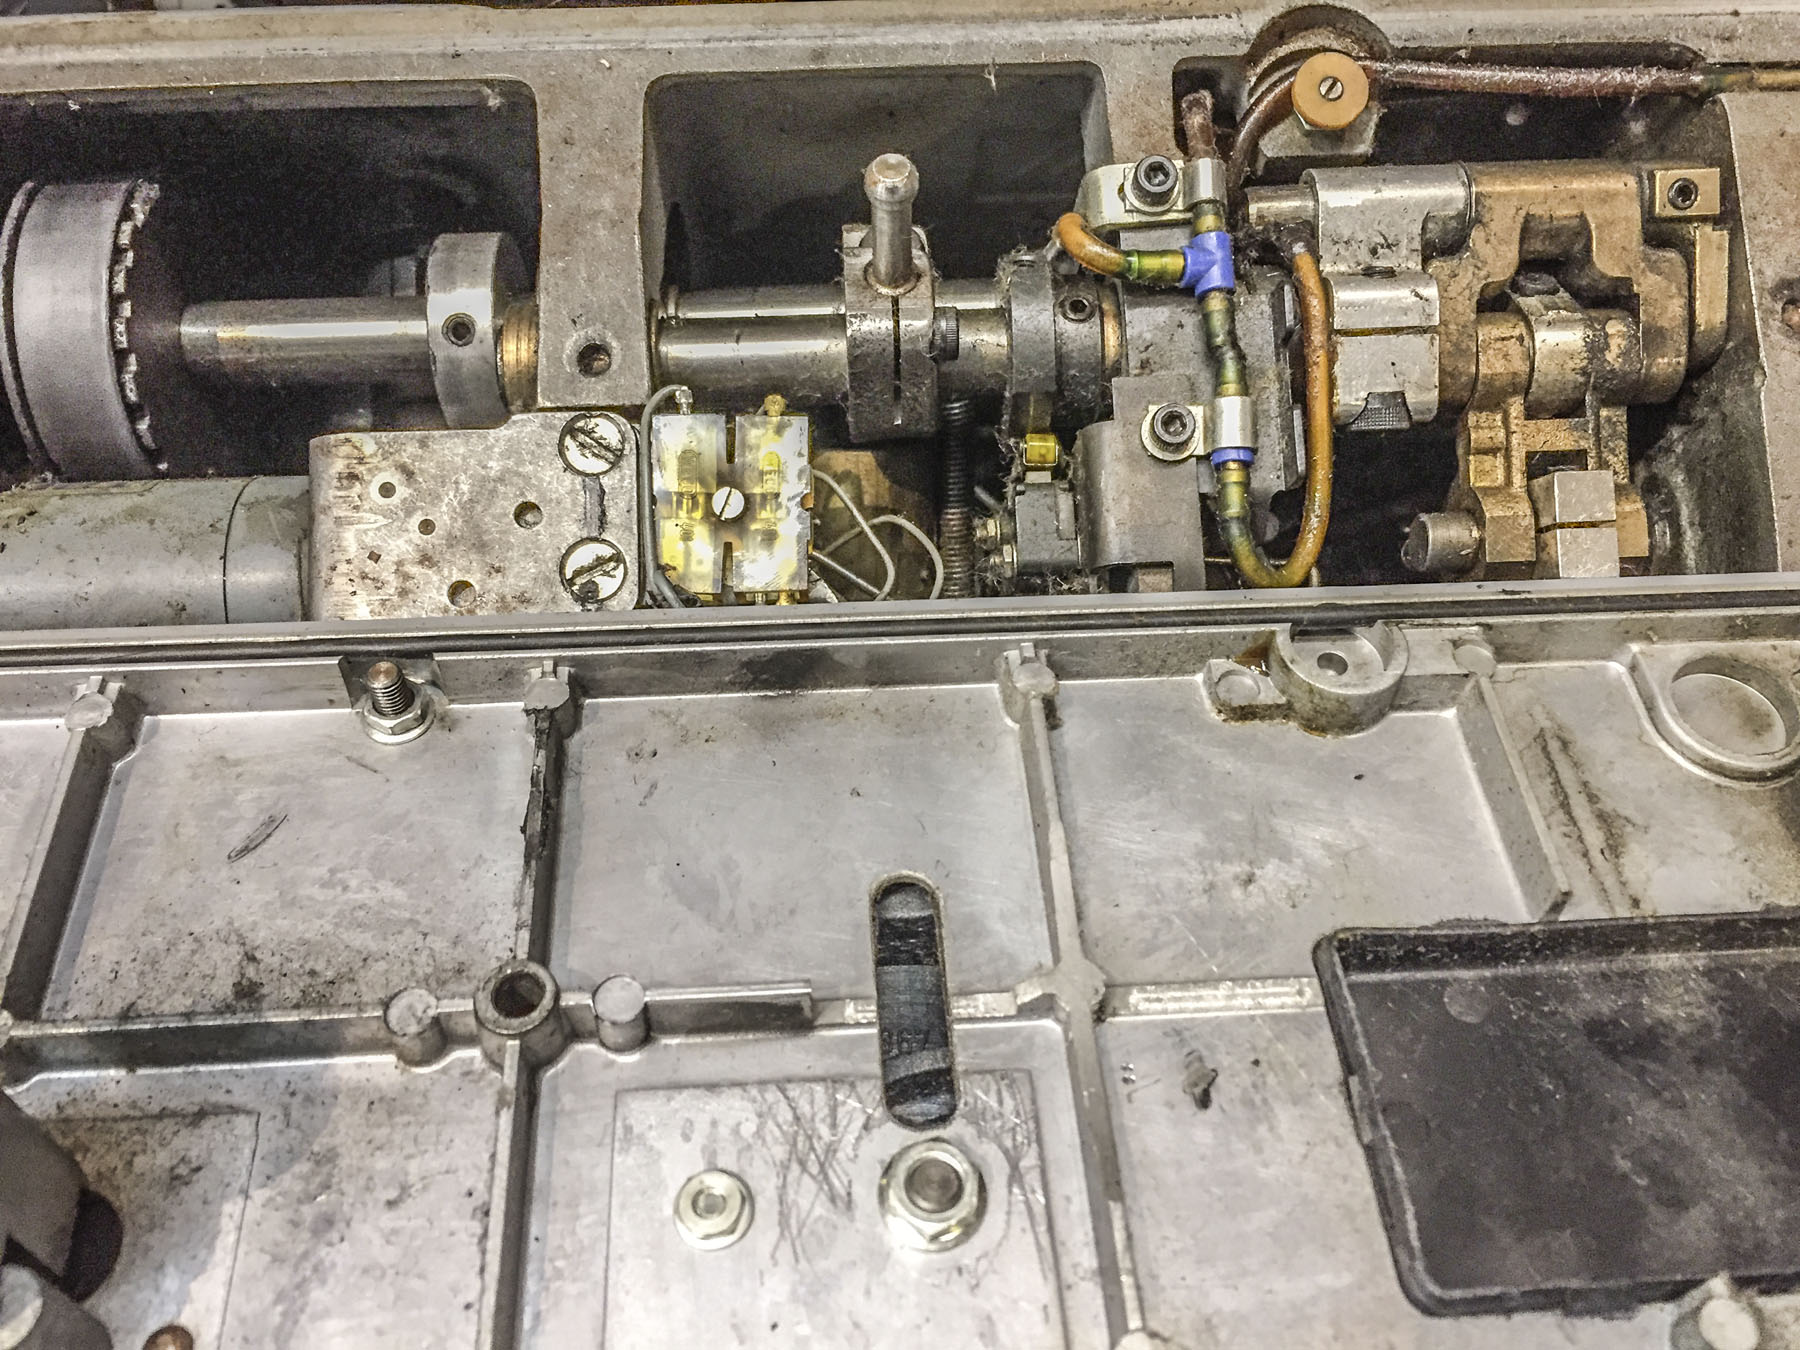
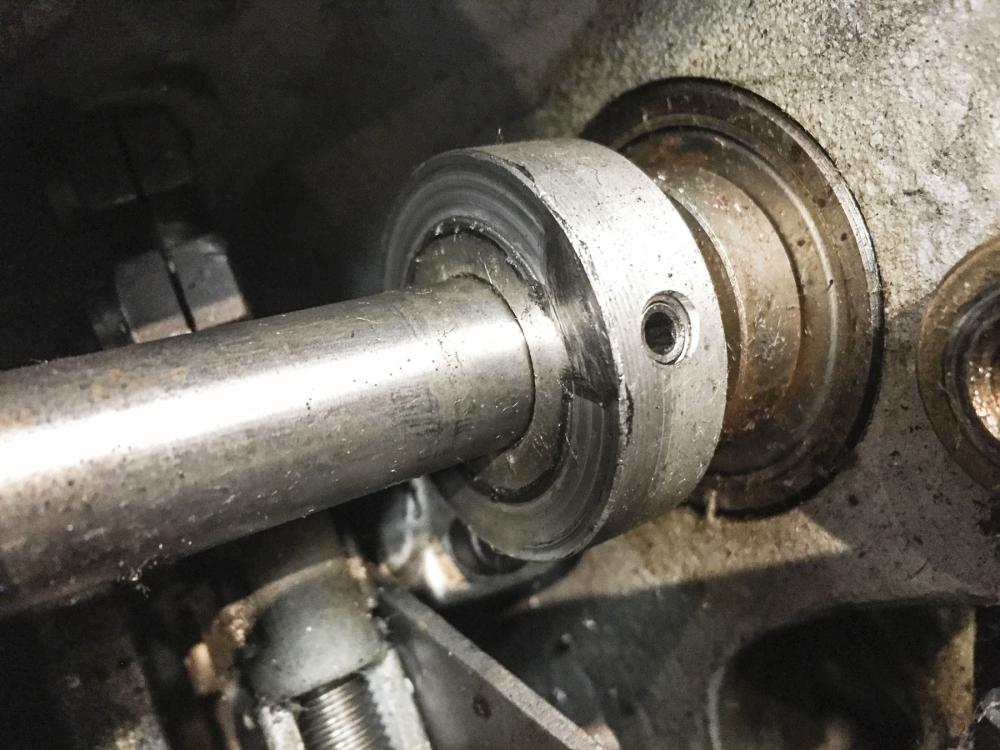
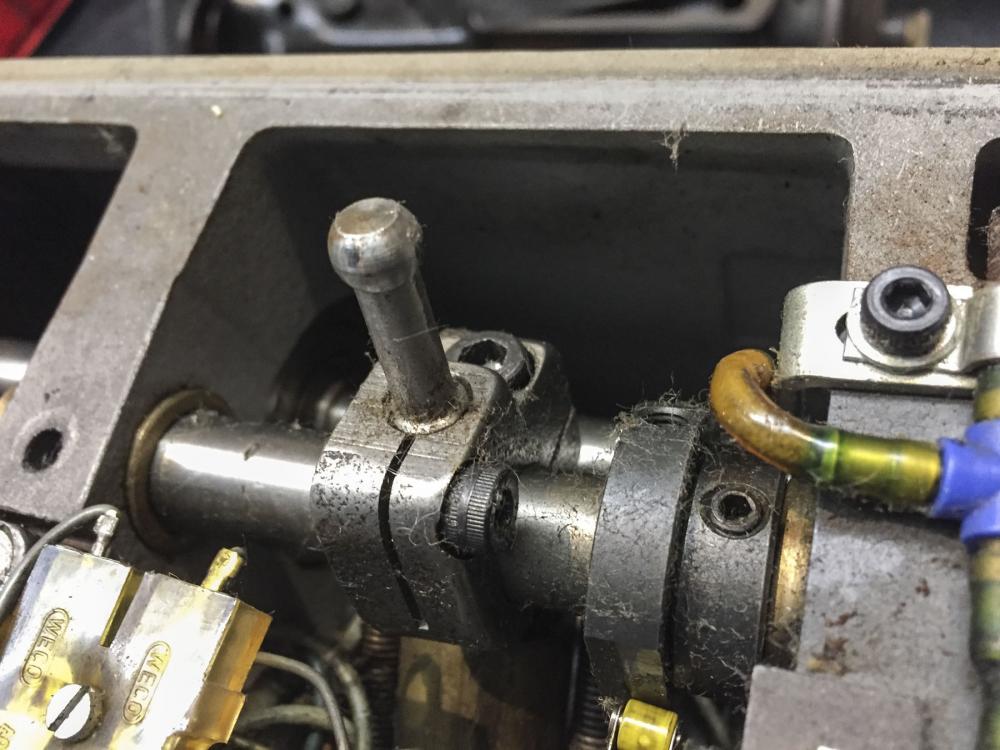
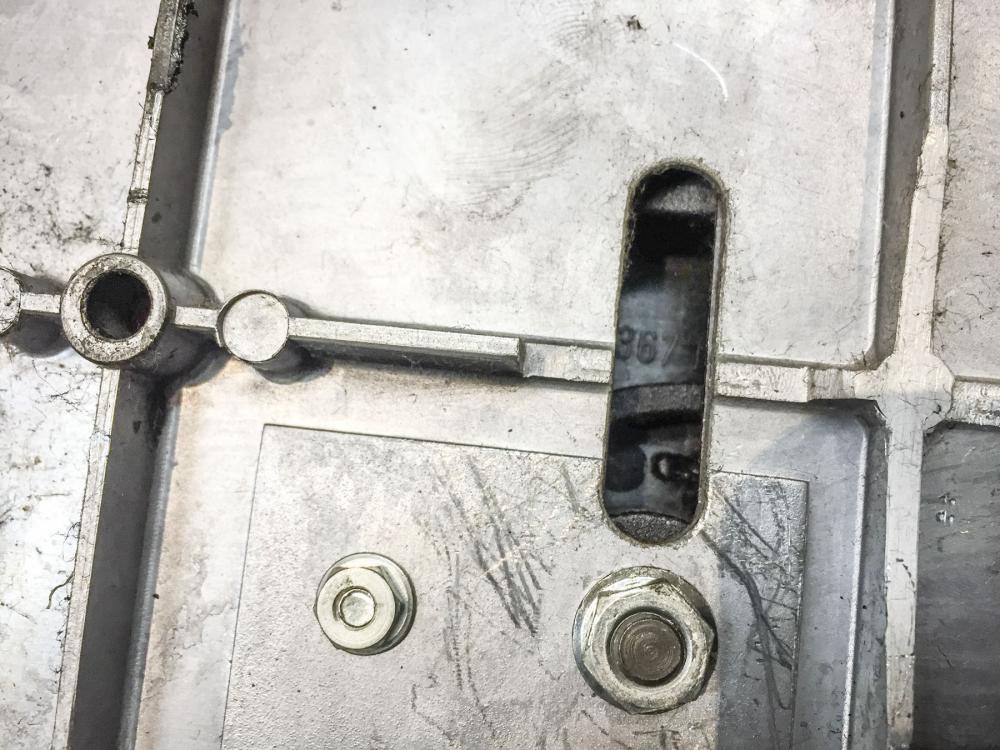
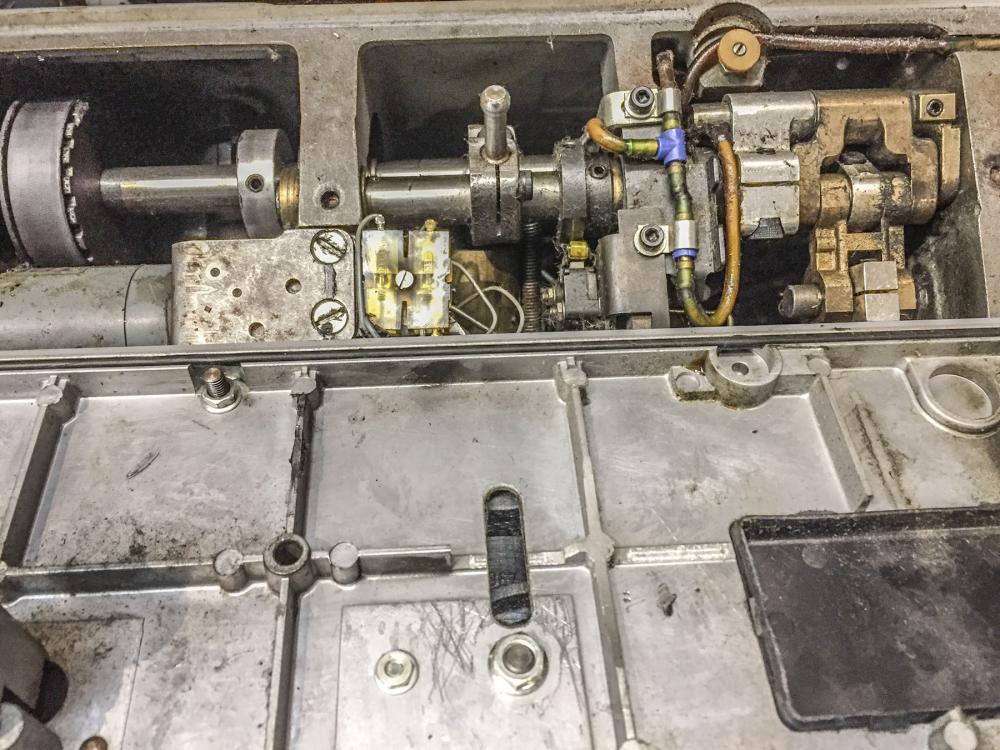
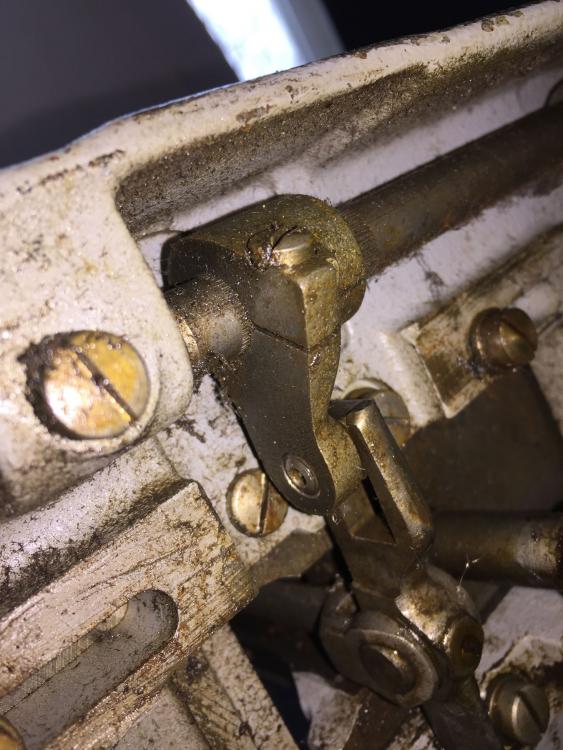
There are just four obvious bolts to remove on the top: The black dial knob can stay on. It has a spiral shape on the underside that pushes a spring loaded pin as you turn the knob. The pin may make a popping sound as you lift the top up. Below is a close-up of my bobbin winder unit. It may just need cleaning or the little black rubber ring may need to be replaced. The rubber ring on the bobbin winder presses against this disc in the picture below to spin. The position of the disc is adjustable on the shaft if need be to make better contact with the bobbin winder wheel. This disc has no other purpose than to drive the bobbin winder wheel - not much can go wrong here if you adjust its position. Clean the driver disc with acetone to make sure it's not slippery. When putting the top back on the pin shown below needs to go into this oblong slot under the black knob. Turn the black knob (clockwise to the right in the picture below) until the slot is totally open (spiral curve all the way down), otherwise it may be hard to align the spring-loaded pin above to rest against the spiral curve. Hope this helps!


-
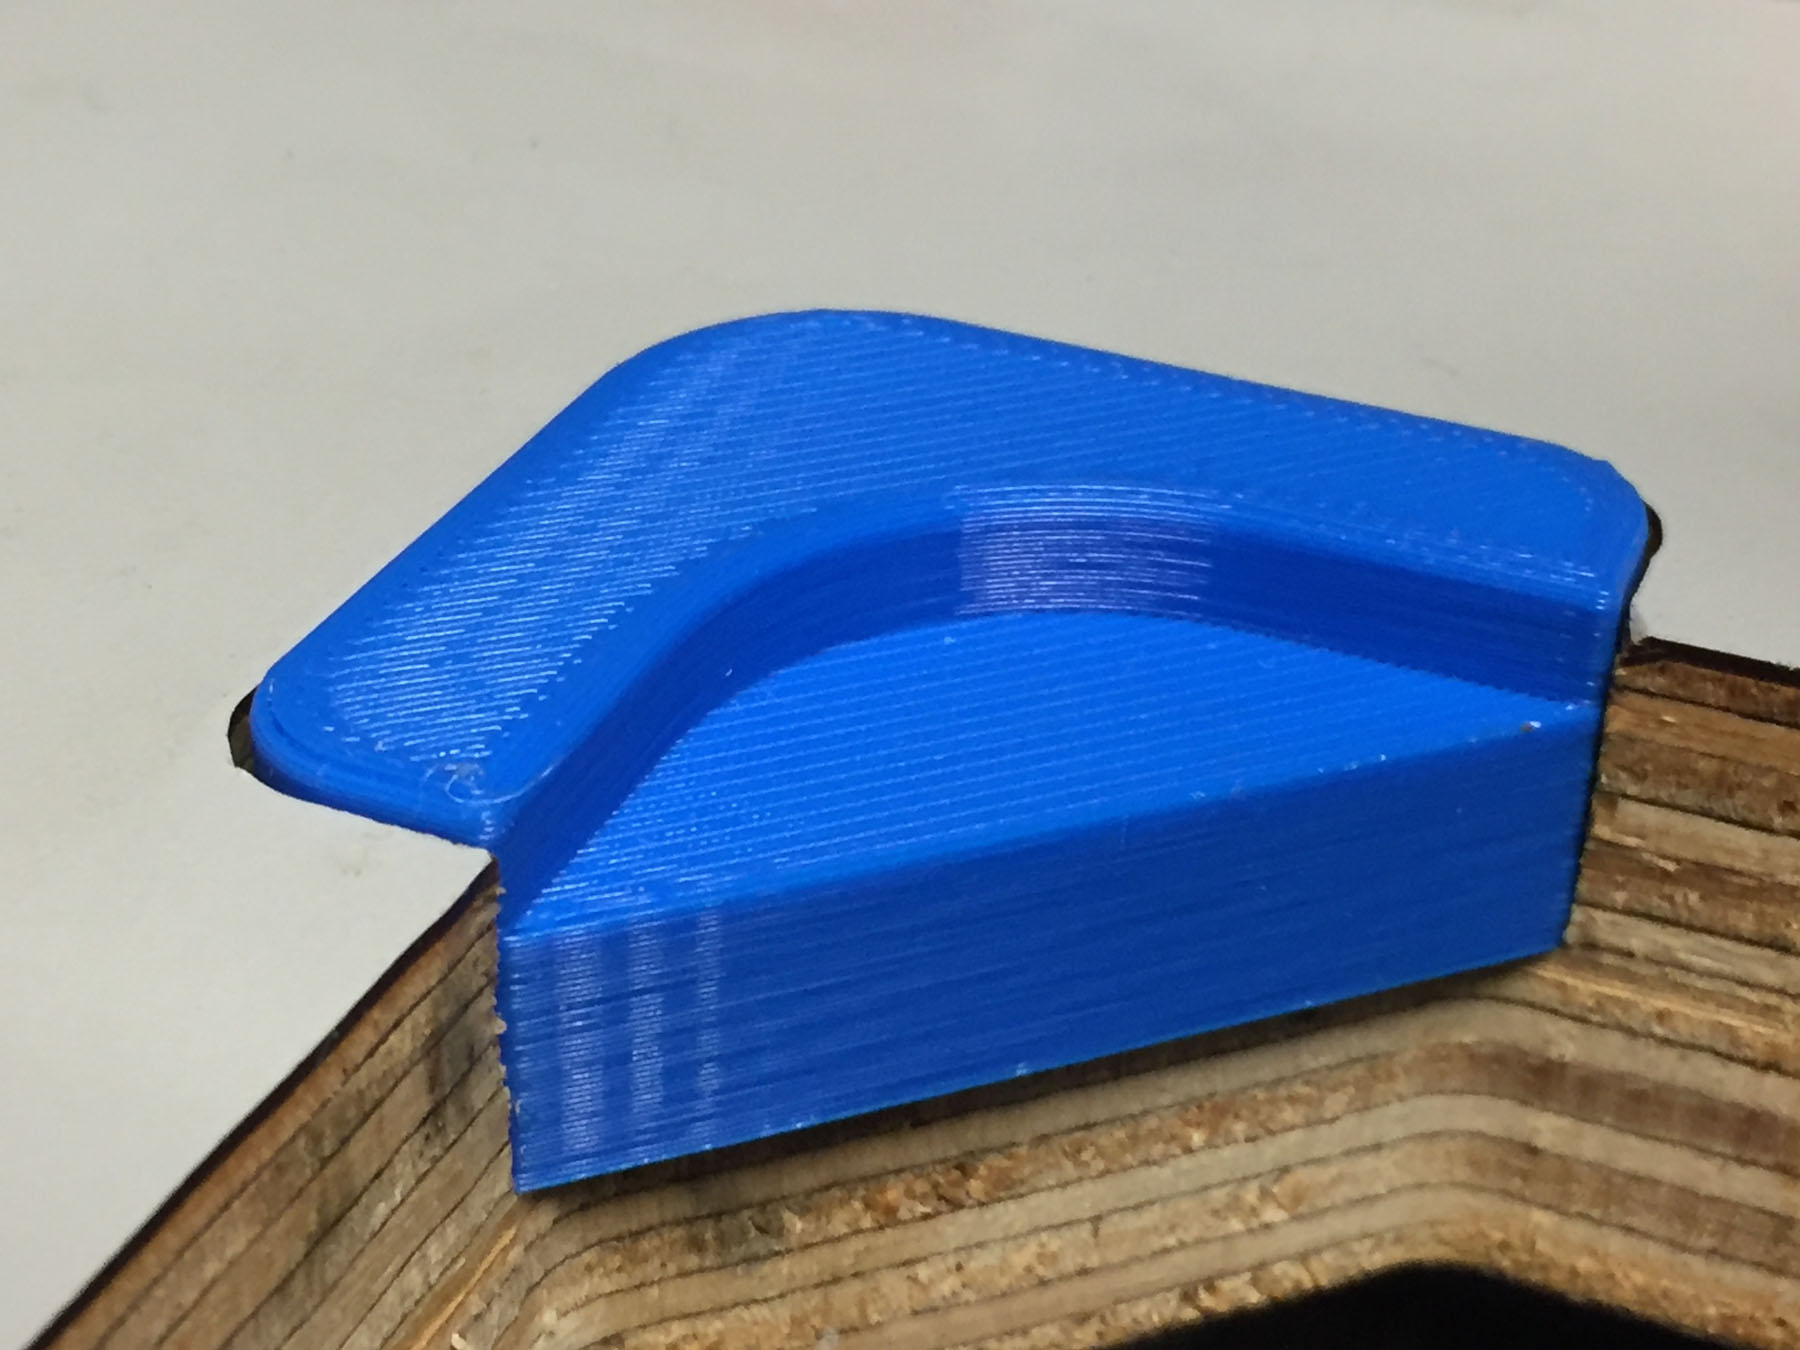
I finally got a 3-D printer (Cetus 3D) a few weeks ago and I'm starting to make a few useful things. Today I printed corner support inserts that were missing from a used table top. It worked out quite nicely and the inserts fit perfectly. I designed the part in Fusion 360 and printed it using a hard plastic material. You can also print with flexible, rubber-like plastic filament to closely match the vibration damping properties of the original rubber parts. Printing took about one hour for each part. Not exactly fast, but way faster than ordering something online. I uploaded the design to GrabCad in case anybody wants to experiment with it: https://grabcad.com/library/corner-support-sewing-table-1 I'm rather excited about the possibilities this cheap at-home 3-D printing makes accessible. Here are a few pictures:


-
The backside seam actually looks like I would expect it to look. It may not be the way you want it to look, but to a degree this is just how this class of sewing machines work. The side where the needle enters the material generally looks nicer and neater than the side where the needle exits the material, especially with leather. Factors like material, thread size, needle size and the shape of the needle point (regular point or various leather cutting edges) all influence how this looks. There is no absolute "correct needle", there is only "suitable needle for one particular application and combination of thread and materials." The knot does actually get pulled to the middle of the material, so that's technically correct and what you want. The pucker or flattened mound you see on the backside is a result of the material getting torn and pushed outward as the needle exits. When the needle retracts again, that exit wound closes up to some degree but often leaves a little mound behind, depending on material. How bad that "exit wound" looks depends on many factors. The type of leather makes a big difference, too. Some leathers are supple and stretchy, other are hard, dry and brittle, depending on leather quality (whole grain vs. bonded leather), age and tanning method. Using synthetic Vinyl material, this seam would would look very different on the backside since that material is much more elastic. Making leather seams look as nice and pretty as vinyl seams is not easy. If you're expecting a leather seam that looks perfect from both sides like a hand-stitched saddle stitch, then you will likely be disappointed, depending on the materials involved.
-
Yakumo ddn 738 with swing down edge guide
Uwe replied to EmanuelWikandaru's topic in Leather Sewing Machines
Nice work on the edge guide install! I'm glad to hear you found my video useful. Is your Yakumo made by Nakajima? It looks identical the ones sold in the U.S. as a Chandler 305-64. I wonder if Chandler sourced the machines from Nakajima, too. Some design elements look very similar to an Adler 105-64, but the casting is very different. -
Nope, the Pfaff 195 is one of those does-not-exist manuals (until somebody finds one and scans it to PDF.)
-
Start with the Pfaff 145/545 manual (Pfaff 145 545 User Manual.pdf). The head should be nearly identical. Very often, if it looks the same, it works the same way.
-
According to the subclass decoder section in the Pfaff 195/595 parts list ( 595 parts list.pdf) , your machine is a version for medium duty materials (B), very high foot lift (H4), for fabric (S=Stoff=fabric), and 8mm stitch length (N8)
-
This is the last one, I really need to stop!
Uwe replied to Chayse's topic in Leather Sewing Machines
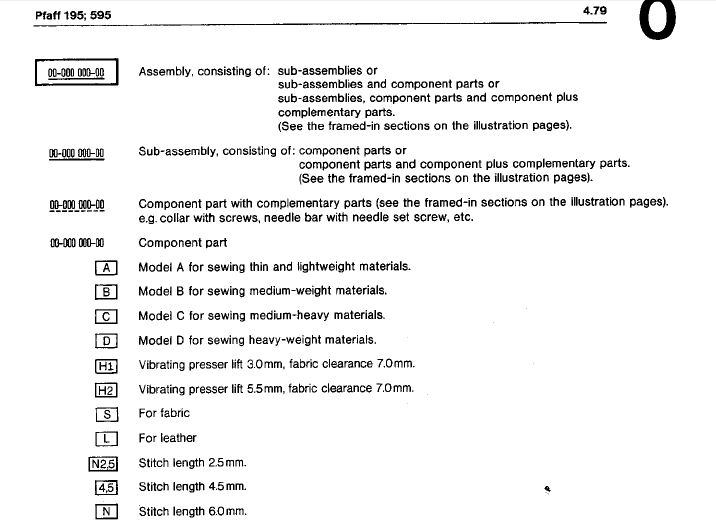
This really belongs in a different topic, but short of making your own slotted feet with a Dremel, the closest ready made product I've come across is this 13246 Presser foot + 13249 Feeding foot set available from Kwok Hing:
-
It seems to be rare indeed. Can you please post a few more close-up pictures, including the type plates, head side cover removed, back and underside? If manuals for the specific models are not available, your best bet often is to determine close relatives and piece things together from their manuals (like that machine in the background.)
-
Also check out this thread for examples on what you can achieve with a manual router, skill and patience.
-
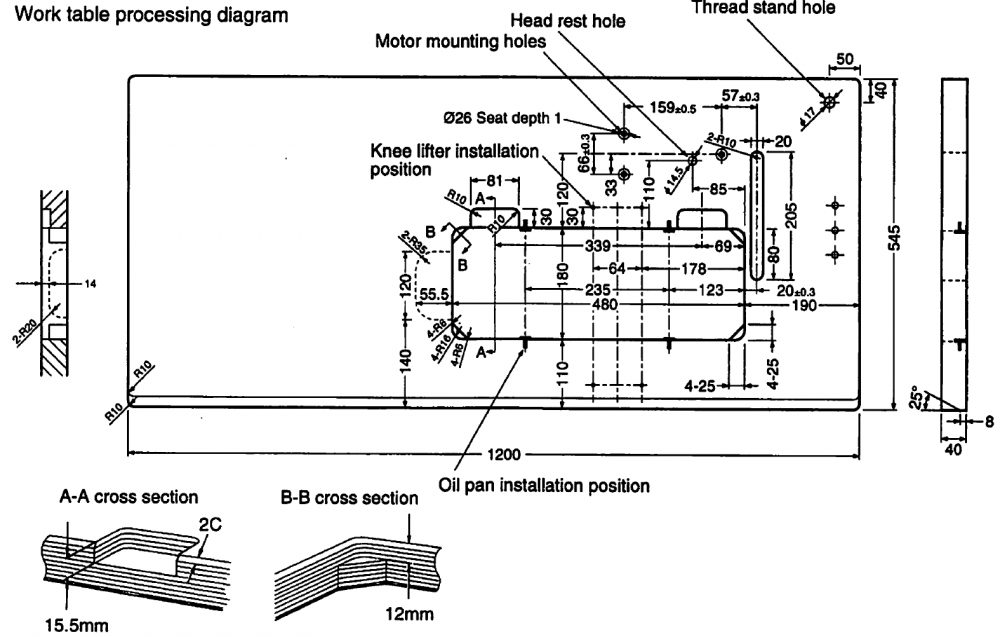
I'm voting for a new table-top made from Plywood. I personally have little confidence in MDF for structural elements. The Consew 206RB is just a re-badged Seiko and Seiko is nice enough to include table top dimension drawings in their manuals. Here's one from the Seiko STH-8BLD-3 manual:
-
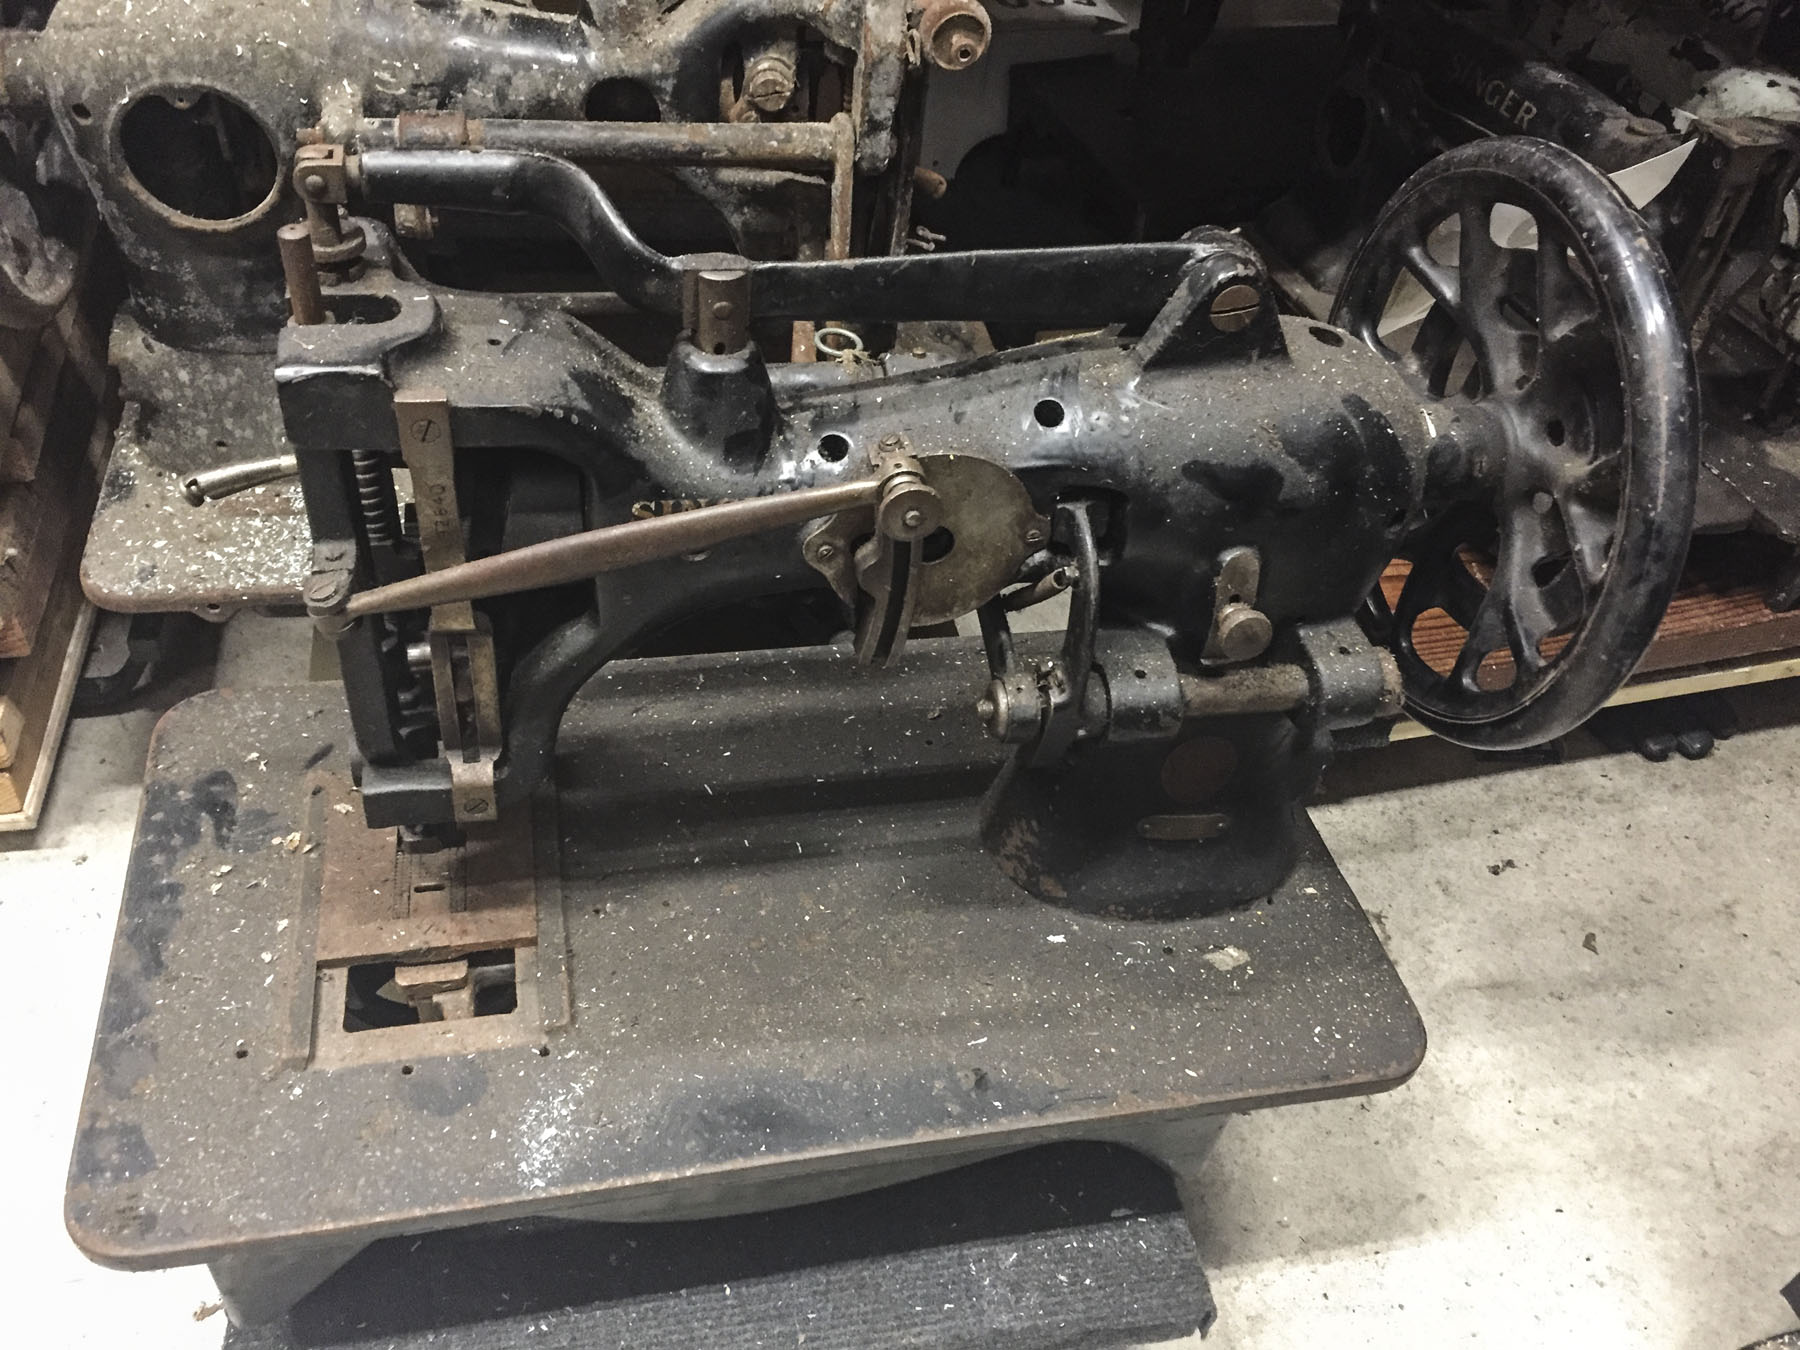
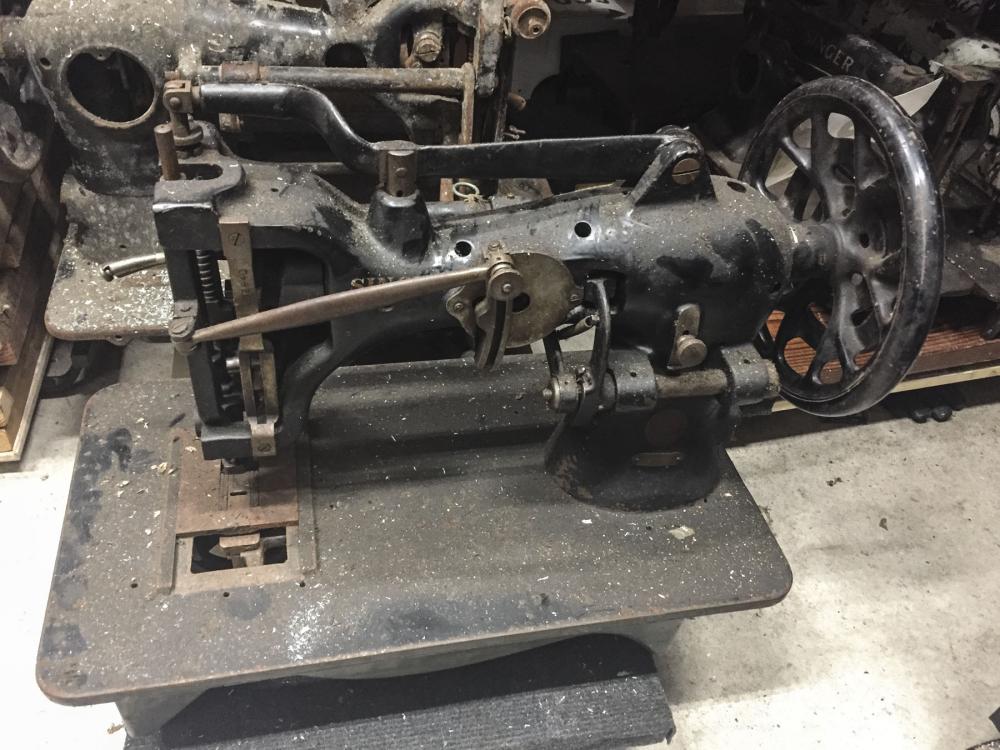
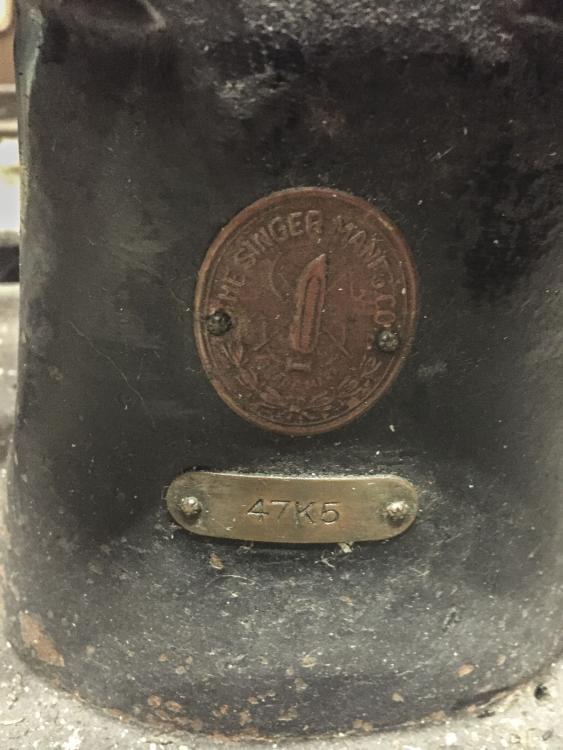
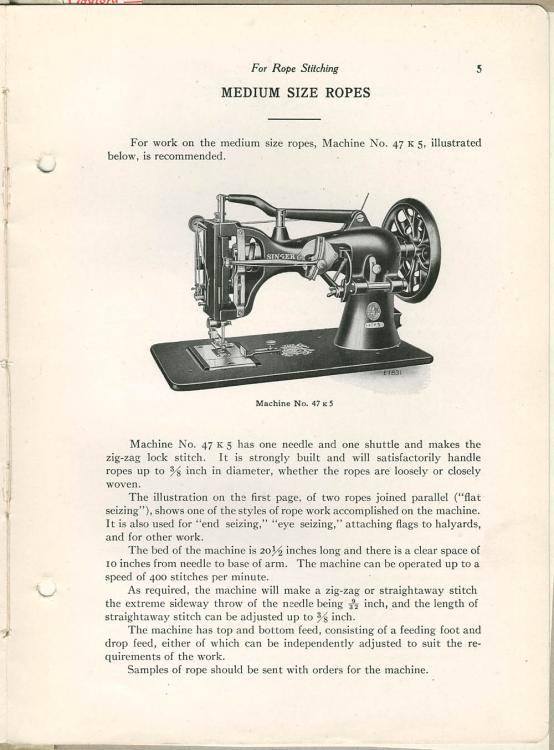
This machine came up in a general thread on zig-zag machines. It seems a significant and rare enough machine to have its own topic for future reference and easy googling I had made a video demonstrating the machine. I didn't know which exact model it was at the time: Today I came across two more unrestored versions of these machine hiding under a shelf. One of them had a type tag, which is how I found out what model it is: I also found a nice quality Singer 47K1, K3, K5 parts manual: Singer 47K1, K3, K5.pdf The Smithsonian had a cool 1936 sales brochure "Singer Sewing Machines For Rope Stitching" featuring this machine: Singer Sewing Machines for Rope Stitching.pdf
-
I was moving some machine around and found that I had two more of these little monsters hiding in the shadows and they had model type plates - yay! I turns out they're Singer 47K5 machines (and they really have nothing in common with Singer 47W machines other than the Singer name) Here are pictures of the black one with good restoration potential:

-
Before you turn the post around, consider one of the key differences between the two post orientations. Imagine sewing the bottom of a stiff cylindrical workpiece. With the current orientation of the post (hook to left of needle) you sew in a clockwise direction and the size of the workpiece you can sew is limited only by the size of the room that the machine is in. With the post rotated 180˚ (hook to the right of needle) you sew the same seam in a counter-clockwise direction, but then the size of the workpiece is limited by the distance between the post and the column of the machine.

-
Now I have post envy! Yours is definitely taller than mine. Looks like a super rare machine to me (mainly because I've never seen that version before.) Rotating the post 180˚ is somewhere between trivial and near impossible, I'm not sure where exactly it falls. Those Ikea lights are indeed super useful, I've deployed several of them on various sewing machines. Your installation looks very clean - nice job! So how much was that part directly from those Germans? Inquiring minds want to know.
-
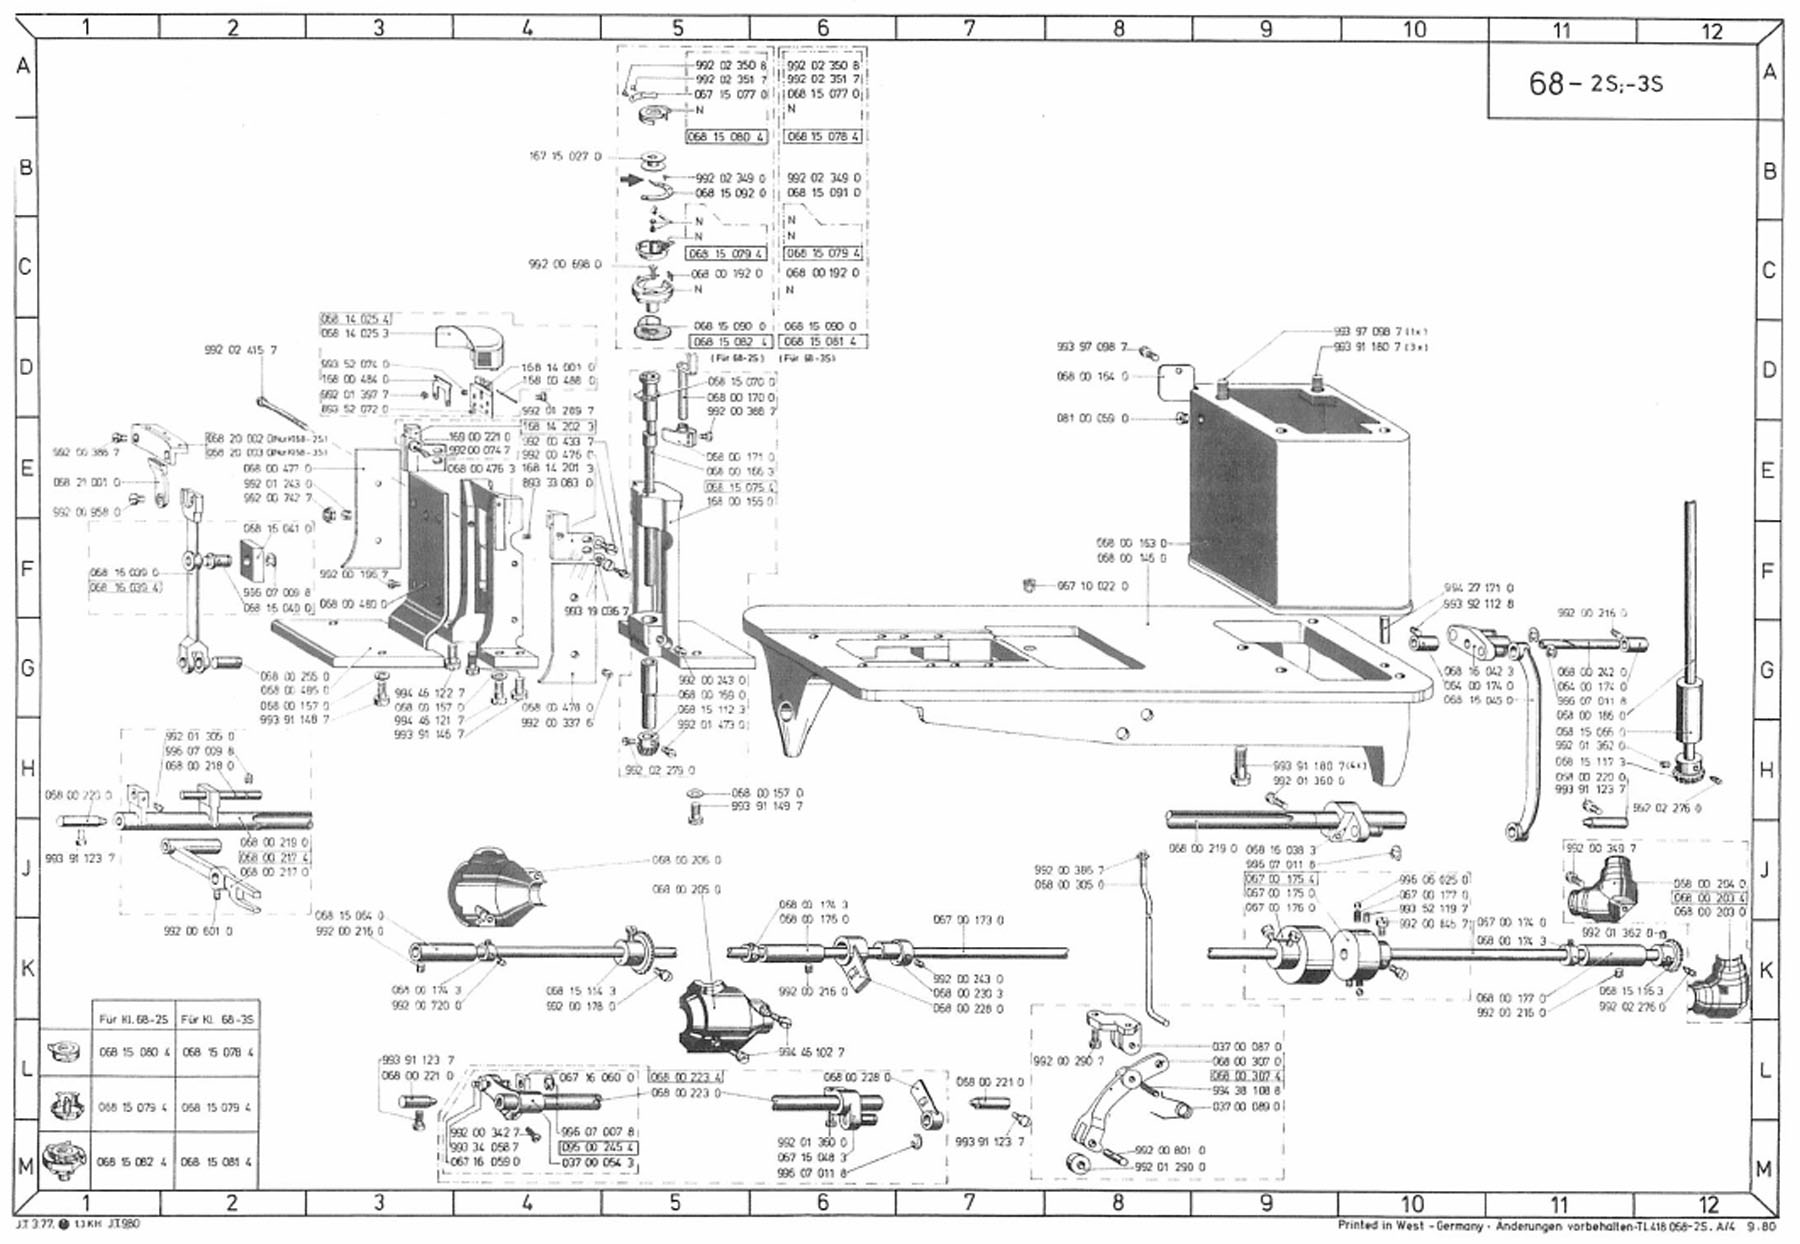
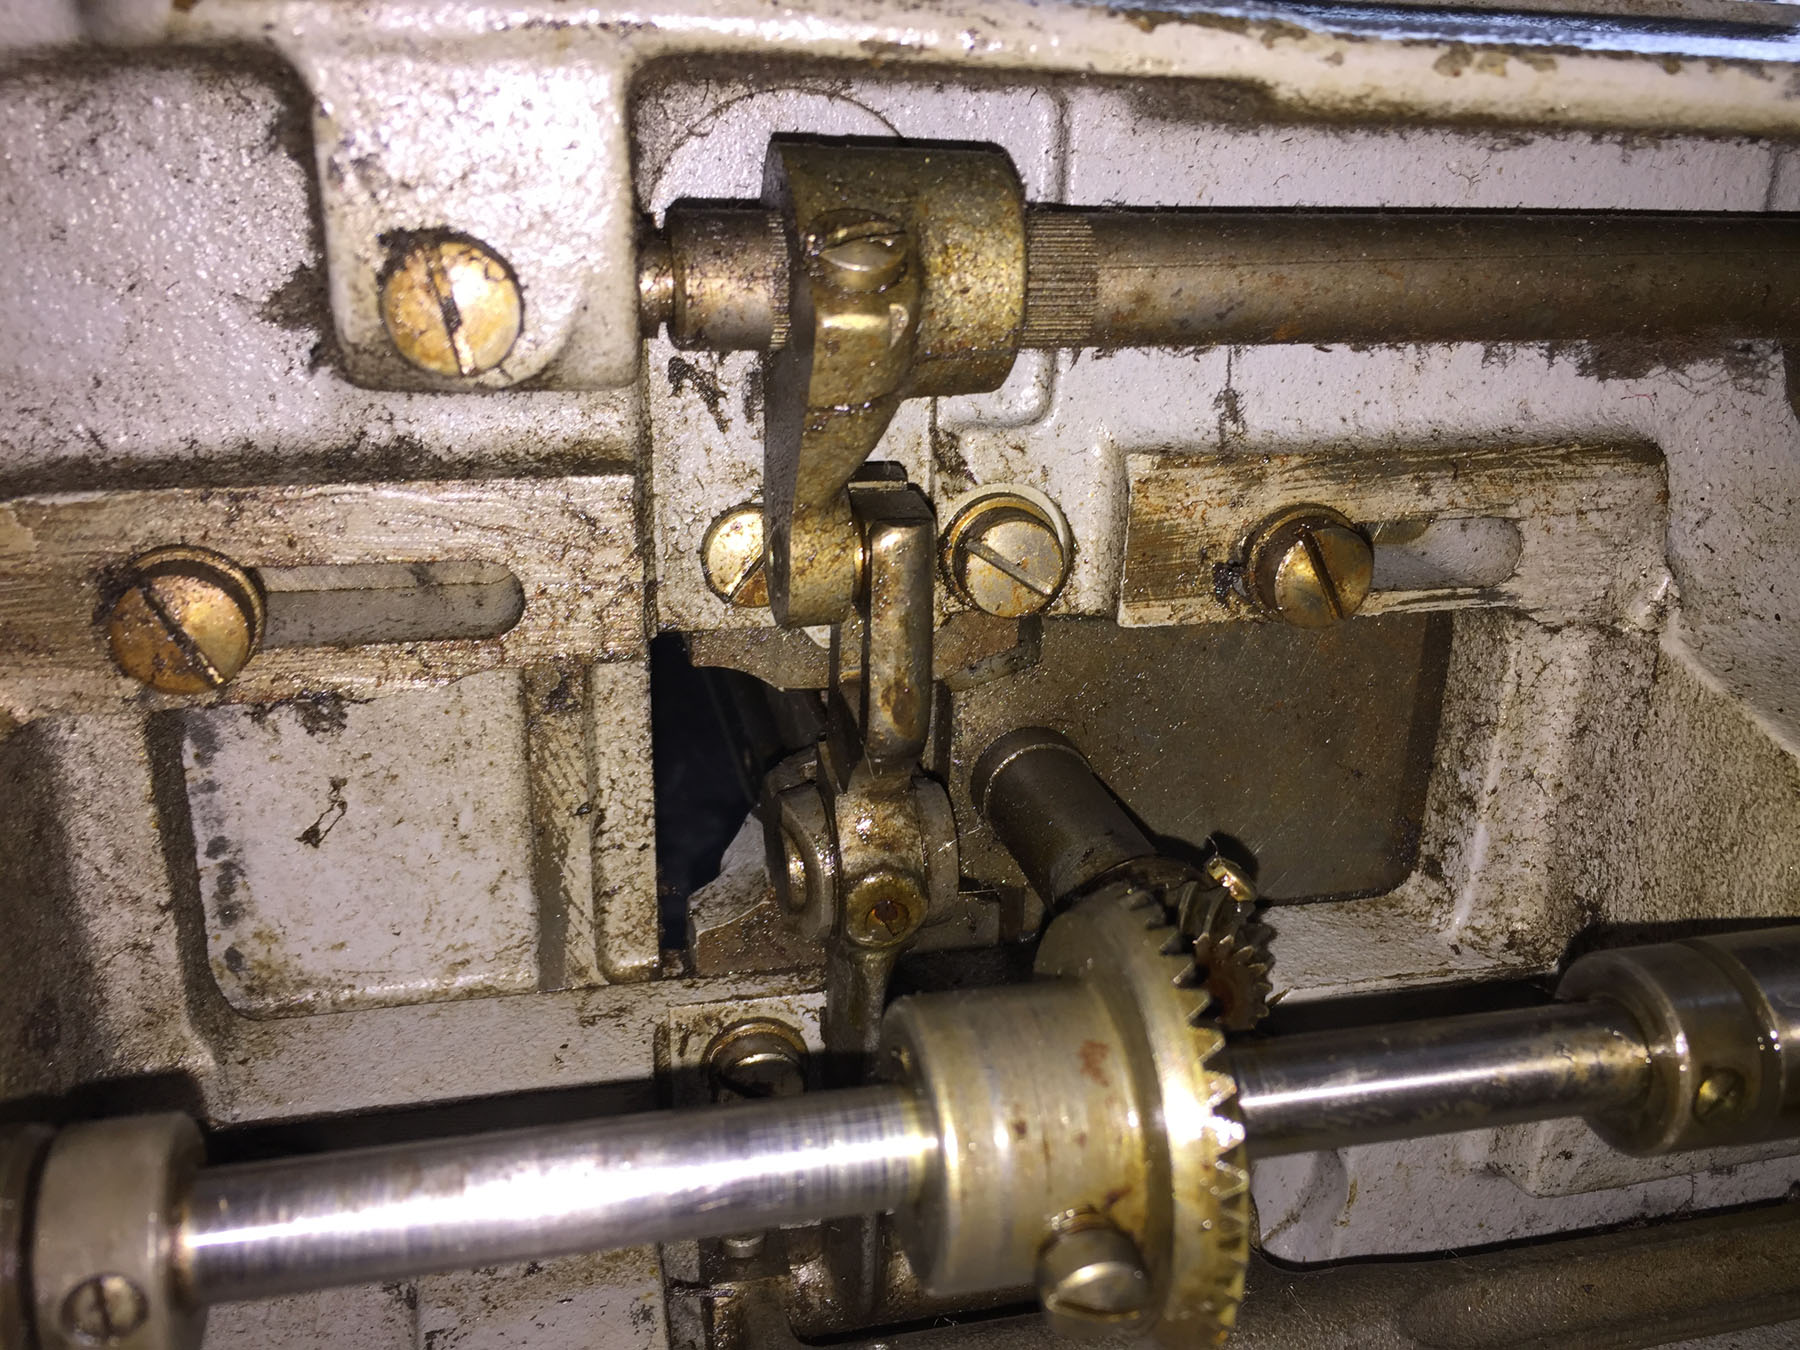
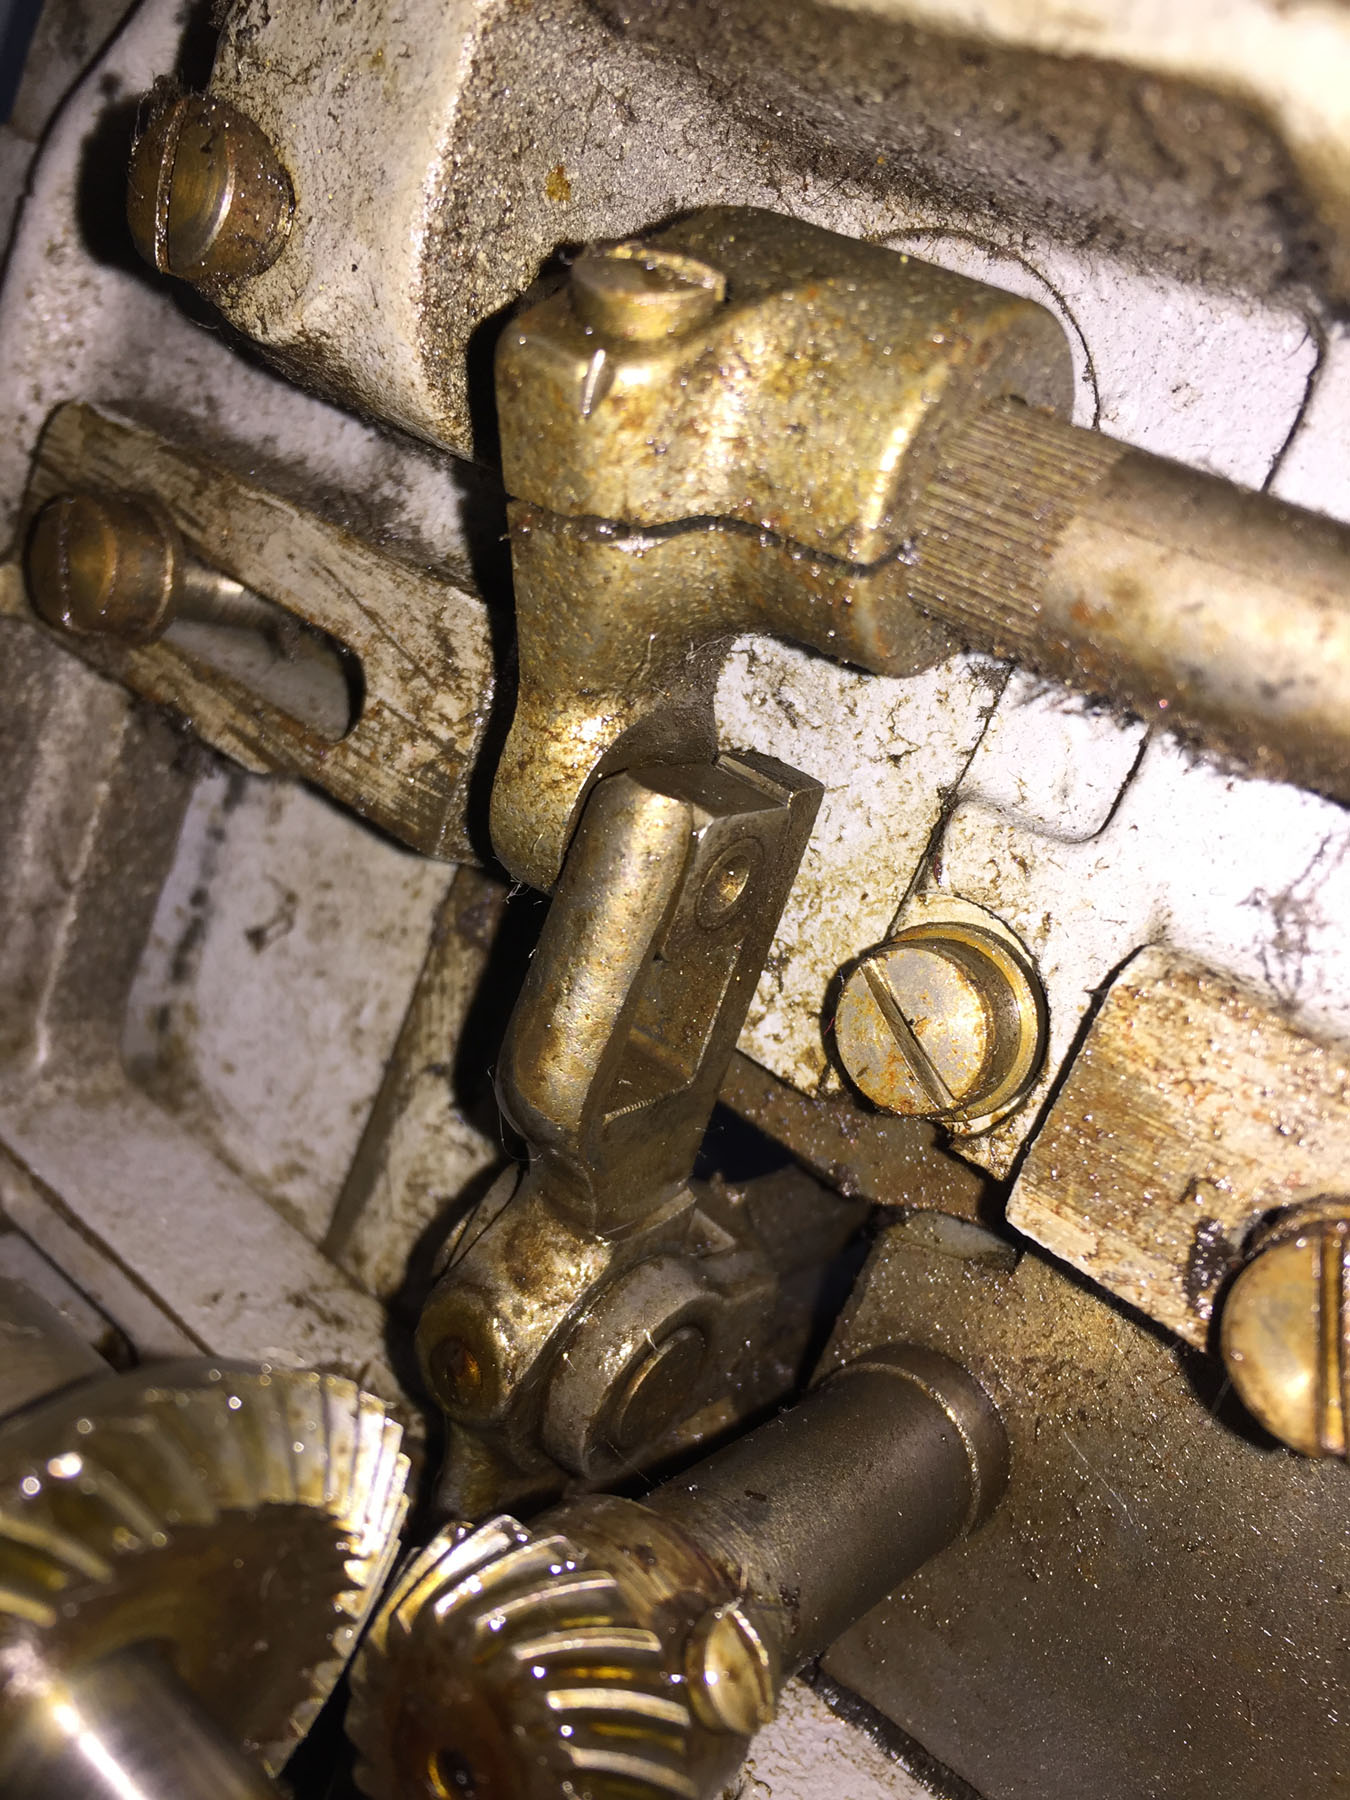
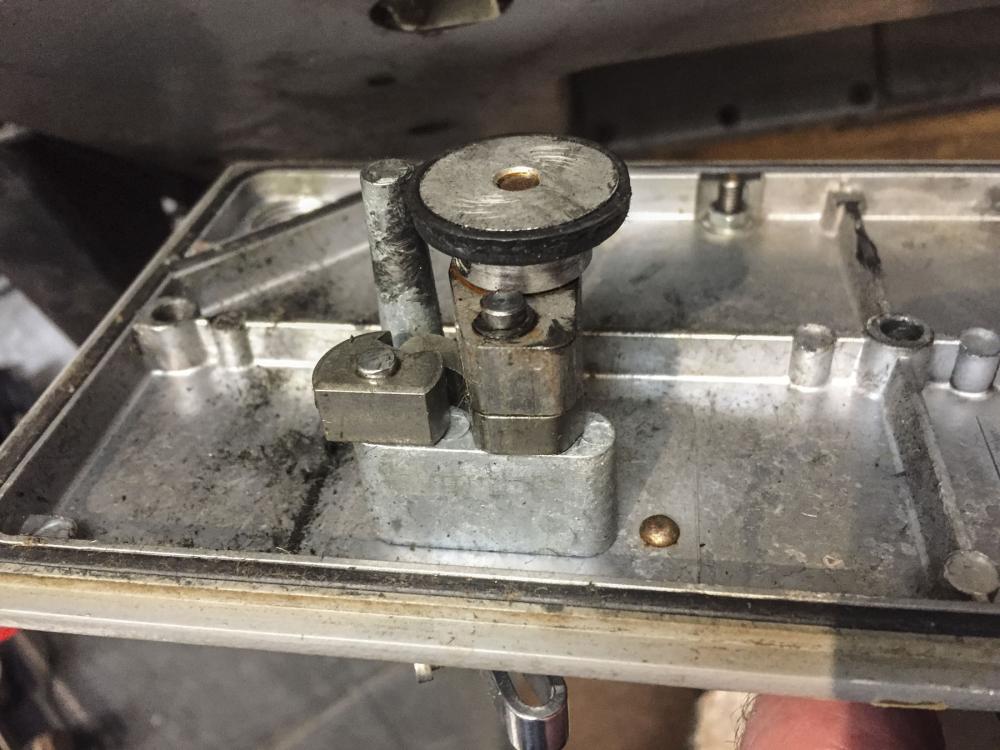
Just for general clarification on what part we're talking about , here are some snippets from the parts diagram and a few photos from my Adler 68:


-
I realized after making the previous video that I had used potentially confusing terminology. I made a second "proper" video that uses the correct terminology for the parts involved. The black part is the "latch".
-
The safety clutch on my Pfaff 545 works like this:
-
Your best bet is service department at Durkopp Adler headquarters in Bielefeld, Germany: http://www.duerkopp-adler.com/en/main/Support/ If they don't have it, nobody else will either.