-
Posts
1,540 -
Joined
-
Last visited
Content Type
Profiles
Forums
Events
Blogs
Gallery
Everything posted by TinkerTailor
-
Switching to crinkle during/after the war may have also had something to do with the name of the old finish, The machines were "Japanned".........Not a selling feature in 1946....
-
Can't add much that Big Sioux hasn't covered, Two things i notice are, In the first pic, on the bottom strap, it already has been fixed at least once and the fix is worn out. You can see a double stitch line on the bottom and looks to disappear off the edge. In the second pic, the bottom strap has all the stitching worn out, i bet all the rest of the stitching on that gear is not far off. In addition, its gonna be pretty hard to get a needles and thread through the original holes without picking the stitching. If you are remaking them for use, could you sandwich a synthetic webbing between the layers to get some strength back?
-
Provided the acrylics are flexible enough, you case from the back and don't over case, It should work. I have wet formed leather with a pretty heavy coat of resolene without flaking. If you can, go easy with the paint on the tighter bend areas. You may also want to test outside vs inside bends. The paint may crack one way and not the other...
-
Saw a video yesterday on how to add a headphone jack to the new iphone. The guy just drills into the bottom of a working running phone the depth of the headphone jack. Granted the headphones didnt work, but the phone still worked.....Just cause its on youtube..
-

Question on punching holes with a hole punch
TinkerTailor replied to Windrider30's topic in How Do I Do That?
Careful with the painters tape, I have had it stick and leave residue on some distressed leathers and more frequently when i use it on the backside. Not sure why. I just decided to stop using green tape on leather to prevent it. I do dust the backside of my patterns with super77 sometimes, then rub it a bit with my hands to reduce tack. It works great to give patterns that little bit of "stay right there while i trace/punch" -
Or use different leather. Sometimes a type of leather is just not suited to the task. Dying aside, how stretchy is it? knife sheaths made out of stretchy leather get all floppy over time, and tend to get cut bu the knife if you make them tight enough to properly retain it. Likely that leather is suited to garments and furniture. If it won't dye it also means its resistant to wine and chocolate stains...... which is a desirable trait for clothing and furniture.
-
Instead of matching the gusset length to the edge length of the front piece of the bag, measure the length of the stitch line. It will be shorter. The gusset actually follows the curve of the stitch line, not the cut line on the outside edge. Next time the gusset is too long, measure how much. I bet it will be really close to the difference between the outside measurement and the stitch line measurement. It is simply a geometry problem.
-
Official US Cavalry Bag Patterns 1-6-3.tif 1-6-2.tif 1-6-1.tif 1-6-8.tif 1-6-7.tif 1-6-6.tif 1-6-5.tif
-

Lower profile snaps or fasteners?
TinkerTailor replied to GaryNunn's topic in Gun Holsters, Rifle Slings and Knife Sheathes
In addition to what SLP said, some use a skirt shave with one toe in the hole to cut a recess all the way around on the backside to recess the socket some. Also, get a cue tip wet and stick it in the hole for 5 minutes or so before setting the snap, idea is to case the leather that is inside the hole and under the snap without affecting finish beside the snap. Moving the snap location down even just 1/4" away from that curve would help to downplay the appearance of bulk as well. The leather sort of falls away into the curve right behind the snap in the picture. I would also put the socket and stud on the opposite sides. The stud is lower profile, and will sink down a little by itself. The socket is the big part. It is really hard to recess a socket on the grain side without evidence, the flesh side is more forgiving. Now for a question, would a sam brown stud work or would it pop open when doing starsky and hutch dive rolls....? -
If you want it to wet mold and stay without glue, like in the video, it needs to be veg tan. Most garment leathers are chrome tanned. For chrome tanned, there is a technique of using glue, and thin pins. You slop the slow drying glue all over the back, form and pin it into position, putting pins in easy to hide positions, and then leave it till the glue dries. Remove pins after. Sometimes a few hidden well placed tacks can be hidden under folds.
-
Here is a video that I'm sure will be a big help. Speaking Italian would make it even better.
-
If you need just a few pieces, You can set one of these (http://www.csosborne.com/NO128.HTM) to make a groove deep enough so the bottom of the groove is just thicker that the final thickness of leather you want.. Then draw a close spaced grid with the groover on the backside of the leather. Use a safety beveler to remove leather until the grooves disappear. I also use a really sharp stanley block plane for this. It goes surprisingly fast.
-
I was trying to drag and drop the image directly from my gmail, the pictures showed up in the edit window, but the links broke when I posted it, I then had to leave for work.... Is there any way to resize the post window? I have discovered that posting long posts like this one is a pain with the new editor because i can't fit the picture and the text into the edit box at the same time. Here is the post again, with the images actually working: Impression #1 was waxed with snowseal several coats and then filled with jb. I embedded a screen into it and stuck on the block. For comparison, I included the final stamp #2(more on this later) and a clean copy of the original #3: In the next photo, after i stamped a piece of 5 oz, two correctable mistakes become apparent. The jbweld was too thick and i could not get out the air bubbles, however the detail of the bubbles perfectly transferred to the leather. I think the solution to this is thinner epoxy, whether it is thinned jb or a different product. The stamp is uneven because the block is not parallel with the stamp surface, so it stamps uneven. Care and attention while casting will fix this. Last one is on some chromexel scrap. All in all i think this is a workable process, though i have not tested it with a hammer, only a press. Its really hard to get an even impression with a big stamp and a hammer, and impossible on some leathers.
-
Thats it.....Hook fight.
-
I'm going to do some searching through the mountain of PDFs I have of 100 year old texts and manuals. Quite a few are on leather. I know one of them has a tutorial on this technique. No guarantees, it's a lot to sift through.
-
Economy tooling can be dry and hard. Get some neatsfoot into it and it should soften. Beeswax seals good but doesn't soften much. changing to a better softer style of veg will help as well.
-
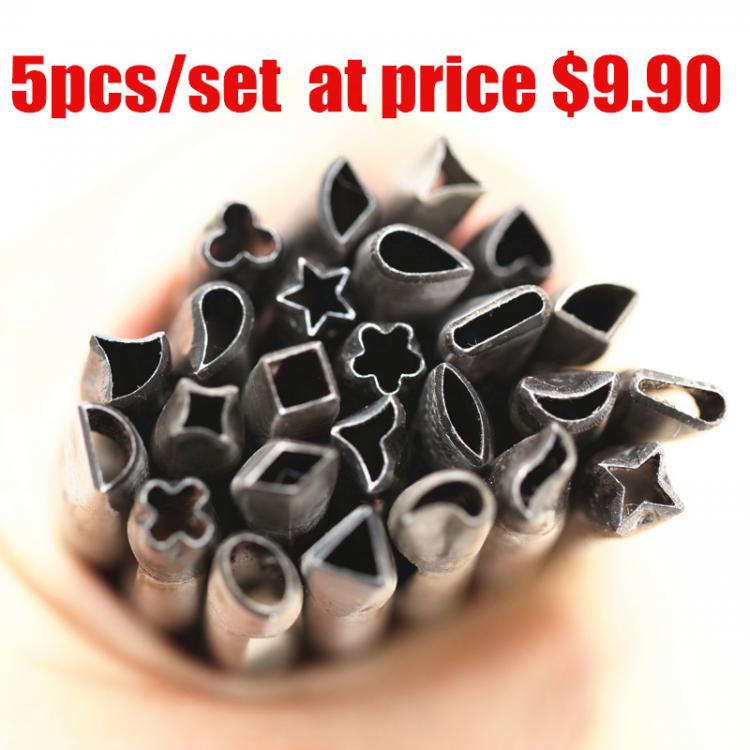
A good source for knives for filligree work are chip carving knives for woodwork. Shape size and style will depend on your preference. Both in what your hand likes to use, but also what the design and materials call for. There are also lots of cheap chinese "shape punches" on the internet that would probably be useful for corners and other things. Assume at that price they may need a little sharpening.
-
I found that storm trooper head on the street and glued a magnet into it. Never stayed on my fridge but he likes it on the wheel. Reminds him of the spinning of a death star. Here is my bobbin winder hole cover if you haven't seen it:
-
Every one i have seen is leather applied to a plastic case. That one looks to be the same.
-
Its much easier with two hands. It is also hard to film in landscape with my left hand....whatever, deal with it.
-
I just took mine off and on in about 5 seconds one handed while filming with the other. Considering my previous posts,I feel i must say that i did NOT do it with the power on.... Will post video tonight after work.
-
Guy could make one dog toy out of the whole scrap bin, layer upon layer, kinda like those Ukrainian nesting dolls. Great stitching practice. Nothing but frustration for the dog, peeling layer after layer off of the leather onion.
-
I watch a couple machining channels on youtube and those guys put a plywood box inside a flat rate box to strengthen it and then fill it with steel tools and things. We are talking a flat rate box filled and packed as tight as you can do it with carbide cutters, which are heavier than steel. One guy sent a 50 pound flat rate box florida to cali.............It was basically a hunk of steel the size of the box. The only problem they have is the cardboard giving away, hence the plywood.
-

Dying grays
TinkerTailor replied to TenHorn's topic in Dyes, Antiques, Stains, Glues, Waxes, Finishes and Conditioners.
Grey is hard . Fiebings used to make it and white, now they recommend dilutting their black dye. It is at the bottom of the page here: http://www.fiebing.com/tips/a-guide-to-using-fiebings-leather-dye/ You may want to try experimenting with blue dye as well, as a lot of grey has a blue tint to it. Edit: forgot vinegroon method (click on the title to read whole thing): -

Need Advice Buying Sewing Machine for Shoes Upper
TinkerTailor replied to EarleneAgripina's topic in Leather Sewing Machines
The 29 isn't known for being friendly with the leather. It likes to mark it. Most people I know who sew shoe uppers use a post with a roller foot. It is the nicest to the leather and easier to steer than a walking foot. Alberta boot company uses mostly post and some flatbed all with rollers for uppers. Look them up. They do nice custom cowboy boots.- 8 replies
-
- sewing machine
- machine
-
(and 4 more)
Tagged with:


