


fredk
-
Posts
5,974 -
Joined
Content Type
Profiles
Forums
Events
Blogs
Gallery
Store
Everything posted by fredk
-
Two suggestions; 1. get a bit of dowel, drill a small hole in one end, push the square-ish shank of a large size sewing machine needle into the hole. you have one pokey-hole tool. 2 one of these might work for you; and a cork block to push the pokey or needle into as it goes through the leather. you can get one for about a $ or two in a hardware store, as a 'sanding' block. keep to the large size or simply cut it down to a handy size for use
-
I use pre-waxed polyester thread in different thicknesses and colours, but mainly dark brown, light brown or black. Either pre-waxed or waxing during sewing is a must
-
Interesting A very different look
-
 A woman's bag too 'out there' for any blokes I know, and I know some real weirdos
 -
A number of years ago I got some python and croc embossed cow hide from Tandy in Manchester, England N.I. has its own animal & plants products import controls. My leather was stopped and checked and I was threatened with prosecution for importing skins of endangered species. It took a number of emails back and forth until them uns did a DNA test on the leather and found it was bovine, but they didn't back down and admit defeat, they left me with a 'warning', like 'we are watching you' A couple of years later I got some more embossed from Tandy, This time I asked Tandy to include a copy of their info sheet saying it was cow hide. The hides went through control and the packaging note was stamped by importation control as leather checked and ok. They missed the snakeskins in the box of hardware in the centre of the roll, There is just one way, possibly, to use really exotic leather. If its at least 100 years old and certified as such. I know of a museum restorer who used the hide of an old 18th century stuffed Bengal tiger to fix an old Zulu shield. The tiger was real mangy and only fit for burning.
-
No elephant, no tiger, no real croc, no real alligator, no pangolin, no rattlesnake yes for, ostrich, emu, kangaroo Check out the World Wildlife organisation lists for endangered species. If its on their list then avoid https://www.worldwildlife.org/species/directory List not exhaustive https://awionline.org/content/list-endangered-species#reptiles
-
Generally, in the UK you may not use any product from an endangered species. There is no licence which allows you over come this Despite N.I. being UK we have different laws. viz, I may not use any product, leather; from any snake or reptile or other endangered species. Totally forbidden, If I do and get caught = jail time and a big fine. N.I. has this overall law as some US rattlesnakes are endangered whilst others are not and the officials don't want the bother to segregate them and all ow some as they cannot tell which is which with out DNA testing, same for some crocs, other snakes
-
The ones found here would not work. The bases are often too rough and there is not enough smooth area on the top, its often moulded in ridges & valleys around the rim Yup, I checked them out whilst searching out the paper weights
-
I find them hard to see but I suggest they are 'sail eyelets' eg
-
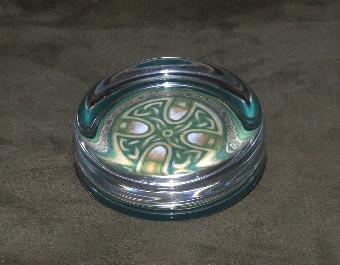
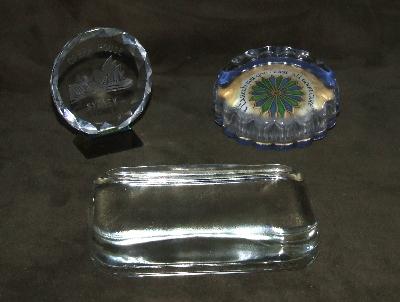
I have a thick piece of hardened glass for burnishing the surface of leather but its not the best as only an edge can be used. The other day I could not find it and searched out something else to use. Then I thought, maybe I should buy another couple of burnishers. I dropped that thought when I saw the price and size of the few that were available. Then I thinked a thunk. What is needed is a perfectly smooth and hard surface. Something of reasonable size A glass paperweight I went onto ebay, looked up glass paperweights and found tens of thousands going for 99p each. No-one really wants them. The sting in the tail is the postage, or s & h to you US readers Here are some I got; 1. Round, 70mm [2.75 inch] diameter. It has a very, very slightly depressed centre but it works fine. It fits the hand very nicely. Cost was £1.20 + £3.95 postage. I sort of bought this one because of the Celtic design in it, but thats just paper stuck on the base, 2. Better value was this set of 3. Obviously the one on the left is of limited use because its solidly attached to a base. I'll drop that one into a charity shop [thrift shop] But the other two are useful. The round one has a Christian saying in it so I like it. It is the same size as the previous one at 70mm diameter overall. A very, very slight depressed centre top surface but it works well because of that. The rectangular lump is 107mm long [4.25 inches] by 65mm [2.5 inches]. The top is perfectly level and smooth. This lot cost me 99p + £3.20 postage So, for under £10 I have three decent glass leather burnishers. And they can be used as weights. eg. I use some lead weights to hold leather onto my cutting table when the leather hangs over the edge. These will do the same job and look nicer to boot If you go for the same, look for flat disc shaped paper weights. Watch out for clear plastic resin ones being sold as 'glass'. If unsure, ask the seller about the paperweight. Be aware that this may start you off on another hobby. I have two more paperweights on their way to me, bought for their subjects not for burnishing, but they may get impressed into the work force
-
I use a seeder stamp You could grind down a 2mm or 3mm hole punch till the metal of the walls is thick and blunt. Problem with a a blunt nail or a nail setter is its too easy just to punch a hole right thru
-
try rubberised horse hair. you can get small amounts, like A4 or A5 size, in model railway supply shops. For large amounts look to upholstery suppliers
-
Acrylic paint and a small paint brush followed by several coats of acrylic varnish
-
Transport leatherworking Supplies for Youth Groups
fredk replied to resqman's topic in Leatherwork Conversation
A. do the granite slabs need to be that large? I often use a chunk of marble that is only about 6 inches by 4 inches. Cut the slabs in half to 6 x 6. That'll reduce the weight. b. get an angle grinder with a fine cutting disc on it and use that on the edges and sides. you'll soon have smooth edges c. use a wooden fruit boxes/crates for them d. mechanics tool chests for all the tools. you can probably get ones cheap in 'Harbor Frieght' [ name?] like the top part of this unit I have one set of drawers just for 3D/2D stamps, one for sewing things, one for general purpose leather working tools, and one for spare tools and odd things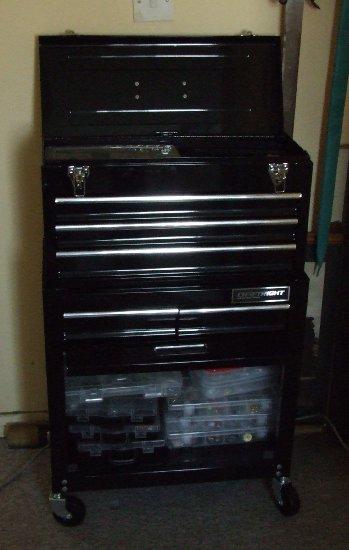
-
-
A very similar knife is sold in the UK (EU as well maybe) as a Stencil Knife. For cutting through thin plastic sheet or card for making painting stencils
-
What about 1mm round leather lace.? I get it from an ebay seller. Its available in many colours https://www.ebay.co.uk/itm/Real-Round-Leather-Cord-1-mm-String-Lace-Thong-for-Jewellery-Necklace-Genuine-HQ/132939661899?var=432459571095 I made mini brass needles to use with it. The needles are made from 1.2mm brass tube.
-
May I suggest you line the jaws with thin leather. It will help grip and prevent the jaws marking the leather project
-
wot he says. sand paper = common name. Use 600 grade wet & dry paper. And if you want really polished, then go to 800 grade. then 1200 grade and then 2000 grade finishing off with a metal polish such as Brasso
-
thanks for the responses so far I've even considered attaching one side of velcro to the inside of the helmet, and the counter velcro to the back of the fleece, then it should be easy to fit and remove for cleaning or replacement.
-
I'm in discussions with a chap regarding a flying helmet, aka an aviator's helmet Like this type, a basic simple one I've no problem making the outer. Its basically the same as a medieval coif and I've made a number of those. My problem is this chap would like it lined with fleece. Either real or faux fleece. He would like it fully lined, or even just around the face and back to the ears and around the rear of the neck I'll be hand sewing as I've not got around to larning how to use any of the sewing machines I have How to fit the fleece? I was thinking of sewing it to a thin-ish lining leather or cloth and sewing that to the main panels along the panel joins as I sew it all together How do you sew fleece? Could I get away with just gluing it in place? If I get this right this chap says he'll want about a dozen made. Any ideas or suggestions folks?
-
Its curling because the leather is drying out and there is tension. You need to counter that tension, with a piece of leather glued on the back. A slightly thicker piece. Dampen it and let it dry out. I believe as the backing piece dries it will pull the corners and edges down
-
They'll need sharpened as well Now, punching the sewing holes - 1. block of bees wax 2. stab chisel teeth into wax 3. punch some holes 4. punch some more holes 5. back to 2 6. as 3 & 4 until you're all punched out
-
Cold Dead Hands Holster
fredk replied to hashtagartz's topic in Gun Holsters, Rifle Slings and Knife Sheathes
They look clear and sharp to me -
It looks very nice so it does eh? please elucidate