


fredk
-
Posts
5,976 -
Joined
Content Type
Profiles
Forums
Events
Blogs
Gallery
Store
Everything posted by fredk
-
Experience talking ?
-
 You don't 'need' to buy a new tool for making a groove; your ruler and an old used up ball-point pen. A used up pen, no ink, press it hard and it will leave a fine groove for you to follow
 -
9 hours ago fredk said afair, and I may be wrong, the political chat was supposed to be in a hidden section, just like the 'life style' leather section, and you were supposed to ask to be allowed into that section. However, it appears it didn't go that way. The 'permissions' doesn't seem to work properly. I've never asked to be allowed in to the 'life style' leather section but I see everything anyone posts in there
-
afair, and I may be wrong, the political chat was supposed to be in a hidden section, just like the 'life style' leather section, and you were supposed to ask to be allowed into that section. However, it appears it didn't go that way. The 'permissions' doesn't seem to work properly. I've never asked to be allowed in to the 'life style' leather section but I see everything anyone posts in there
-
1. If they are steel or iron, put them in a closed up bath of very strong lemon juice & water. Leave them for a couple of days, inspect, and renew the juice. Eventually the corrosion will be converted 2. once cleaned up you can give them a light coating of spray paint. You can get a spray-on zinc coating [at least you could]. Car restorers use it on steel/iron parts
-
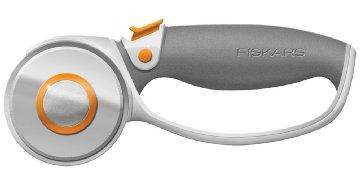
The rotary knife is good for cutting any thin leather, up to even 4mm thick. It doesn't pull the leather so you get a nice straight cut the whole length
-
Try to get one of these rotary blade knives. They cut this type of leather much easier
-
Dye the edge and rub in plenty of bees wax
-
-
1. consistency; on the three large pocket wallet you have sewn over the edges of the pockets in three places but not the fourth 2. your thread looks to be a bit too big for your stitching holes 3. your thread looks very dry - did you wax it? and refresh the waxing as you sewed? 4. I suggest you make a stitching groove along the line of your sewing. It doesn't have to be cut into the leather, it can just be a pressed in groove 5. use a lightweight hammer or mallet and tap down all your stitching 6. your back-stitching at the ends needs working on. It looks too rough but I think that may be because of # 2 7. I suggest you put a circular hole in the apex of each corner so the sewing changes direction neater 8. On the two pocket wallet; have you sewn over the edges of the large pocket? afais it looks like you did on the top but not the bottom, back to # 1 9. you can use strong double-sided tape to hold plastic windows in place
-
I think that is actually two or three stamps Something like a 'Sunburst' 301 in the centre and a veiner 406 on the edge
-
Look further up the page; I posted a photo of plumbers aluminum heat proof tape. That's what I use. I stick that [its self sticky] on the inside of the wallet, on the outer piece, then cover it with very thin lining leather so it can't be seen, just for beauty looks
-
But it ain't a 'scam' if the customer specifies or asks for it. The last wallet I made for a guy he asked for the RFID protection and wanted me to show that it worked. I asked him if he thought he needed it and he was quite definite that he wanted it and said that he reckoned his cards had been skimmed and he'd lost about £5000 and didn't want it happening again.
-
Our cards and equipment must be very different. At one shop I frequent, their card reader is well behind a spit screen. I can wave my card at it from 6 inches away and it will read my card - I have measured the distance. At one place today my card was no closer than the width of my hand - about 4.5 inches - away from the shop reader and the payment was taken Also when testing the aluminium tape I mentioned above, I made several small card wallets of various thickness of leather, all them to hold more than one card. I used cloth, plastic and thin leather linings as well as no lining. The only time the card readers would not read any [I used several different payments cards] of my cards was when there was that aluminium tape between the card and the reader The risks are not 0 - they are low but the thieves in Belfast got several thousands of £££ from hundreds of shoppers. And unless the shopper really notices they don't contact their bank over £25 - they just think they've spent it somewhere. Slightly different - but I do know of several ladies who had debit cards cloned and small amounts taken from their accounts regularly, each lady believed they'd spent that money. It wasn't until the police contacted them about the cloned cards did they find out the truth. Even I had a card cloned and my wife thought I'd spent the money and I thought she had spent it. It was all small odd amounts that looked like small purchases. It was only when our bank fraud office contacted us we found out A PS. Here you can get a card reader which will take a payment from your card and puts it straight into a paypal account, so that simplifies the route the stolen money gets to the thieves
-
Not really a scam using blocking material Christmas before last N.I. police stopped some thieves using a store type card reader to get payments into their 'account' The thieves were doing 'sales' of about £25 a time - the card limit on contactless was £30 - and were simply going by womens' handbags in very busy & crowded shops. They passed the card reader over near the handbag and the reader took the money from the card. Police would not give full details, for obvious reasons but advised women to use a RFID card holder
-
To me; hard leather = a good stiff veg tan and soft leather is like chrome tan lining or upholstery grade leather Just like wot you used
-
or one of these, for now, Will cost anywhere from £10 and upwards. Mine cost me £10.50 a few years ago. Don't pay over £20 for one
-
As I said, I use a sewing awl, for widening holes, but for pulling lace up tight or to loosen I use a hooked dental probe, which I have blunted
-
My leather seems to be a paint stripper
fredk replied to nbutterfield186's topic in Leatherwork Conversation
I think the two incidents have two different causes -
Certainly don't put any NFO on. It will leach out and stain the Bible. Just dye and M&G should be enough
-
Trying to compare unlikes?
-
Resin Printer for making embossing plates and stamps
fredk replied to BDAZ's topic in 3D Printers and Lasers
That looks absolutely superb so it does A thought; you could print the design with a raised border line top and bottom, then when its pressed into the leather it makes the stitching groove/line at the same time -
I just use a regular sewing awl. If you have a spare sewing awl you can round off the point
-
One thing we must remember is that these bricks & mortar shops have large overheads that need paid. Thus, a valet tray that I can make and sell would see me in good profit at £10 needs to be at least £40 in a B&M shop, because they have to pay for electricity, city taxes/rates, employees wages et cetera, which I don't have to So, whenever we see these expensive prices, divide by 4 or 5 and see if that item is worth that, or can we make it for that or less
-
I need a belt expert
fredk replied to Dwight's topic in Purses, Wallets, Belts and Miscellaneous Pocket Items
imo I think you'd be better off making a fresh one. I think you can do it in time given. Better to be a bit late with a good item than on time with one you're not really happy with