


RockyAussie
-
Posts
3,265 -
Joined
-
Last visited
Content Type
Profiles
Forums
Events
Blogs
Gallery
Store
Everything posted by RockyAussie
-
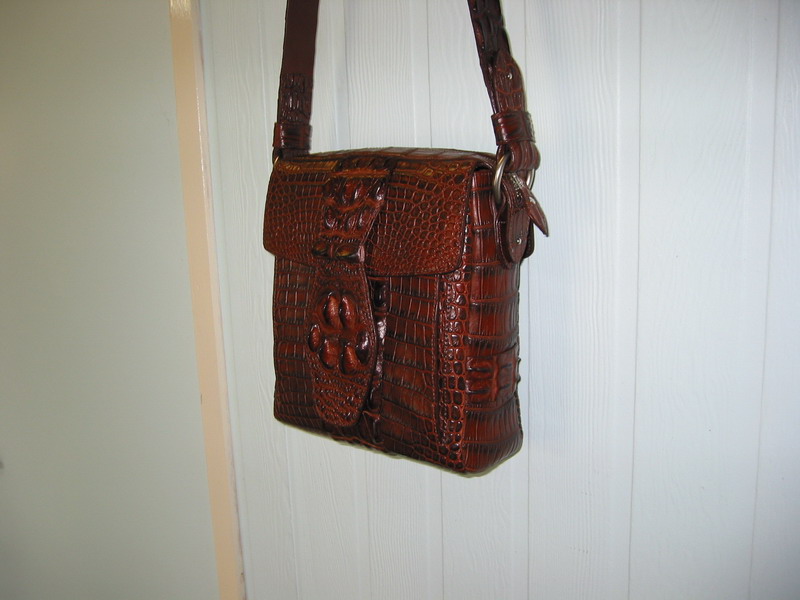
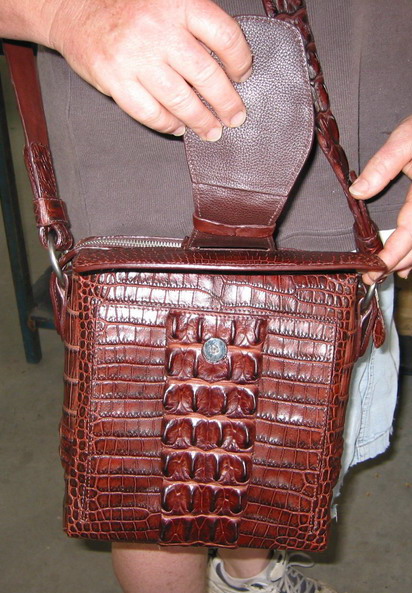
Here a couple of pics of a bag I designed a while back. It shows how with just pouch studs and a keeper you can make a small adjustment to length on both sides.I believe that you could attach similar to your centre gussets but a couple of inches lower down. Regards Brain

-

looking for someone to cut 2 inch leather circles -nat veg tan leather
RockyAussie replied to teresamwong's topic in Old/Sold
If this helps with a clicker press that's about 50 minutes to cut and a quick calculation says a little over 3 square feet should do you a hundred if its clean. Over this side of the pond I'd charge you a dollar AU each(about 75c US last time I checked) and with your logo done as well. One off stamp made here would cost you another $75AU though. Surely there has to be someone over there can do it.............. Best of luck. Regards Brian -
looking for someone to cut 2 inch leather circles -nat veg tan leather
RockyAussie replied to teresamwong's topic in Old/Sold
If you don't have a lathe I reckon that's a good tip. -
I just sold an Adler that does this job. It is a twin needle with a single bobbin and the tension can be adjusted to make the raise more or less. It was a pretty good machine in that it can be a single needle or a couple of different spaced twin needles. I can get the model number if you want to track one down.
-
The machine looks in good condition and the grease cap etc all looks as normal. The cap says time for a little refill but as to the type I cant say as I have only ever used the same grease as I use on my vehicles. To be honest although mine get used a lot they have gone for more than a year or 2 without a check at times. The rubber dust cover should be replaced but they do seem to go for a lot of years in worse than that condition ok. There is no way the feed wheel should be able to touch anything except the bell knife or the presser foot if it is lowered too far. If you are hearing a metallic scraping sound it is likely the cover on the right touching the bell a bit. The black knob that is attached at the front to it can be also rotated around to give more clearance from the bell.Try to adjust to a minimal clearance so as to not have leather wanting to get in between. If the bell is wearing out the ejector may be coming to far forward in the bell and need to be pushed back into the bell a bit deeper. Once the threaded rod is screwed in the ejector can be forced back and forth sometimes with a little tapping. The bell should be only a mm or so from the edge of your presser foot unless you are doing very heavy thick leathers. Hope this helps Brian
-
Leather newbie seeking answers about watch bands
RockyAussie replied to doingmahresearch's topic in Leatherwork Conversation
so backing Horween Chromexcel or Dublin would be hard since they are both waxy/oily? In regards to good adhesion to backing (stitching can overcome this a bit) and edge coat if applied to edges for durability. Not hard to do just not such a good idea. As for asymmetrical I have only ever done symmetrical but I doubt if there would be any significant difference to stretch but that may depend on the construction method used. I have only ever done bands with fillers to enhance the profile but I guess that would also give more resistance to stretching.. -
Well I must say this is somewhat disconcerting. Most members I think come here to get some assistance and sometimes to help people with a problem. Invalid interjections aside and before the moderators can shut this down, JLS I have given this some serious thought and have come up with a few hopefully helpful suggestions. That little spoon used for getting into those tighter areas when ya moulding THEY call it a T spoon and is somewhat misnamed as its really a coffee and sugar spoon when not in the workshop. Now here's a tip worth noting - If after making up a cuppa n tasting you find that your eye is suddenly hurting, you have to remember to take the spoon out of the cup first. Oh and dont forget that it must be thoroughly stirred first. Ya coffee I mean. Now I must admit I have been getting a little inpatient of late and what I am trying to work out is how can I teach mine to match up my socks???? Over 30 years married now and I still cant work that out I already know not to say anything after 4 as its getting to close too dinner by then. Any help would be most appreciated. Seriously
-
Leather newbie seeking answers about watch bands
RockyAussie replied to doingmahresearch's topic in Leatherwork Conversation
As to the finishes I agree with Mike and as to what is suitable I could only say ones that are not oily and waxy are easier. In the watch band pictures of mine above you see one that has a red back and on that one I embossed a line pattern onto the entire back surrounding the logo. I have done many various patterns and the reason I do this other than looks is that I don't like sweaty watch bands and this helps the air keep the band dryer and more comfortable to wear. To save you a lot of experimenting try .25mm as your line thickness if you are getting plates made for the impression. The backing leather is best on this with a firmish veg. The lines will make it more flexible.Below see a picture of one pattern version which allows a space for the holes. Regards Brian
-
I've only ever used them with the ejector in place so how they go without one I could not say. If you have waste coming up to the top often then I would have to say it would help. Regards Brian
-
40W Chinese Laser - Engrave and Cut Leather - Discuss
RockyAussie replied to Billy Hell's topic in 3D Printers and Lasers
-
Nice job and well done. Lucky you had the bolt hand to help.
-
Thank you so much for this Tom, I will try and do some tonight and see how I go. With a bit of luck we may have to pin your input here ?? Regards Brian
-
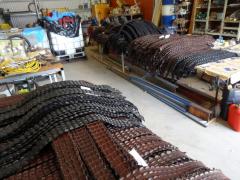
Backstraps to process
RockyAussie commented on RockyAussie's gallery image in Gallery- Our Leatherwork
 Thanks. I forgot I had loaded these other pictures but I will load a heap of the belt making steps from them over the next few days.
 -
Did I not warn you bout them NZ ones already mate??? Next time spy on her and see how you it is you like your coffee and threaten to make it yourself in the future......Maybe
-
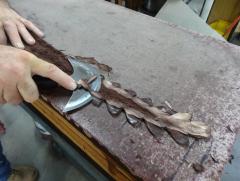
Thinning the tail tip to fit into splitter
RockyAussie commented on RockyAussie's gallery image in Gallery- Our Leatherwork
 Oh Bugger, that's nearly closer to me here then.
 -
Leather newbie seeking answers about watch bands
RockyAussie replied to doingmahresearch's topic in Leatherwork Conversation
The ones shown would be very inexpensive to make but they will stretch longer in a very short time. If your watches are throw a ways these would be fine. Just to add to what Mike has said I think the oily waxy type leathers can be a little more of a problem in watch bands due to the glue not sticking as well and the edge coat being more likely to peel up. Brian -
Teflon are a fair bit better but I like the roller way more. You may be able to buy some teflon tape and try it. Brian
-
Leather newbie seeking answers about watch bands
RockyAussie replied to doingmahresearch's topic in Leatherwork Conversation

-
Leather newbie seeking answers about watch bands
RockyAussie replied to doingmahresearch's topic in Leatherwork Conversation
To not go and waste a heap of time answering a whole heap of variable methods and their pluses and minuses I would suggest advising what sort of a retail price you hope to achieve and what you think a band to suit would cost you. I have made many different types for different purposes and on some more expensive watches the deployment type clasp may be preferred and so on. The actual skin types used and the variety also has a bearing in the method best used to manufacture. Croc skin with folded edges is difficult and therefore more costly. If price is important then none of the videos I've seen here or elsewhere would be anywhere close to realistic in time to produce. A stitched watch band is best for sure. Marketing and a name brand count for a lot I have to say. One of the biggest brands I have made for has sold into Nieman Marcus and Sachs amongst others and is also one of the quickest and easiest bands I've ever done. Was their design and the silverware on it made it extra nice.are you yet able to post any pics of the watch? Below are a few of the bands I have done some low cost some not.Regards Brian


-
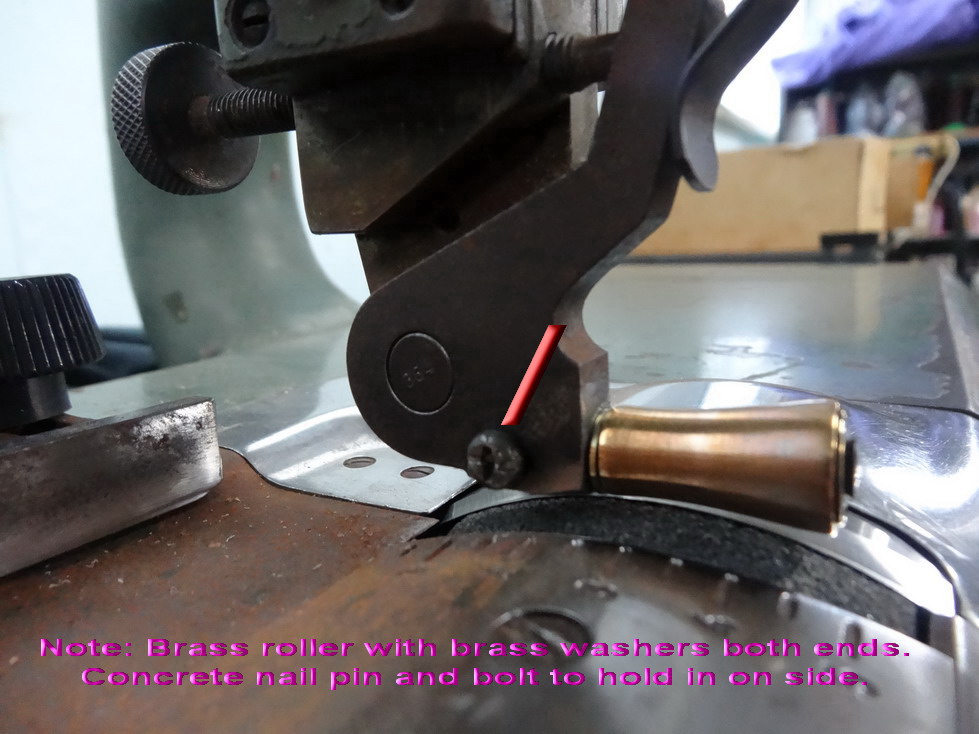
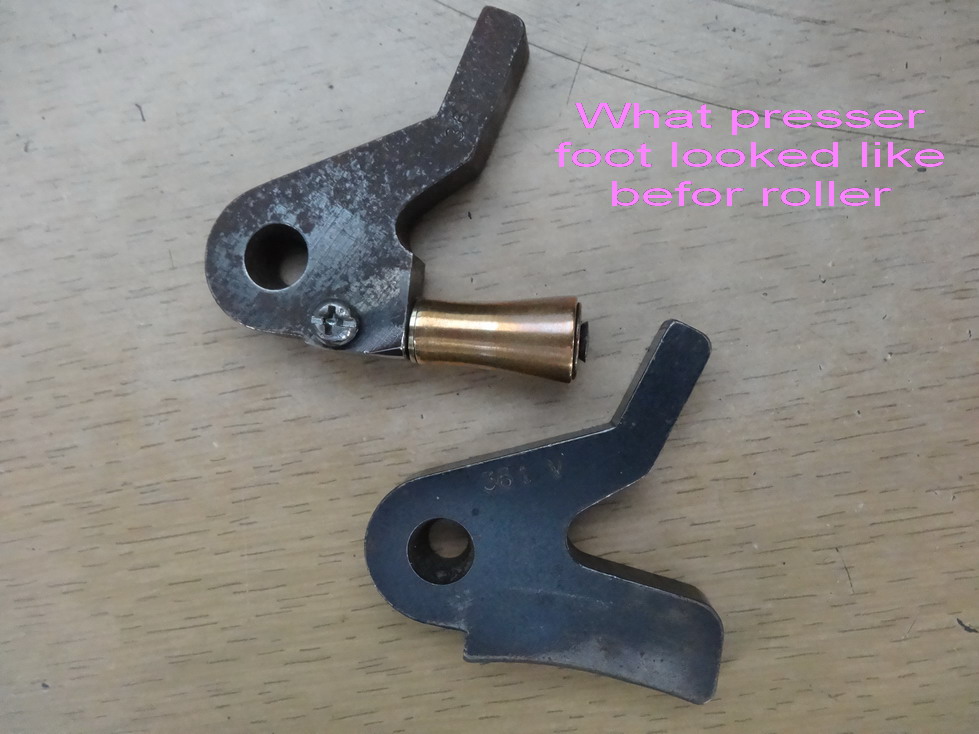
Ok I checked into the 34mm roller and yes I see it. I cant think why they make it as I have never wanted a shorter feed and if anything a longer feed would be better. As far as their feet go I cant say to be sure if there would be any problems in using their 34mm roller on a 50mm wheel. About 20 or so years back when I am not sure if they even made roller feet I made my own, even before I had a lathe. See in pictures below. They start off as a common foot that comes normally with the machines and I just got a bit of round brass and drilled a hole in the middle and smoothed off a nail made for hammering into concrete. I then cut down the foot to fit with a hacksaw and filed and sanded up then drilled it out to take the nail. To stop the nail turning I ground a flat on the side of the nail then drilled and tapped the side of the foot to put a small bolt to touch the nail.The pics should explain mostly I think. It needs some oil in the hole every now and then. Once I had the brass on the nail and installed I just ground it down to shape comparing it to the feed wheel roller. It does not have to be as an exact match as you might think and it is easy to take of the machine and re sand a bit if you think it is needed. After a few years of heavy use they can get a little sloppy but that does not matter much as when the job feeds through it just moves up and ends up straight anyway. Have some fun. Brian
-
Thinning the tail tip to fit into splitter
RockyAussie commented on RockyAussie's gallery image in Gallery- Our Leatherwork
Ha Ha I see in your profile albums you've got some pretty nice round knives and sheaths yourself. Did I see your hand up.. Is Pennsylvania anywhere near Seattle??? -
G'day back to you Hennessy. Yes it is a salty backstrap (porosus) skin. Contact glue is what is used and probably because that is all I ever used in years of shoe making and repairs. Years of sweat does take its toll though as you can see. Many customers do buy a new one again but still like to have their old favourite repaired anyway. I myself generally don't get to be the seller and whatever arrangements they do is their business I just like to assist if I can. Normally if the belt looks cared for I fix it for free but whether the seller charges or not is another matter. The seller gets better than double I do so I figger some of the good will needs to come from them as well. I hope that someone puts their hand up soon but so far no takers. Price I have to say is up to the buyer and what ever he is willing to pay. Regards Brian
-
Thanks for the try Tom. When you go to my profile section across the top there are 3 sections and in the third there is albums. This is where I am trying to post the pictures so that they are visible if people if they care to look there. I am trying to do this so as to not crowd out the gallery section with pics I have posted before in activity threads and some more relevant to how something is made. The aim would be when answering someone's thread that I could refer them to that section rather than chewing up data space repetitively posting pics on LW. I am sorry that I am a complete 1/2 wit with this techy stuff and at the end I guess I could just go ahead and have them all show in the gallery. Thanks again for your help here and for all the help you give to this site as well. Brian
-
Hi Adam, I am only aware of one size feed wheel. They can come in a few different types as in fine and coarser stones and likewise in steel and even in rubber but as far as length and diameter they are all the same as far as I have ever seen. The bell is a set shape and the feed has to match. The shorter length roller yo mention should give you a bit more angle if you need and the 50mm would be better for splitting purposes as it may require less passes. The one I have shown in the video above is about 31mm long and due to its shape being bigger on one end I can angle it a lot for grooving out as well. I don't know if this link will help but it shows the foot I used in the video.Best of luck Brian https://ko.aliexpress.com/item/2pcs-Roller-Presser-Foot-For-Skiving-Leather-Machines-nippy-fotuna-taiking-801-parts-kit-best-Quality/32782944504.html?spm=2114.53010508.4.103.7VVEtX
-
Backstraps to process
RockyAussie commented on RockyAussie's gallery image in Gallery- Our Leatherwork
Yea, about 90% go into belts then ones too big go into stubby coolers and such and the off cuts from the belts mostly go into hat bands and wristbands and key tags and purses and and so on. Couple of pics should help here.
