RockyAussie
-
Posts
3,265 -
Joined
-
Last visited
Content Type
Profiles
Forums
Events
Blogs
Gallery
Store
Everything posted by RockyAussie
-
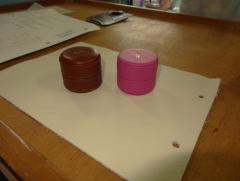
From the album: How to make a ring box
-
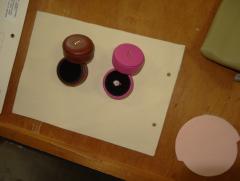
From the album: How to make a ring box
You can see details in the how to section as I make them through this week -
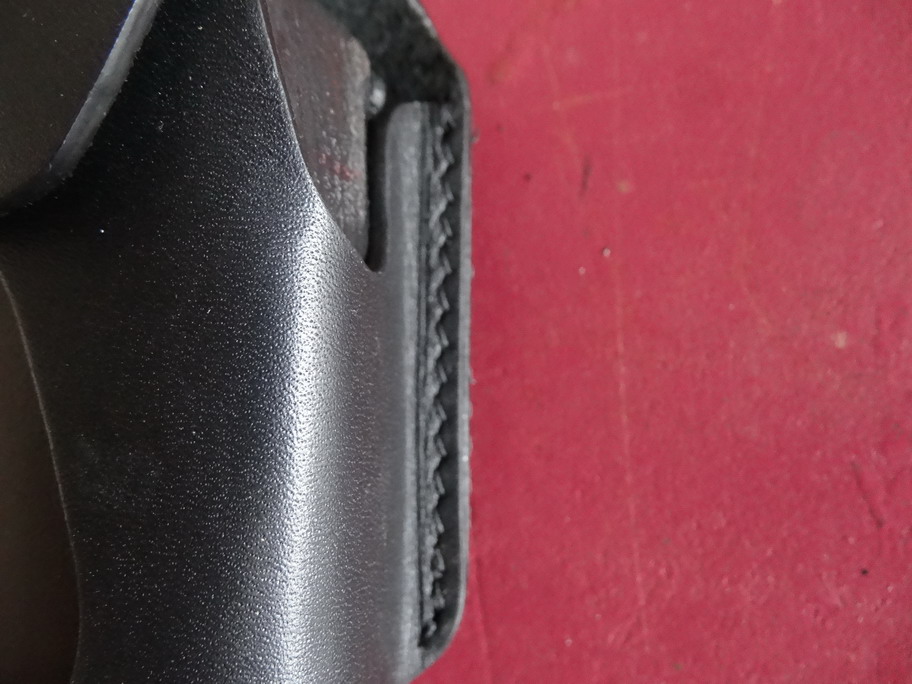
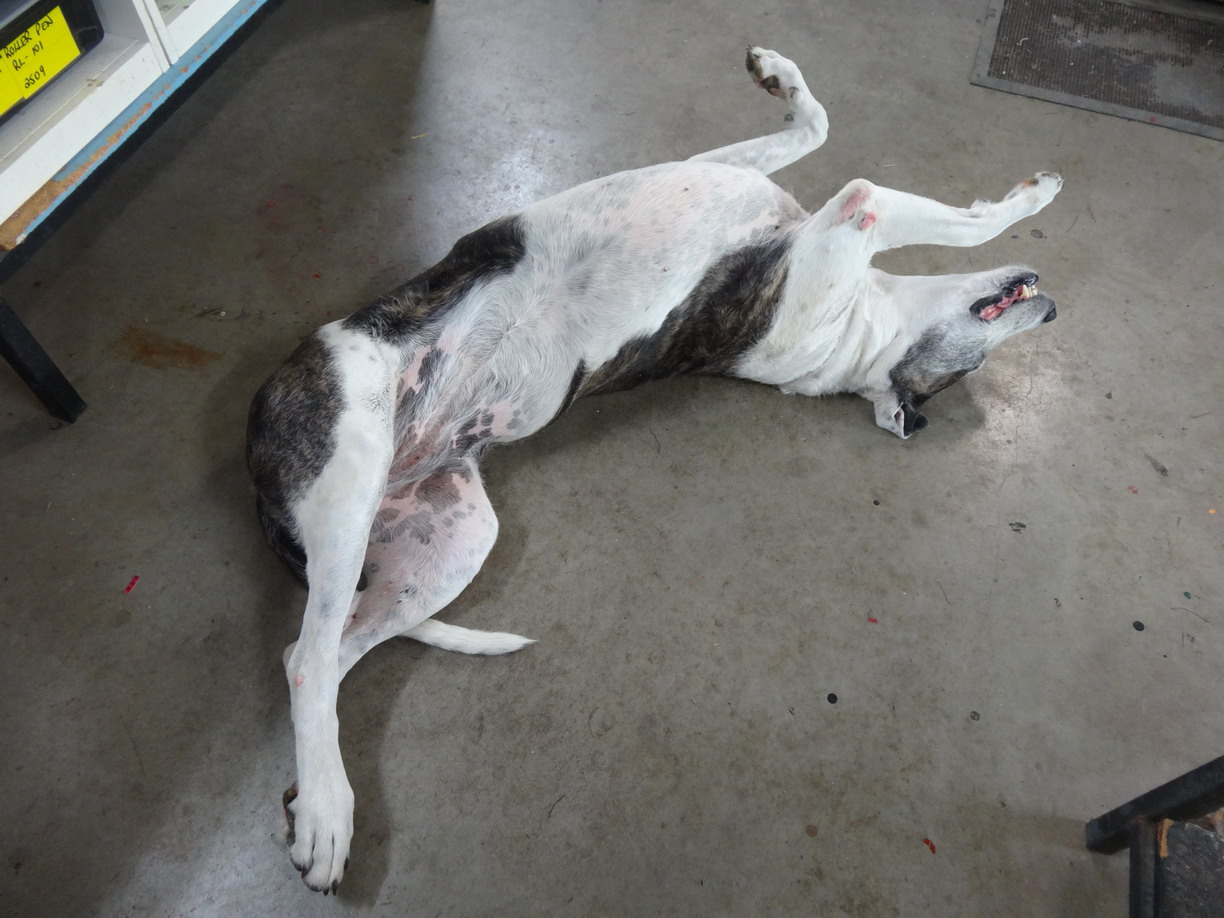
 No most things we stitch are glued and set into place before stitching. One exception is the circular coin purses which I think can be seen on my u tube. I hate doing them so leave it to the more adequate women here. Hope none of them read this. I would have left the zip completely separated and glued each strip to the liner piece first then to the outer and then joined at the zip bottom. But if I were doing more than the one I would make up a board to 3/4" or so thick to that shape and use it to keep the zip in shape and even on both edges and use it to tap down on where the glue holds it in shape. Though these pictures attached are not quite the same the principle is the same. To cap - zip to liner - liner to outer. Hope that is of some help. Just found a pic of my helper "Molley" who is worn out from toooo much guard duty I guess Brian


-
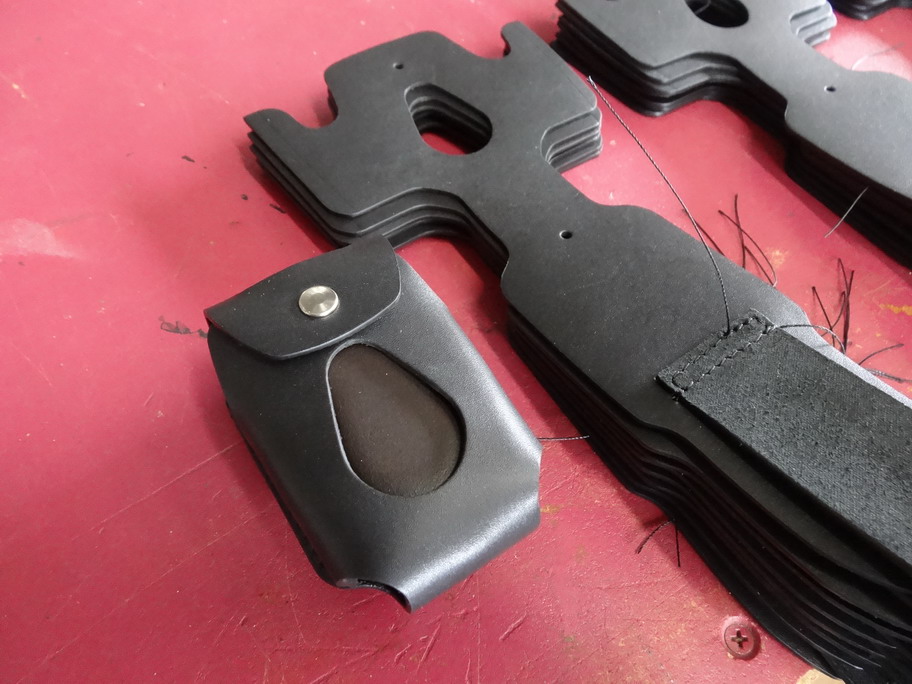
Nice looking work and attention to detail on the stitching. Interesting design knife pouch as well. Brian
-
Beautiful stitching and I think that bag is quite safe being with your helper there. I was wondering how you would go stitching the zip in without being pre glued into place but your competency keeps showing through. Brian
-
TECH SEW 2750 PRO BINDING ATTACHMENT
RockyAussie replied to Appaloosa's topic in Leather Sewing Machines
In the past I have found that the softness/stretchiness of the leather means that for one leather the thickness needs to be this and another that. It is frustrating unless you do large runs of a colour and of the same type . On some jobs like bags I do binding but I don't bother with the binding attachments or for that matter even the dedicated binding machine I have. Where fabric tapes tend to stay nice and true and run smoothly many leathers don't like to play by the same rules. In mostcases it is quicker to glue it in place and sew than the time to get everything set perfect to bind. Just my opinion. Brian -
From my point of view on this I think being a good maker and being a good marketer are very different skills and some I make for double in their mark up and some as much as 5 times in their mark up and as you said, once they pay my price the rest of it is their own business. 95% of my work is done with other peoples brands on it and that keeps a roof over my head and food on my plate as well as a few others so that's OK. I do prefer making product so that's what I mostly do. Brian
-
COWBOY CB 4500/441 Stitch length increment fix
RockyAussie replied to RockyAussie's topic in Leather Sewing Machines
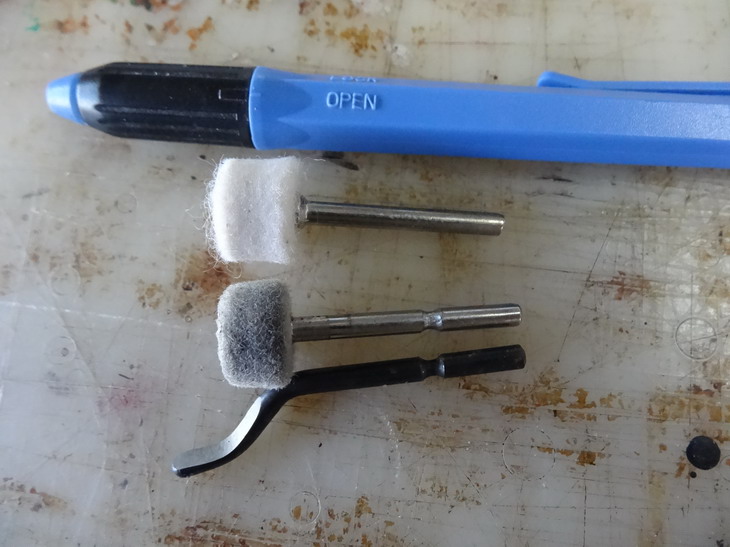
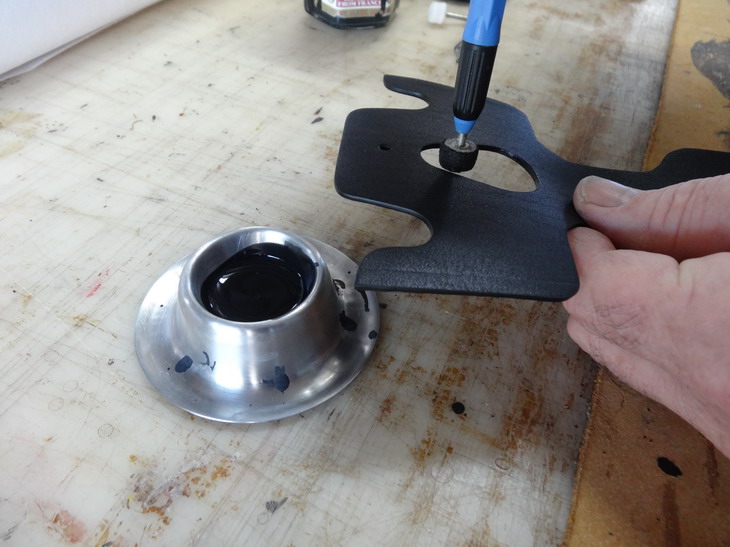
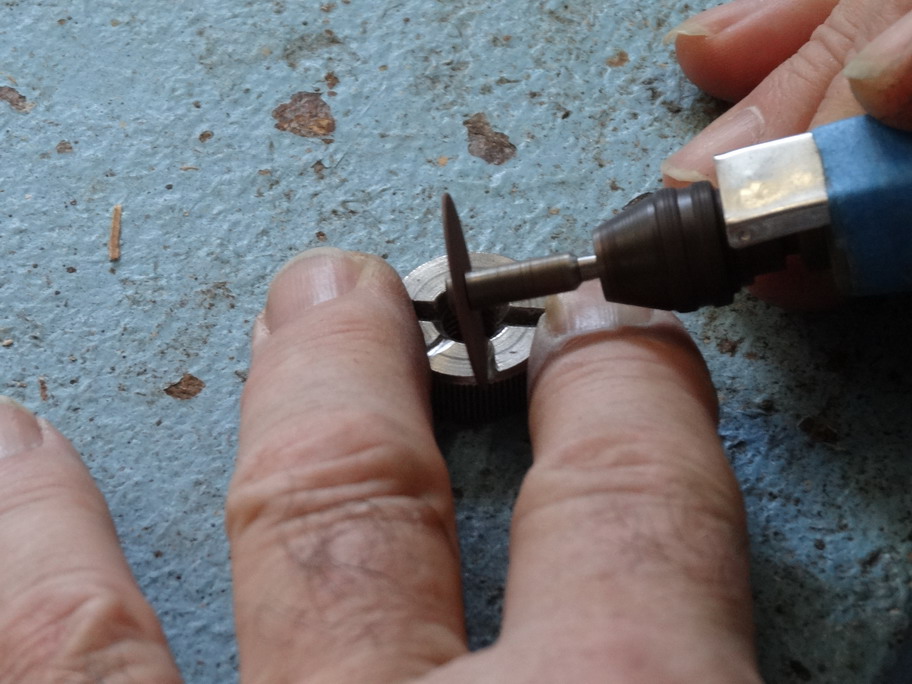
I reckon if there's a clean bench top and your a leather work you just aint been busy enough. Regards to the felt when you get one loaded I found it useful to smooth it out a bit and I've done that by letting it spin against the sander as shown in the picture against the disc. Don't do for too long in one hit as I think the insides of the holder are fully plastic and probably won't take too much heat in one hit. Let us know how you go. Brian
-
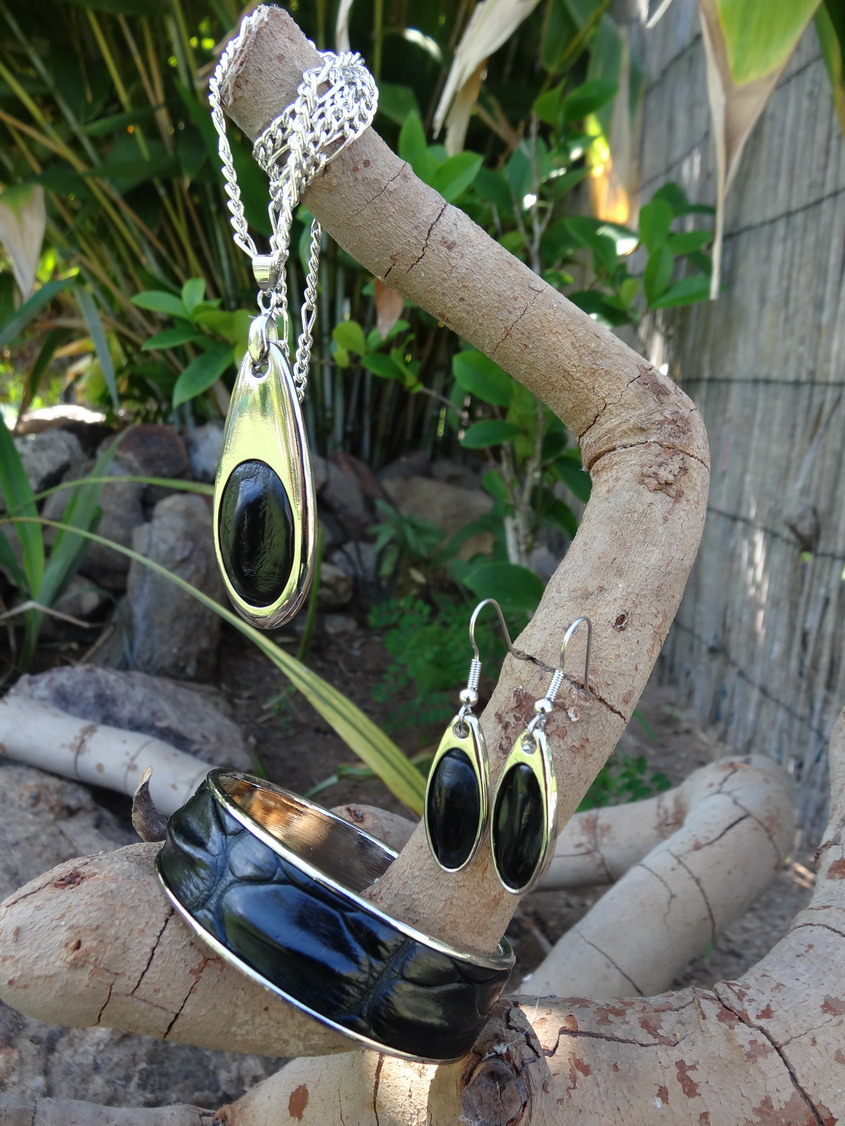
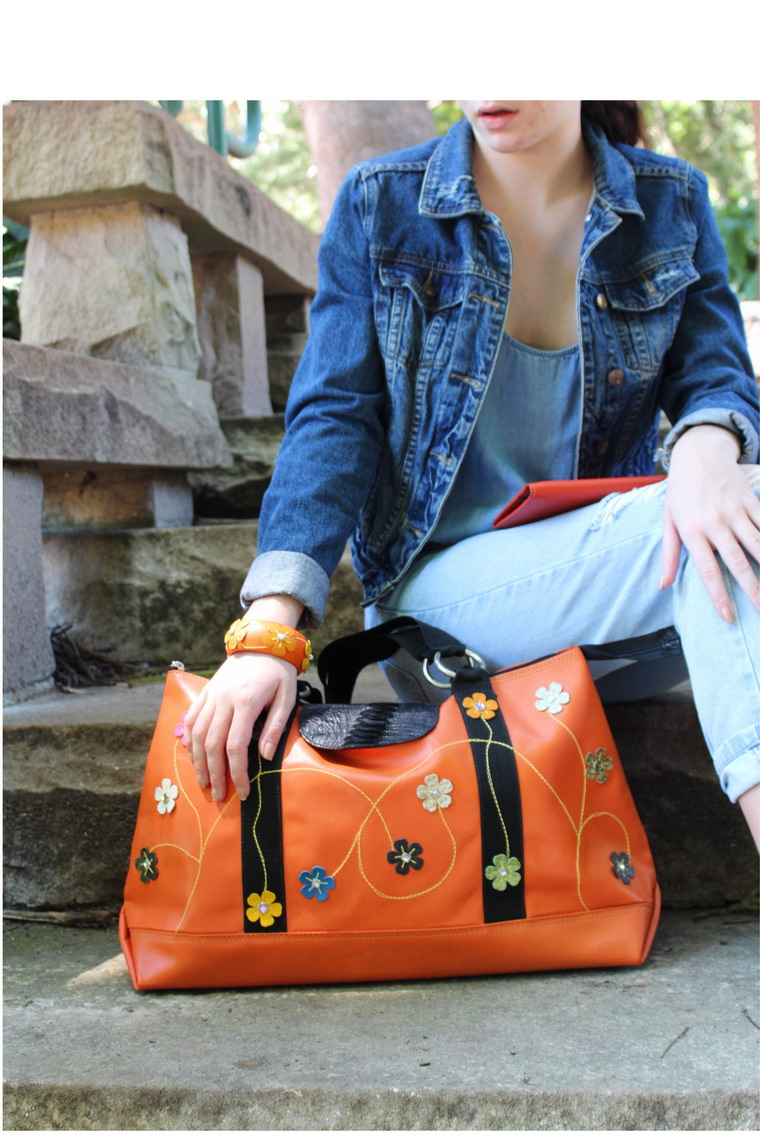
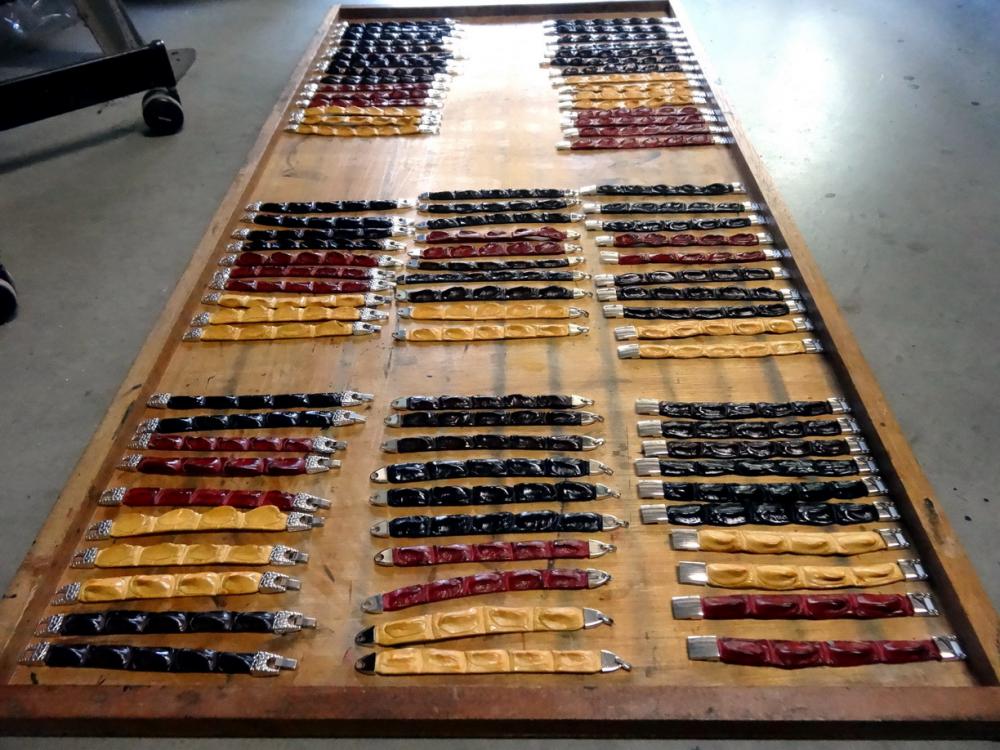
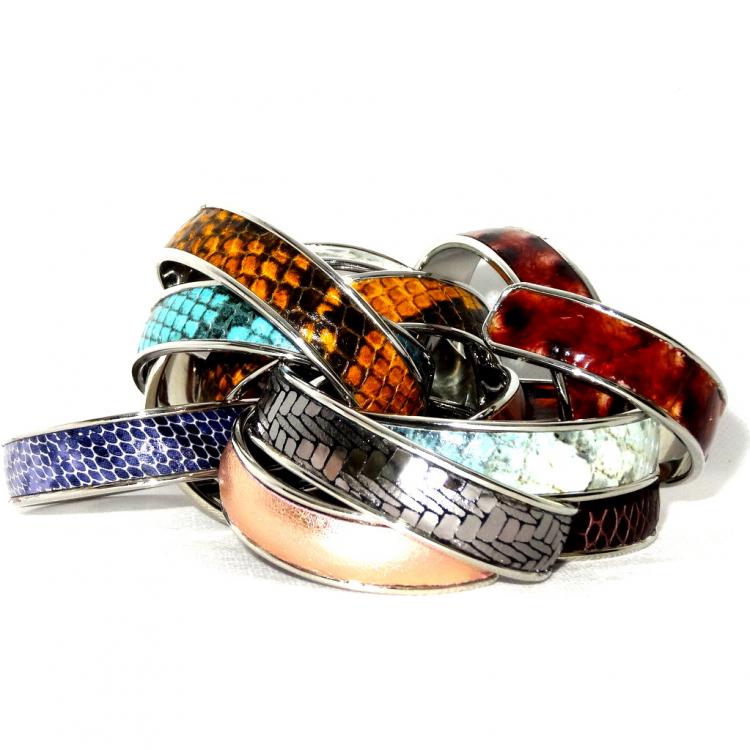
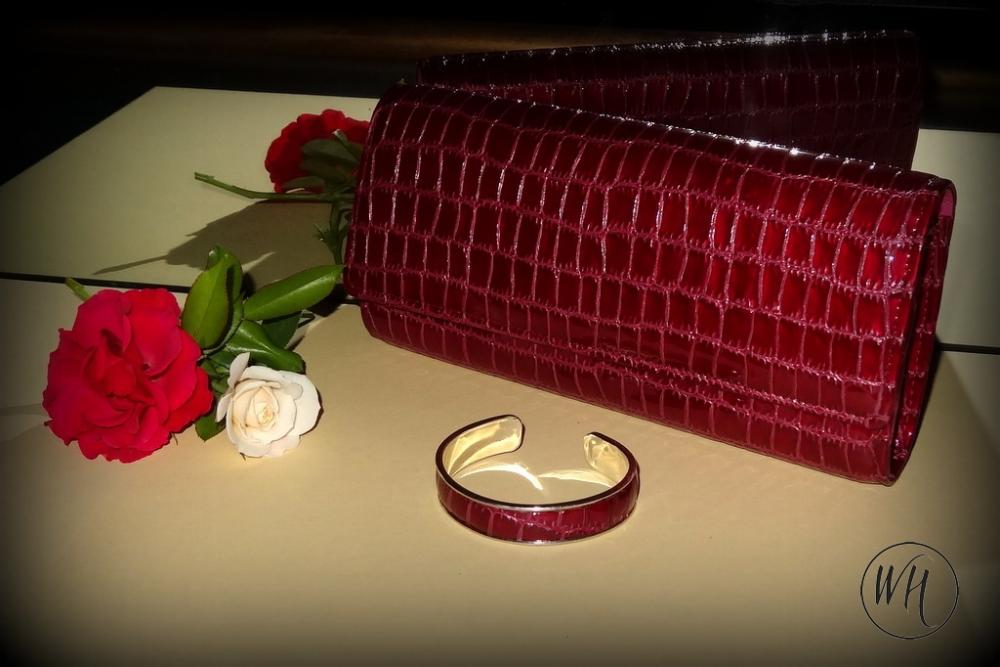
Just curious about what you mean by 1/2"think high end bracelets? Do you mean you think you want 1/2" thick or 1/2" wide bracelets? I do a lot of various bracelets and bangles and such for different clients amongst a lot of other stuff as well. I have seen your posts before and as you never answered or acknowledged any ones offers I did not take you serious. In case I was mistaken here's a few pictures of the things I make but many unfortunately I can't show due to them being for clients brands. I can say that three different jewellers have won awards of the year combining my high end work with their work. Sorry if these are not what your wanting but If you'd care to post any pictures of what does it for you some here might have what you want. regards Brian


-
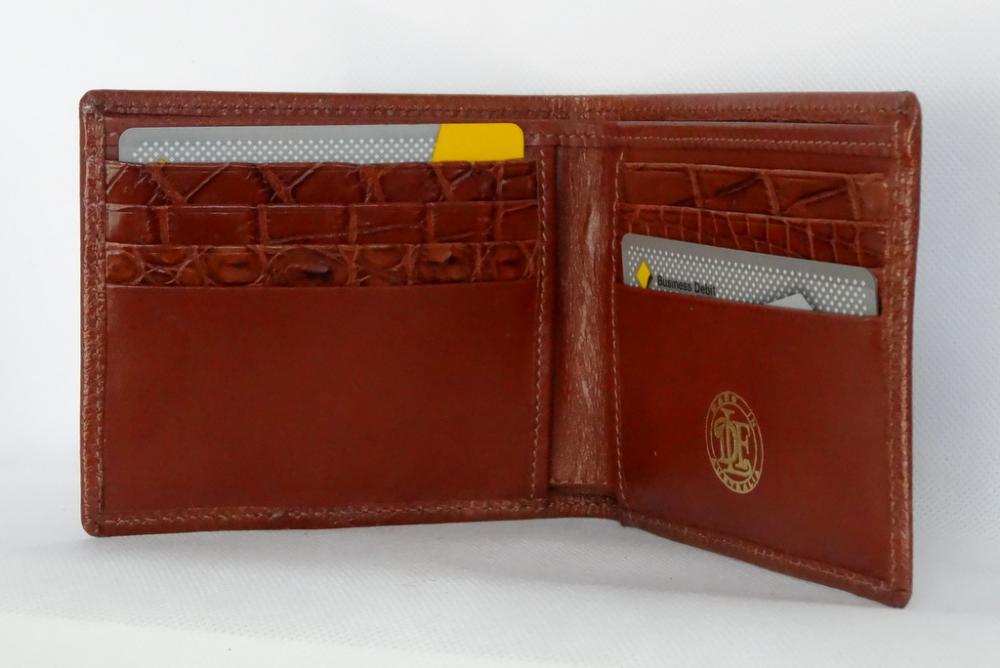
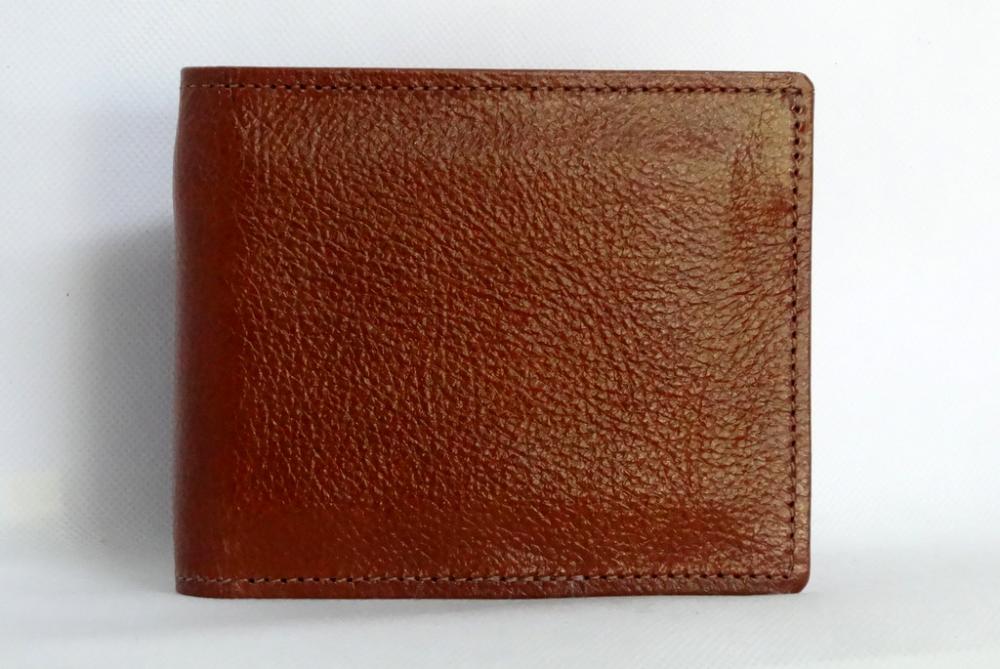
I think to give a correct answer to this you would need to post some pictures of the type of products you want to make more specifically. For the majority of the products you mention I use a 40m 69 thread but if your into heaver threads then you may want the bigger machine. The smaller cylinder allows me to more easily get into tight gussets and such where the big machine would have no hope. If you check my web site you should see that on many of my wallet they are stitched all the way around. Many here use larger threads and the products are thicker often as well in which case you could be better with the larger machine.I have attached one of our training wallet pics to show what I mean. The best in the end is often both machines along with a stack of others. Most of the products we make would use the smaller machine. Regards Brian
-
COWBOY CB 4500/441 Stitch length increment fix
RockyAussie replied to RockyAussie's topic in Leather Sewing Machines
I should have added that to clean up the felts on this edging tool works by running the felt up and down on soap under running water until no more colour shows. Also by not overfilling the egg cup allows room to get a even amount on the felt. -
COWBOY CB 4500/441 Stitch length increment fix
RockyAussie replied to RockyAussie's topic in Leather Sewing Machines
I think I'll have to post this as a how to topic but for now here goes- first up I could not do these holes on my edging machine as I do with most things and with the edging it needs to be held downward so as to not have the edging running back down away from the application all the time. I needed some way to hold the felt and have it spin while holding it down. This meant I needed to lock the shaft and let it spin some how. I came up with this tool for removing the burr on the edge of plastic that I had already here and by putting a groove in the shaft for holding the felt as supplied for the Dremel it worked. I have here a couple of pictures of how I use it and a couple of links to eBay where you can get the felts and deburring tool as follows - Note the felts come with a couple of holding shafts that fit the deburrer so you dont need to have a dremel or set. All for under $10.00 Regards Brian http://cgi.ebay.com.au/ws/eBayISAPI.dll?ViewItem&item=291098472944 http://cgi.ebay.com.au/ws/eBayISAPI.dll?ViewItem&item=302394995242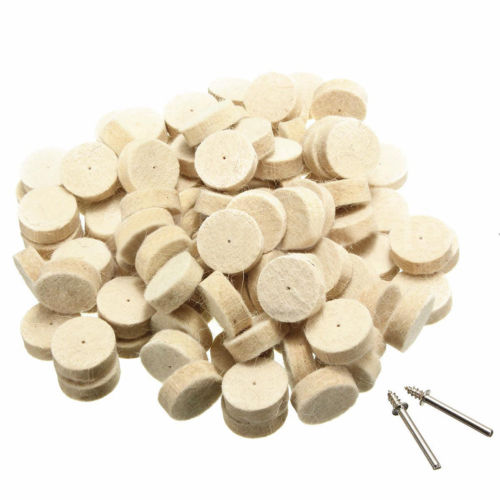
-
COWBOY CB 4500/441 Stitch length increment fix
RockyAussie replied to RockyAussie's topic in Leather Sewing Machines
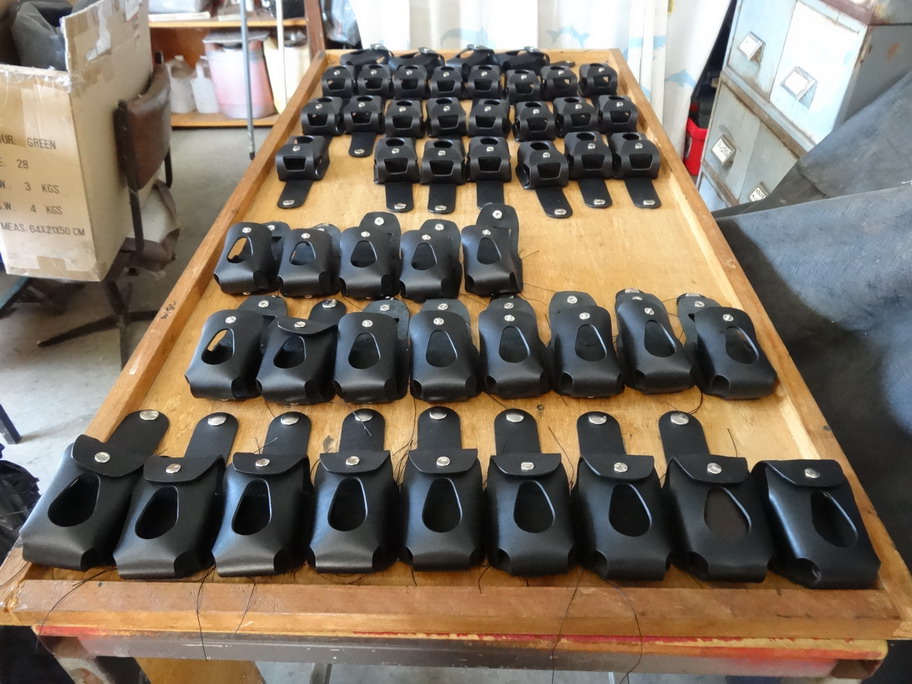
There's not a lot of movement between one notch and the next as it was originally but over 15 stitches it could be 1/2 a stitch or more out longer. With the extra increments and being able to lock it in stopped in wandering out of place from the setting I wanted to stay at. It would be possible to do an extra lot of slots between but I think for now this should be good enough for most jobs. As to the number of pouches I'll have to get round to posting the small revolving edging tool I made up for doing all those holes. Basically it is the small felt out of the Dremel set put into a hand piece that locks it in and allows it to spin as you push it. Worked well enough I ordered another 100 felts from China for SFA. This lot pretty well used up one felt. I'll post more details of later if you like. Brian -
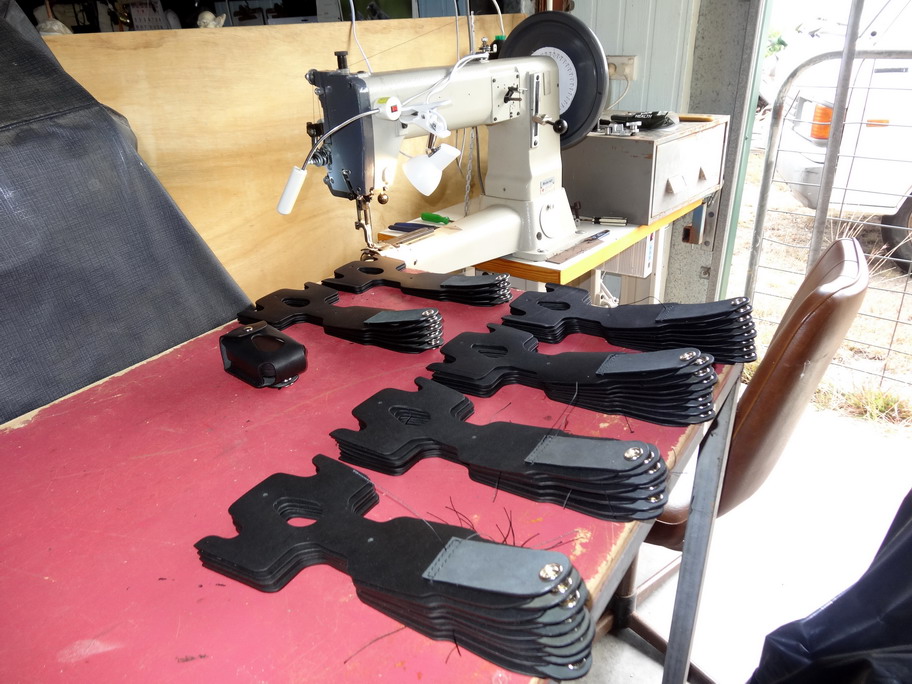
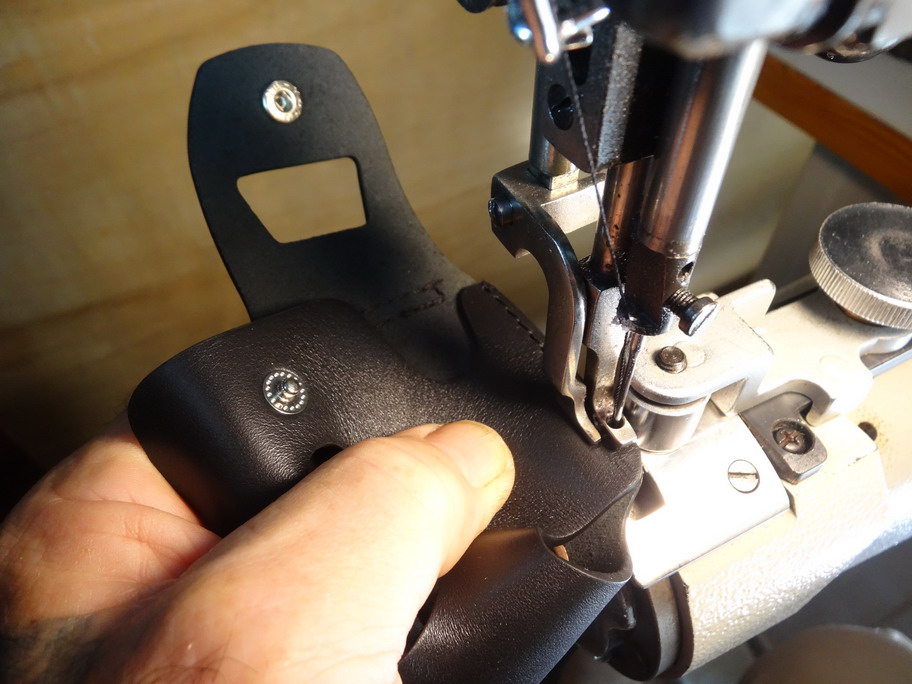
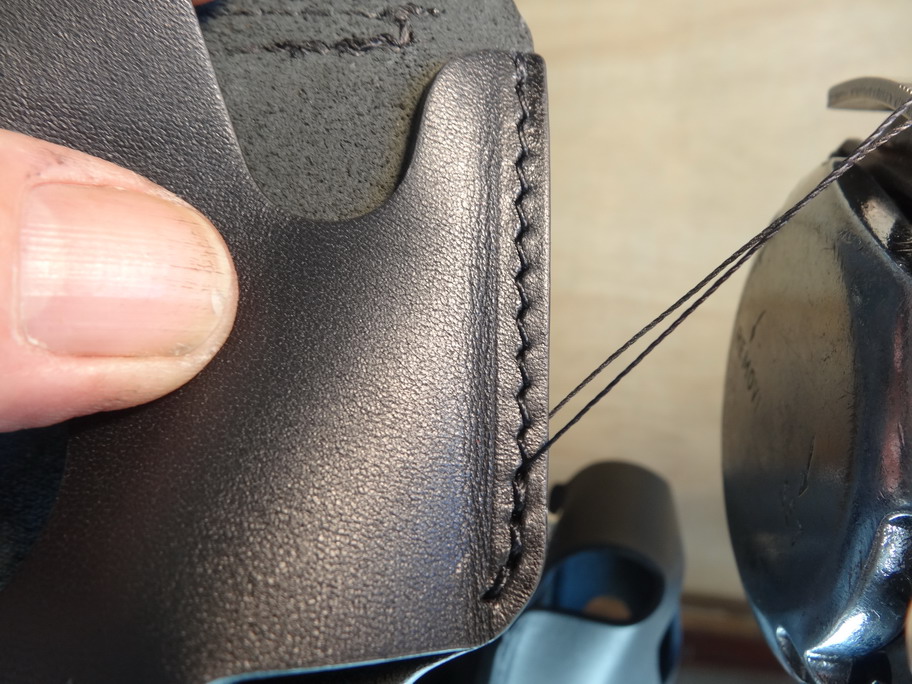
Heres a couple of pics showing what I am describing above. Thankfully this jobs finished for now and 1/2 of the sewing machine cost is now booked out. Hopefully I'll have the new feet and stuff before the next 200 they want. Got 1 week left now to make 50 ring boxes.
-
COWBOY CB 4500/441 Stitch length increment fix
RockyAussie posted a topic in Leather Sewing Machines
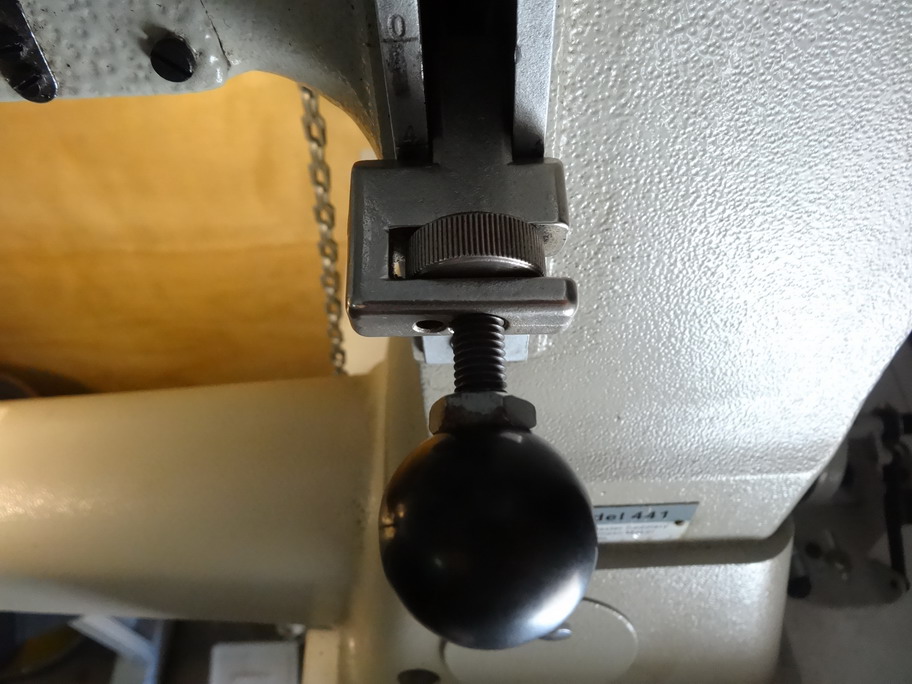
While doing a rush job of a 60 personal alarm pouches recently I ran into a problem with the stitch length getting longer on the run. I started by getting the stitch length set to have the needle finish just where I wanted and at first I thought I must be doing some thing wrong, I found that with all the reverse stitching the adjuster was moving wider and falling into one of only 2 slots that hold the adjuster from moving. I decided to remove the adjusting nut and put in a few more grooves to stop it moving. I have some pictures here to show what I did but take note of the small ball bearing and spring that comes out when the adjuster is removed. Have your hand ready to catch it all as you remove it.I was in a hurry to do this so it is a little rough and in hind sight I could have used a centre punch and drill bit and followed the ring around where the ball bearing rubs. It worked very well at any rate and gave me a lot more confidence knowing that the last stitch hole was no longer a mystery. Hope the pics tell it better than me. Regards Brian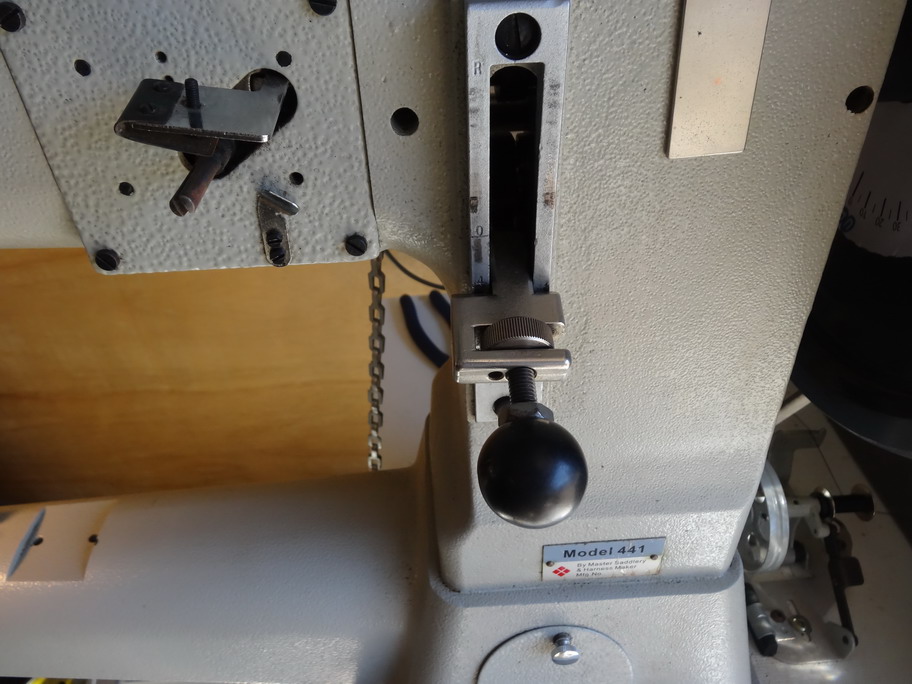


-
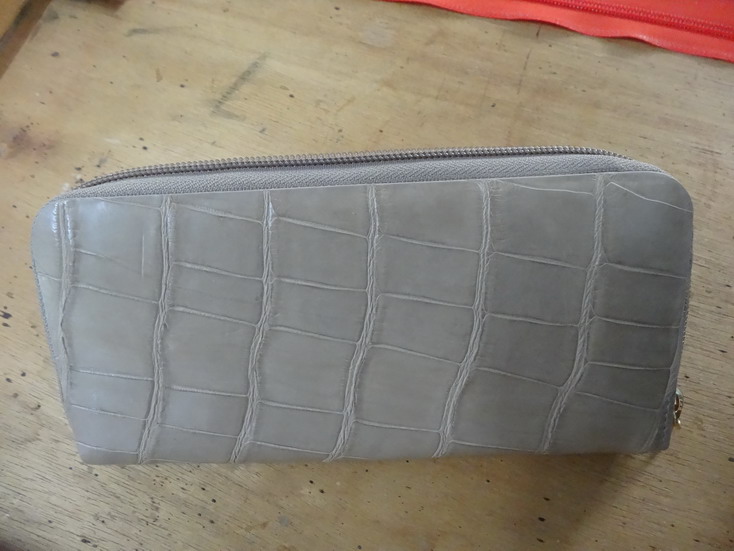
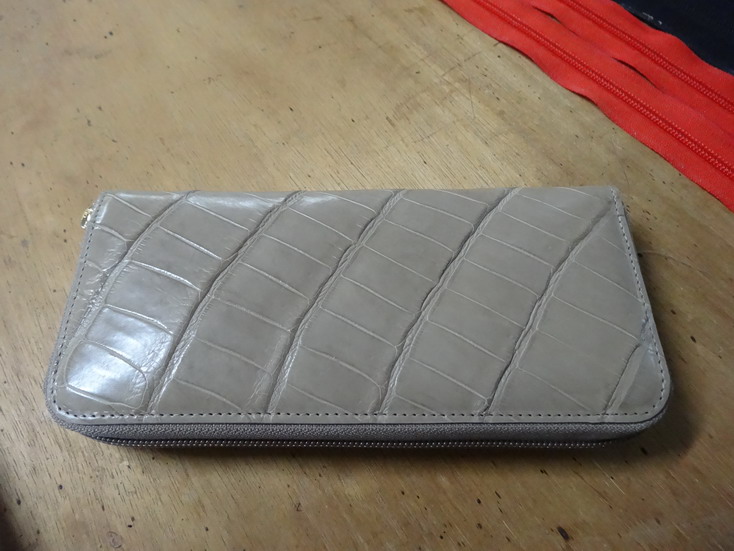
Crocodile edges. Can you burnish them?
RockyAussie replied to Leahlovesleather's topic in How Do I Do That?
Now that explains why your so damn capable I reckon. -
I have not got that machine but with most of the machines I have it is normal to have to increase the top thread tension as well as reduce the bobbin tension. What I do is have another bobbin case set up for the thicker thread so I don't have to fine tune adjust it when I go up in thread size.Regards Brian
-
I think the feet I have ordered from Uwe will have an advantage in that the left foot being wider will allow a bit more contact on the throat plate and help in keeping the job flatter as well. The way I designed these pouches I contact glue them first then I can flex them over when I run the stitch line down. I will let you know how they go when I receive them. I can only add that I hope Uwe gets some more into stock as I can see quite a few advantages being able to swap around the different feet options etc. Brian
-
I did consider doing that but the drag of the material over the plate in comparison to the getting the more positive assistance of using the dog foot made me think to look for a better solution. I am a lazy B at times and to be honest and although I could use a smaller machine I hate changing bobbins which is a big reason for buying this machine. I am 3/4 finished the job here and am still on the same bobbin. Although many here on LW make heavy holsters and saddlery work where these issues would not show up there are also a lot like me that make handbags and wallets and such. Check my followers in my profile if you like.This machine does have the ability to cope with these things easily but I am not sure if the dealers can at the moment. I hope that I am proven wrong. Brian
-
Thanks for the thought again Darren. If I raise the feed dog any higher then it will hit the roller guide.If I then raise the roller guide I am back with he same problem with more of a kangaroo hop thrown in. Are the 7441-09-0092 Narrow feed dog and throat plate 7441-01-0064 Narrow throat plate able to be bought or not? Do you have in pictures of them? I have to say I'm a bit surprised that none of the dealers here have any answers to this as yet. Regards Brian
-
Thanks for that LeatherLegion. I thought I was going to have to do the same trick but I think this set from Uwe will save me the effort. You must be one hell of a fast hand stitcher. I think I could do the re edging a fair bit faster than I could do it by hand. Can I ask if you shaved any off of the tension disk separator to give a bit of room for the foot to lift without dropping the thread tension? Most of my other machines allow up to 3mm foot lift before the thread tension gets released.I did and as I stated earlier it enables me to lift the foot a little and turn corners without getting any bottom loops etc. Regards Brian
-
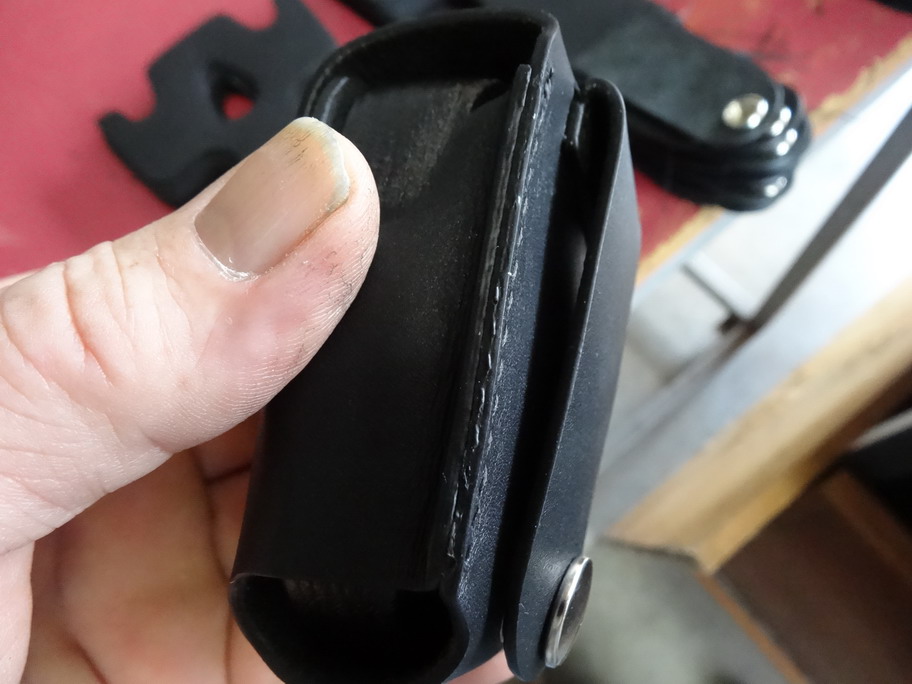
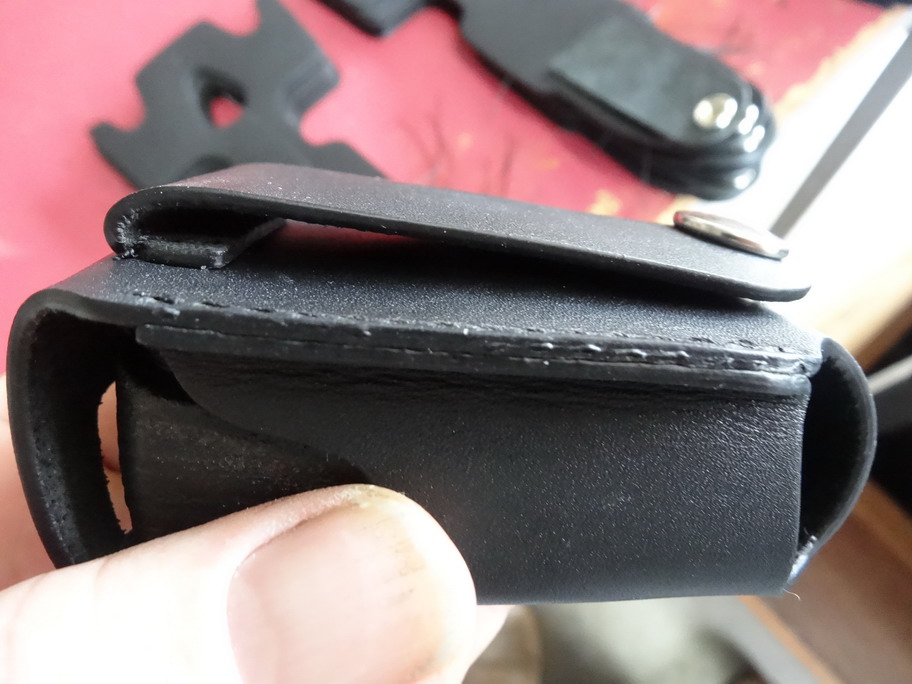
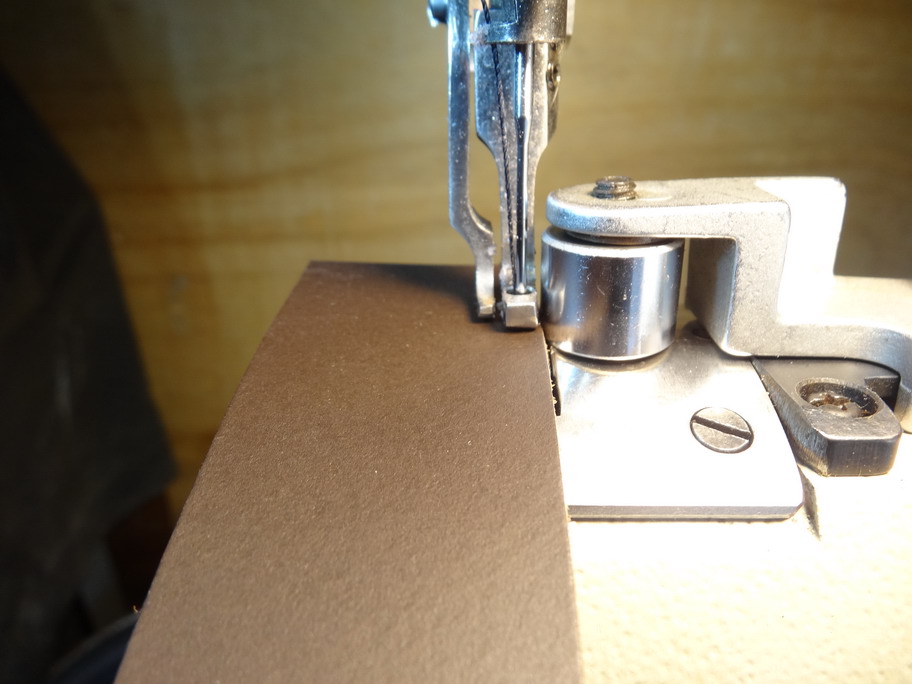
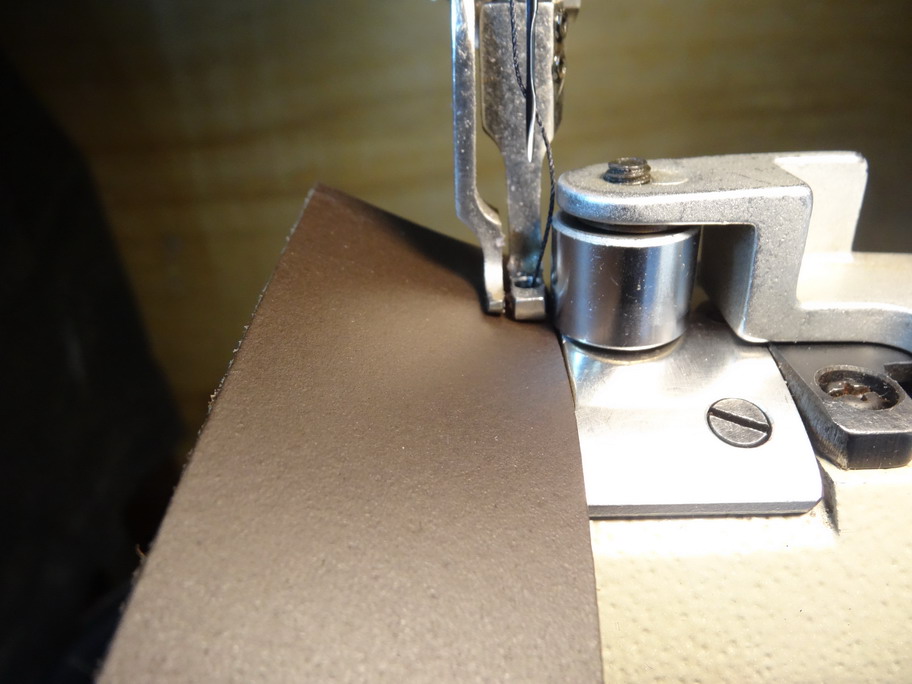
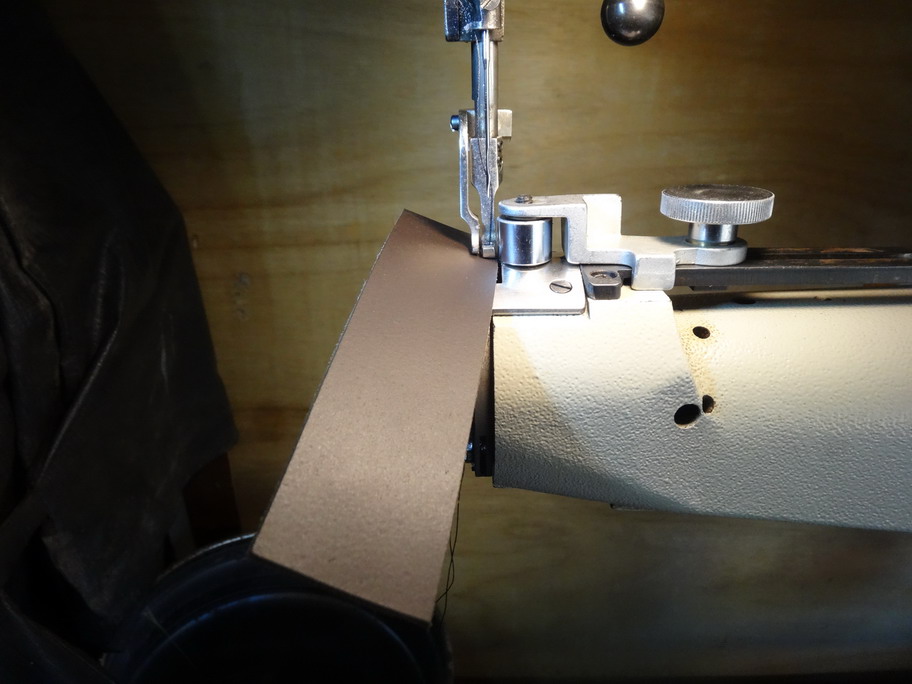
Thanks for the thought Darren. Are these the feet you sell for stitching around boots and such? In an application where the job is quite stiff I expect these would be handy but the problem I'm having is where the softer leather deflects down the hole at the end of the stitch when the dog foot drops down. I have a couple of more pictures that should show what I am saying more clearly I hope. Be that these look quite bad I have to say after getting the machine all set up and readjusted I have not had one missed stitch or even a knot pull to the top or bottom so far. I might get to like this machine yet. For now until the new dog feet and stuff arrive I have ground and polished the edge of the roller guide to help it not scrape against the edge so badly when the dog foot comes up. I expect to finish this batch of 60 tomorrow and with a bit of luck I will have what I need before the next 200 they want. First picture shows how the job sits when needle enters. Second shows how a 2.5mm piece goes down under the needle plate at the end of the stitch when the dog foot goes down Third picture shows what it does if you are not holding the job in place. As I said like a drunken rocking horse. Cheers Brian
-
Thanks Uwe, You can post it to me now.
-
Uwe, That looks a lot better than what I have got at present and I have a lot more of these jobs to do yet. How can I buy them? PM me if you prefer. Note I used your timing dial in the first picture. Still have a bit of a problem getting enough length in the backstitching and I wonder if the front plate behind the stitch regulator was flat instead of angled wider at the top would the problem be solved. Thanks and regards Brian
-
Recently in a post on these sewing machines Solar LeatherMachines, kindly put up a link to their webpage where you could find an English version manual of these sewing machines. http://www.solar-leather.com/supporthelp/ I have been considering making up a narrow dog foot and throat plate to do the finer leather jobs. I tried the narrow slotted plate without feed dog and found several problems, one being that the stitch length dropped back considerably which was not such a big problem but the reverse suddenly went to making no sense at all. I went looking all over the place to find a solution before going to the trouble to make them when I came across this interesting bit on the last page (page 21) in the Instructions Manual & Illustrated Parts Catalogue #7441-09-0092 Narrow feed dog: work together with 7441-01-0064, for sewing very small borders on hard material, like suit case, furniture, instrumental cases, chairs etc. 7441-01-0064 Narrow throat plate: work together with 7441-09-0092, for sewing very small borders on hard material, like suit case, furniture, instrumental cases, chairs etc. I have not been able to find any pictures or diagrams of these parts and was hoping someone here may have a set they could post a picture of or have some information about. Because of the large drop of the dog foot in between stitches I have found that when stitching close to the edge that the job sinks down into the hole and ends up going along like a drunken rocking horse making it quite difficult to keep all lined up nicely. When the edge guide is up close the job wants to come back up and lift the guide which then wrecks the edge coating as well. I have an urgent order to get out this coming week for some personal alarm pouches for one of our correctional centres and this problem showed up whilst I got into stitching them up so I have taken a few pictures to help see the problem with the standard feet I am using. It looks like I will have to sand back and re edge now.The thickness combined is a bit over 4mm or around 10oz and the thread is 20m or 138 if you like and needle is Schmetz size 23 794LR. I hope that someone here can shed a little light on this and also I would like to ask who else would like a narrow feed dog and throat plate set. Regards Brian