.jpg.d60258221c476480a6e073a8805645bb.jpg)


RockyAussie
-
Posts
3,265 -
Joined
-
Last visited
Content Type
Profiles
Forums
Events
Blogs
Gallery
Store
Everything posted by RockyAussie
-

Inline Cowboy presser feet on Cowboy CB4500
RockyAussie replied to Wizcrafts's topic in Leather Sewing Machines
@Uwe Do you have any of these available to buy? Regards Brian -
What is this machine for? Leather Edge Bending / Folding?
RockyAussie replied to Constabulary's topic in Leather Machinery
I dont know but I think it may be for rolling down the back stitch line on shoe uppers. After they are stitched the need to be pressed out very flat but still maintain the curve to fit the last. A picture taken side on I think would show the post is a curved anvil shape. -
At least you can remember to take the knife in the first place.
-
How to make a press for moulding leather pouches and such
RockyAussie replied to RockyAussie's topic in How Do I Do That?
@gigi although it works it is a little catchy as yet. I'm thinking I might go for a pneumatic ram on top possibly. I made one awhile back out of a 4" aluminium pipe and and some other stuff. Other than just wanting to learn how to do it I never really had a use for it but this might be it. Time will tell I guess. Brian -
Looks Ok to me @plinkercases and I reckon that will be a a lot better on your pocket wear and tear as well. Brian
-
How to make a press for moulding leather pouches and such
RockyAussie replied to RockyAussie's topic in How Do I Do That?
Thanks for the thought there Itch. I have done similar in the past and I may need to do something like that but fingers crossed .....I can get it to work. Having the printer do it over and over while I do something else would be great. -
How to make a press for moulding leather pouches and such
RockyAussie replied to RockyAussie's topic in How Do I Do That?
Thanks Dwight.... as I said I hope it helps some. -
How to make a press for moulding leather pouches and such
RockyAussie replied to RockyAussie's topic in How Do I Do That?
That is my plan indeed. I hope to be able to inset a bolt head and use a socket in the battery drill and if needed I can then just switch to a hand ratchet to finish off. I'm thinking that if I wanted it to do clicking more so (I don't as I have 2 hydraulic machines already) I would be tempted to put in 2 jacks side by side and use one jack for small jobs and 2 when the knife is larger. Bit slow but way faster and better than doing by hand. Thank you -
How to make a press for moulding leather pouches and such
RockyAussie replied to RockyAussie's topic in How Do I Do That?
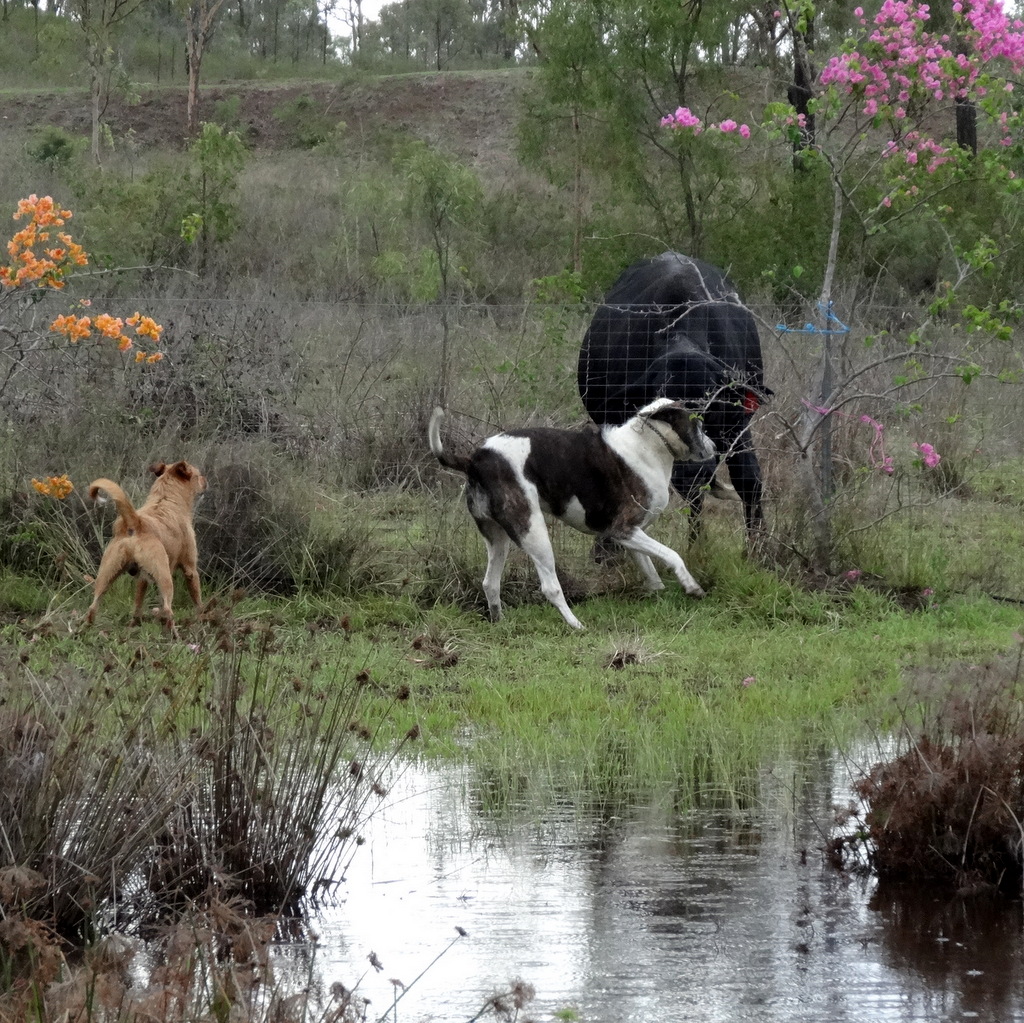
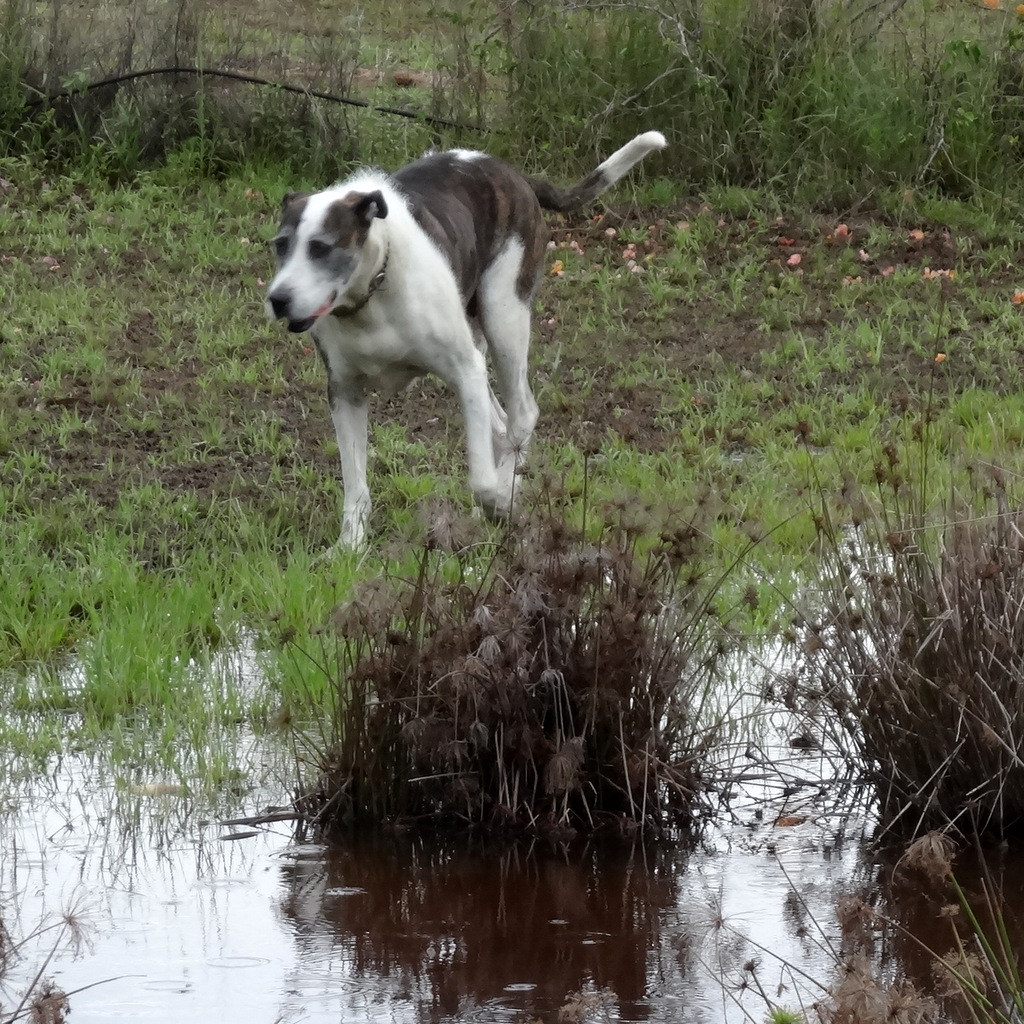
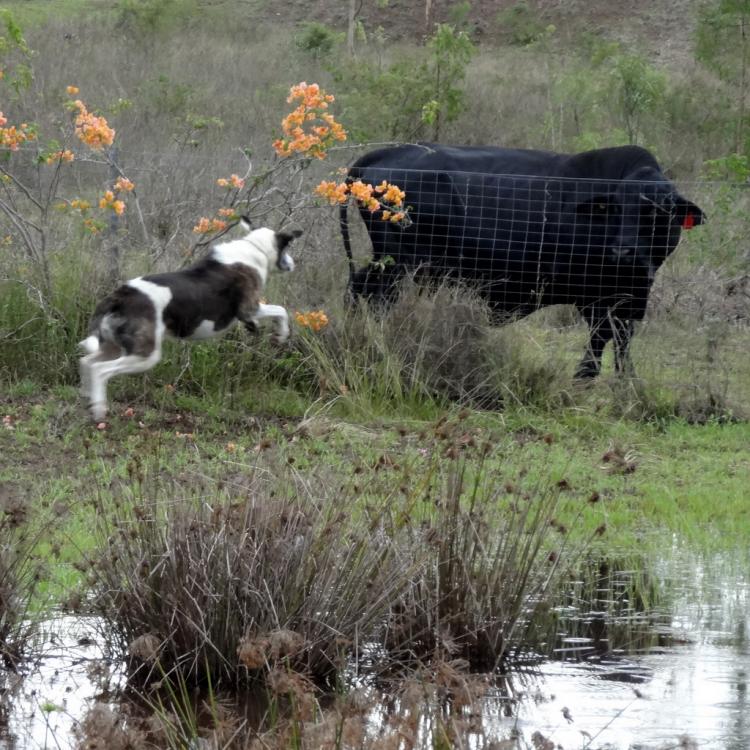
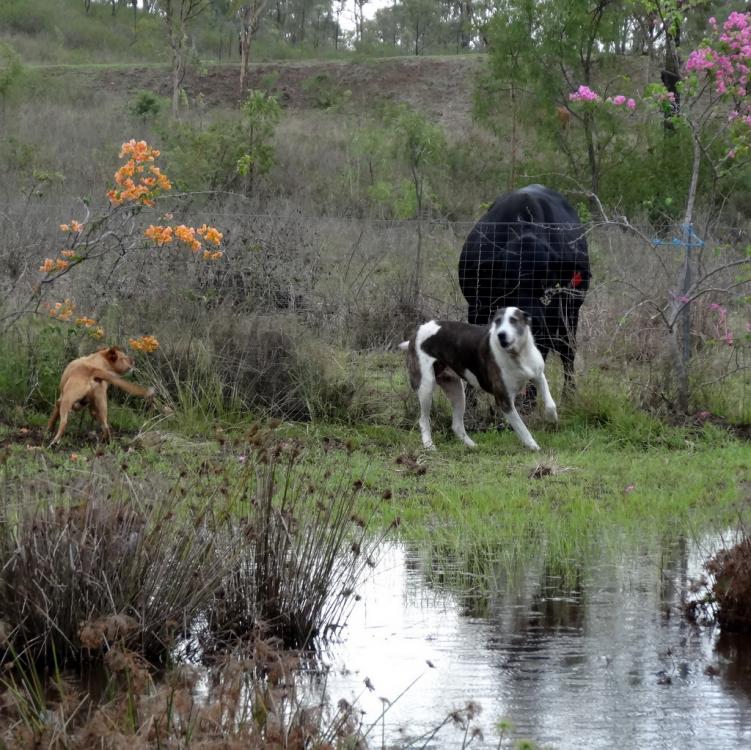
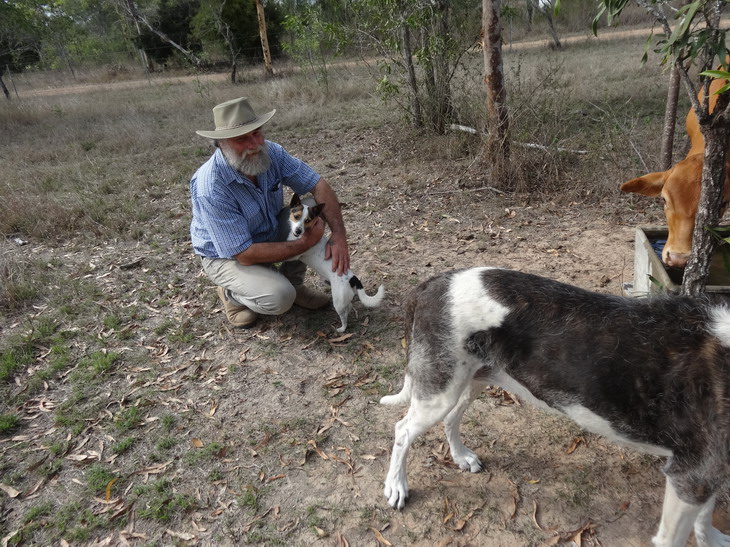
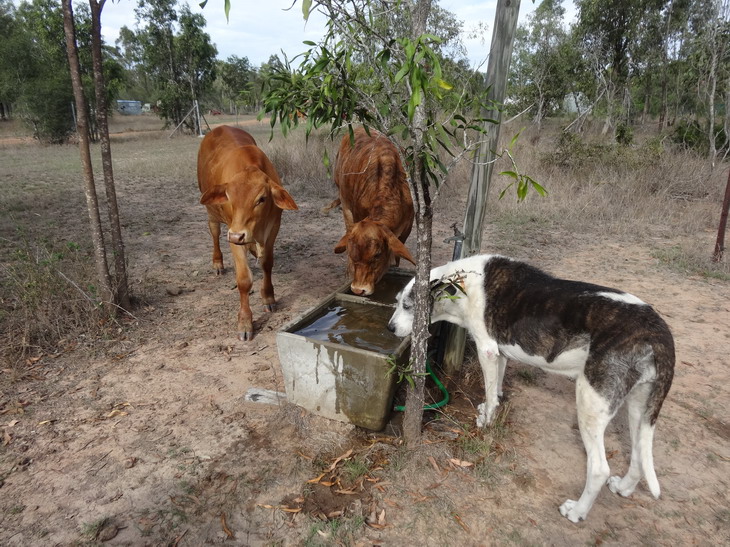
Mightn't be competition sparing but here a couple of pics of my Molly (The quality inspector/guard dog) trying it on with Jet the brangus bull. Here below she's thinkin (not real smartly) to scare Jet. A big leap into the air should do it. Woooops where is the brakes....up here? Actully I was just goin this a way. Bit busy right now I'll take care of that matter some other day. Now my new dog in training is a bit worried about the size of these critters so Molly shows him that they aint all that bad. So far he has shown a great willingness to be a taste tester for staff at lunch times. I guess his got a lot of growing to catch up here. End of story. Brian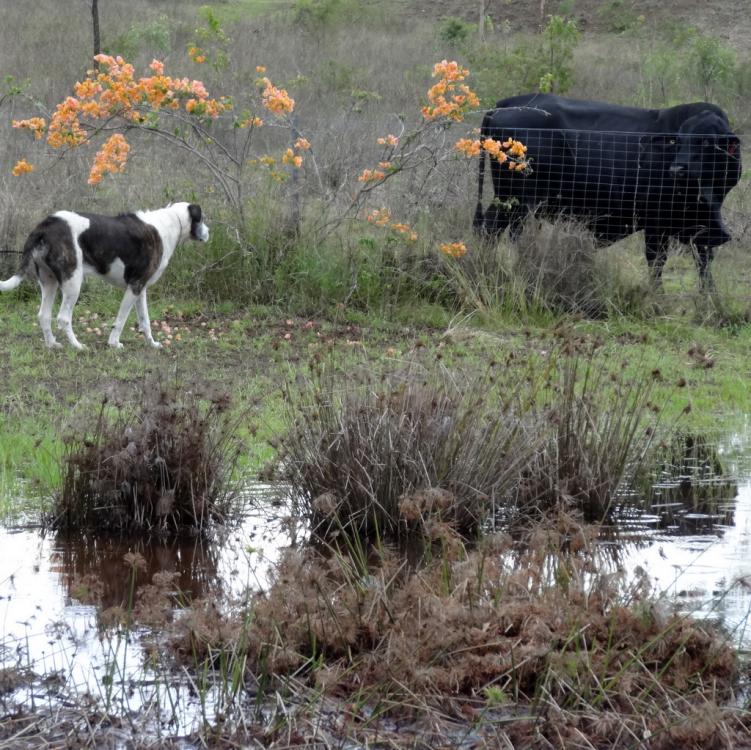


-
Onto the third bag....
RockyAussie replied to motocouture's topic in Purses, Wallets, Belts and Miscellaneous Pocket Items
Most excellent -
How to make a press for moulding leather pouches and such
RockyAussie replied to RockyAussie's topic in How Do I Do That?
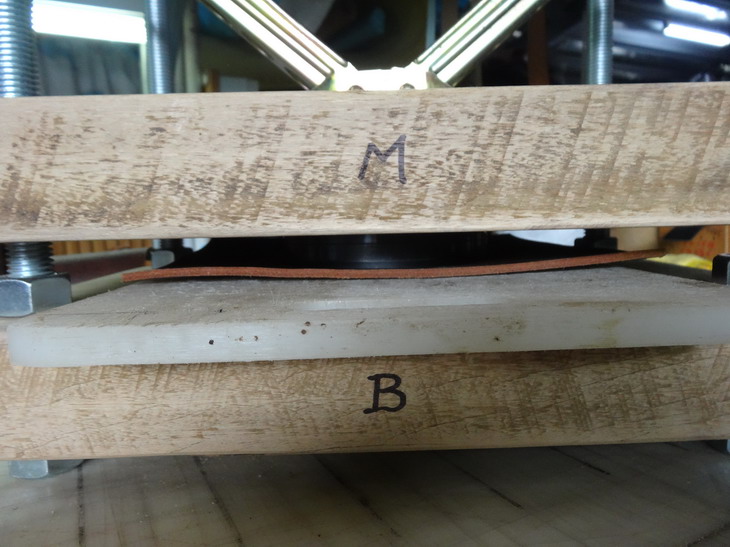
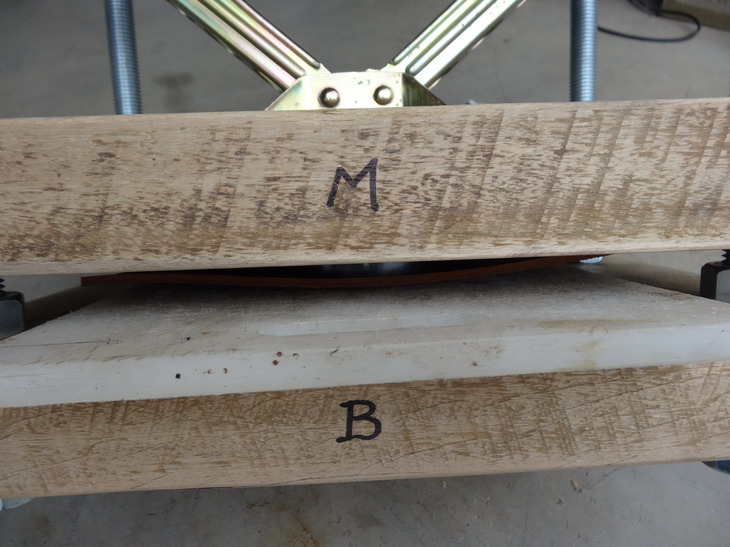
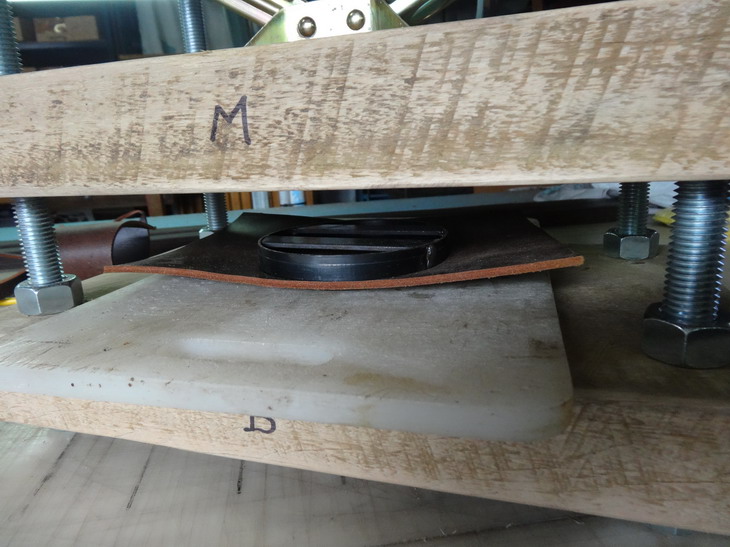
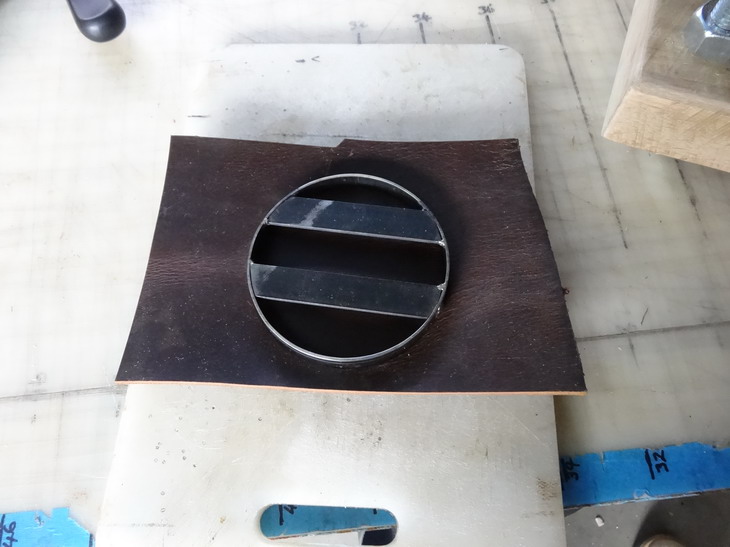
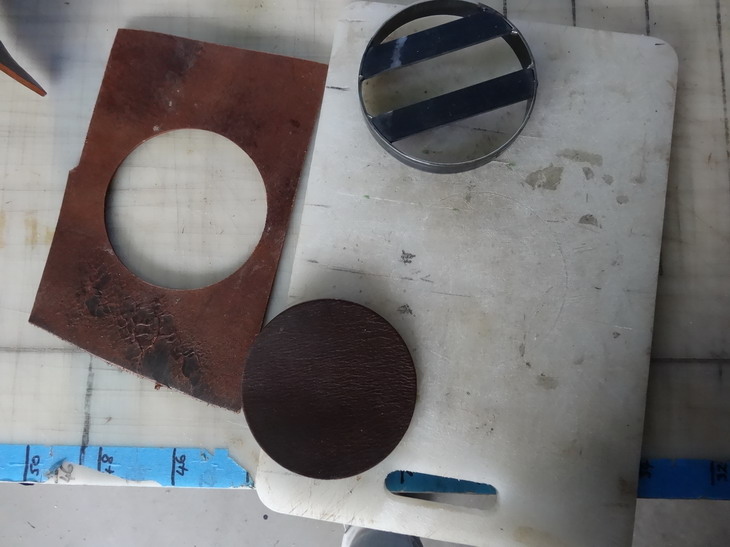
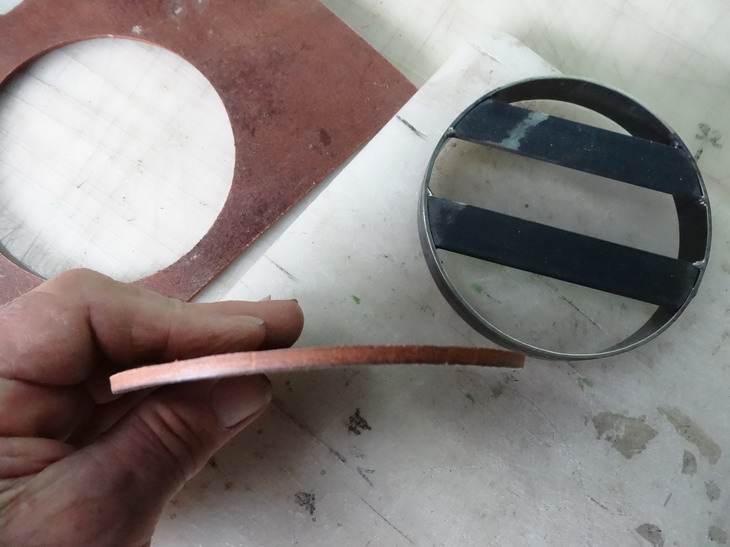
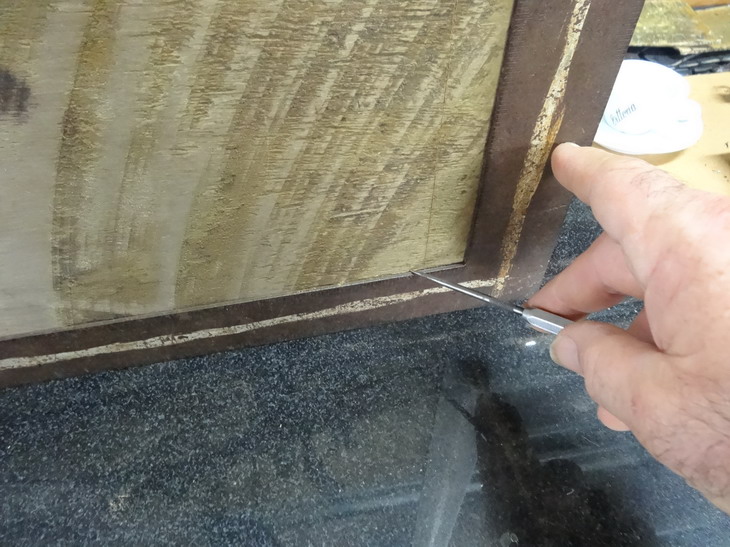
How to use my new press for small scale clicking. I never made it for this purpose and if you do so I would recommend finding a metal plate to cover the knife in order to protect the timber. The boards and the rods etc are easily up to the job but if there is a weak point it would be the jack. I decided to use a kitchen cutting board for the base as shown below. Below pic shows the knife fully in and with a typical clunk. I was not sure about that. I did not line up in both directions to the centre as well as I should and had to readjust it back a bit to the middle more. Pressure lifted off I removed the cutting board to inspect. It went in deeper than I expected. Note the knife mark line in the cutting board. Well that's about it for now until I print up some moulds so I hope that some of you find something that is of use to you in this and I wish you to find fun in making your own if you do. Regards Brian.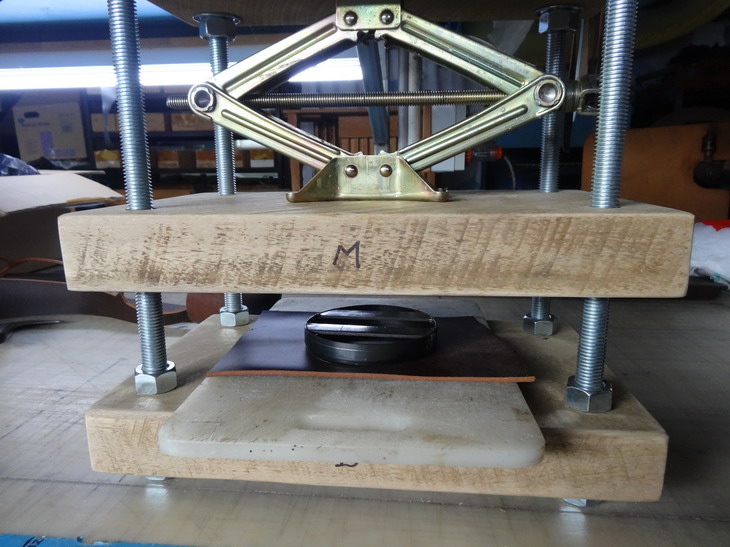
-
How to make a press for moulding leather pouches and such
RockyAussie replied to RockyAussie's topic in How Do I Do That?
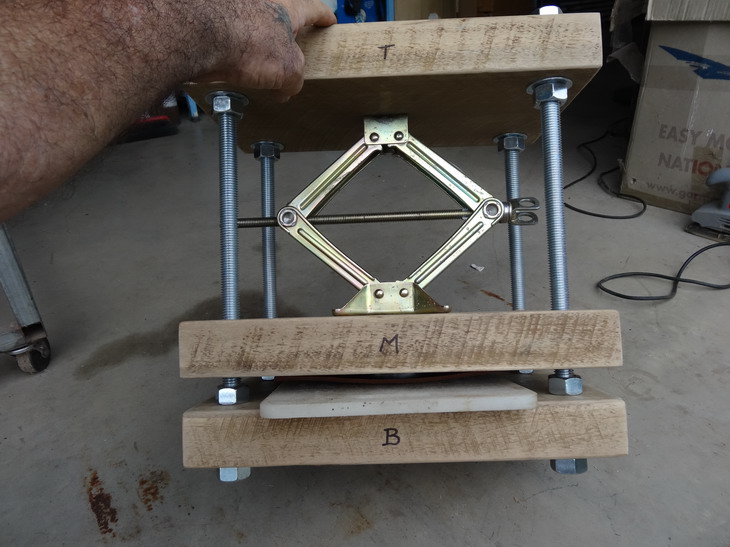
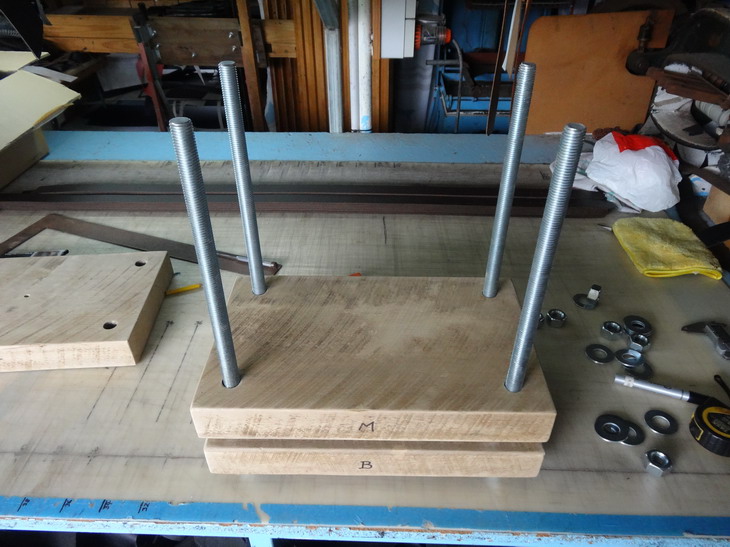
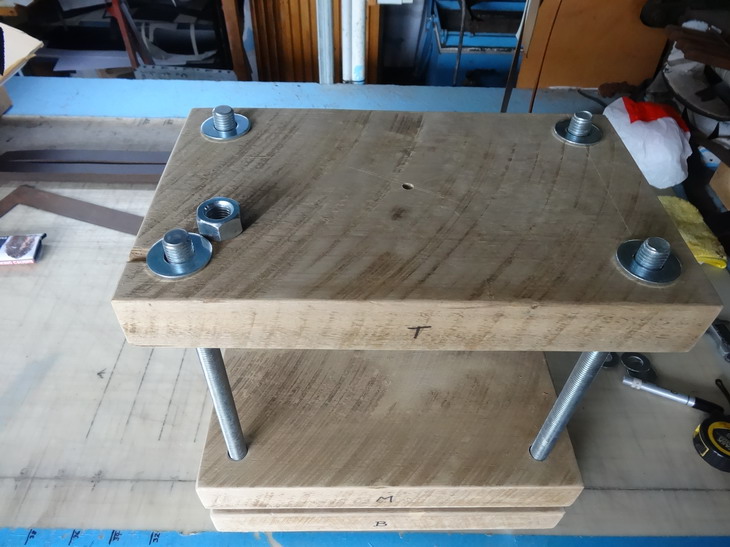
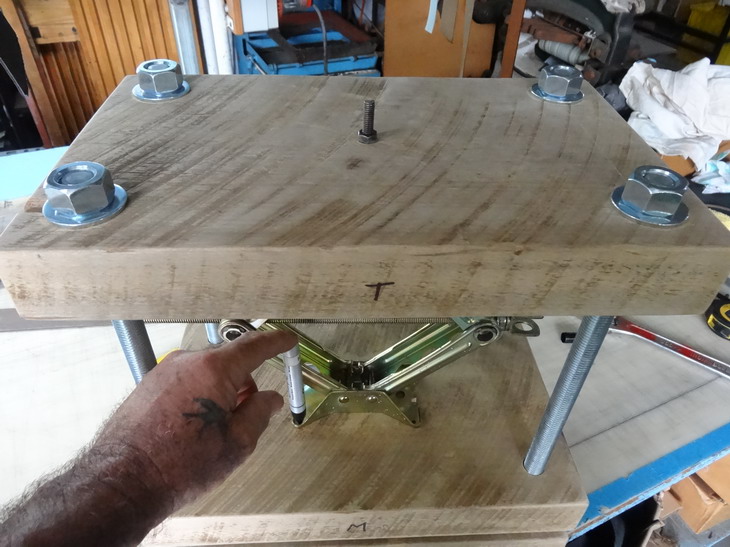
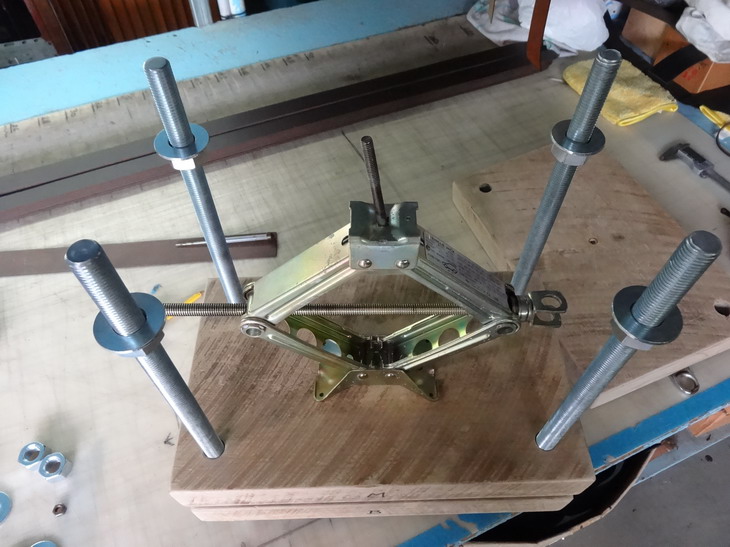
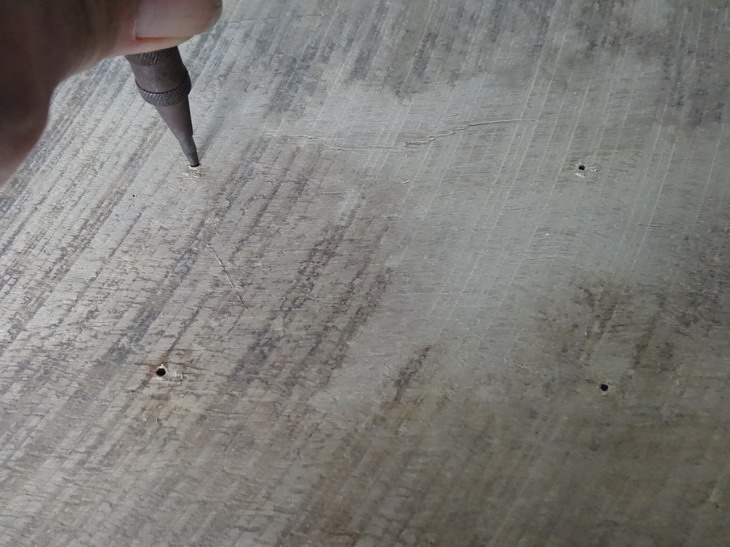
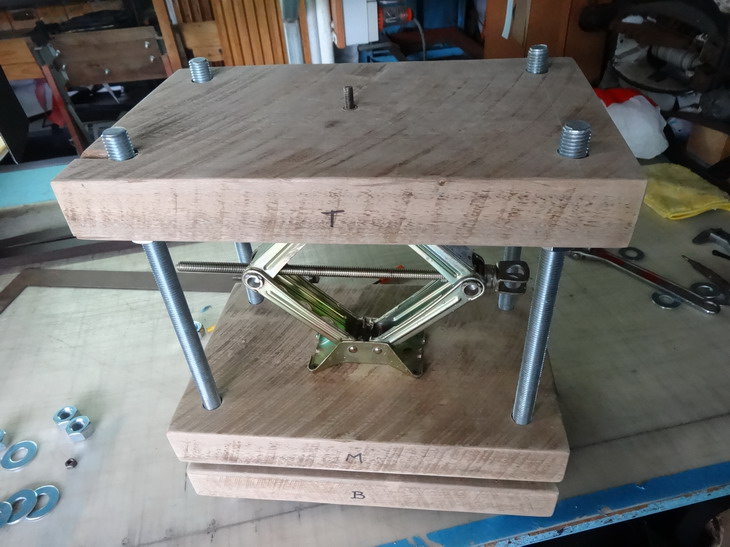
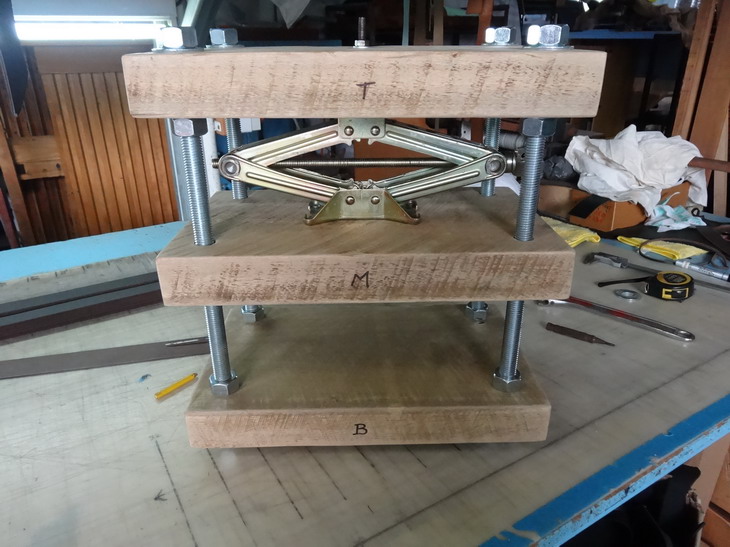
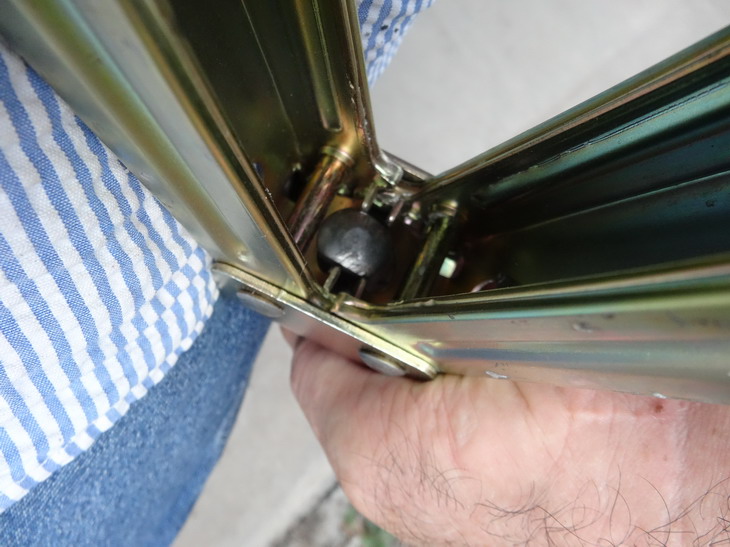
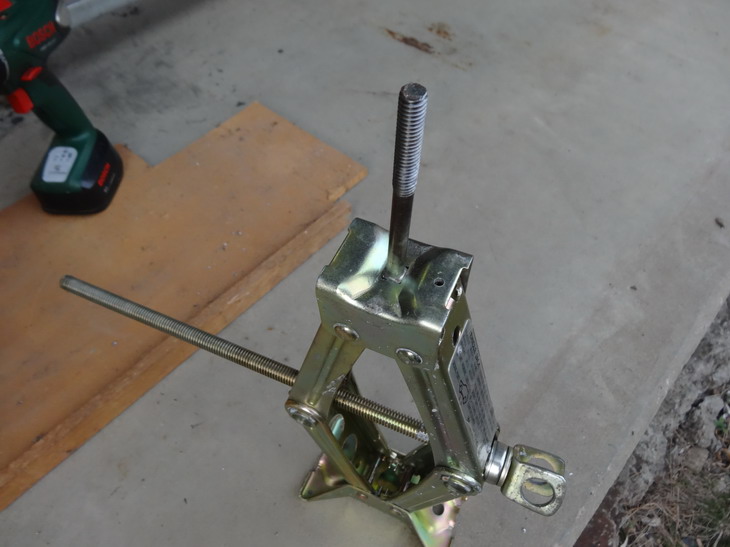
Back again. I hope you all bought heaps. The next step is to drill out the top hole for attaching the jack Next attach the 4 3/4" rods that have been cut in half to now 18" lengths. AS seen above the bottom plate is bolted up and in the following picture the middle moving board located over the rods. Now the top board is located and then tensioned to get the unit to sit squarely and flat. A little adjusting up and down in one corner should do the trick Now the jack can be attached to the top board and carefully positioned to attach to the middle moving board. I used a felt pen to mark the holes with. Pull the top board off to give access to screw the jack down to the middle board. A centre punch mark done here to keep the screw holes true. I pre drilled for the screws as the timber is very hard. The unit is now ready to bolt back together Now below then unit is bolted up and square checked and ready to test. Time to go and buy some more stuff Fantastic world class leather goods from Wild Harry. Next steps will show the testing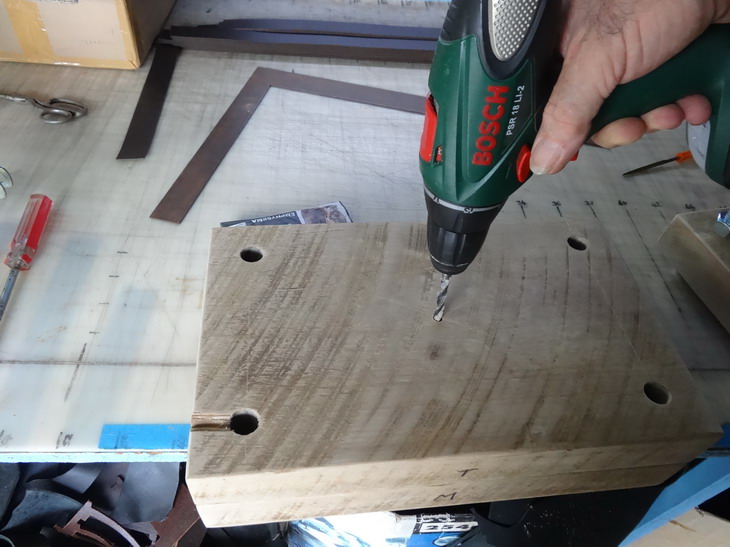

-
How to make a press for moulding leather pouches and such
RockyAussie replied to RockyAussie's topic in How Do I Do That?
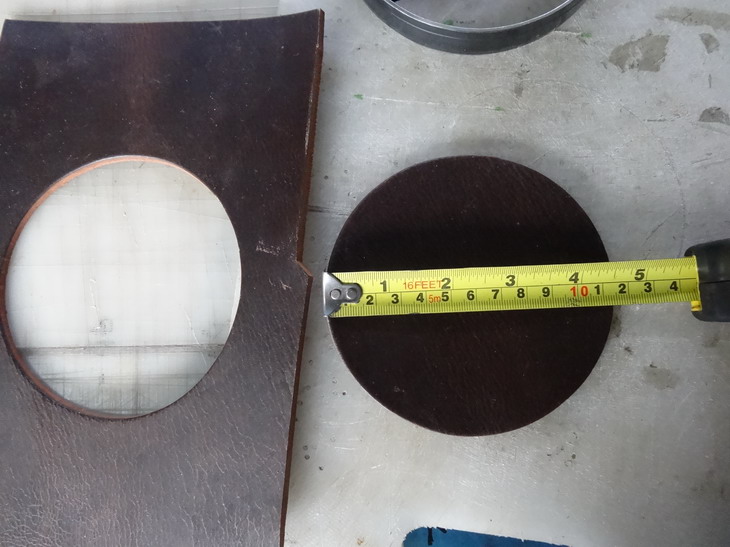
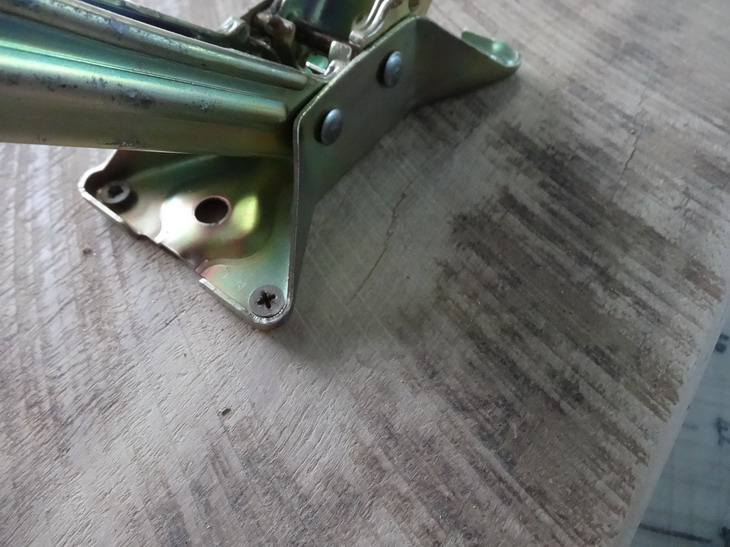
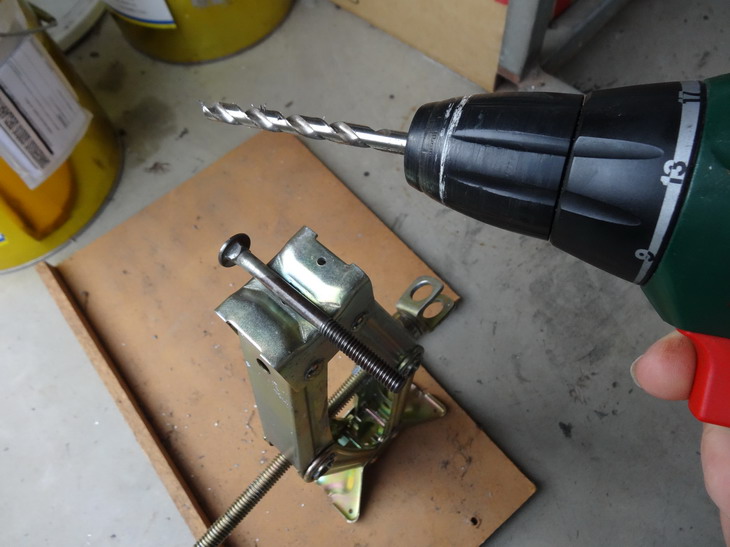
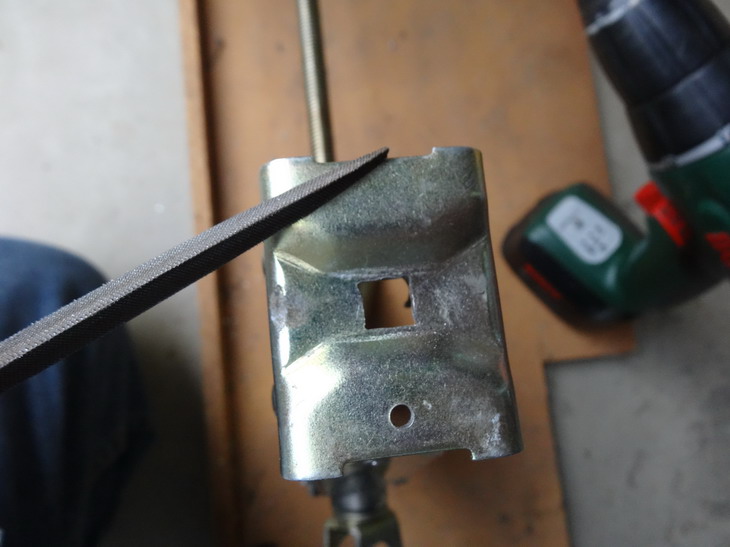
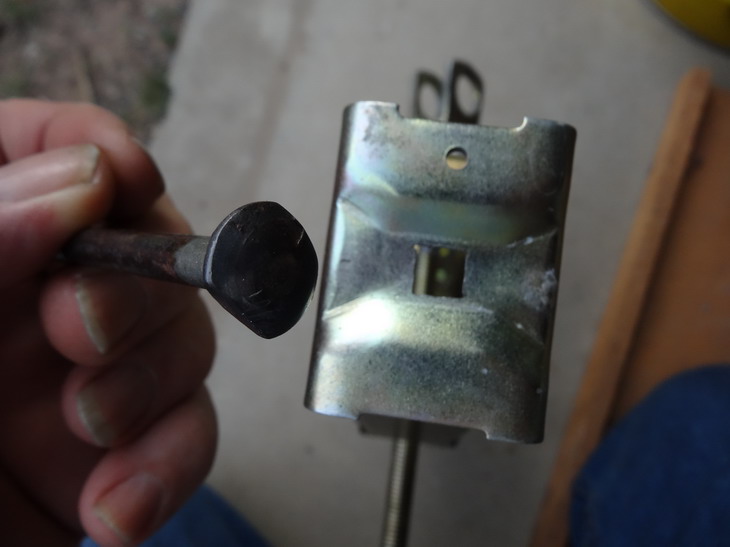
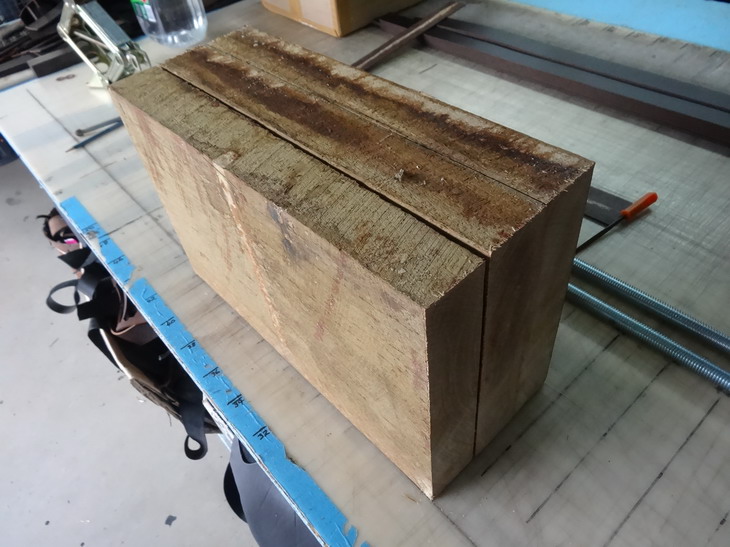
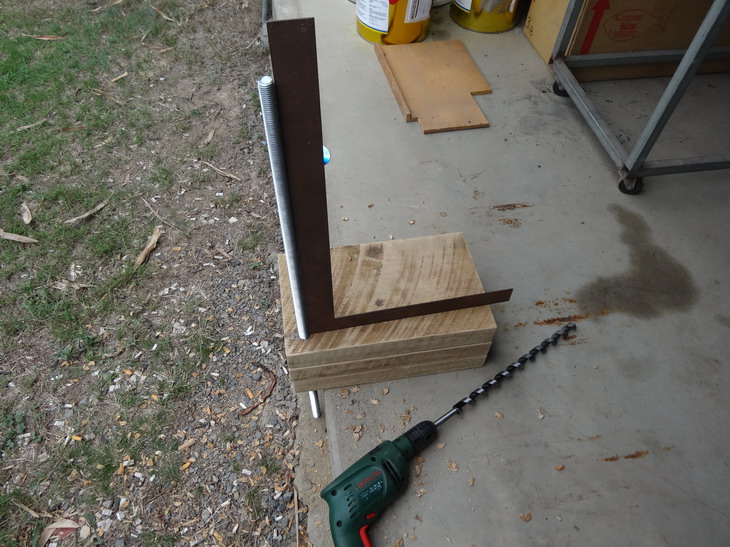
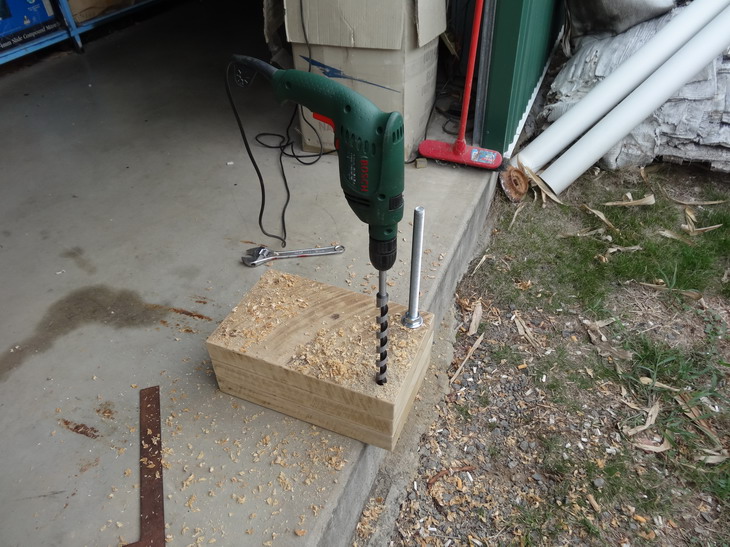
Ok Its DONE. Not sure how it goes for moulding what I want yet but we now have a poor man's (whoopps I meant persons) clicker press at least. See the pics. 1st is to drill pilot holes into the jack for later attaching the jack. 1/8" size bit should be fine. 2nd step - I found a cup 5/16" cup head bolt I think would be good to use and drilled the top out to receive it. 3. I then used a small triangle file to square out the hole to lock the cup head into the jack. 4. It was necessary to take a little of each side of the cup head to fit up into the jack. The jack must be fully wound up to give enough opening to push the bolt through. It should now look as below Next I cut the stair tread into 3 equal lengths. After giving the boards a little sanding on the orbital sander I marked out the positions for the holes. In order to get every thing at the same distance from the edge I decided to stand the board on its edge and use my square to scribe with as shown below Next step is to drill out one corner and watch to keep square. I decided to use the long drill bit I use when I do a little fencing for the cows. I broke the screw tip on one recently and checked for 1 at Bunnings. The cost there was about $60 something dollars so I got a whole set of 6 out of China for about the same. The come in a nice wooden box and all and go from 10mm up to 20mm. They have imperial sizes if you want as well. Next step is bolt all the boards tightly together and drill out the last 3 holes. Time for an advertisement. Check out my Wild Harry site and buys heaps of the best made leather goods in Australia. Well........ I cant post any more pics than this in the one posting.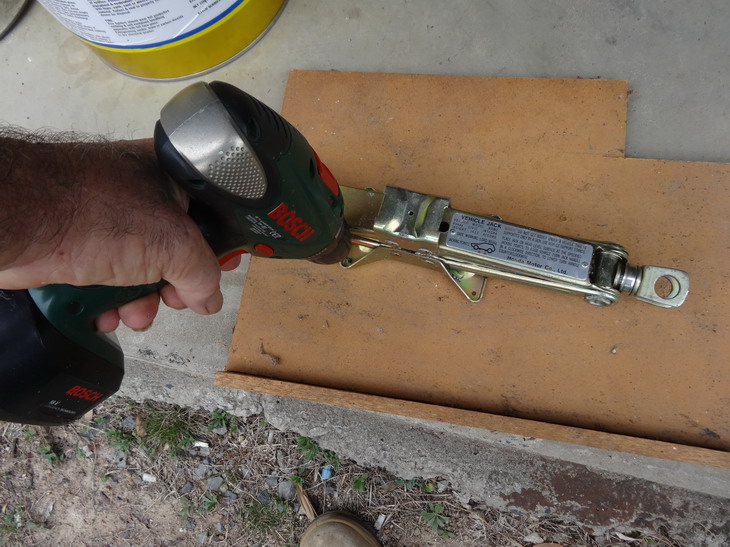
-
Onto the third bag....
RockyAussie replied to motocouture's topic in Purses, Wallets, Belts and Miscellaneous Pocket Items
Just like a bag but cut out the front and back.... Ha ha Sorry just could not resist that one -
Hi Robert, I had a quick google check and found this manual. You can see all the pages on line --https://www.manualslib.com/manual/1226154/Consew-206rb-5.html I have a lot of different machines but not that one sorry. I would study the hell out of it particullarly with regards to the timing. Take some pictures of any parts you have trouble with and post them on here. That will often give the best feedback. Brian
-
Yeah that's the teflon tape and will help a lot if you can make it stick where you want. Clean the steel well and give a little sand or scotchbrite first. Have fun Brian
-
1. is it just the same leather and or job application? Sometimes I have run in to a leather or a particular job section where this might happen like turning a corner. 2. Would it help to increase your foot pressure a bit? There are a lot of reasons as well which may include a dulled off hook or slightly out of timing. I'd try a little more foot pressure first then also if it happens mostly in the one area of a job see if your needle is being deflected to the left a bit. If it is alter how you hold it or go for a bigger needle perhaps. If it happens just anywhere then check you timing and be sure the loop is well formed when the hook is getting to come through it. Does your tensions stay constant when stitching or is there a tendency for the tension to come high when it misses? Brian
-
How to make a press for moulding leather pouches and such
RockyAussie replied to RockyAussie's topic in How Do I Do That?
No I wish it were stainless. Bunnings hardware price here in Australia on all but the scissor jack. And people wonder why our prices barely compete. -
How to make a press for moulding leather pouches and such
RockyAussie replied to RockyAussie's topic in How Do I Do That?
Thanks @Double Daddy I hope to get it done tomorrow and load some pics by Monday. I would have liked to use the vacuum but I don't know how to do it then keep the shape compressed while drying while I do more. Minimising the leather usage and lining up are other issues as well. I said earlier 38mm was close enough to 2".........I was tired ......I meant to say 1+ 1/2". Sorry. Regards Brian -
Looks good jimi and well done. Thanks for sharing. Just a thought ......A little dust coat of silicon spray can help with some leathers sometimes as long as it is not going to interfere with any to be glued areas. Outer edge of a wallet ...no problems and can help with the latter sewing as well.
-
How to make a press for moulding leather pouches and such
RockyAussie replied to RockyAussie's topic in How Do I Do That?
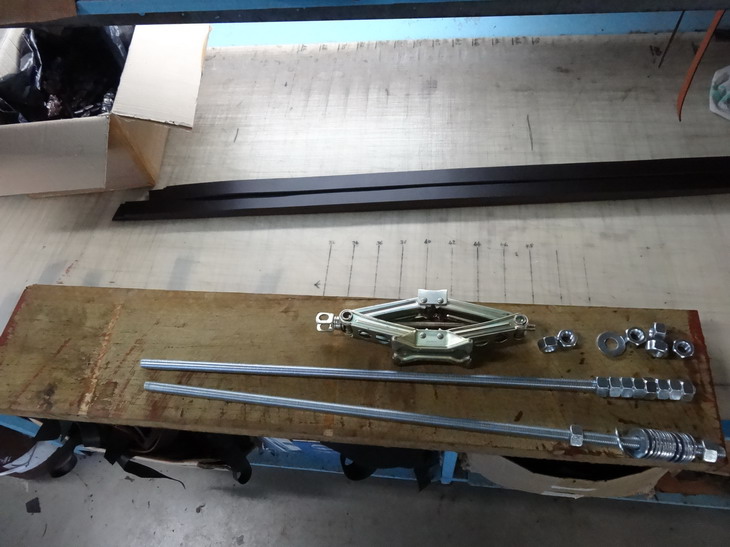
That is a nice and strong looking press there @plinkercases. sort of looks a bit like you've used a step tread the other way to what I'm thinking. Here is the plans for what I am thinking and a list of the parts and costs so far. In the second picture you see - 2 x 3' threaded rods at 3/4" round = $31.80au 16 nuts to suit =$11.04au 16 washes to suit =$6.72au 1 x stair tread at 4' long by 2" thick hardwood (Very dense) = $34.40au Scissor jack from the wreckers ( short one for Honda civic) $10.00 au Total so far $93.95 Still to get 1 of 3/8"x 2- 1/2" bolt and nut and 4 screws to attach jack to moving board. I will do some pictures of the making this weekend. Brian PS. I know I didn't draw the thread on the rods or even the jack either .........SO WHAT .... and 38mm is close enough to 2"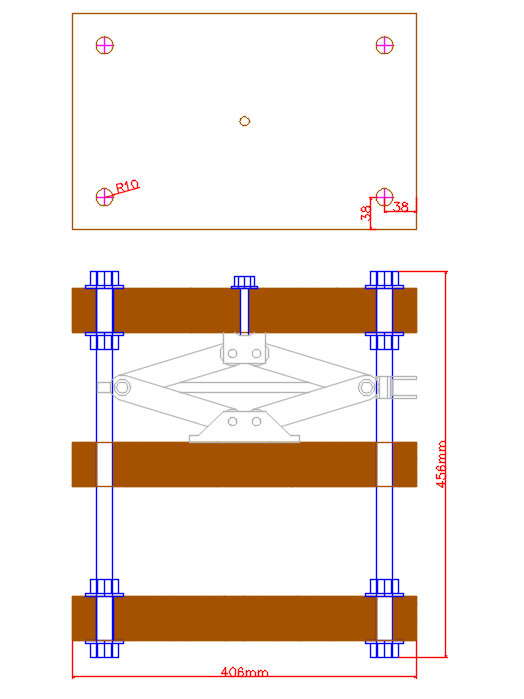
-
I guess we can just keep asking. Someone has to have one there somewhere needs a new home.
-
How to make a press for moulding leather pouches and such
RockyAussie replied to RockyAussie's topic in How Do I Do That?
Like you I have mostly only ever done moulds with wood and I have not done any with pla before. What worries me is the very tight fit for such a high wall. If it fails I will try a little wider opening and make it a little higher and more rounded off. I hope to have it work out as the advantage with the 3d printing is that although it takes hours to do them they all come out the same and you can keep on working on other stuff while that is happening. If that fails I'll probably just get a heap of outer shell parts laser cut out of aluminium or something. Thanks for mentioning the quick release I will check for that in my design. Regards Brian -
How to make a press for moulding leather pouches and such
RockyAussie replied to RockyAussie's topic in How Do I Do That?
Noted. I still would not mind getting one except I'd have to keep it out in another shed and the hydraulic action I think would be a bit slower than I want.. The cost here is about $300+ and probably need to be ordered in. Thanks again. -
How to make a press for moulding leather pouches and such
RockyAussie replied to RockyAussie's topic in How Do I Do That?
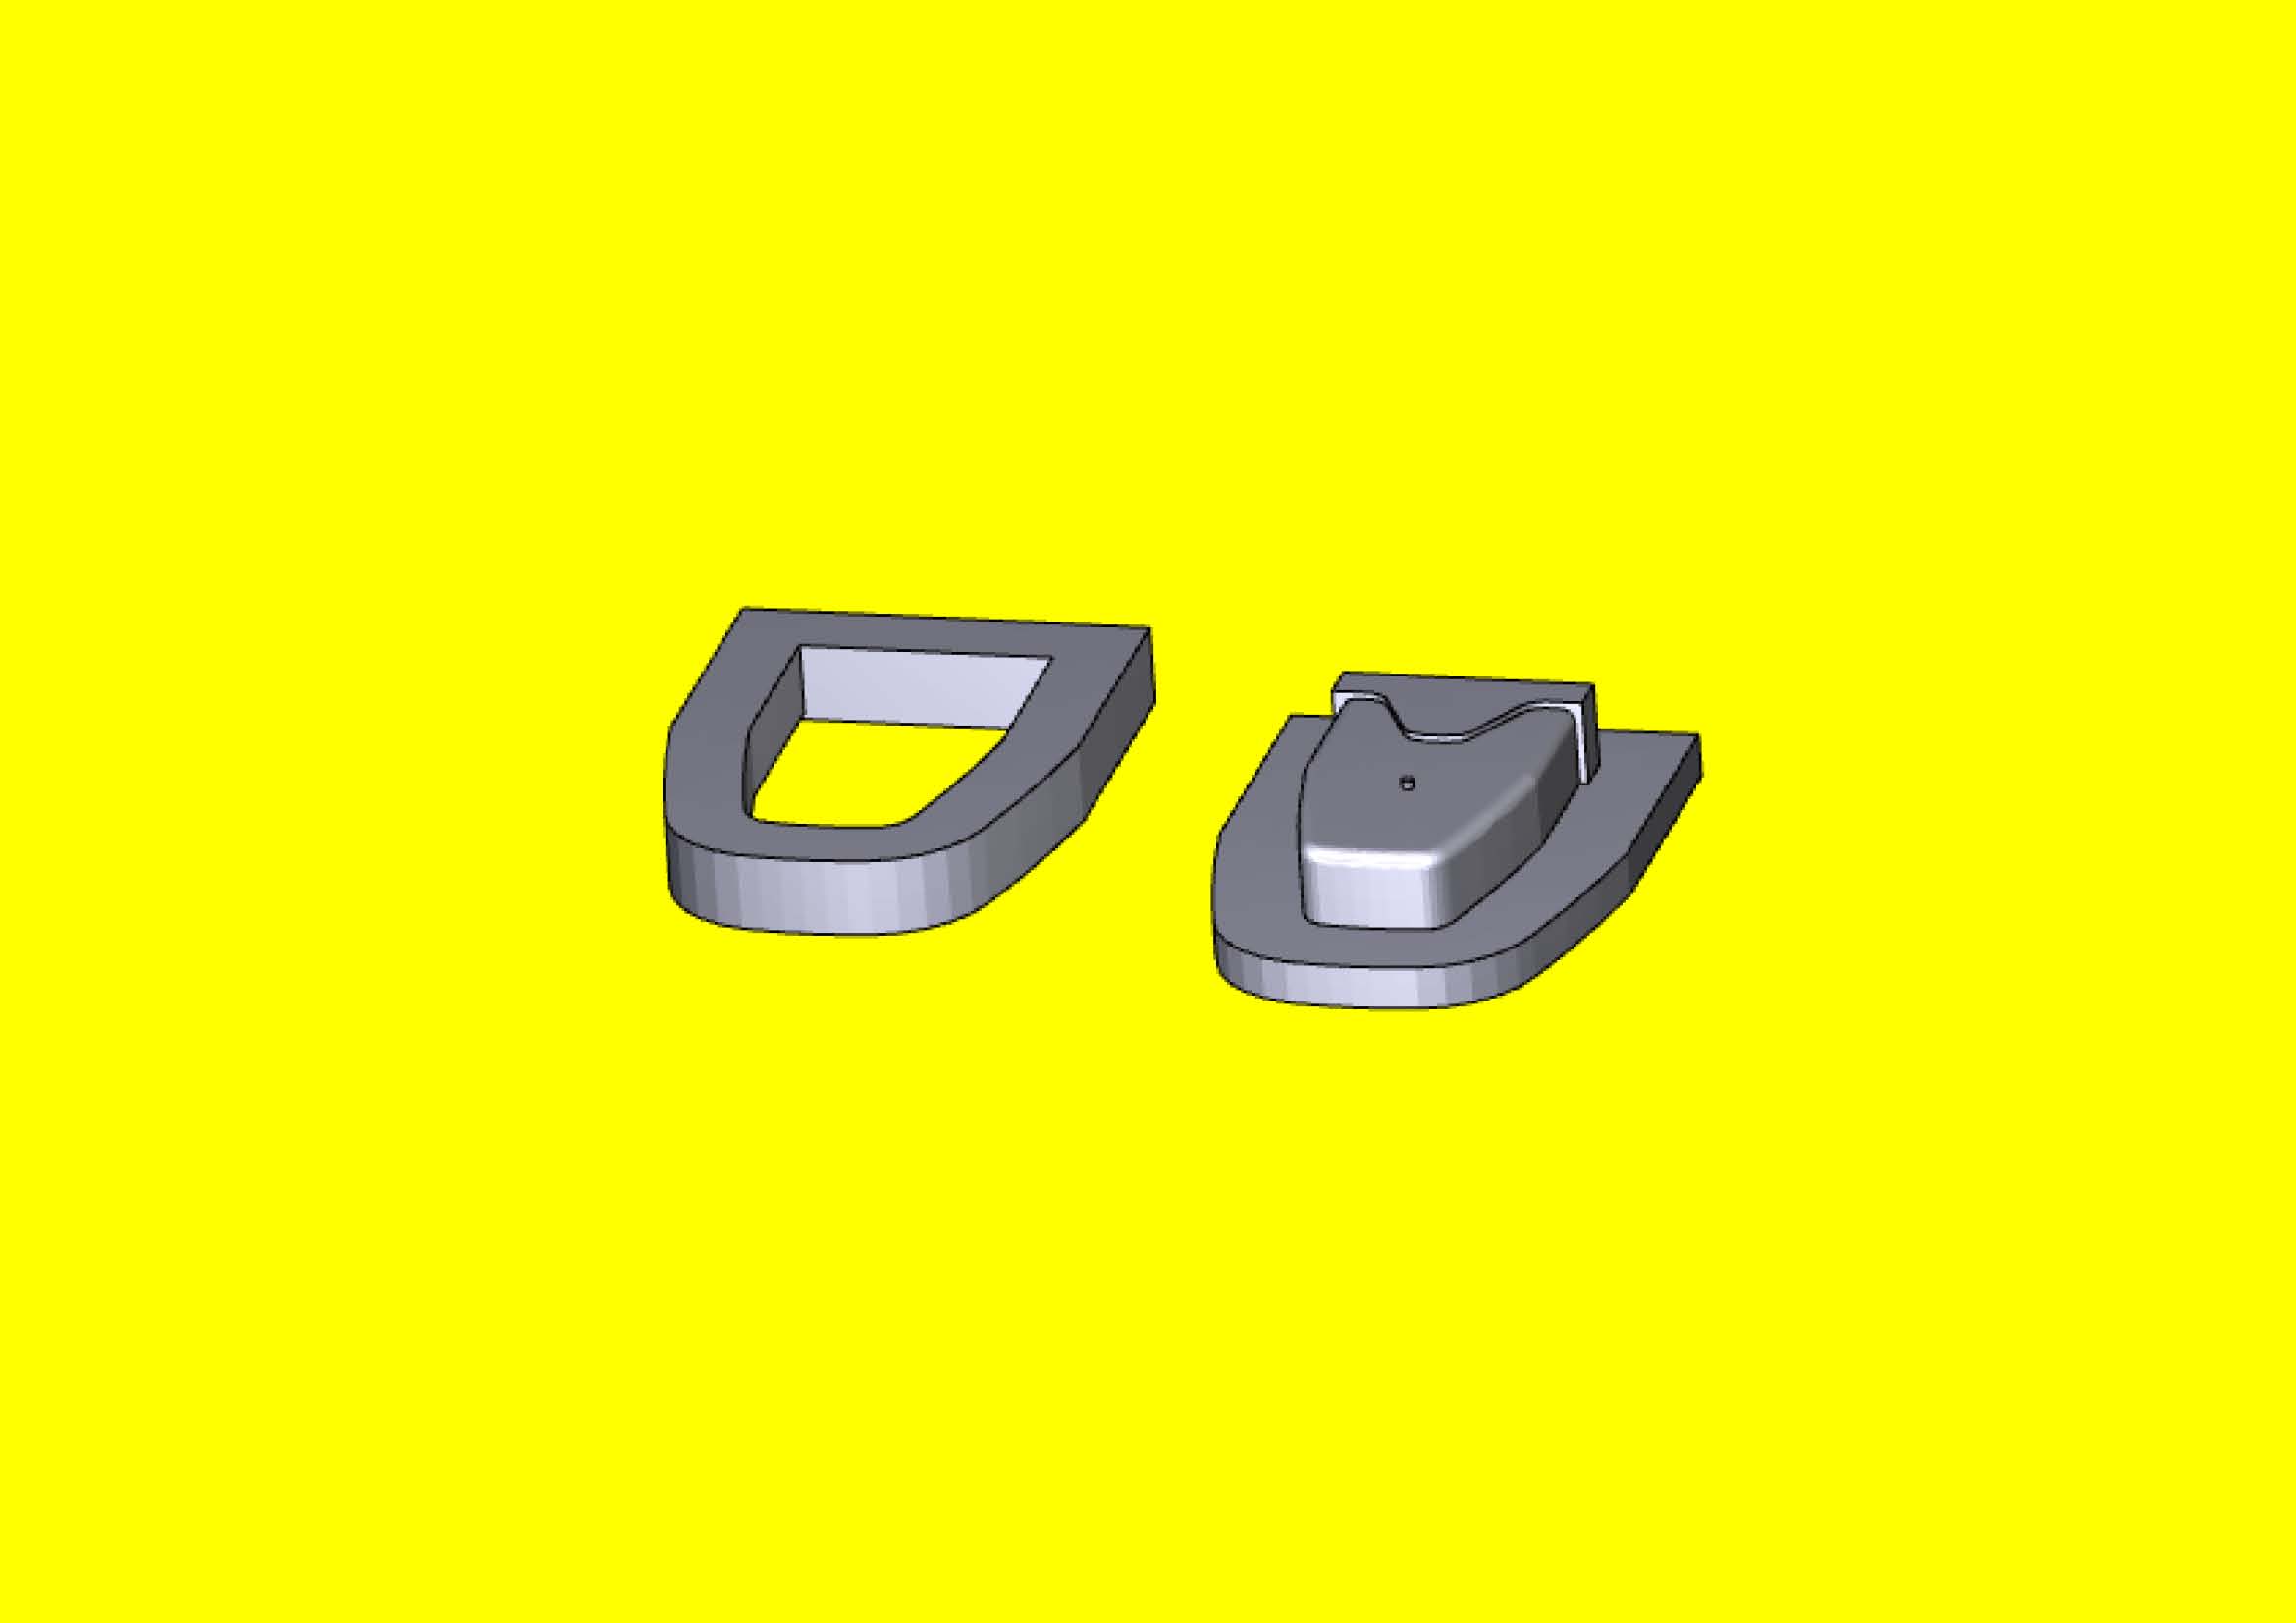
Here are some pictures of the pla moulds I intend to try in the press. At this stage in the drawing I have not included any clips for keeping them attached together. I think before I go that far I will need to test the strength of the pla print in the application first. I have done a jpeg to show for all but if you want a more detailed look in the pdf file you can click the picture to activate it and then you can get the mould to spin around to whatever view you wish by just holding+ moving your mouse button. I have seen Dwights press previously when doing my homework on this and there is a lot of good ideas in the construction of it. I think so far what I am likely to do will be quicker and cheaper and have the advantage of being able to down and up with minimal effort and time. I will have some draft drawings and pictures as I go soon. My goal on the press is to cost under $100 au and 2 hours to construct. It will have the leeway to allow for various pressure methods and stronger if needed. Did not say it will be pretty. Thanks for thoughts JD62, I hadn't though about stacking them on top of each other as the moulds I hope will be a quick in and out process. Good idea though I think. Thank you everyone for your inputs so far. Regards Brian HANDCUFF POUCH 3Da.pdf