motocouture
-
Posts
475 -
Joined
-
Last visited
Content Type
Profiles
Forums
Events
Blogs
Gallery
Store
Everything posted by motocouture
-
You’ve probably already got the covered, but embroidery designs might be another place to look. They usually have simple line art designs for layout purposes.
-

Onto the third bag....
motocouture replied to motocouture's topic in Purses, Wallets, Belts and Miscellaneous Pocket Items
Ah, that makes sense. Thanks so much for the tip, that will definitely help, especially when trying to laminate long runs like the handles, or the side seams. -
Yep, would probably be the last thing you ever wrapped around your wrist, ‘specially if it was a saltie thanks! Was going to use some pyramid rivets, but turned out I would have had to quadruple my bracelet before it was thick enough for the rivet back, so I went rummaging through my hardware box...which mysteriously seems to be getting stuff added to faster than it gets used.... Right there with you, used well, I think it looks great on so many things!
-
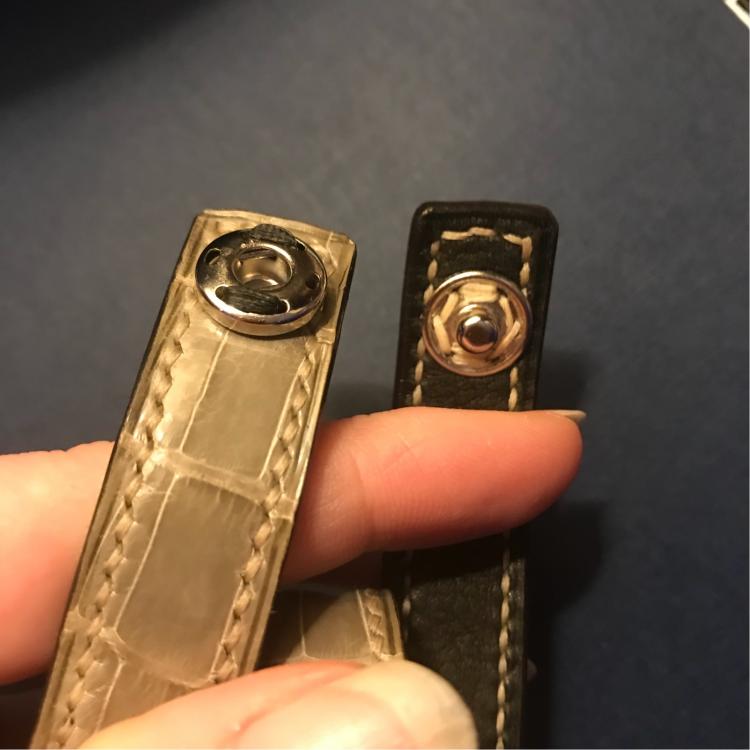
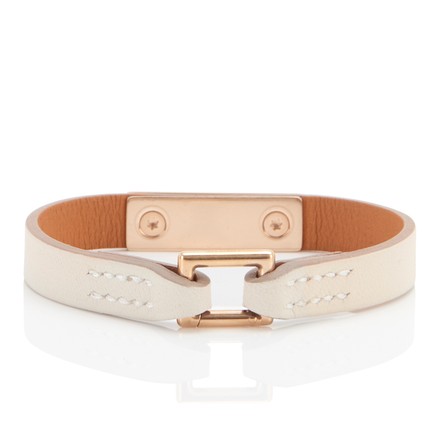
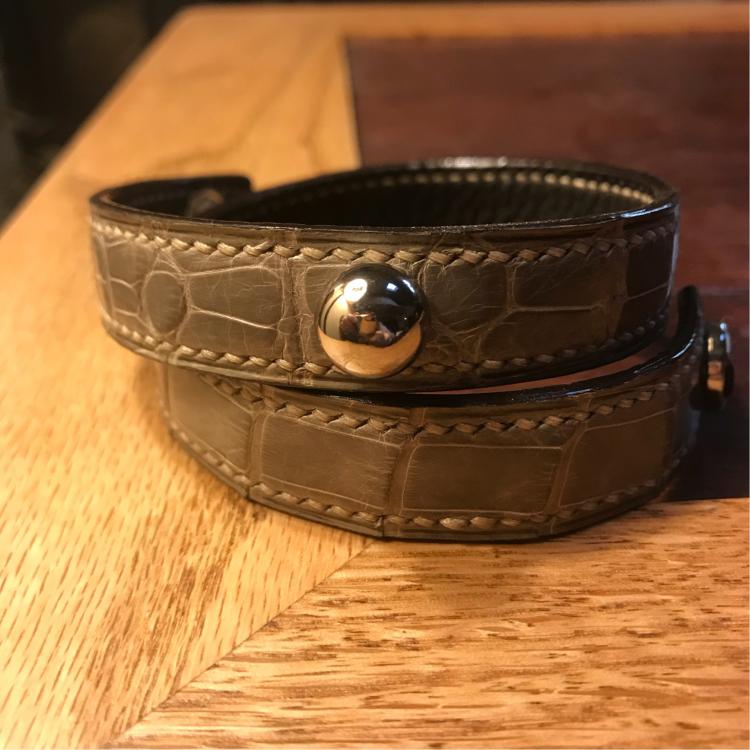
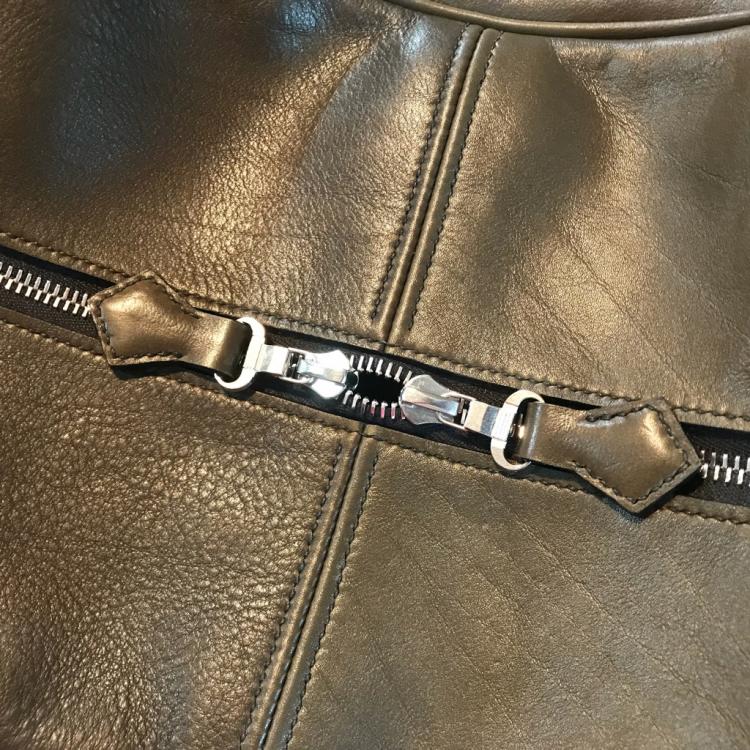
Ha! And no pun intended . Thanks! Great advice on the edge coat, will add some wax (although hot weather is something I can only dream about as we head into December here in Philly lol). I’ve added a photo of the clip below - it is literally just a silver sew on garment snap I had laying around the house. What I really wanted is in the second photo below (Hermes bracelet); a rectangular spring gate Turns out they’re a little hard to find (for me at least). Tracked down something similar in silver from Rio Grande, but I don’t think it has a large enough clearance on the gate. Would love any insights on where else to look (tried the usual Ohio Bag and Buckleguy).
-
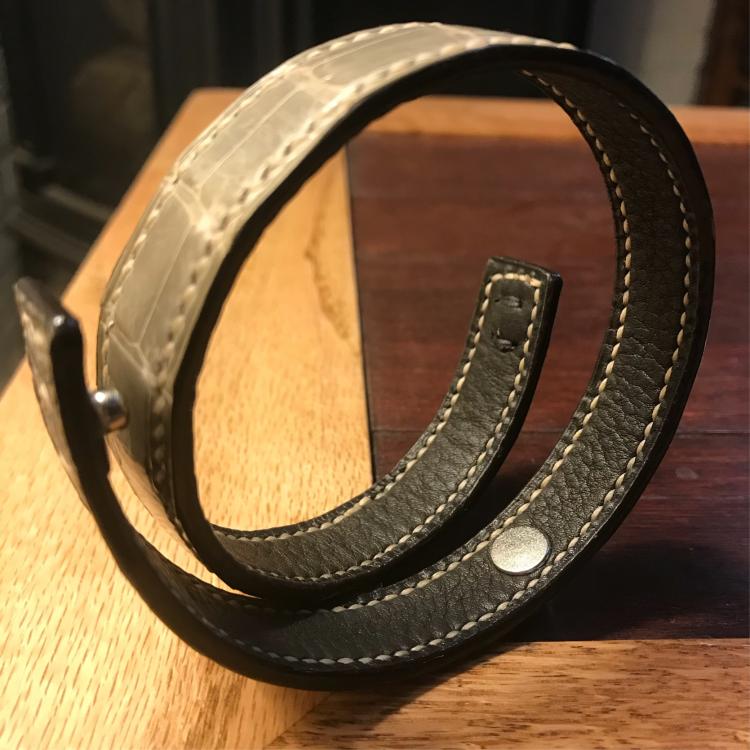
After the bag, decided to make something small in the name of instant gratification . Made a narrow ‘double tour’ bracelet, with: some scrap glazed croc from @Lee05 (thanks!) some great HAAS calf in smooth black from @nstarleather (beautiful quality as always) a handy dose of croc-working advice from @RockyAussie (I interfaced the back like you suggested, and cut oversize then trimmed down....) hardware from @buckleguy - used a handbag foot stitched with 0.6mm beige Tiger thread, using 3.0mm KS stitching irons (would’ve used Lin Cable but only have it in black....sooooo expensive per reel lol)
-
Onto the third bag....
motocouture replied to motocouture's topic in Purses, Wallets, Belts and Miscellaneous Pocket Items
Thanks! Kinda like eating an elephant, teaspoon at a time how do you use the waxed paper? Sounds like a great idea, never thought of it being a great non-stick material.... -
Agreed on looking better - might have to use some of those tips myself next time I do a rounded corner! @RockyAussie your rememberer isn’t broken yet I’m originally from Albany, WA, then somehow ended up in Pennsylvania with snow and no beaches
-
Onto the third bag....
motocouture replied to motocouture's topic in Purses, Wallets, Belts and Miscellaneous Pocket Items
No worries! Will add some more detail on the piping later as well -
Onto the third bag....
motocouture replied to motocouture's topic in Purses, Wallets, Belts and Miscellaneous Pocket Items
Ha! Love it! Maybe I’ll just threaten to get him shaved like a poodle @billybopp thanks! Took a while (always looks smaller on paper lol), but really enjoyed the process. Love the Boston Terrier comment! -
Onto the third bag....
motocouture replied to motocouture's topic in Purses, Wallets, Belts and Miscellaneous Pocket Items
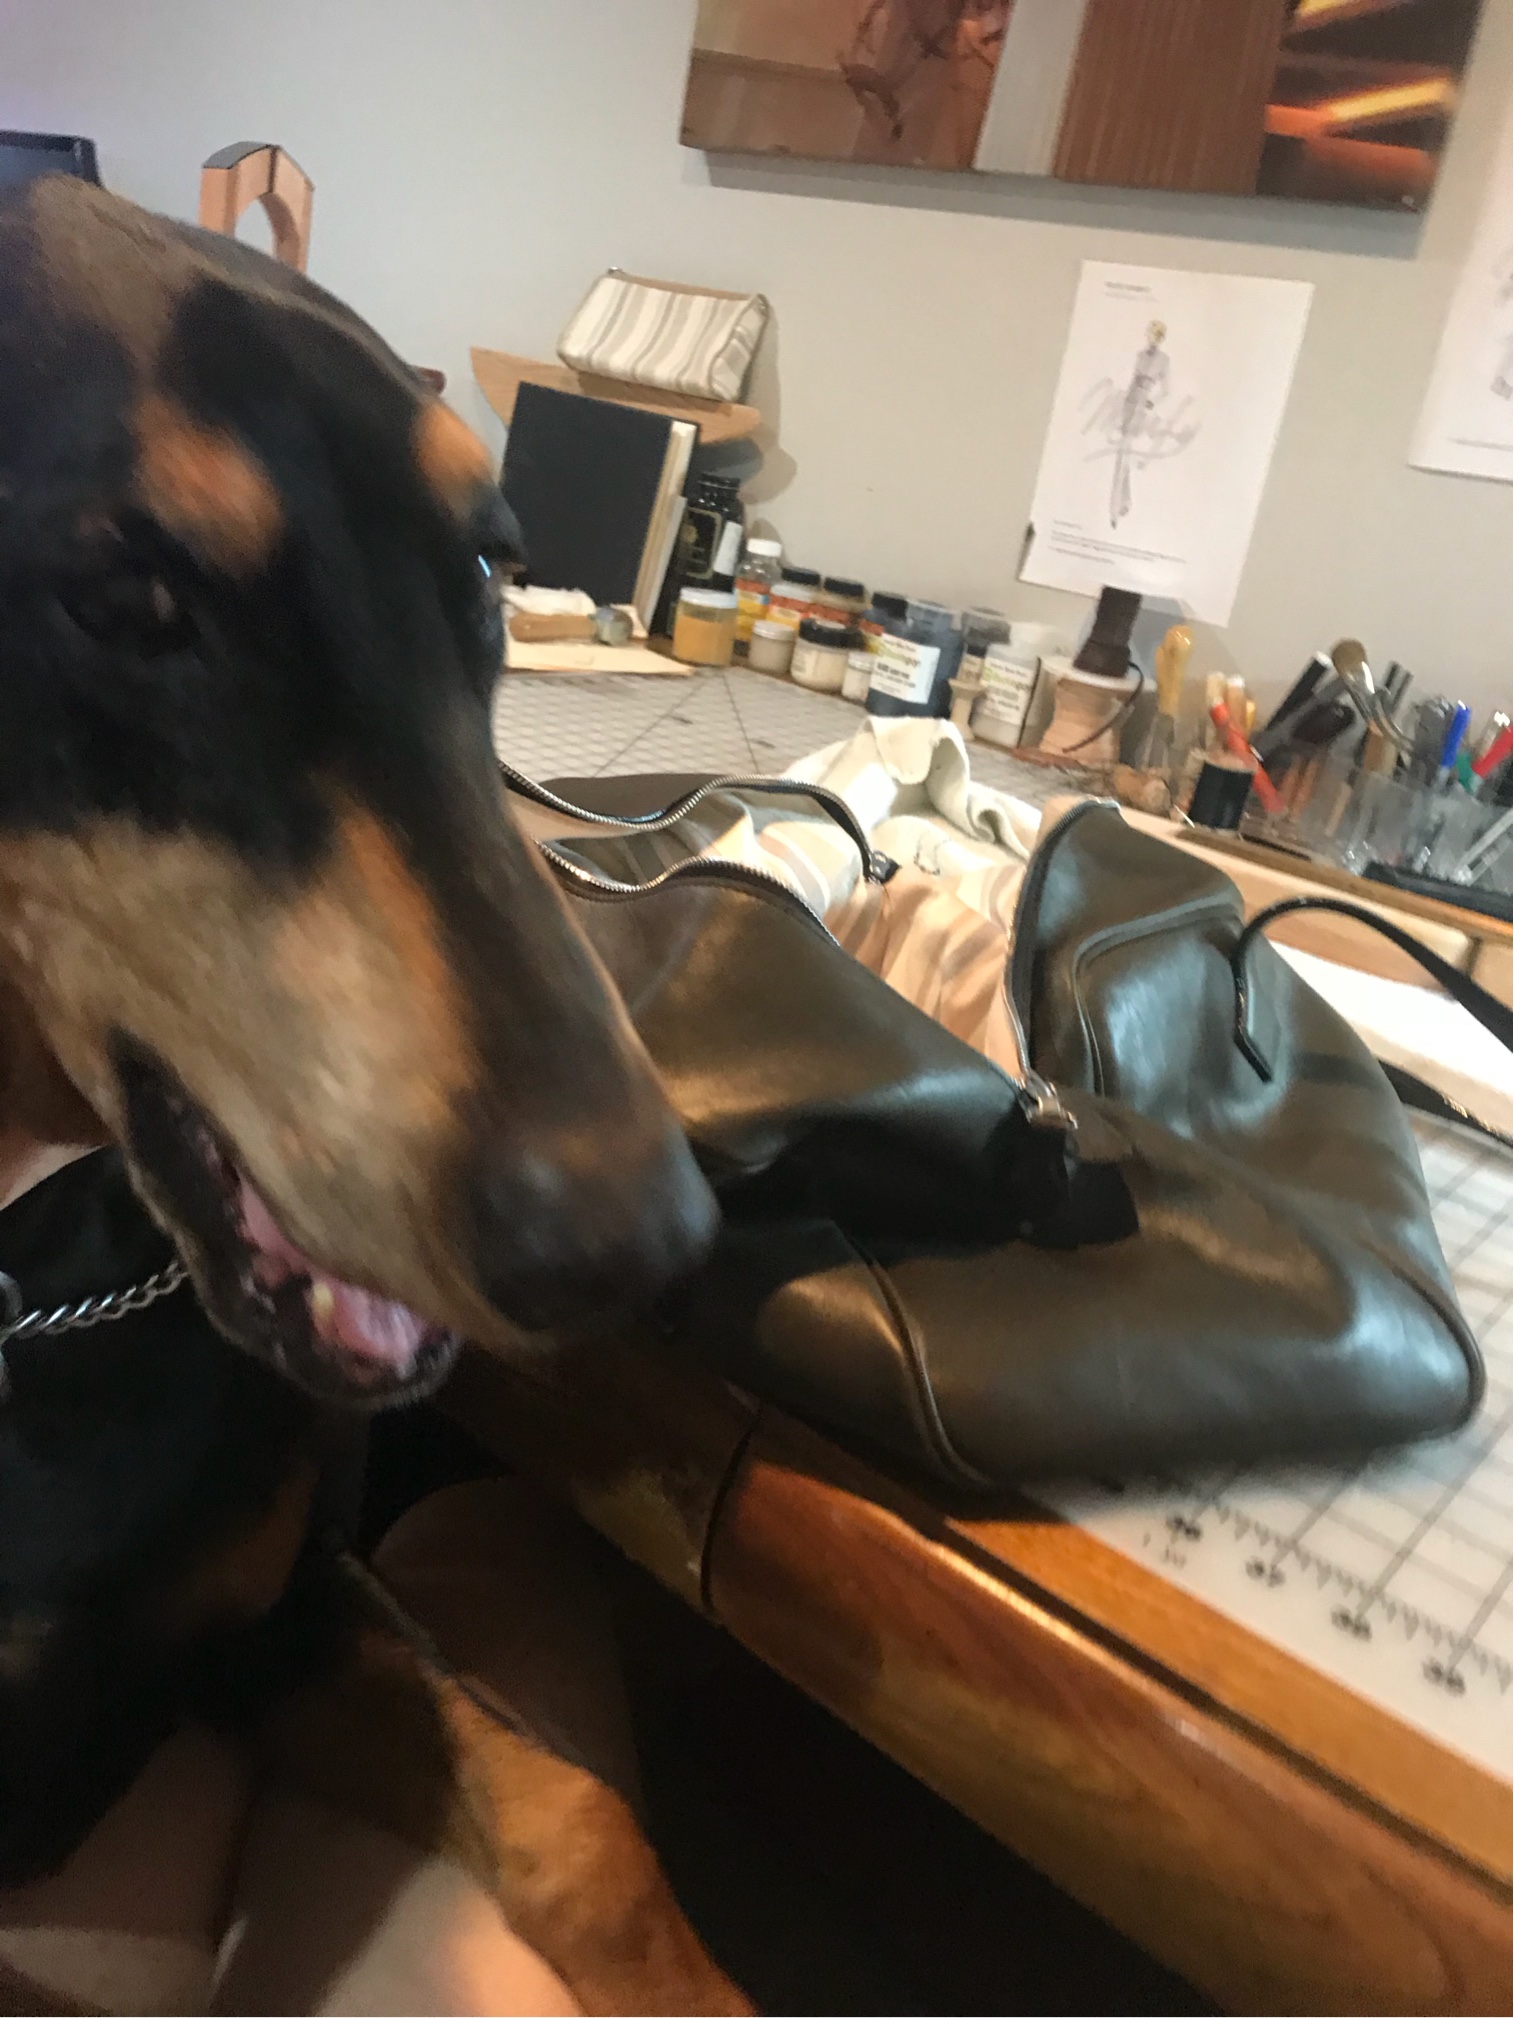
Oh, and my lining helper - he’s convinced he’s a lapdog...
-
Onto the third bag....
motocouture replied to motocouture's topic in Purses, Wallets, Belts and Miscellaneous Pocket Items
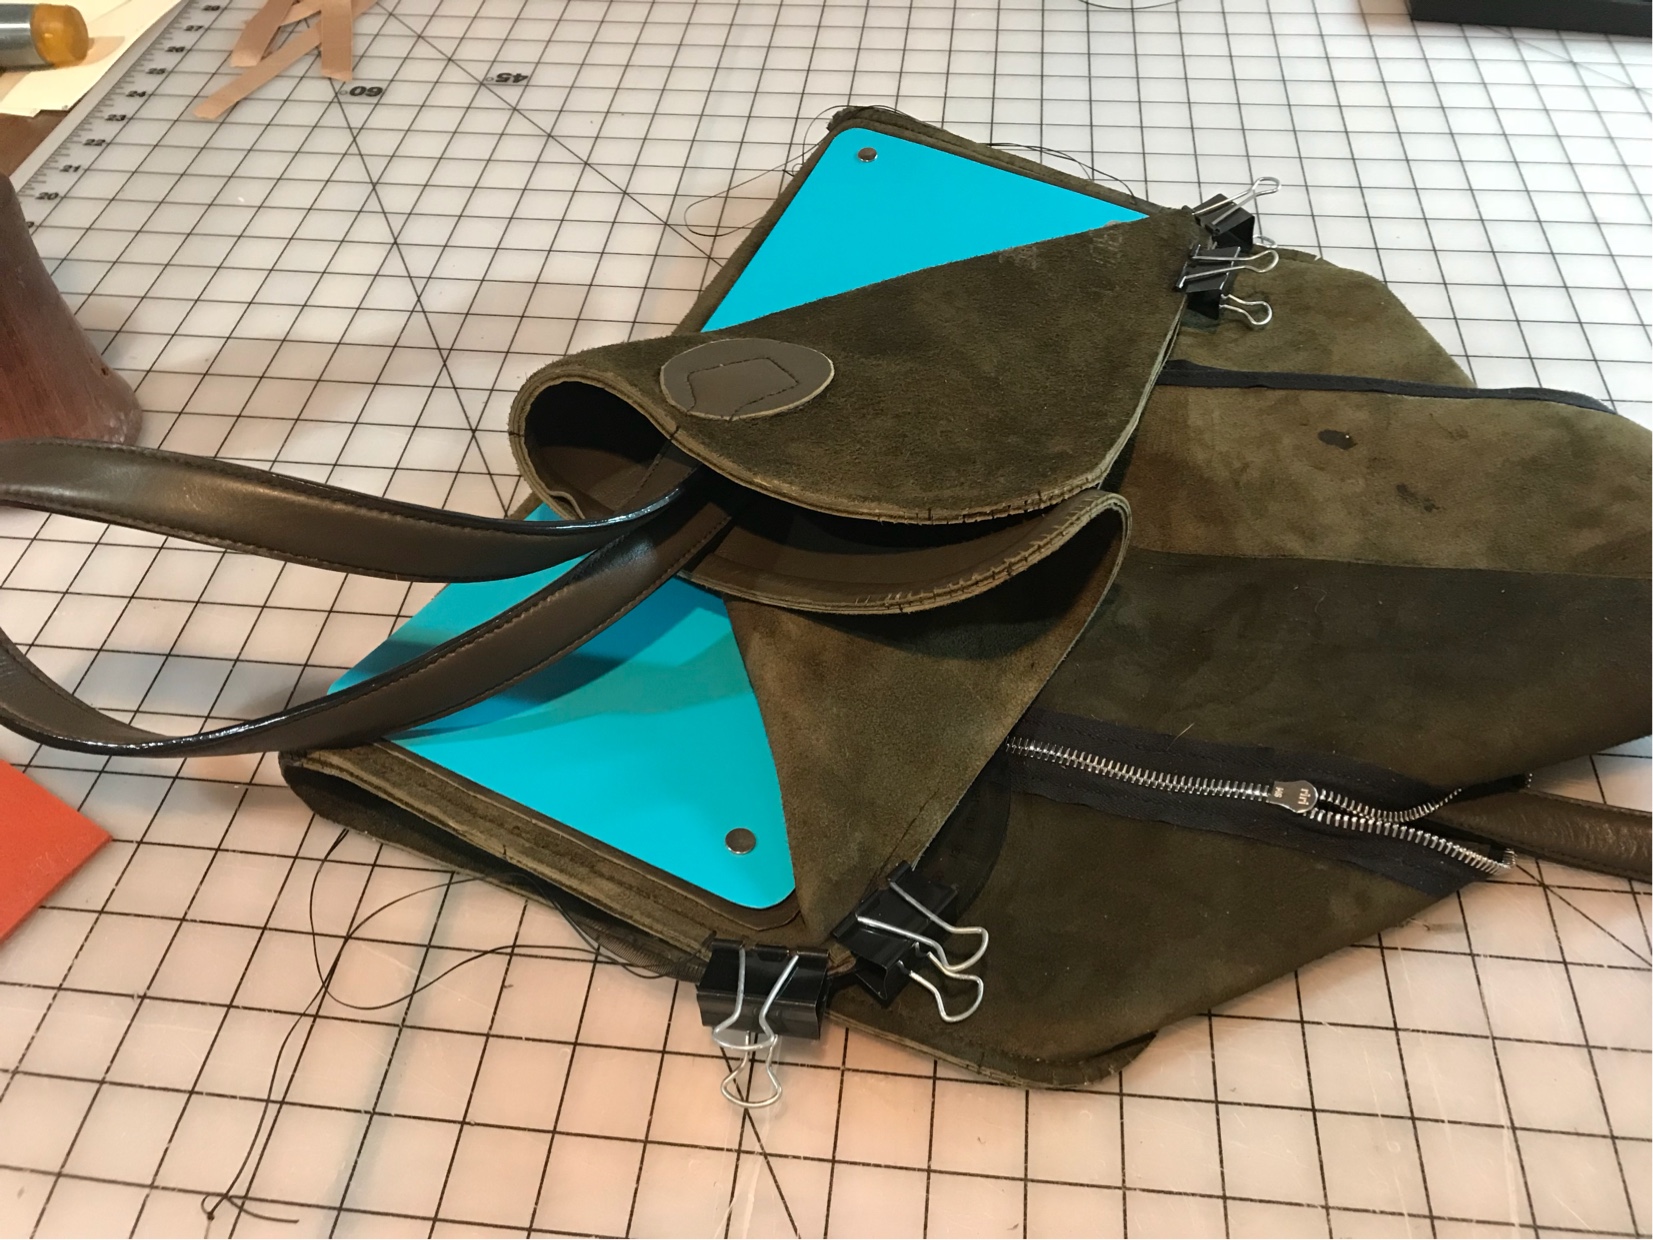
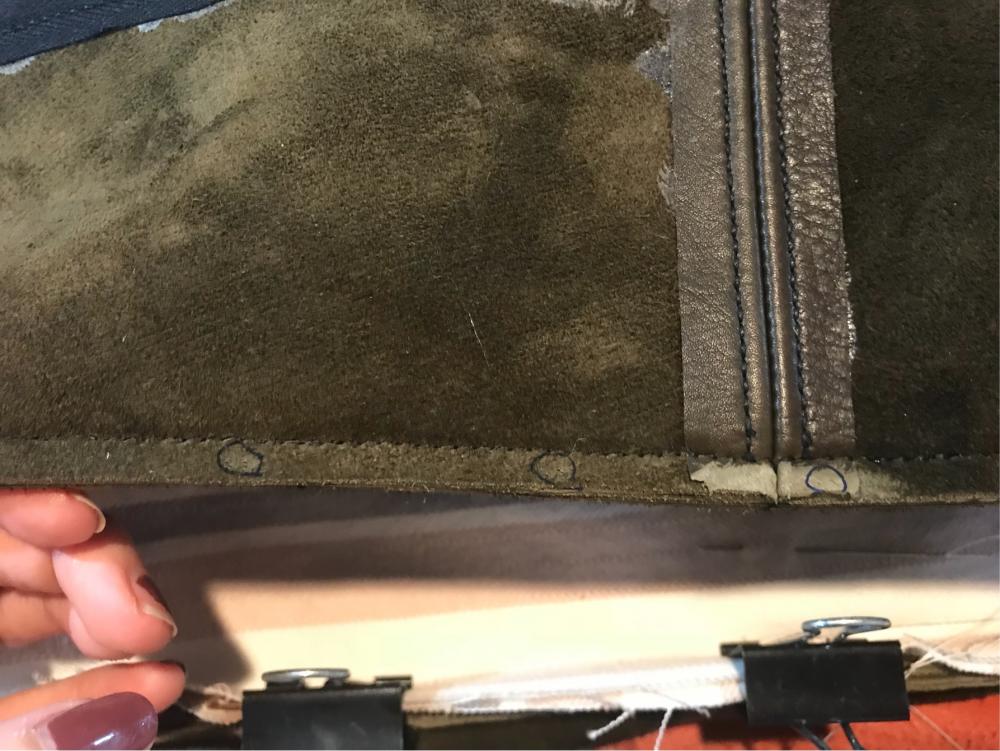
To attach the lining (cotton twill quilted with a thin wool batting), I used my two-tooth iron to punch holes every inch or so in the seam allowance of the leather. The seam is 6mm, so plenty of room to add some stitch holes here and there. I then used a and sewing needle (normal sewing, not harness needle), and Coats heavy duty thread that I waxed, to stitch the lining to the leather seam allowance. I made sure I backstitched a couple of times in the fabric after going through the leather, so that it locked the thread each time. Apart from that, hand stitched the edge of the lining to the inside of the zipper tape the whole length of the zipper (took a while....). Used an ultra sharp, fine Japanese hand sewing needle with waxed polyester (garment) sewing thread, and a thimble. I didn’t attach the lining anywhere else, as the quilting gives it some body and helps keep the shape. I also added some ease to the lining so that it can move a little without disrupting the outside of the bag.
-
Onto the third bag....
motocouture replied to motocouture's topic in Purses, Wallets, Belts and Miscellaneous Pocket Items
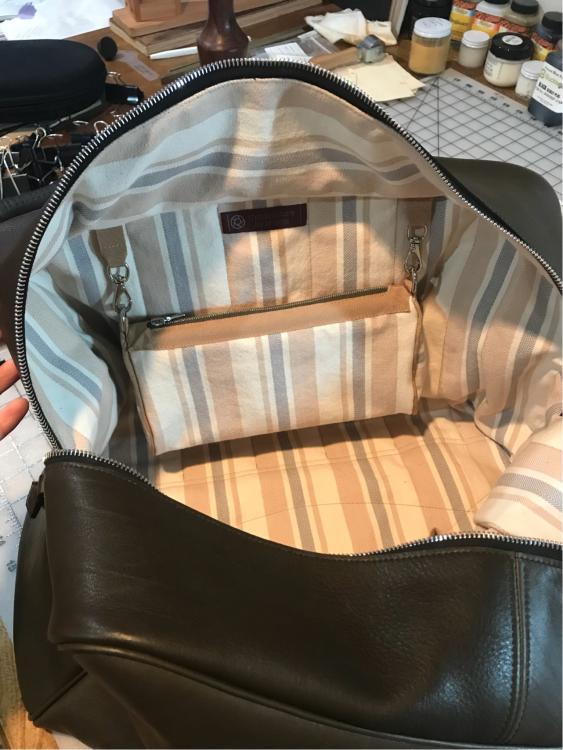
Finally finished! Forgot that making the lining is essentially making the whole bag again lol. Below are a couple of photos with the lining in - apologies for the quality of the pics, it’s hard getting the inside of the bag. @YinTx, @JD62 will throw a couple of pics up showing how I attached the lining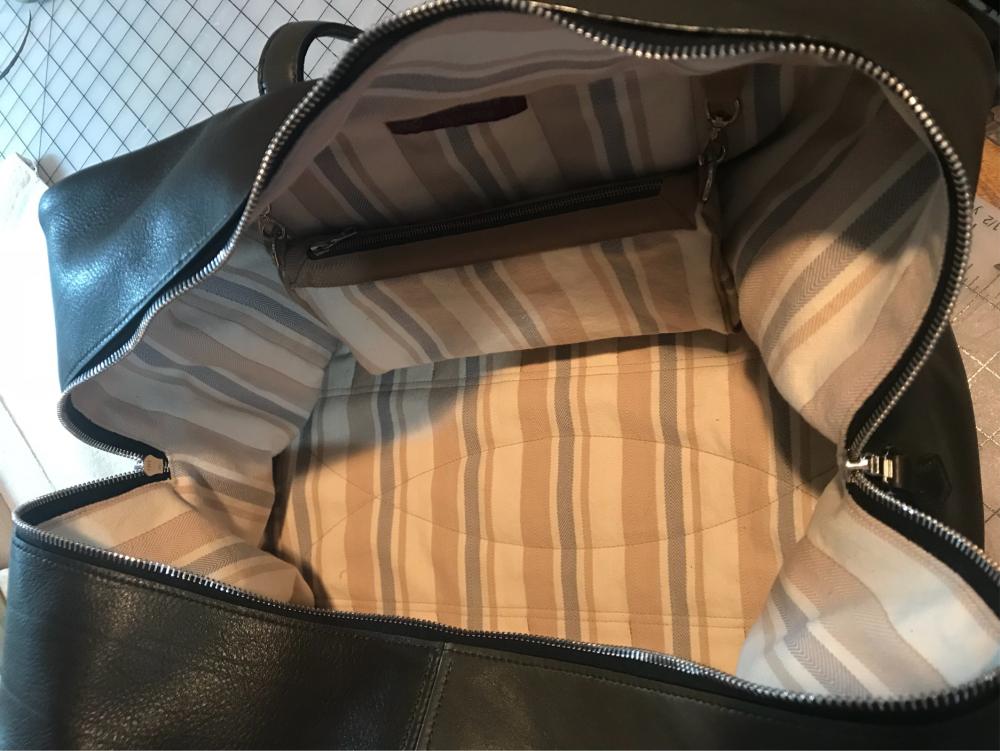
-
Onto the third bag....
motocouture replied to motocouture's topic in Purses, Wallets, Belts and Miscellaneous Pocket Items
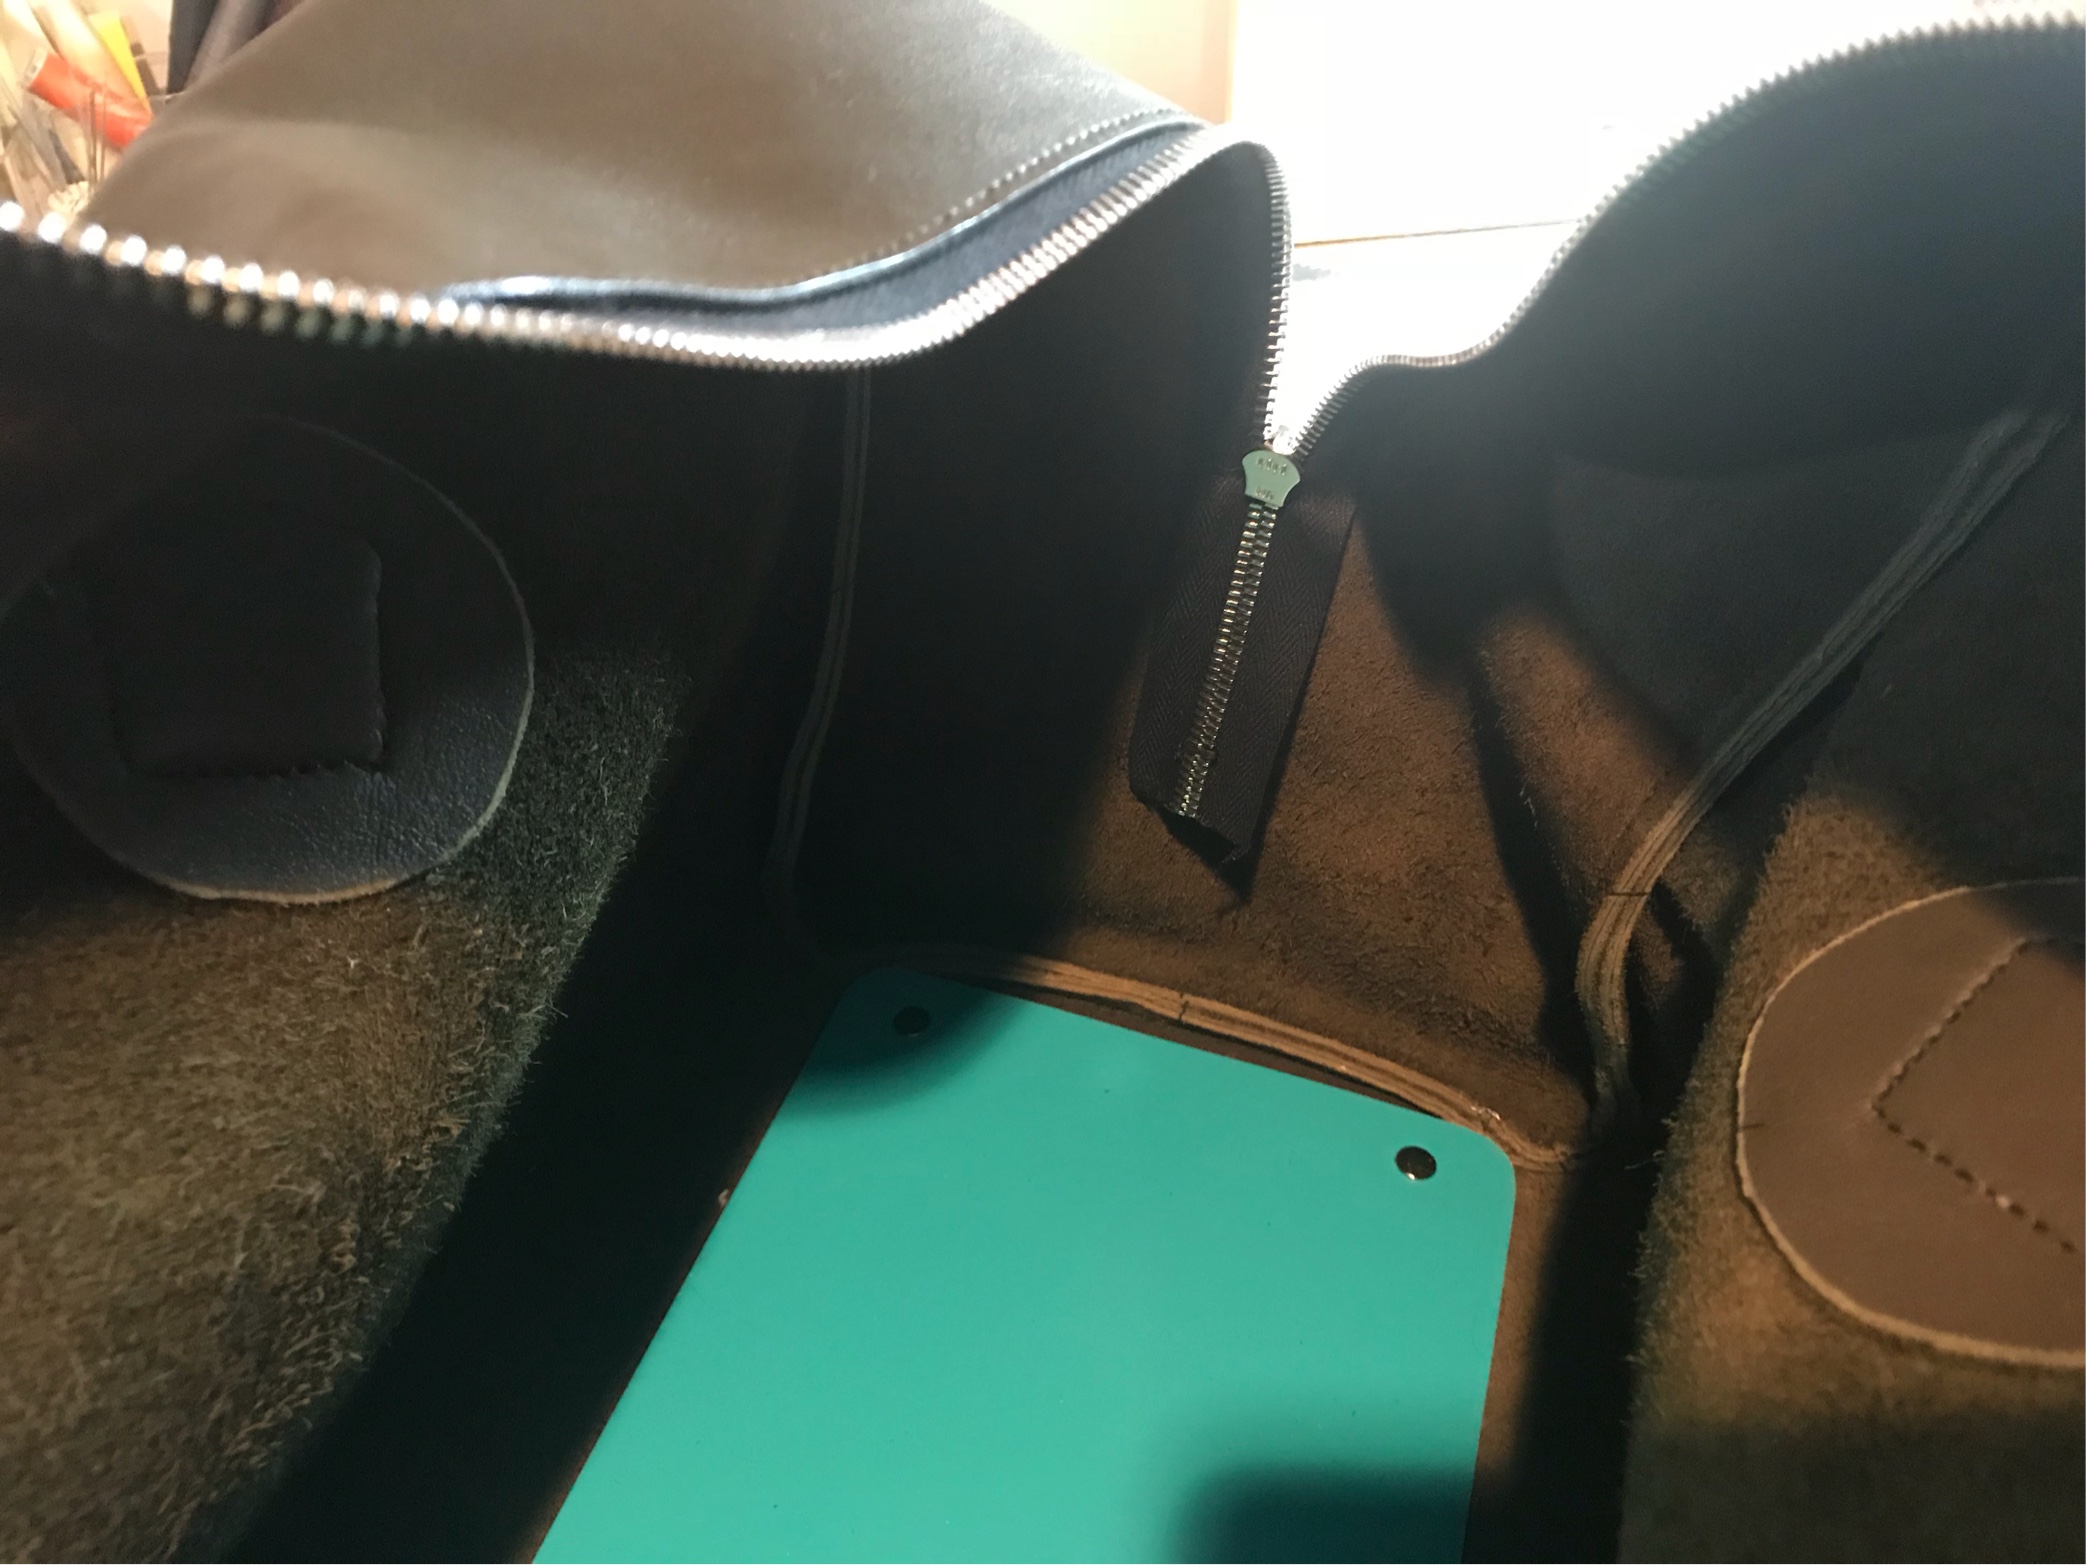
@tzleather here are a couple of photos of the bag interior. The blue sheet is a stiffener from a thin plastic kitchen cutting mat (from TJ Maxx ), and is both glued to the base and held by the five riveted feet. I haven’t finished the internal seams at all, since they’ll be hidden by the lining. Otherwise I’d bevel, do a coat of tokanole and burnish. In this case, I didn’t trim the seams any thinner on the corners (it’s a 6mm seam), because I wanted the extra stiffness to help support the bag. The round patches are extra reinforcement for the strap handles; I used the same calf leather as the outside so that it moved the same way and didn’t create a ridge on the front. In hindsight, I’d probably make the patches a little bigger to really help disperse the strain from the handles. The small black marks are key marks, that I design in from the start. I really try to get them as accurate as possible on the original template, and they really help get accurate placement for gluing, especially on the round corners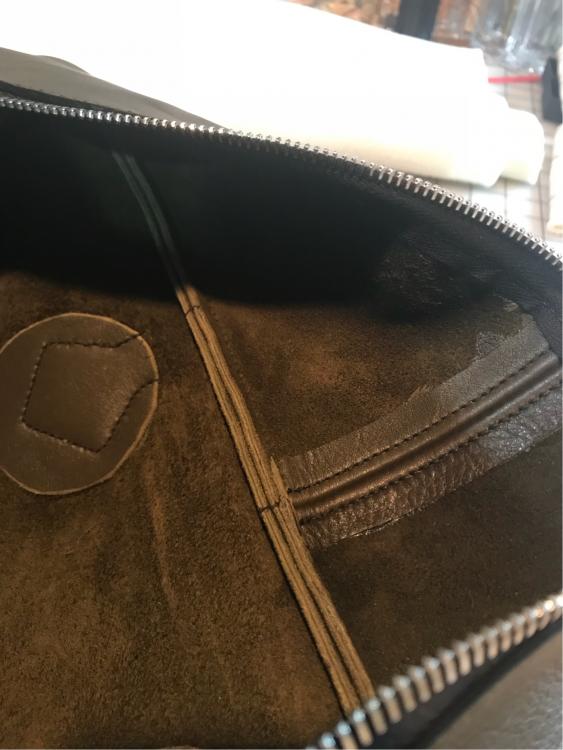

-
Really Stupid Basic Question on Leather Types
motocouture replied to rodneywt1180b's topic in How Do I Do That?
In terms of cutting, I find a hand held rotary cutter (45mm disk size) works really well if you don’t have access to a head knife or something similar. Olfa is a good brand; the replacement blades can be a little pricey but the blades last for ages if you take care of them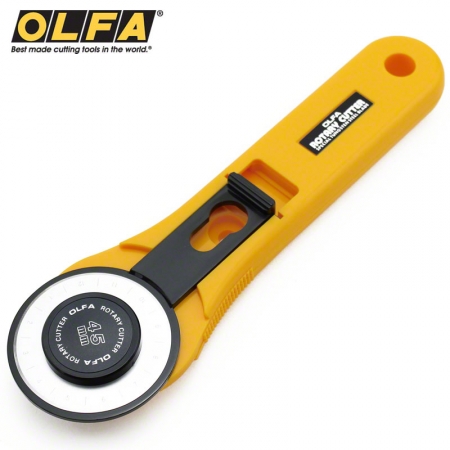
-
Onto the third bag....
motocouture replied to motocouture's topic in Purses, Wallets, Belts and Miscellaneous Pocket Items
Thanks, really appreciate your kind words! Always happy to share the steps, since I enjoy seeing the amazing stuff others share absolutely! Will post more pics tomorrow, with some detail on the steps I used for piping (not definitive by any means, I’m sure there’s other ways, just what I used here). -
Onto the third bag....
motocouture replied to motocouture's topic in Purses, Wallets, Belts and Miscellaneous Pocket Items
Thank you! I just do bits here and there, around my day-job Ha! Absolutely! After thinking about your advice, I’m actually going to quilt the canvas liner with some thin needle-punched wool wadding, to give a nice, soft appearance on the outside and protect the calf skin. Thank you! I’m glad you enjoyed seeing the process, I didn’t want to overwhelm people with the details. -
Onto the third bag....
motocouture replied to motocouture's topic in Purses, Wallets, Belts and Miscellaneous Pocket Items
Thank you! It’s great leather, appreciate you sharing Thanks! It’s taken a while but it’s exciting to see it finally come together -
Onto the third bag....
motocouture replied to motocouture's topic in Purses, Wallets, Belts and Miscellaneous Pocket Items
-
Onto the third bag....
motocouture replied to motocouture's topic in Purses, Wallets, Belts and Miscellaneous Pocket Items
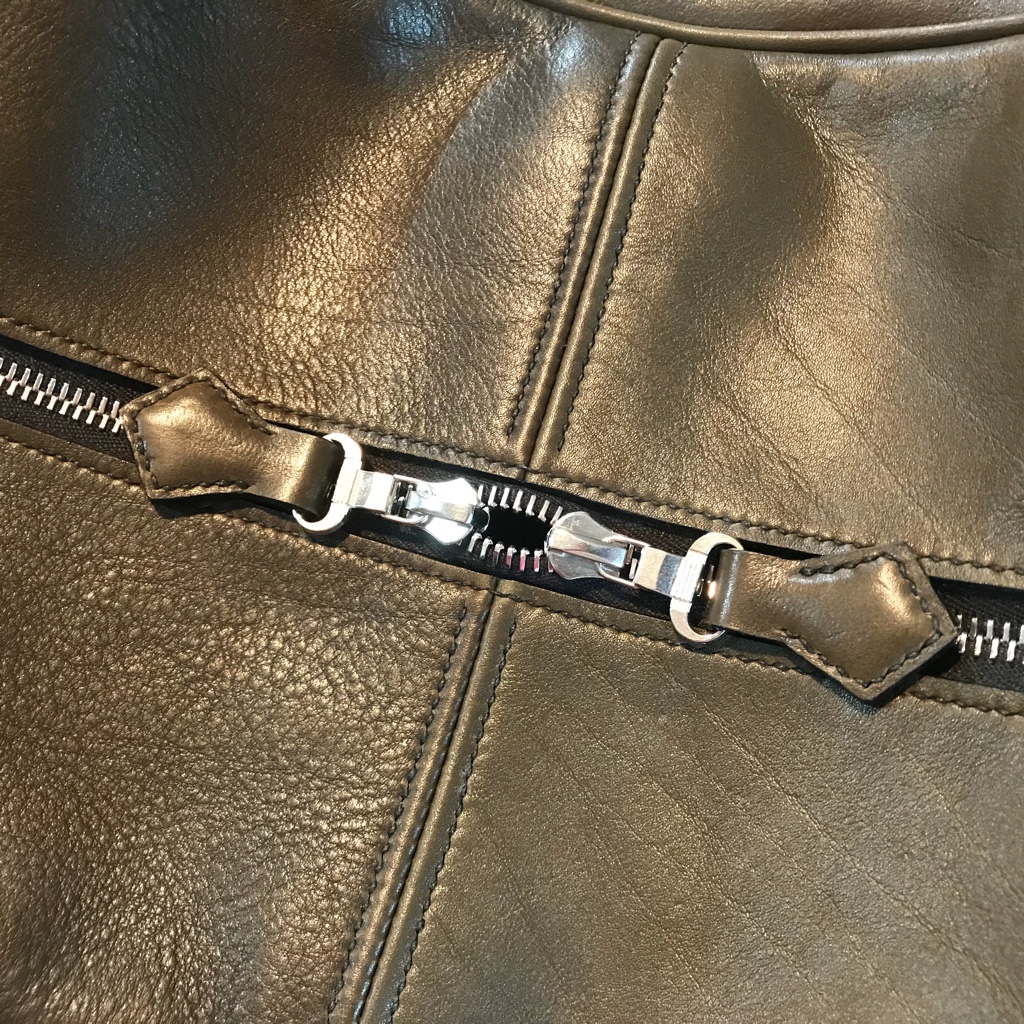
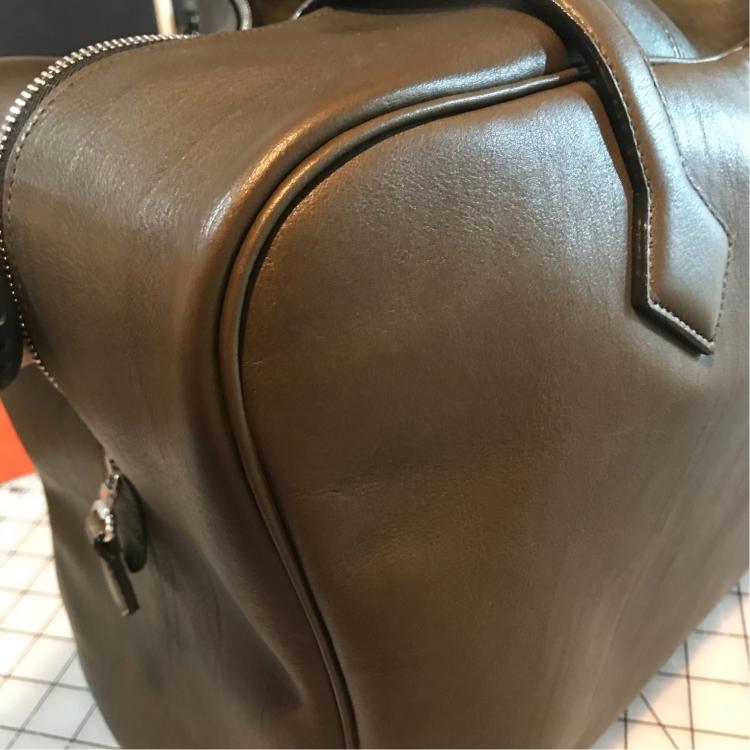
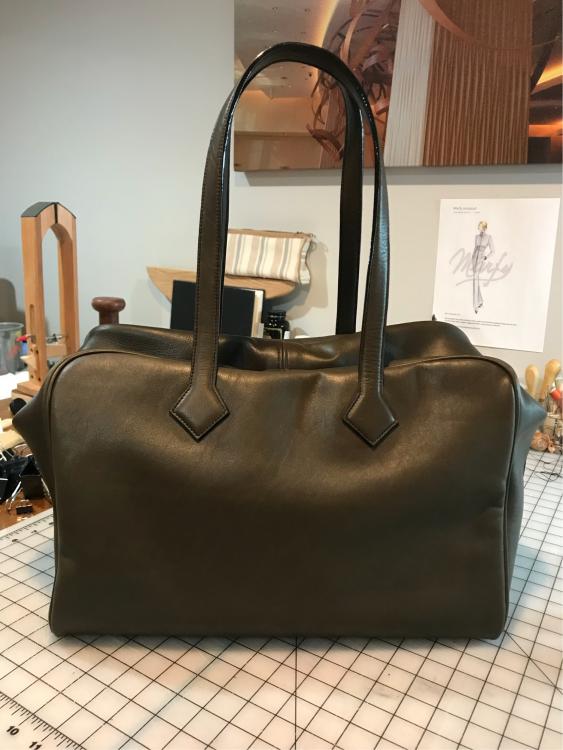
Finally, all saddle stitching complete and bag turned! I have to say, I love working with this calf leather from HAAS (thanks again @nstarleather). All turned seams were stitched with 0.6mm black Tiger thread and 3.0mm KS stitching irons (used linen thread only where it would show on the right side). Now onto the lining, which will be in the same fabric as the small zippered bag in the previous photo.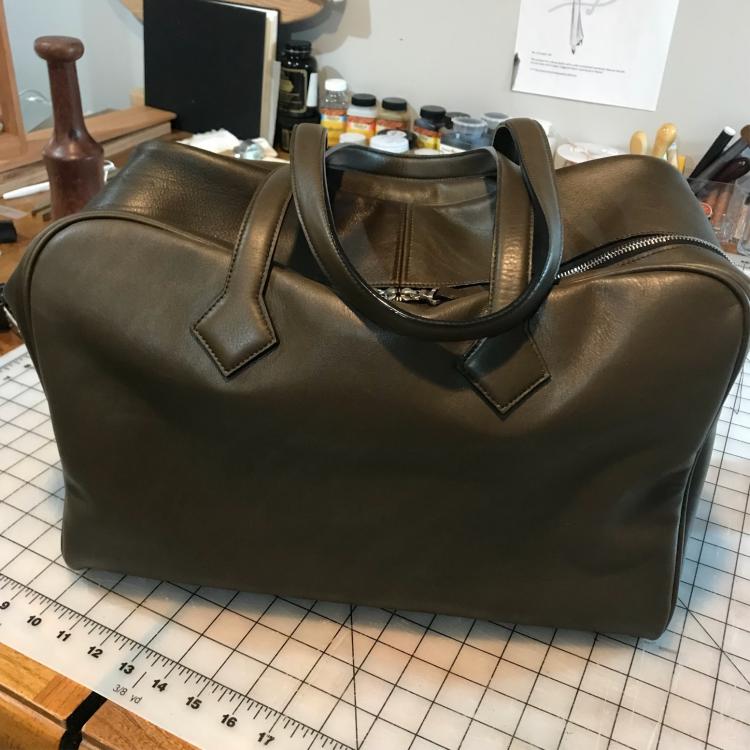
-
Onto the third bag....
motocouture replied to motocouture's topic in Purses, Wallets, Belts and Miscellaneous Pocket Items
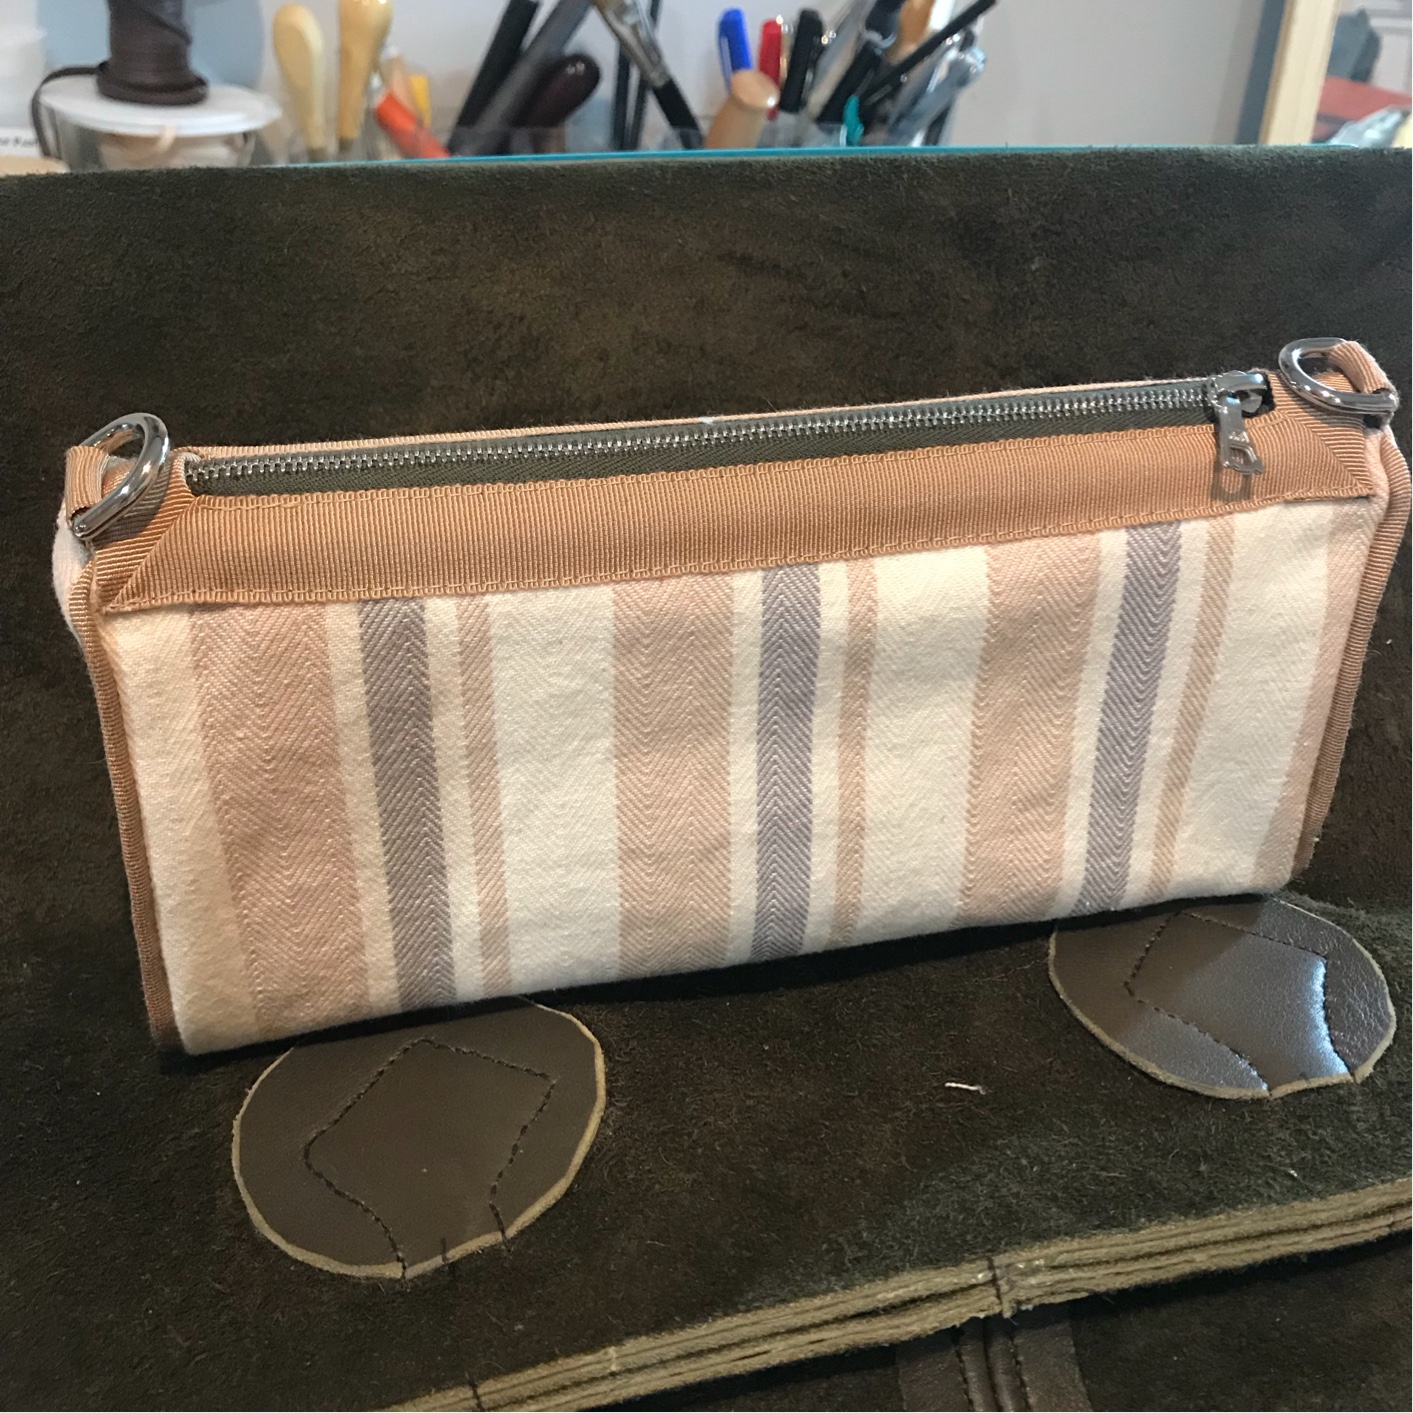
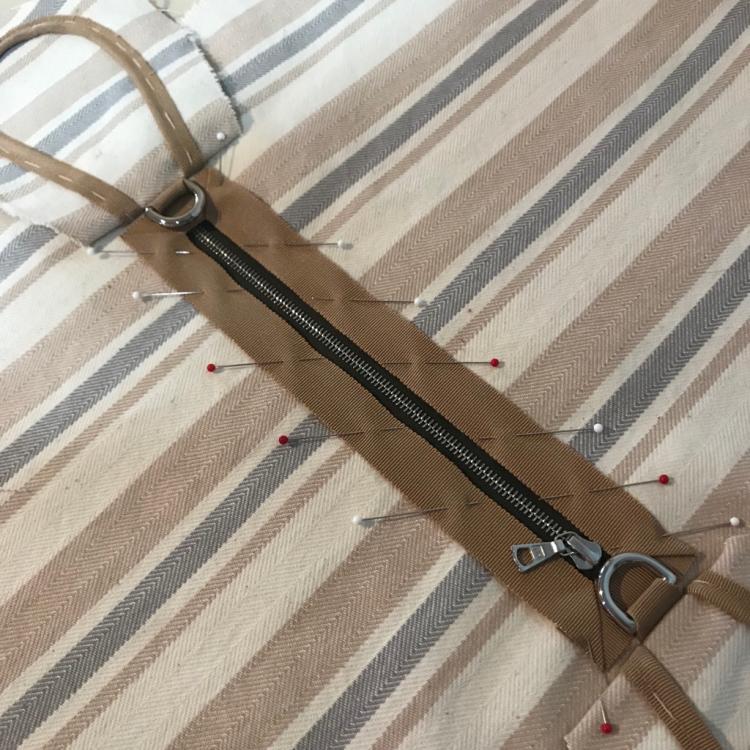
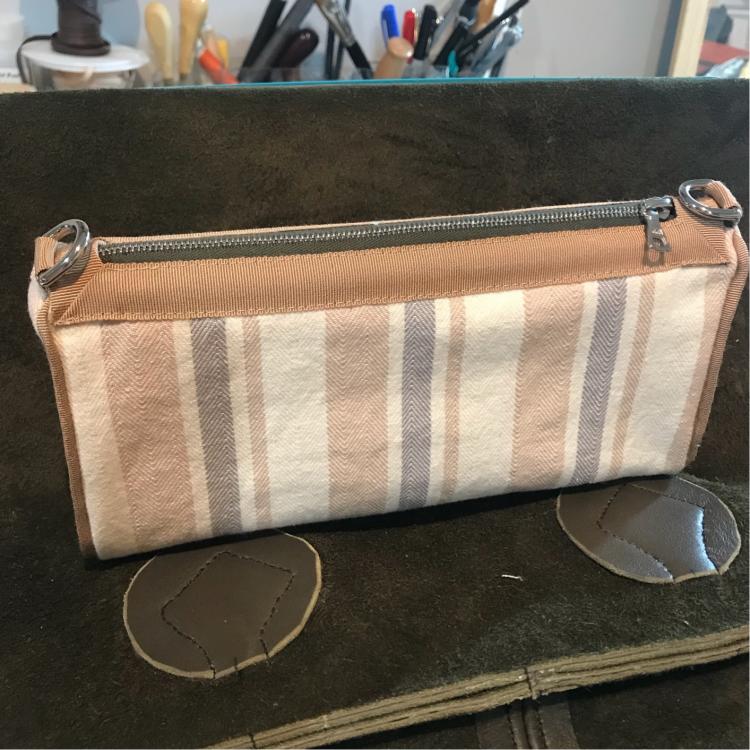
So, my bag is at what I affectionately call the “caterpillar” stage. Have some time off this week though, so I’m hoping to finish the stitching and get it turned in the next couple of days. In the meantime, made a small, detachable zippered bag for inside, in the same fabric as the lining (French cotton twill canvas from EBT Fabric, NYC). I liked the idea of the practicality of being able to use the bag separately, and since the calf is soft, I didn’t want the outside lines of the bag to be distorted by a pocket between the lining and outer leather.
-
Nice contrast! And I think the 0.8mm works well
-
Well done, Celtic knot work is harder than it looks!
-
Really Stupid Basic Question on Leather Types
motocouture replied to rodneywt1180b's topic in How Do I Do That?
Thanks for sharing! I love the contrast of the leather with the natural wood. I wouldn’t stress too much about the stitching - I have no doubt that will improve with time, and a stitching chisel does wonders too -
Onto the third bag....
motocouture replied to motocouture's topic in Purses, Wallets, Belts and Miscellaneous Pocket Items
Ha! so true on both of them! Thanks! In the middle of stitching the looooong side seams at the moment, starting to finally feel like it’s coming together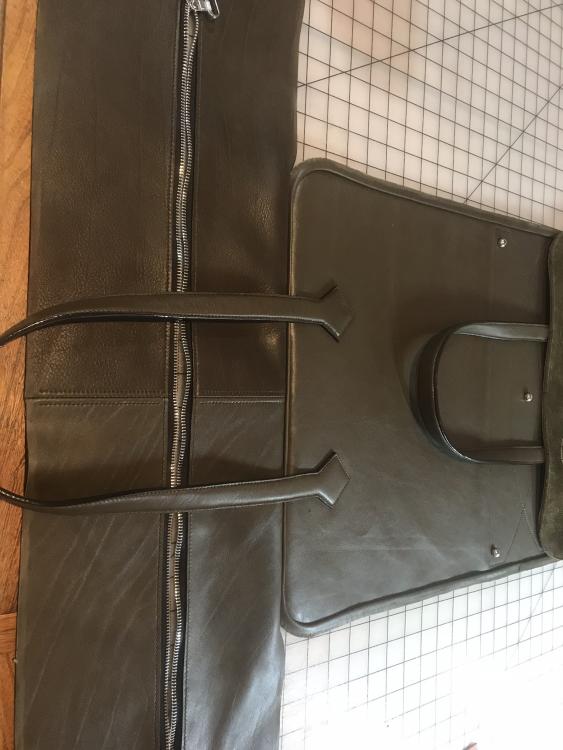
-
Onto the third bag....
motocouture replied to motocouture's topic in Purses, Wallets, Belts and Miscellaneous Pocket Items
Thanks, kiems!