Stetson912
-
Posts
1,431 -
Joined
-
Last visited
Content Type
Profiles
Forums
Events
Blogs
Gallery
Store
Everything posted by Stetson912
-
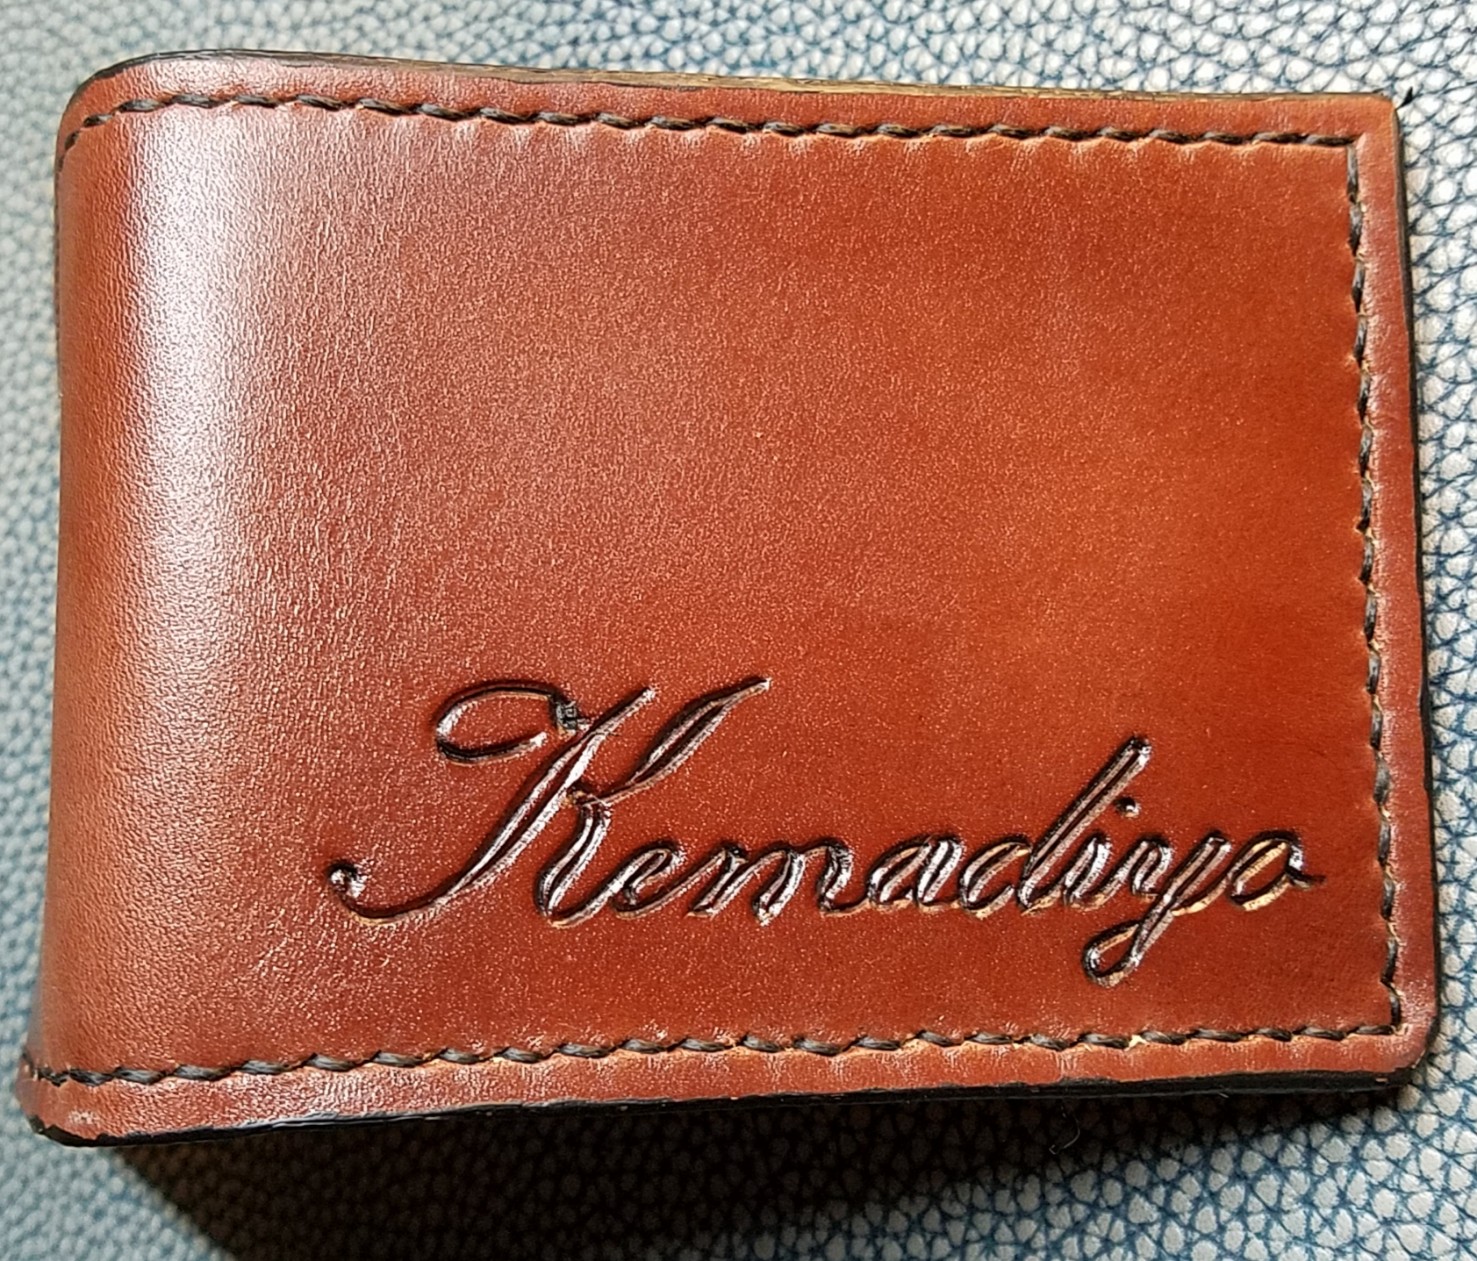
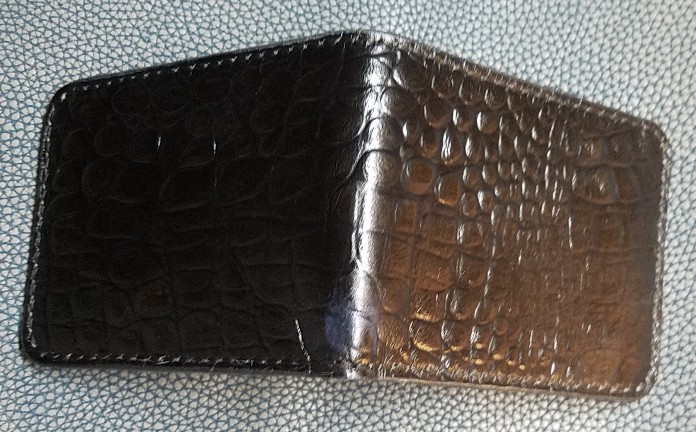
 I've been making things for everyone else lately I decided to make myself this new wallet. Let me know what you think. Alligator Embossed cow hide dyed black (it was an insettling grey color to start) stuck to a 2-3 oz veg tan backer. Interior is 2-3 oz veg tan. 50/50 is mop n glo finish. All comments and critiques welcome.
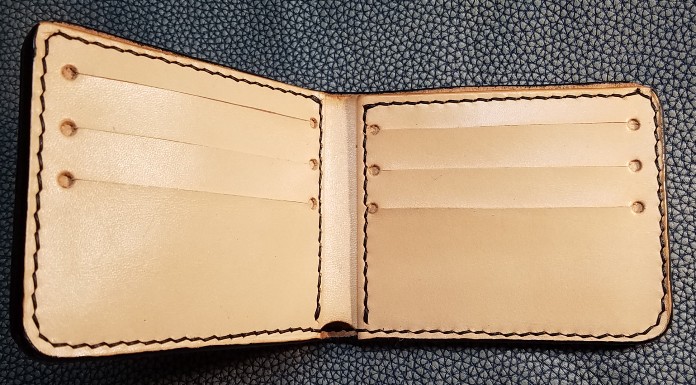

-
Nitecore - "Burnished" Stitch Line
Stetson912 replied to FlatwaterLeatherGuy's topic in How Do I Do That?
@Chain I should clarify, I was just pointing it out so that maybe someone could figure it out. I'm unsure what he is using exactly -
Nitecore - "Burnished" Stitch Line
Stetson912 replied to FlatwaterLeatherGuy's topic in How Do I Do That?
If it's the darkening of the edges, then I remember him showing it in one of his videos. The corset hat video I think. Maybe you can figure it out from there? -
Clutch purse
Stetson912 replied to Fire88's topic in Purses, Wallets, Belts and Miscellaneous Pocket Items
Nice quilting. Looks like a don't gonzalez pattern no? -
I can't say for sure but I think there's enough contrast that properly burnishing then would still show both colors. If you are in doubt take some scrap of each color and glue them together. Trim edge and burnish and see if it works out. I'd say the edge is ok but not quite to the finished stage.
-
Cool. That serpentine can be tricky to lay out
-
Custom name wallet
Stetson912 replied to Stetson912's topic in Purses, Wallets, Belts and Miscellaneous Pocket Items
Thanks! -
Custom name wallet
Stetson912 replied to Stetson912's topic in Purses, Wallets, Belts and Miscellaneous Pocket Items
I hear ya there, takes a lot of concentration not to really mess up a project. @battlemunky, much appreciated. Not perfect but I was real happy with the name color and finish of it this go around. -
Custom name wallet
Stetson912 replied to Stetson912's topic in Purses, Wallets, Belts and Miscellaneous Pocket Items
Well THANKYOU! haha. I like the smaller projects like this sometimes. But even these take me a week to do sometimes. Between work n stuff lol I hope to have one or two more done up soon. I'm trying to figure out a good fabric for lining them -
Custom name wallet
Stetson912 replied to Stetson912's topic in Purses, Wallets, Belts and Miscellaneous Pocket Items
Well I went into inkscape found a font I liked and sized it to a size that I liked for the wallet. Traced it onto damp leather and Then I used a 1/4" angle blade in my swivel knife and carved the outline of the letters. Then I dyed it and sealed it. Went back with some watered down black apple barrel acrylic paint to fill in the lettering. And a few more coats of mop n glo to seal that. Not exactly free hand but I didn't have any stamps or anything I used but I followed the "template" I made -
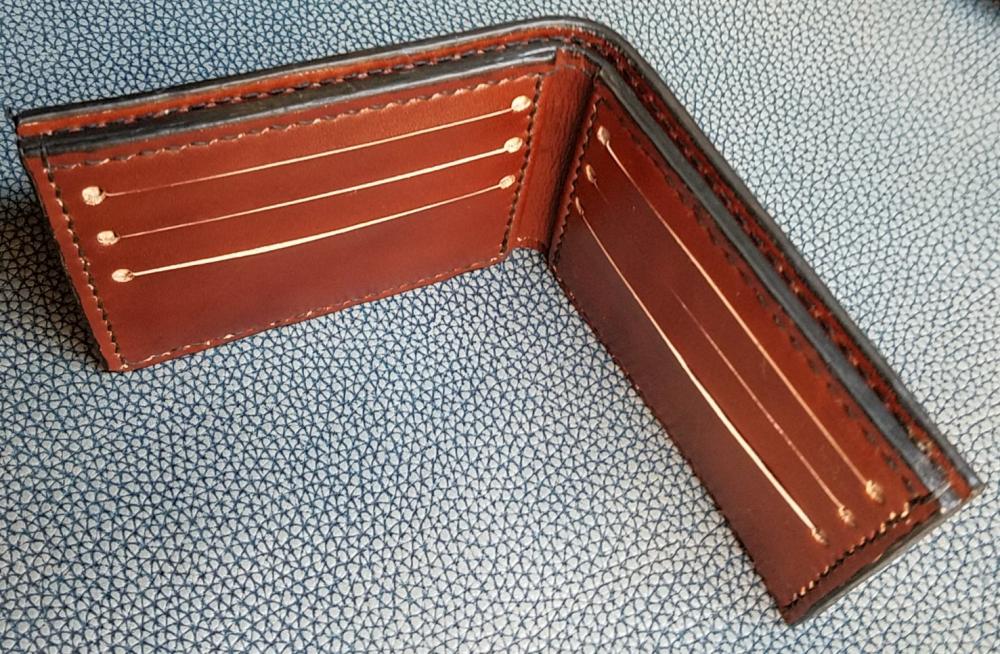
Howdy folks, just finished this one up. Just a bifold for a friends uncle. I used wickett and Craig 5oz for the back and 2-3 for the interior and linings. Used an airbrush and Feibings mahogany and mop n glo to seal. Got a bit thicker than I'd like but it'll do the job. A little wonky stitching in one of the corners too. I had to fight this one a little though. Always open to critiques and comments thanks!

-
Not sure about sharpening. But ks blade punch makes some great tools. Well worth the money. They are in South Korea so ordering direct may not be the best way. But, I think Rocky mountain leather carries their line of stuffs haha. I got a set of 8spi irons from them.
-
I should say I got my mold at holstersmith.com which is owned by knife kits... I thought it was hilarious that they send you a band aid that has their logo on it haha.
-
3x, I got my firestorm mold from them. Very good folks. They even were quick about exchanging the first mold I ordered. I ordered the wrong model by mistake and.they were more than willing to send me the right one after they got the first one back.
-
I was just going to suggest that zuludog! Barry King, leather wranglers, chrimson hide, and I'm sure many more offer awl blades sold separately. The Barry King and most certainly the leather wranglers would be sharp when you get them. I wish I could see your efforts and how hard it is for you to get the awl through. Something just doesn't add up for me :/ I too use an Osborne awl. And have no problems with it.
-
My guess would be you have a burr on the tip of the awl blade. You might be able to feel it. Sometimes you can't. Try stropping just the tip of the blade on a strip with either roughe or buffing compound in it. Or, very lightly, draw the tip of the blace backwards on the finest stone you have. That would remove the burr. Then just polish it again on the strip using the same short forward backwards motion as you do sharpening. If you don't have a burr, and the awl is indeed sharp, I'm at a loss of what's wrong. I have some pretty stout dry hard saddle skirting but it still cuts through that, rawhide as well. I hope you get it figured out. It's far more enjoyable with a sharp well working awl.
-
Yes, that is the traditional method. And there is a bit of a learning curve. You have to be consistent with your angle of the awl, the awl needs to be really sharp, and handling all of that with the needles can be tricky. But like everything else, practice. I use a modified method. I like pricking irons to lay out the holes and then I use an awl to punch them. I still hold the awl and needles in my hands but the holes are pre marked with the correct angle of attack. I never was good enough to make a real nice line by eye. When transitioning from needle to awl you should be able to hold the needle between your index and middle fingers while using the awl and start that needle by sort of closing your fist or rotating your hand to start it. Some are even good enough to switch it back to their thumb and index. Ultimately you need to do what works for you. Tradition is great but it isn't the only way either. Also try stropping your awl. It will help. And make sure you don't have a burr. The awl should glide easily through the leather.
-
@Handstitched I've heard the same thing. Just haven't gotten around to trying it haha.
-
Serge volken preaches about a "non swivel knife" which is basically a swivel knife blade on a stick. But he says it works great and I'm inclined to believe him. Just goes to show that you don't always need these fancy special tools to get a job done. I think it looks pretty good!
-
Basketweave belt
Stetson912 replied to Jack1970's topic in Purses, Wallets, Belts and Miscellaneous Pocket Items
Good reason haha -
Basketweave belt
Stetson912 replied to Jack1970's topic in Purses, Wallets, Belts and Miscellaneous Pocket Items
Looks real nice! Is there a reason the stitch like doesn't connect at the top by the name? -
Mountain man inspired sheath
Stetson912 replied to Stetson912's topic in Gun Holsters, Rifle Slings and Knife Sheathes
Thanks @rodneywt1180b. I am kinda jealous that I can't keep the knife haha -
Mountain man inspired sheath
Stetson912 replied to Stetson912's topic in Gun Holsters, Rifle Slings and Knife Sheathes
@bdpeters, I think so too, and some fringe. But I was told to make it plain so that's what I did. Brass tacks would look cool too. -
Mountain man inspired sheath
Stetson912 replied to Stetson912's topic in Gun Holsters, Rifle Slings and Knife Sheathes
Thanks mutt. Update: the sheath is more for presentation than actual hard use. So not having a welt doesn't bother my uncle at all haha. Phwew, that means I don't have to re-do it haha. -
Mountain man inspired sheath
Stetson912 replied to Stetson912's topic in Gun Holsters, Rifle Slings and Knife Sheathes
Oh, and I usually slick the fuzzies down. It's cheap leather and I don't like working with it but it's stiff and worked for this. In this case, I kind of like the fuzzy bits. I think it adds to the asthetic of a fur trapper or something using what they had around to make something to protect their tool. I did sand it a little bit to get the longer stringies off