


Stetson912
-
Posts
1,431 -
Joined
-
Last visited
Content Type
Profiles
Forums
Events
Blogs
Gallery
Store
Everything posted by Stetson912
-
Haha, for me it's because the wallet curves and doesn't fit in my stitching pony all that well. You just have to stick it out and keep going haha.
-
Yes it can be a pain on the second part haha
-
I do one side at a time. Sometimes I stitch the middle gap sometimes I don't. The middle gap usually has a half circle cut out on the part with the cards so stitching g would only be on the exterior of the wallet. 1. Like up the interior and exterior on one side of the wallet. Glue or use double stick tape to hold it in place. Once that's dry / ready to go stitch from the top corner down and around to the center "gap" portion. 2. Stop here at the gap if you want. If not stitch just to the other side of the gap just before the interior shoulr start again. 3. Repeat step one for the other side. If you happened to stitch the gap straight through, you will be starting your stitching in the bottom around to the top corner. However, you can stop and tie off the stitching at the gap, then start at the top corner and around back to where you tied off the stitching and connect the stitched sections there and "hide" your backstitch at the bottom of the wallet. That's what I recommend. It is easier,slightly , to skip the middle section.
-

Edges - Alcohol/Oil dyes and Resolene/Sealers
Stetson912 replied to samNZJP's topic in How Do I Do That?
Noope. Gum trag and I think tokanole are used for burnishing instead of water and soap like a lot of people do. Resolene is an acrylic based finish/sealant. Angelus has an acrylic finish too that's similar, and I believe tan kote is acrylic based too. Mop n glo (as I'm a recent convert) is also an acrylic based sealer. -
Computer Drawing Software For Making Leather Patterns
Stetson912 replied to Blackey Cole's topic in Computer Help
I'll see what I can come up with for you. You can import images into inkscape and draw over them, by using the import function or drag and drop. You can even "trace bitmap" which in theory gives you a vector image of the imported picture. Mine seems to not work for I ain't can use it right. And has a scale you can set to whatever units you want, down to pixels even haha. I'll try and make one up for a 1911. As that's the only gun I have that matches your patterns. -
Edges - Alcohol/Oil dyes and Resolene/Sealers
Stetson912 replied to samNZJP's topic in How Do I Do That?
It's a bit of a misnomer. The pigments in the pro (oil) dye are oil based pigments or so I've been told. It is still a spirit based dye. The other dyes have pigments that may/ are not be oil based. Feibings is great. Angelus is another good brand. Both will do well. But I recommend diluting the Angelus as it is very pigment heavy. They even make a "clear" dye that is meant for just that. Sealing your edges: resolene is good. Dilute 50/50 with water and apply. I imagine tan kote would work too. Wyosheen probably would work also. And I've used plain ole beeswax and buffed it in real good. The acrylic based sealers like resolene and Angelus acrylic finish leave a shinier edge whereas beeswax tends to be more flat. I'm.not familiar with tokanole so I can't attest to that. -
Yup, binder clips of varying sizes. Clothes pins are good and cheap too. Of you need more, squeeze clamps come in several sizes. There a multi pack Walmart has. They apply a good deal of pressure. I like the poscicle stick idea. I always used scrap leather but sticks would be more effective.
-
Computer Drawing Software For Making Leather Patterns
Stetson912 replied to Blackey Cole's topic in Computer Help
@JLSleather I'm coming into this late so forgive me if you've heard already, bit there is an open source free program called inkscape. It is similar to Adobe illustrator. It's a vector graphics software. You can scan in your tracing of your gun mold, and there are both rectangular and isometric grids that are 100% customizeable. I'm still getting the hang of it but I've made some some patterns thus far. Hope this helps. and One thing is for sure, it won't break the bank hahaha! You can say, it pays for itself when someone downloads one of your patterns from your site hahaha! -
Yup. I agree with plink. If you're worried about the holster not fitting through the loops just make a loop that attaches to the skirt. It'll look and function almost the same. And is easier. I like Chicago screws too for holding them down. That way you aren't wasting snaps if you get the strap wrong or want to change it later. Good Info and advice plinkercases!
-
I want to make a rolled edge bifold wallet what leather
Stetson912 replied to chrisash's topic in How Do I Do That?
Hey @chrisash, you really can use any leather you like for a rolled edge. It comes down to your skiving skills and thickness of leather. Personally, anything above say, 4-5 oz would be better bound or burnished. So I wouldn't go heavier than that. 2-3 oz would probably not need skived if it folds easy enough. So, I recommend skiving a 4-5 oz down and folding it over for your rolled edge on the back, and using 2-3 oz for the innards. Also, Ian Atkinson has a YouTube channel and shows how to do a rolled edge if you are so inclined. As to where to get a few feet, I can't help you much. I'm not familiar with vendors in your location. I know here in the states Maker's Leather Supply out of Texas sells wickett and Craig by the foot. But, I do not know if they ship internationally, nor do I think it would be worth it. Oh, search for remnant bags at your usual vendor too. Usually off cuts but sometimes bigger pieces are available. -
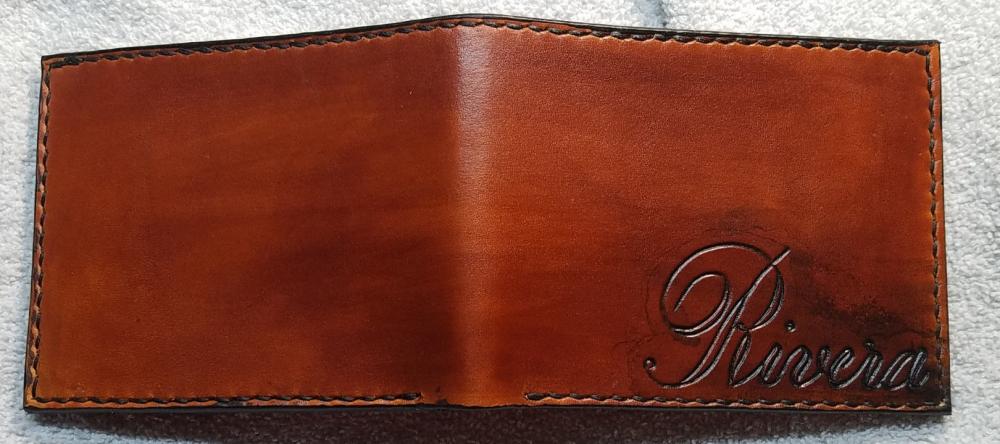
Wallet for a cowboy
Stetson912 replied to Madmax500000's topic in Purses, Wallets, Belts and Miscellaneous Pocket Items
Ah I see, lighting playing tricks again haha -
@Sheilajeanne, there are 3 ways that I know of to finish the edges. First would be binding, or folding over. My eyes can't really tell from the photos but I don't think this is the case. I don't see stitching on the pockets so unless it was glue only he used a different method. Second, if it's veg tan, it would/could be burnished and sealed. And I'm unfamiliar but possibly tokanole of gum trag was used. Third, edge paint. This seems most likely to me (although only the creator really knows. As my eyes again, can't tell) a lot of sanding between coats. That's my speculation for ya. I think they were burnished, as the edges color seem to match.
-
The instructions by jls are straight forward and simple. I'm using it right now matter of fact. For a bersa firestorm. So thanks to JLS!
-
Wallet for a cowboy
Stetson912 replied to Madmax500000's topic in Purses, Wallets, Belts and Miscellaneous Pocket Items
Looks good. Two things, now I'm really not picking here, it looks like you missed a few stitches (I know you didn't and that the function is just fine without them) I'd recommend in this case to stitch all the way around the wallet. Second, the beveling looks a little choppy in places. I ain't saying I can do any better tho haha! A modeling spoon would clean that up pretty quick though. All in all tho, good and unique looking wallet. Good work! -
There ya go. Not bad at all. And Matt makes a good point too.
-
That's supposed to say Don Gonzalez lol
-
The glycerine soap is a transparent orange bar that contains glycerine. The paste, to my knowledge, does not have glycerine. The glycerine soap resembles the neutragena bars you find in the stores. Might even be the same stuff idunno. I've used the paste and it's been effective. The trick is to put a drop or two of water in the tin and get a lather going with your finger. Then just dab some of that foam on the edge and work it in. Lately tho, as I've mentioned, I've omitted saddle soap and have been using g just water with a squirt of dawn dish soap and that's been working fine too. But, try them out and see what you like best. That's the only way you'll figure it out haha. Sanding I don't do much of. I use 80-120 grit and sand the edges so they are flush with each other. Then I bevel and slick. Slicking time varies as all leather is different. It isn't so much time as what to look for. When you burnish you want to feel the edge after, if it feels rough still keep going. Of it's smooth stop and move to the next section. I like to move around a piece completely before going to the next pass. That way, where I started the first pass is dry and you can start over again. You need multiple passes because when it dries some fibers don't stay put haha. As for how wet, the answer is not very. Heat and friction cause the edge to burnish. I take a dawber and dip it in my soap solution, and just run it briskly down the edge once or twice then get to it. Gluing: I haven't had an issue with glue honestly. I use contact cemented all the way to the edge. It may be a problem if it isn't 100% dry. Or if you get it on the edge. But typically sanding the edge flush solves that problem. You can stop just shy of the edge when you glue pieces together, that may solve your issue. Maybe just 1/16" is all it needs in from the edge. Check out don't gonzalez on YouTube, he uses glycerine soap and has a burnishing video.
-
Wellp, that was interesting. Thanks to everyone who commented to help the OP. We enjoy helping people who want to listen and learn. For rustic, I'm not sure what the issue is and I don't care, but this forum isn't the place for your political and religious rants. And for someone claiming to be a part of a "Christian backed culture" you aren't practicing your Christianity all that well. China is not atheistic either, budhissm taoism, and Confucianism are all practiced heavily there, as are I'm sure many other religions. I strongly advise that you take criticism with a grain of salt and apply it towards bettering yourself, lose your pride and arrogance(pride being one of the 7 deadly sins btw... FOR SHAME!), and the sooner you accept that you don't know as much as you think you do you'll realize it's easier to learn new things. That goes for life not just leatherwork. also, you'll find that on this form; with the former suggestions applied to your character, that the real skilled Craftsman who know a thing or two will be willing to help. Otherwise your list of resources will dwindle to null. @samNZJP, there are different techniques for edging and I'm in no place to say what's best or not, it's all relative to what leather you're using and what works for you personally. If you use paint you will need to sand inbetween layers and at the end wax it. Some use heat too, which is effective. Burnishing: Bob parks method is steadfast. But play around and find what works for you. I like to use water with a bit of dawn soap in it. Doesn't take much. Daub it on the edge and rub with a wood slicker. Then another coat of water and burnish again with canvass. Then I dye the edge if I want too. And another coat of water and burnish with canvass. Repeat with canvass as much as you want. To seal, rub some beeswax on the edge and rub it in with canvass or wood slicker. OR, use an acrylic sealer like resolene or... Mop n glo! Vioala! Hope that helps some
-
I'd love to learn about the laser. Especially if it works well and is cheap. As I am a poor white boy haha!
-
Do you mean the stitch lines of the crease lines on the pockets? Stitch lines, if done by hand, would be marked out using wing dividers. If by machine, usually an edge guide would be used that keeps the material a certain distance from the edge. And practice, lots and lots of it haha. The creases are done with a creaser. Some are set widths and are electric and heat up, others are a set size and are heated over an alcohol flame, and a third adjustable type that is used in the same fashion is also heated over alcohol flame. Once hot, the tool is run over the edge of the leather leaving a nice crease in it. The straightness of both stitching and crease lines depends 100% on the straightness of the cut edge of the leather nearest the line. Also, the use of straight edges is a good idea.
-
Well, leather will stretch to a degree. However certain parts of the hide and tannages will be more susceptible to it. I'd recommend a good latigo or bridle, even straight veg tan that's a little thicker. You can also line the strap, making it a 2 play strap, or ditch the leather strap all together and use thick canvass or nylon webbing.
-
The stitching just takes practice. I can't tell if it was machine stitched or hand stitched. But both would just take practice, a machine could utilise an edge guide however. The edges are edge painted with multiple coats then polished probably with beeswax and hot iron. Some people use an acrylic sealer instead like resolene.
-
YO! DAT IS ON FLEEK BRAH! Hahaha
-
Looks a lot better. Tooling looks cleaner and smoother.all I see is a few spots where there should be backgrounding in my opinion. Just below the tip on the big scroll at the top and below the scroll in the bottom left. But I'm really not picking haha. I couldn't do any better lol
-
Tan kote is weird. I've never had lick with it either. I used to use supersheen and that worked ok. Bit resolene worked better for me. Just took a long time to dry. The mop n glo resembles the resolene bit is a little thinner and has a lemon scent! Haha I couldn't find a d don't know if there's an unscented version
