-
Posts
1,432 -
Joined
-
Last visited
Content Type
Profiles
Forums
Events
Blogs
Gallery
Store
Everything posted by Stetson912
-

Mountain man inspired sheath
Stetson912 replied to Stetson912's topic in Gun Holsters, Rifle Slings and Knife Sheathes
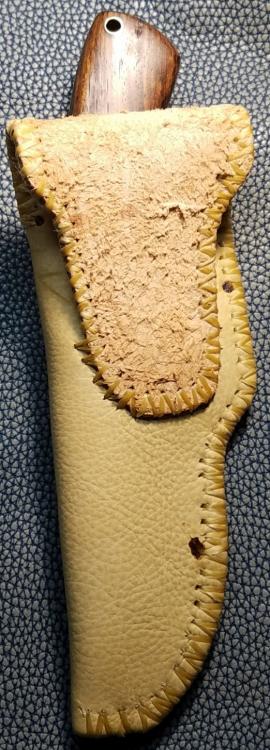
Oh, and I usually slick the fuzzies down. It's cheap leather and I don't like working with it but it's stiff and worked for this. In this case, I kind of like the fuzzy bits. I think it adds to the asthetic of a fur trapper or something using what they had around to make something to protect their tool. I did sand it a little bit to get the longer stringies off- 12 replies
-
- damascus
- drop point
-
(and 3 more)
Tagged with:
-

Mountain man inspired sheath
Stetson912 replied to Stetson912's topic in Gun Holsters, Rifle Slings and Knife Sheathes
@battlemunky that's a good point..pun intended. Hehe. I never thought about movement. I'll see if it'll be better with molding- 12 replies
-
- damascus
- drop point
-
(and 3 more)
Tagged with:
-

Mountain man inspired sheath
Stetson912 replied to Stetson912's topic in Gun Holsters, Rifle Slings and Knife Sheathes
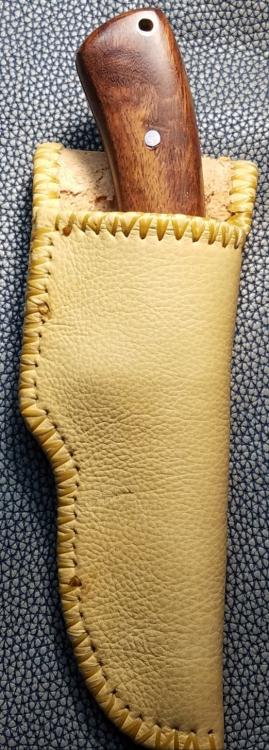
@ScoobyNewbie, unfortunately I got lighter happy when melting the sinew. So it got on fire and turns black :/ the other parts are also where I melted the sinew but they didn't turn black. @Instinctive, I'm thinking of wet moulding it a bit so it fits better and kinda wraps around the handle and gaurd better. There is a lot of room down near the blade but it's a gamble. Thinking back I could have done a 2 part welt and still "bound" the seam. Guess we will see. Haha And if one is wondering about stitching. Just use one needle and do wipping in alternate directions if using sinew. That stuff gets stringy and you WILL mess it up piercing the thread haha.- 12 replies
-
- damascus
- drop point
-
(and 3 more)
Tagged with:
-
Well, this is my fourth or fifth attempt at a sheath. Back and forth on styles and such... And 3 that didn't work. This is what I ended up with. The knifewas sent to me by my uncle and was forged from chainsaw blades. The modified gaurd and proportions didn't lend itself to traditional frontier styles so finding something that worked and was similar in style was challenging to me. Specs: 10-12 oz saddle skirting covered in deerskin and stitched by hand with artificial sinew. I was inspired by dhaverstick as far as stitching is concerned. Although his is better. I decided to semi bind the edges of the seam too. And there is no welt. My hopes are that the retention will keep the blade from the stitching as there's a bit of room down there. Anyways, let me know what you think and as always, I welcome critiques.
- 12 replies
-
- damascus
- drop point
-
(and 3 more)
Tagged with:
-
I like the sortimo style boxes for hardware. And I don't have many tools, the ones I use most fit in a cheap toolbox from Walmart. I was thinking about one of those rolling mechanics tool chest with drawers and such, a cheap one from harbor freight or something. I like those cigar boxes though. Good way to use up materials you have lYing around.
-

Bersa firestorm 380 pancake
Stetson912 replied to Stetson912's topic in Gun Holsters, Rifle Slings and Knife Sheathes
I'm not sure, I haven't ordered from wickett and Craig directly. I use makers leather supply because I don't have a lot of money and I can order just a few feet instead of a whole side. But that said, I think shipping was 15-20 but I don't quite remember. -

misc work
Stetson912 replied to TwoBrothersLeatherWorks's topic in Gun Holsters, Rifle Slings and Knife Sheathes
Very nice -

Bersa firestorm 380 pancake
Stetson912 replied to Stetson912's topic in Gun Holsters, Rifle Slings and Knife Sheathes
Thanks @bikermutt07, always good to hear from ya. -

Bersa firestorm 380 pancake
Stetson912 replied to Stetson912's topic in Gun Holsters, Rifle Slings and Knife Sheathes
Bahahaha @JLSleather that is a total oversight. Guess what I'll be fixing haha! I'm really kicking myself now because I looked at it for a solid 20 minutes trying to figure out what was missing! @battlemunky, I agree. The depth may be less but I like how even it is. And I'd rather have that than splotchy. I just run alcohol through it. I want to try a gravity feed brush because I think it would be easier changing between dyes and such. I like the siphon feed because it holds a good amount of dye and I can mix right in the jar. So maybe just more jars? I just run denatured alcohol through it or water for the mop n glo. Easy enough so far. I'm also using a cheap brush from harbor freight. So if it dies oh well haha. @ScoobyNewbie, are you referring to the stiffener pannel? That's a debate in it's own. It really just makes the front panel stiffer. It doesn't really reinforce the mouth so much. But I like how it looks too. So I put it there for both added rigidity and asthetics. I apparently just forgot to finish the stitching bahahahaha! -
Contact cement should be plenty strong. Stitching wouldn't really help with cracking I don't think. Just conditioning the leather.
- 6 replies
-
- knife sharpening
- grinder wheel
- (and 4 more)
-

Bersa firestorm 380 pancake
Stetson912 replied to Stetson912's topic in Gun Holsters, Rifle Slings and Knife Sheathes
Oh, and thanks for the kind words. -

Bersa firestorm 380 pancake
Stetson912 replied to Stetson912's topic in Gun Holsters, Rifle Slings and Knife Sheathes
They do appear that way. I thought the same thing. But it fits an 8 oz 1 1/2" strip through it so, that'll do lol and you could probably get 10-12 oz through them. I used an airbrush to dye it this time. And I'm never going back. It's the most even I've been able to achieve. -
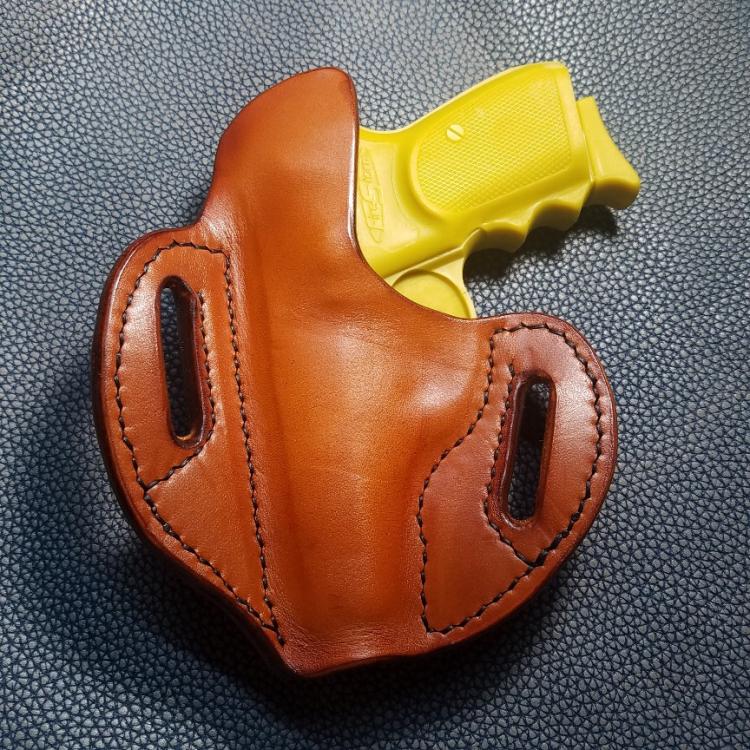
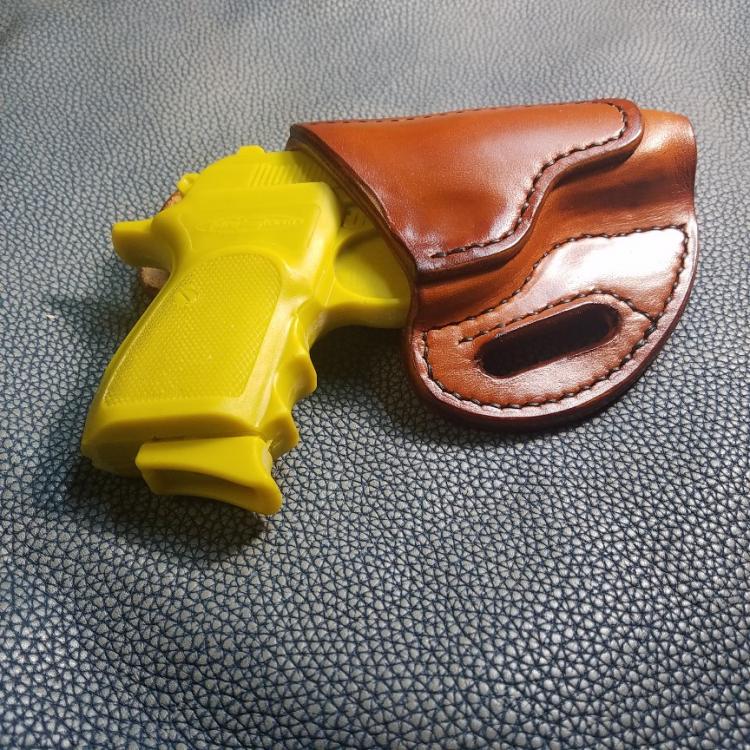
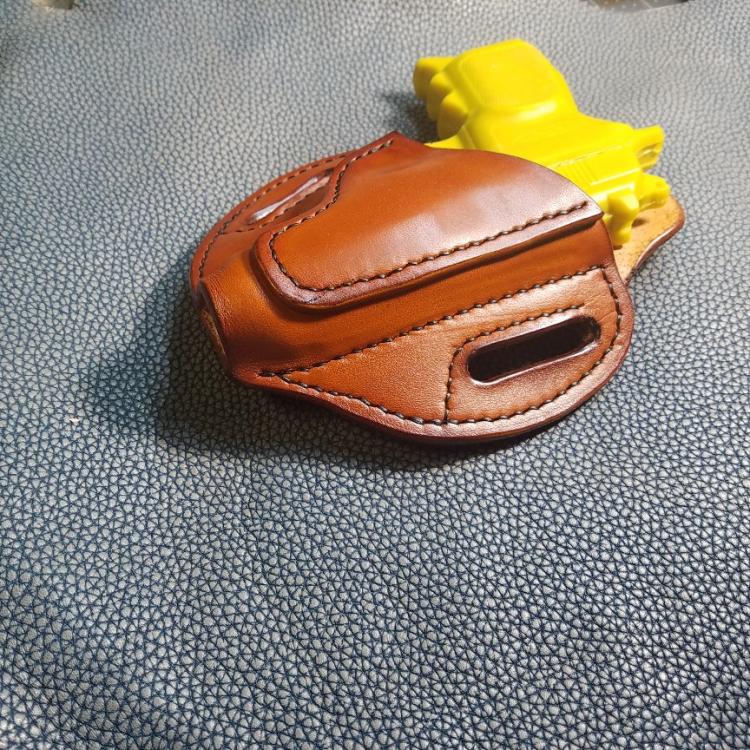
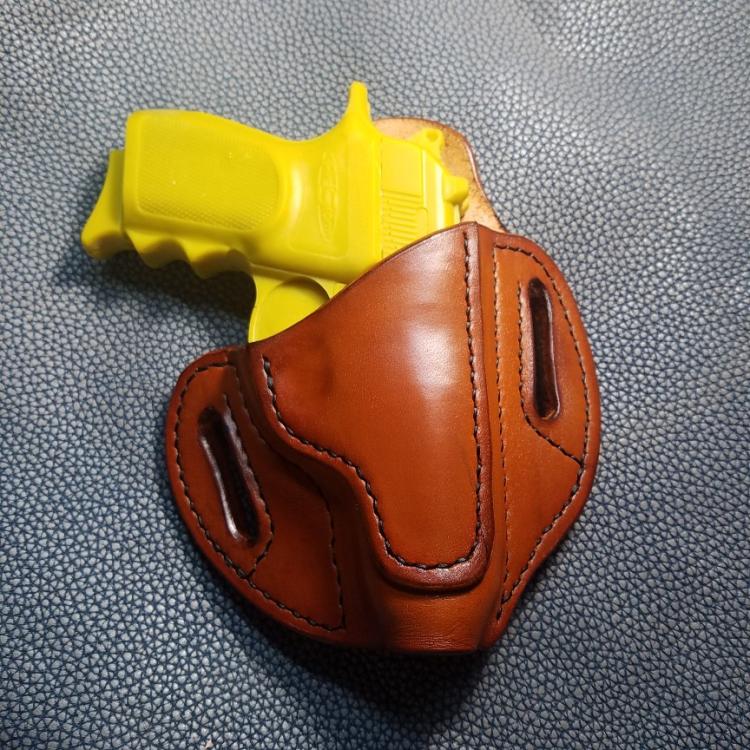
Just finished this one up for my uncle. 8 oz. Wicket and Craig, hand stitched, saddle tan and mop n glo finish. I experimented with this one and it came out pretty well. I wanted more of a 80/20 pancake instead of the regular 50/50 to avoid binding. Let me know what you all think. And as with most of my posts, critique is welcomed.
-
That's what I had in mind Haha
- 6 replies
-
- knife sharpening
- grinder wheel
- (and 4 more)
-
as pinker mentioned, a beader blade would be the easiest method. But there are a 1000 different ways to do it. I do like the idea of making a border tool though. I would think a round file and stainless steel bolt you could replicate the shape of a beader blade. Similar to Serge volken's "non"swivel knife just with a beader blade instead.
-
Do you have a way to mount it to a grinder or something? I'm thinking if you can spin it you can sand the edge. Probably wouldn't take 5-10 mins max. If not maybe a belt sander. Just have to be careful not to over sand in one spot.
- 6 replies
-
- knife sharpening
- grinder wheel
- (and 4 more)
-
Well depending on what you are using the slots for, it may be a good idea to punch some small holes at the end anyways to prevent tearing. If you have a small enough edge to get around that corner then that's easiest. If not, a fine bladed knife like a scalpel or exact that's real sharp can bevel out the tighter spots. Without holes punched, I'm thinking you might be able to just edge each side like normal almost. If anything g else, the exactoscalpel trick would work too
-
Angelus is very pigment heavy. More concentrated than most other dyes. As djole mentioned, angelus direct has all the colors you could want and I think they do have a dark navy. Their reducer is good for diluting their dye too, but you can also use isopropyl or denatured alcohol.
-
Peter main has a book on coloring leather. He uses dye diluted in isopropyl alcohol I think. Making it darker I don't know about. It makes sense mixing with black. But if it isn't working right I can't comment why. I don't know squat about color theory etc. Fiebings also has acrylic dyed in a lot of colors. Maybe there is something there that would work for you. You should be able to use a brush to paint withdyed, I don't see why you couldnt.
-

Glue on edges squeeze out, won't burnish well
Stetson912 replied to AllanD's topic in How Do I Do That?
What kind of glue are you using? Contact cement should dry and get tacky before you stick the pieces together. I use wildwood because I can get it easy, but barge, masters, etc.. the same rule applies. Apply the glue to both surfaces and allow to get tacky. It shouldn't be wet but still stick to your fingers a little. Then stick together. Sometimes 2 coats helps too. As for the white glue like leatherweld, you just apply and stick. Any squeeze out can be cleaned up quick with a damp cloth. If by chance some glue gets on your edge, you can try sanding the edge with high grit sandpaper to remove the glue. -

First go with Horween
Stetson912 replied to stormcrow's topic in Purses, Wallets, Belts and Miscellaneous Pocket Items
Ooo, never tried it. Maybe I will try it one day -

How to prevent leather from making stains?
Stetson912 replied to Frankzweekhorst's topic in How Do I Do That?
Have you tried diluting the dye before using it? Or maybe just buffing it a lot. I think the diluting will cut down the pigment concentration and keep it from rubbing off so much. You'll still need to buff it but maybe not as much. -

First go with Horween
Stetson912 replied to stormcrow's topic in Purses, Wallets, Belts and Miscellaneous Pocket Items
What kind of horween did you get? I used the tumbled Essex and it was nice -
Mutt has the answers. A hard dense surface for punching with something to protect your tools on to like mutt mentioned A roller cutter will help with the stretch. Anything that had downward cutting or chopping pressure instead of more lateral or slicing cutting. Use multiple passes when cutting thicker stuff. Nothing wrong with that. Strait edges are your friend as well.
- 20 replies


