-
Posts
1,431 -
Joined
-
Last visited
Content Type
Profiles
Forums
Events
Blogs
Gallery
Store
Everything posted by Stetson912
-
Thanks man, it worked surprisingly well. Especially out of the airbrush. Cut it 50/50 with water (it'll spray just fine full strength too) and I used maybe a half a siphon bottle thingy worth of it. So not much at all. My favorite part is not having to wait 12+ hours for it to dry haha.
- 4 replies
-
- basket weave
- mop glow
-
(and 1 more)
Tagged with:
-
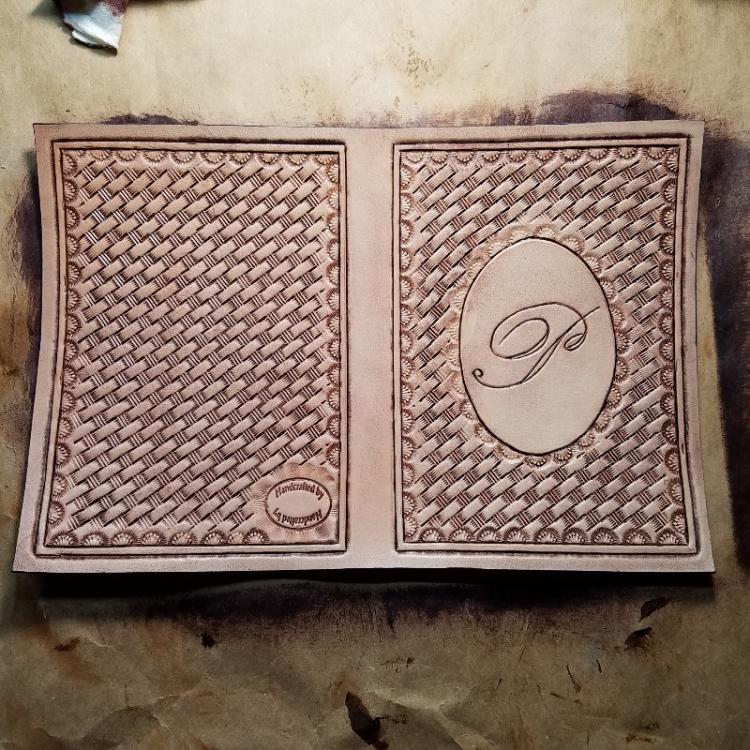
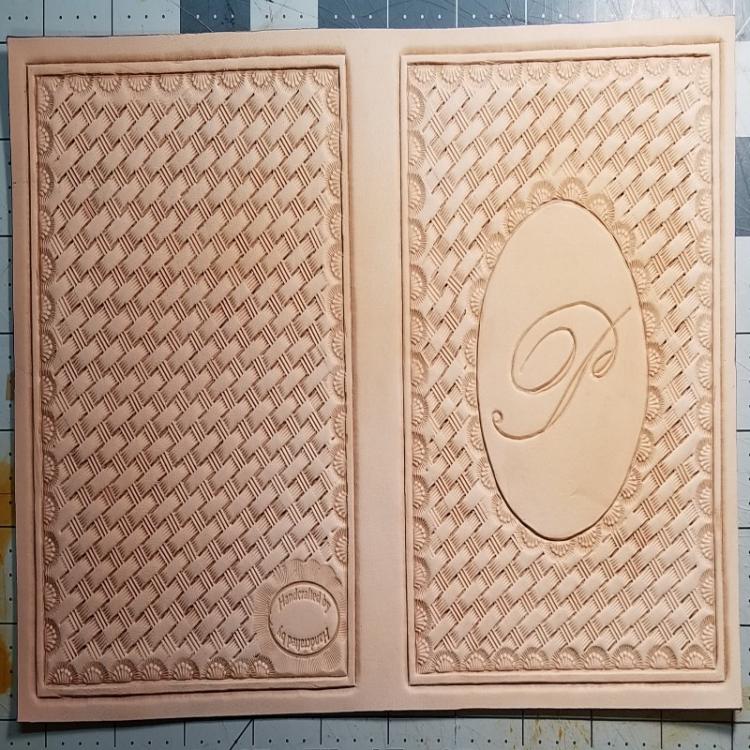
Wellp, I was 50/50 on the whole mop and glo as a finish/resist... But darnit if it doesn't work great haha. I recently invested in a cheap harbor freight airbrush kit and decided last night to try it out to put the resist on this photo album cover. Not only did it work like a dream, but dried super fast. I was able to antique it 30 mins later! Crazy. Anywho, let me know what y'all think. before antique After antique
- 4 replies
-
- basket weave
- mop glow
-
(and 1 more)
Tagged with:
-
I just looked breifly. I don't know anything about them or what not. You can find oil tanned hides many places. But it seems they may specialize in a product designed specifically for marine use. Hope you get what you need!
-
This is awesome. I thought you meant motorcycle trikem this I think is cooler. Good looking work on the seats and bag. And that whip is a quirky touch. That's probably my favorite part. I can see little biker kids peddlin down the street haha. Just needs a little two stroke hehe!
-
What leather are you using? I found this site that may help. I'm not so familiar with marine applications for leather but oil tanned leather I believe would do the trick. https://shipcanvas.com/collections/leather
-
Well aint i all silly with my airbrush stencils and paint brushes over here hahaha! Thanks for sharing the video. Sometimes Ithinga are simpler than we imagine haha.
-

IPad Cover
Stetson912 replied to YinTx's topic in Purses, Wallets, Belts and Miscellaneous Pocket Items
Nice -
Welcome, easy to go bankrupt on that site by the way, I advise caution hehehe
-
Well it isn't cheap, but fine leather working offers a overstitch wheel set that comes with 7 9 10 and 12 tpi wheels. The 12 tpi wheel would be just over 2 mm apart.. that's the finest I have seen. http://www.fineleatherworking.com/leather-tools/pricking-wheel-set Fine leather working had listed individual wheels. But says it's not available right now. You could contact them and ask when or how you can get them as well.
-
If you are trying to resist dye I'm afraid resolene won't help. Like you mentioned, the latex or liquid frisket (spelling?) Is what you'll have to use for that. Antique is usually a gel or paste and is resisted by resolene, dye not so much haha.
-

Green Lantern wallet
Stetson912 replied to DJole's topic in Purses, Wallets, Belts and Miscellaneous Pocket Items
If you ever find it, their Jade color is nice. Looks good -
It's real easy to want to rush antiquing too. I always want to get it done so I can see what it looks like, and it's gotten me into a few ruined projects haha. 8-12 hours drying time for the resolene and antique is sufficient. overnight like Gary said is best time to do it because you will make it your stopping point for the day for that project and be less tempted to ruin it with impatience haha!
-
You sure can. That's what I do. The trick with resolene is to let it thouroughly dry before antiquing. And it may take 2 or 3 coats d pending on your application method. I thin mine 50/50 with water to avoid streaks and such. So it takes 3 coats for me. Then antique like usual and once that is dry, add a few more coats of resolene.
-
I use the john James 002 and .8 mm thread. It's s great combo. I like the .6 for smaller things so I go down a size in needles. That's the beauty of leather craft, everyone had their own way of doing things and that makes them different than other people. 2000 grit wet/dry paper will polish your awl fine. But it'll only polish. If you need to sharpen it you'll need a stone or coarser papers lol
-
Wow! How cool is that! I've never known of such a thing. Very cool!
- 11 replies
-
- shoemaking
- leather
-
(and 1 more)
Tagged with:
-
Hey Bob. Try here. maybe something to figure out what you need. I know tandy sells one and had dies for it (dies for setting snaps) and maybe you could lay a Chuck of wood or something on top of the stamp while pressing your makers mark. I didn't look that closely at it
-
Does it have to do with embossing or splitting? I don't know what it is but I want to know haha
- 11 replies
-
- shoemaking
- leather
-
(and 1 more)
Tagged with:
-
That's a cool effect.I can't really say how it was done. But it looks like a brush was used
-
Try this, on Google's search engine put in Search site:leatherworker.net wood grain dye And see what comes up. They do make little brusses/rollers with wood grain on them if that interests you... Otherwise I would think a lightly loaded bristle brush and light strokes would work. Maybe after a base coat and resist of some sort like resolene or mop n glo. But if you really want to get people thinking, you could use an airbrush with a... Ahem... Wood grain stencil... Haha. That's almost cheating it's so easy hahaha!
-
Yup, same exact process. I was just trying to help Scooby out haha. I'd like to see a sample of your stitching Gary! I have lusted after those chisels. Lots of good questions. So first, the reason I suggest marking the stitches then using an awl to make the hole is because the hole that a diamond stitching chisel makes is huge. Far bigger than necessary. The awl will make a smaller hole that will grip the thread a bit better (as Gary mentioned) this is where the chrimson hide chisels are superior, the teeth taper (much like an awl) instead of being the same width all the way down the tooth. Grant it, stitching chisels are meant for making holes all the wy through the leather and pricking irons merely mark the holes. However, both give you an index for your awl, that is they show the angle the awl blade needs to be at when you make the hole. Actually making the hole is trickier than you would think. You have to keep the blade perpendicular to the leather and push straight throughwhile supporting the leather on the back with your fingers being careful not to stab them. Any sight angular mishap will make the hole on the back come out in the wrong location. And it is absolutely imperitive your awl is sharp and polished. You should never have to force an awl through leather with a lot of effort. Plus, it's dangerous! As for being too close to the edge, you should get some wing dividers if you don't have some already. Mark a light line 1/8" to 3/16" from the edge. This is where you want the tips of the teeth of your chisel or iron to lie. This is a decent distance for most things in my opinion. It is important not to rush anything when you start learning to control the tools and stitch properly. Speed comes later with practice. I didn't stitch that section because I started from the top corners when putting the interior and exterior together. One side at a time. It's a matter of choice really, it doesn't effect function at all. You could stitch all the way around if you like. If the wallet sits open on the table it's possible the interior is too long or the exterior too short. The exterior should be about 1/2" longer than the interior. That allows the wallet to close properly. Finally, needles. John James harness needles are great. I use the size 004 and 002 because different thread sizes. This gide comes from Rocky mountain leather supply. Size 4 (004)- Smallest Needles (length 48 mm/Outer diameter 0.9 mm ) Lin Cable - Pairs with 532, 632, 832 Tiger Thread - Pairs with 0.6mm Size 2 (002)- (Length 54 mm/Outer diameter 1.0 mm) Lin Cable: Pairs with 332 & 432 Tiger Thread: Pairs with 0.8mm Size 0 (1/0) - (Length 57 mm/Outer diameter 1.1 mm) Lin Cable: Pairs with 332 Tiger Thread: Pairs with 1.0 mm Size 00 (also known as 2/0) - (Length 57 mm/outer diameter 1.3 mm) Pairs with thread 1.0mm to 1.2mm Size 000 (3/0) - Largest Needles (Length 62 mm/Outer diameter 1.6 mm ) Pairs with thread 1.2mm I hope this clears things up for you scoobs. Sorry it's so long.
-

Pancake knife sheath
Stetson912 replied to mick86's topic in Gun Holsters, Rifle Slings and Knife Sheathes
Nice, that'll work. I don't think the dye job looks bad. What dye and finish are you using? -
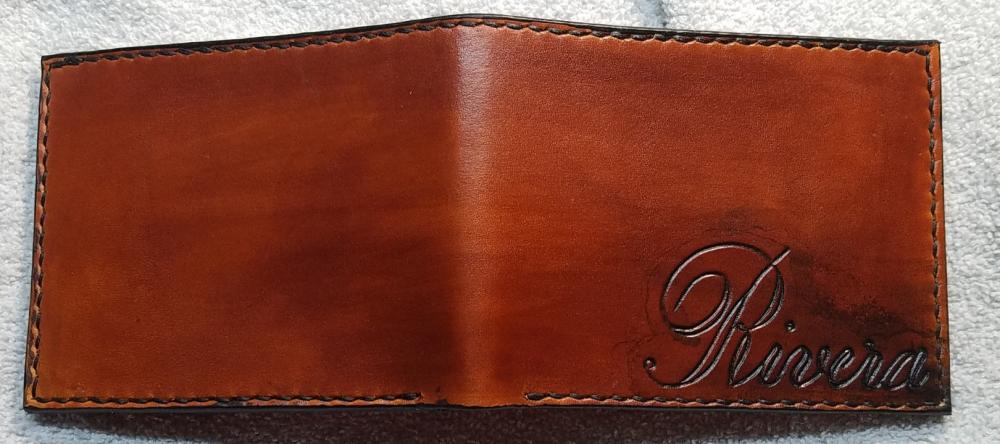
You don't need real expensive tools to get a good stitch. They are nice to have and they do work better due to quality, but they aren't necessary. I'll post a picture of a wallet I finished recently. All you really need is a way to mark your holes and a way to make them. An awl is necessary for making the hole, and a pricking irons or even stitching chisel can be used to mark the holes. In the following picture I used cheap tabdy stitching chisels(I'm sure sewa ect would be fine too) to mark my holes (NOT punch all the way through) then my awl to make the holes.
-

Wallet with name carving
Stetson912 replied to Stetson912's topic in Purses, Wallets, Belts and Miscellaneous Pocket Items
Awesome idea thanks!- 6 replies
-
- name carving
- script
-
(and 1 more)
Tagged with:


