Stetson912
-
Posts
1,432 -
Joined
-
Last visited
Content Type
Profiles
Forums
Events
Blogs
Gallery
Store
Everything posted by Stetson912
-

Parisian pink? Tote/handbag
Stetson912 replied to Stetson912's topic in Purses, Wallets, Belts and Miscellaneous Pocket Items
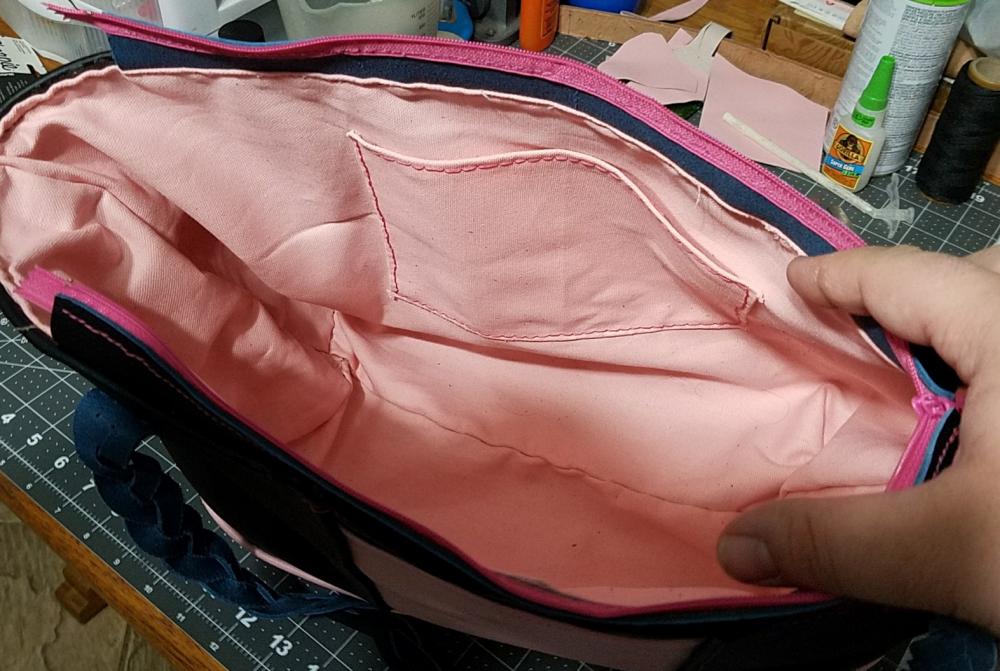
Thanks @JeannieH, I used the same pattern for my liner as the main bag. It is a little large. But with the turned lining I thought it had to be (I put the main bag inside the liner then turned the liner ect) but this may not be the case. I'll be doing a smaller one coming up and I might be able to get the liner to fit better. Thanks for the tip! -
Parisian pink? Tote/handbag
Stetson912 replied to Stetson912's topic in Purses, Wallets, Belts and Miscellaneous Pocket Items
Thanks @crfiremech, that's a good philosophy. The canvas is easy to work with. Cutting can be a bit tricky (I recommend a rotary cutter) if you have even a fabric seeing machine it would make the liner look nicer, but the way it's put together the seamsare on the outside of the liner and are unseen. I more or less used the technique in one of Arthur Porter's videos on YouTube about making a bag with fabric lining. I like the technique and style, just needs some refinement haha -
That's true, but too much for me haha. I think I'd rather make my own or get one from Andrew anyway haha. As you said, I'm not sure you can trust "veg tant" leather
-
Parisian pink? Tote/handbag
Stetson912 replied to Stetson912's topic in Purses, Wallets, Belts and Miscellaneous Pocket Items
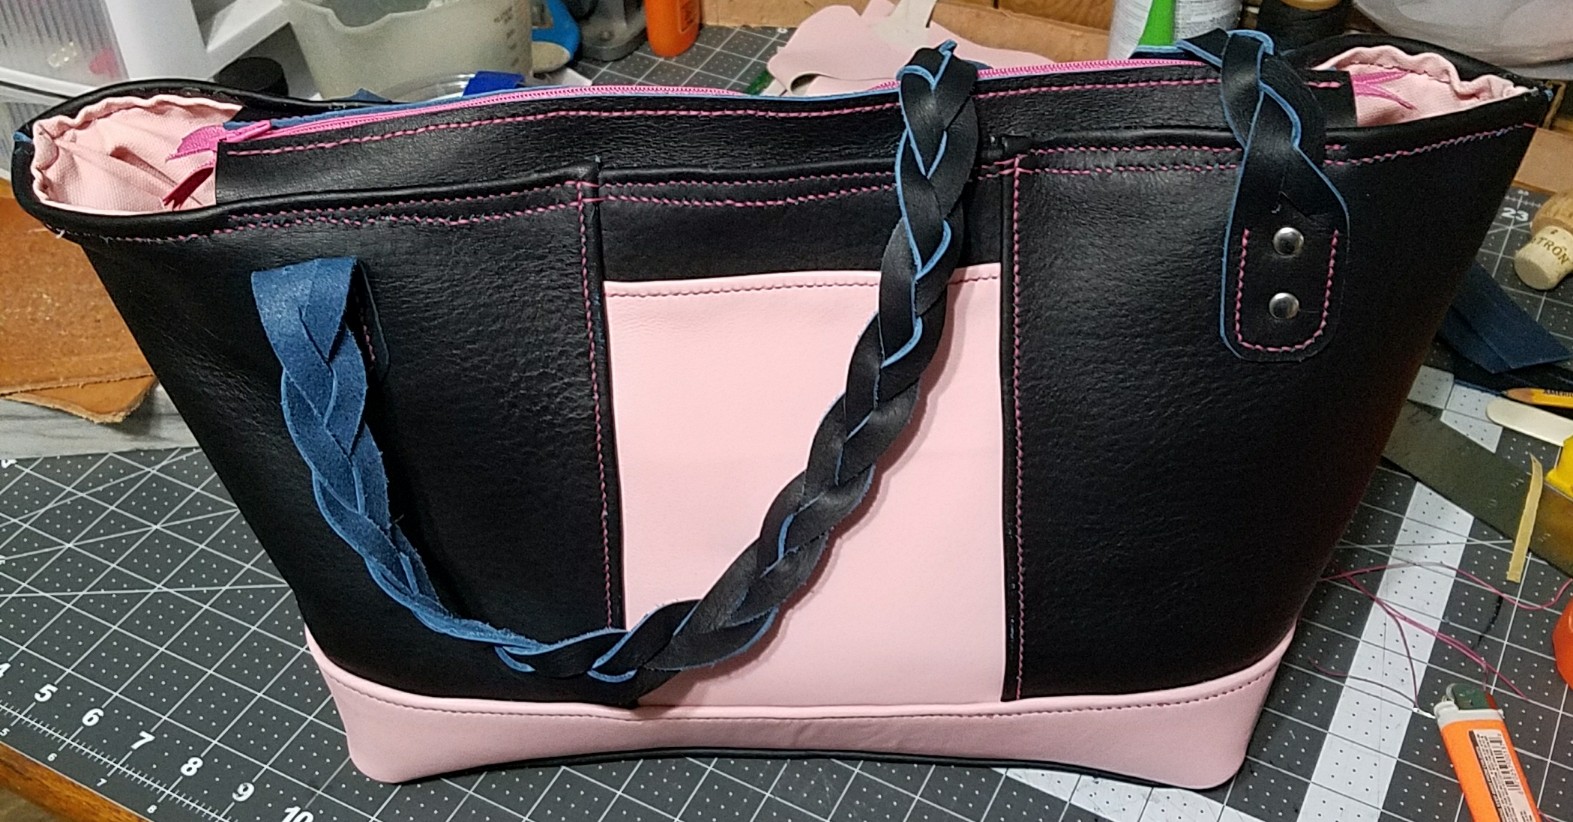
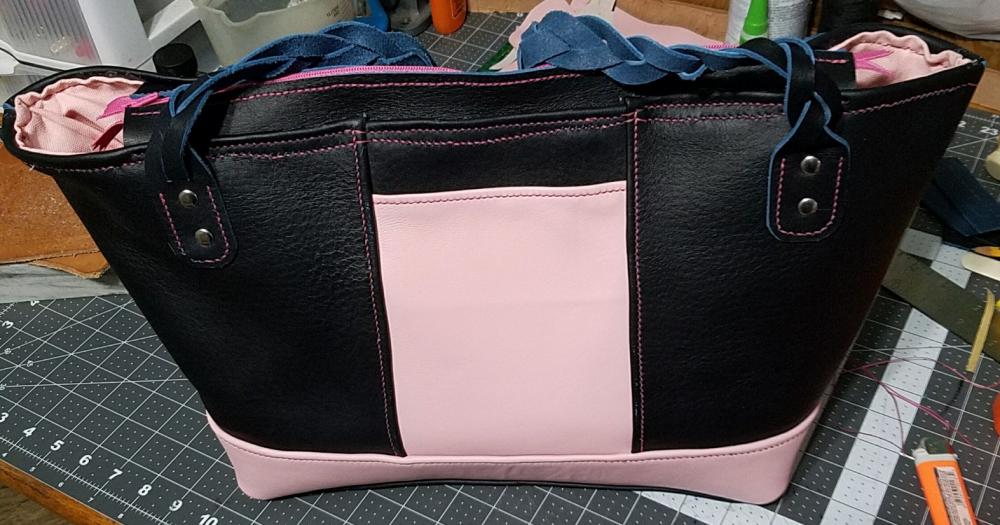
Haha it's a play on the horween leather I used. It's Parisian blue. I just thought Parisian pink had a nice ring to it. The pink is an italian lamb skin of some kind (i think veg tan but most certainly could be something else). It's super soft and supple, that's why it's just trim. The bottom I had to glue to a piece of veg tan to give it structure. The bottom, bottom trim, pocket and two side pannels have rolled edges and we're stitched first then put together. Then when the main bag was done I made the liner. It's a turned lining so the top edge is also rolled. A lot of stitching as you know. But I really like this style bag. My stitch lines are wonky because my bound edges at the top weren't very good because i didn't skive thin enough, but you learn from these things. Next one will be better haha -
Says the minimum order is 100? Or did I see that wrong. Lol.
-
Parisian pink? Tote/handbag
Stetson912 replied to Stetson912's topic in Purses, Wallets, Belts and Miscellaneous Pocket Items
Thanks. It's pink duck cloth aka canvas I got from Joann's I think. A yard was a lot more than I needed for the project haha. But it'll get used somewhere -
So this project isn't close to perfect. I've been working on it for a long time. It was frankly a bit too much for me. But that's ok, I've learned a lot from this. Mainly, my stitching and skiving need work. I've ordered better stitching irons (KS blade) and in the future I will know how to plan out my project better. That said I'm still kinda proud of it. It is a 3 part panel tote with a zip. It's my second bag ever, first with a fabric lining (duck canvas), first from my own pattern. All edjes except the zip gusset are rolled and the liner was also (poorly haha) hand stitched. I kept it simple with a single pocket. Straps are mystery braid. Excuse the photography, best I can do right now. Thanks for looking.

-
"Carving" on Western Style Holsters
Stetson912 replied to PAMuzzle's topic in Gun Holsters, Rifle Slings and Knife Sheathes
I'm not real sure, but I'm thinking that tools were far less advanced during that period. Therefore the tooling would be far less detailed than what we can achieve today. I'm not a carver per say and certainly no saddle maker, but I believe the stohlman/Porter style would have been closer to what was used for ornamentation. I would think depth of tooling would have been similar, but again, just speculation. -
@JMixx, some people just stick toothpicks to a board or something. There are a bunch of ways you do it lol.
-
@jxtime, how well do those work with lettering? I imagine the steep angle is better for lettering as well as Sheridan because of how close your lines get right?
-
That's a pro tip from cowboycolonel guys! Seems simple right? Yeah, I once dyed my hands black because I thought gloves are for wimps! Not true, walking around with black hands, that's a bit embarrassing haha.
-
Wow, ain't gonna get outta that haha. Look at that Dee ring! Whoah! Looks awesome.
-
Hey @bikermutt07 I got some from the colonel myself and haven't touched it yet. It's still in the box haha. Mine was about 5 lbs. So10 lbs will last you a good while I think. I will be using it for antiquing and finishing. I just haven't done any for a while makes me sad.
-
I'm surprised banana guns are legal in California... Hehe All jokes aside, looks like you found what you like to do. Keep it up!
-
Nice
-
NewWork Belt
Stetson912 replied to Tim Schroeder's topic in Purses, Wallets, Belts and Miscellaneous Pocket Items
Ooo, hehe. Now I gave to get some -
NewWork Belt
Stetson912 replied to Tim Schroeder's topic in Purses, Wallets, Belts and Miscellaneous Pocket Items
I should clarify, I had meant on the face of the belt. The borders are darker than the tooling, I was wondering about that and how you did it haha. My mistake. I've heard of his edge markers, I oughta get a few haha. And I'd also like to try wyosheen. I hear it's awesome stuff. -
NewWork Belt
Stetson912 replied to Tim Schroeder's topic in Purses, Wallets, Belts and Miscellaneous Pocket Items
Do you use a resist of some sort when dying the edges? Or just a lot of care with a brush? -
Best weight leather for a front pocket notebook cover?
Stetson912 replied to MarkCdub's topic in How Do I Do That?
i wouldn't go any higher than 5 oz. And that may be pushing it. -
For being so thin it looks heavy, about 20 pounds... Hehe.. Ok ok, enough with the bad jokes, I think it's a neat concept. Looks good, I agree about the stitching. That takes practice and will come with time.
-
First two projects
Stetson912 replied to JamesMcn's topic in Purses, Wallets, Belts and Miscellaneous Pocket Items
I agree with mutt, both people he mentioned are great and have videos that will hello with stitching. And wing dividers are invaluable tools, you should get a set. -
bag Dragon Boat Bag
Stetson912 replied to AdamLVL's topic in Purses, Wallets, Belts and Miscellaneous Pocket Items
That's pretty cool. I've never seen anything like it. I like the inlay work. Welcome back to the leather world. -
Ah I see. I saw the beveling in the video. Perhaps that's more for thicker leather. Either way, it looks good.
-
Show me your wallet
Stetson912 replied to Joseph1836's topic in Purses, Wallets, Belts and Miscellaneous Pocket Items
@Petewon very nice work. I'd like to see your construction methods on those. Watch straps are beyond me at the moment haha. Also, when setting that snap with the leather covering, does the setter damage the leather? Or do you put something over it to protect it? -
Did good on that arrow weave too. Are you only supposed to bevel the one side of the line like that?