Stetson912
-
Posts
1,431 -
Joined
-
Last visited
Content Type
Profiles
Forums
Events
Blogs
Gallery
Store
Everything posted by Stetson912
-
I think the issue with the stitches showing like that is the shape of your holes. You will see improvement if you can get round holes. Higher spi will help too (8-9 should be fine). You should be able to stitch just behind the "bead" and not have the stitches be visible unless you really stretch the leather out. Ks blade makes round hole pricking irons in case you were going to search them out. I'm not aware of any others but they could be out there. Maybe you can use a sharp round needle or scratch awl to make your holes as well? I haven't experimented with this personally.
-
@Dunluce, are you machine stitching or hand stitching?
-
This isn't a bad idea. I think how you will finish the edges will determine how to proceed. As tugadude said, if you are binding the edges you can probably leave the last 1/2" or so later open flat and skived thin for the binding to go over. Rocky here knows his stuff, his techniques are solid and will work also. If you are using thick leather and burnishing the edges, I wouldn't bother too much with skiving it down. Just edge and burnish. Just my thoughts.
-
Yeah, looks like a tote with a zipper to me. That "H" pattern is pretty common. The corners would then be boxed and the bag turned. That's how I would do it
-
 Interesting idea. Makes putting on the holster a lot easier
 -
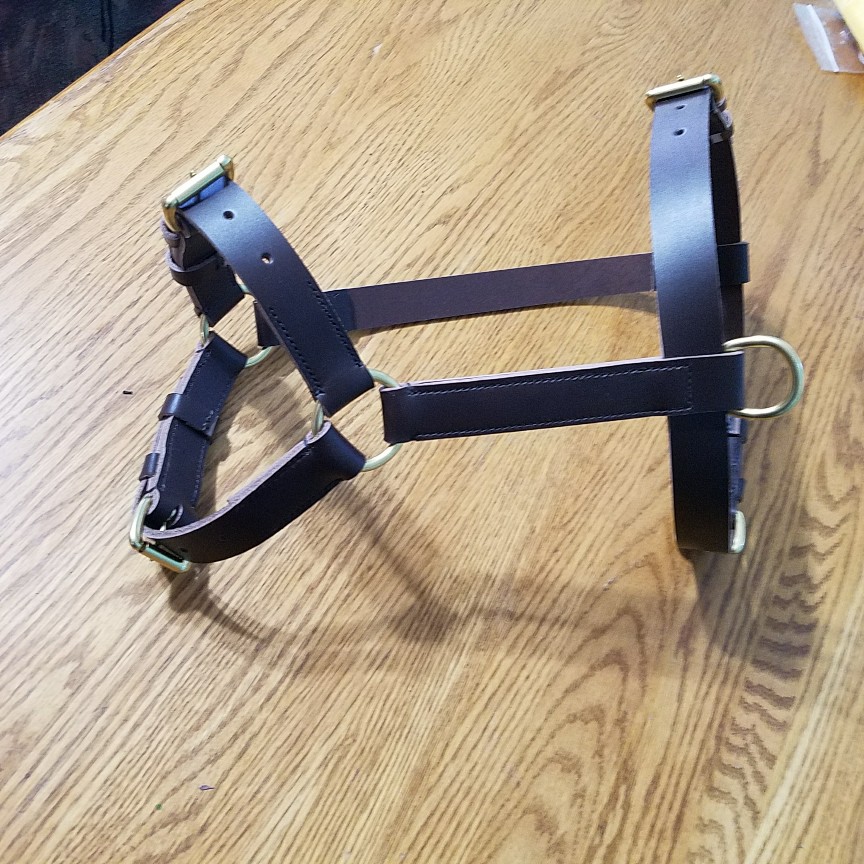
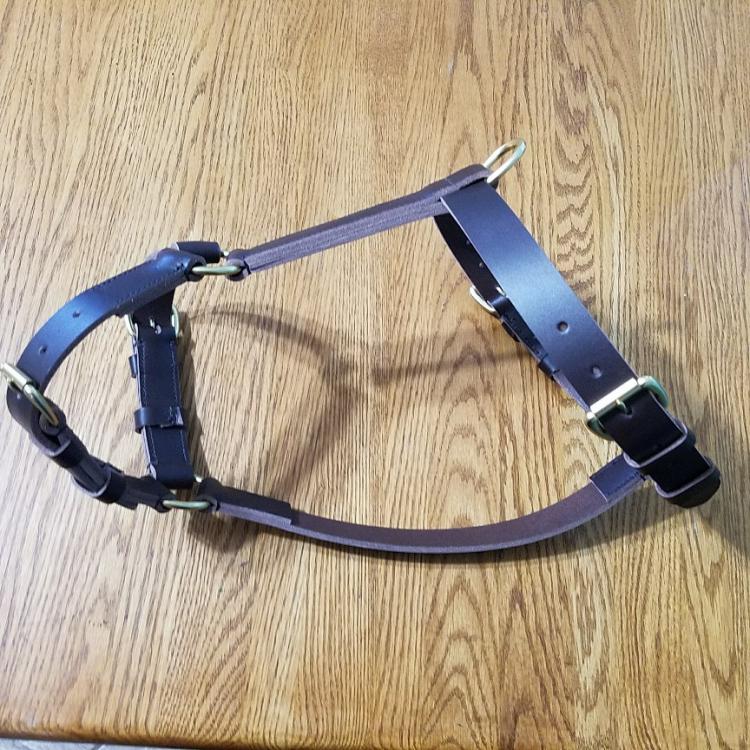
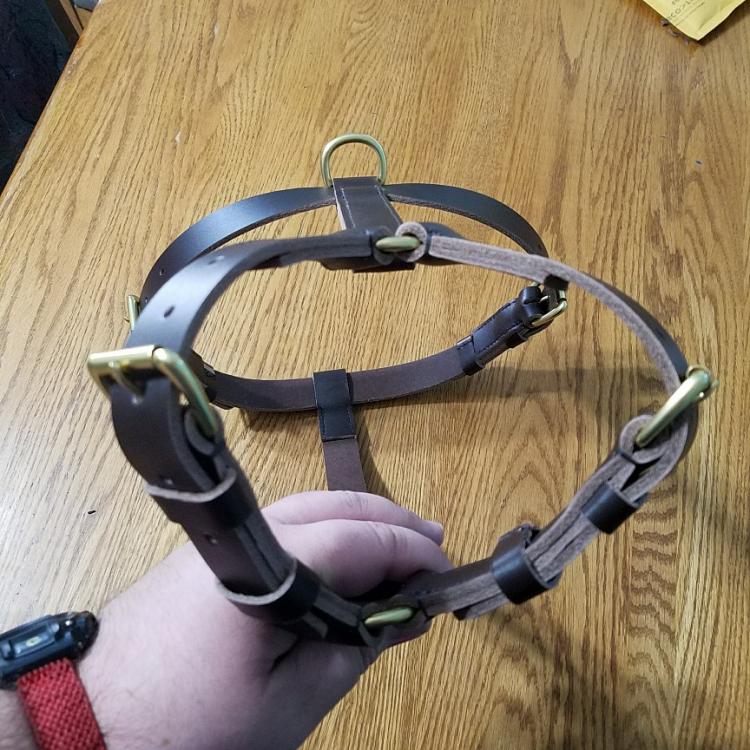
A while ago I made a harness for an Akita. It didn't go so smoothly. It broke twice and wasn't the correct dimensions. But, it taught me a lot. 1. Don't skive the turn where any hardware will be.... And 2. It pays to make a mock up in craft foam to test fit it to the dog. This harness is made from 1" wide 9/10 oz European bridle leather in Havana brown from rjf leather. I used mostly .6mm tiger thread to hand stitch it (fit my 8spi irons better) but I ran out and had to use some .8mm which worked well. The back strap was a problem on the last one. So to fix, I made it tripple thickness. All turns are full thickness and not skived or split. Each chape has a stationary and floating keeper. Let me know what you think. I'll try and get pics on the dog (for a husky this time)

-
Very nice. That's a lot of stamping. Hand stitched? Ignore my question... It pays to read haha!
-
The scotch shipping tape is good. I also like using an off cut of Mat board placed under the piece I'm tooling after it has been taped. Works pretty well, and helps add depth to thinner leathers.
-
Nicely did I like the thread color choice too.
-
Very nice work! @Handstitched, that little burner is an alcohol lamp. It's used for heating up the creaser before creasing the edge. It helps set the crease nice and crisp. Just a little tid bit if you didn't already know. I thought it was interesting when I learned about it haha.
-
I not bad. I like it.
-
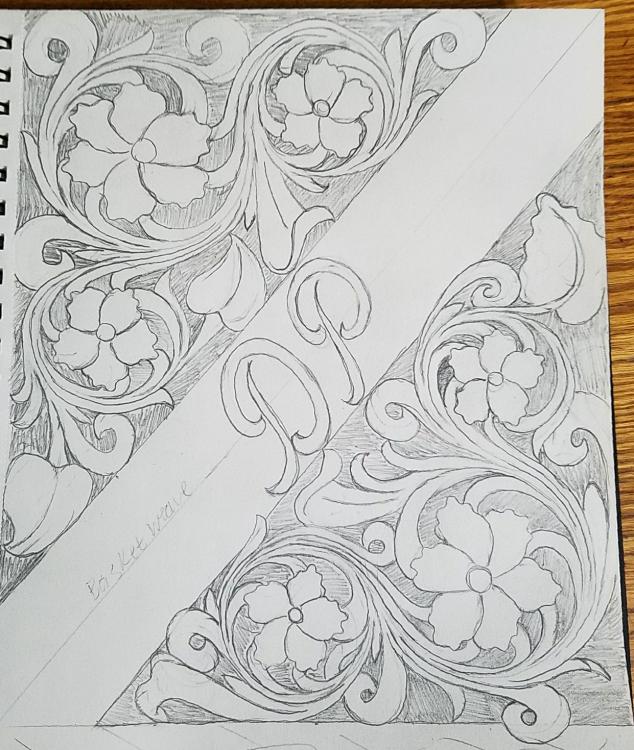
@Goldshot Ron, thanks for the input. I will have try to make my stems more convincing. And the French curve is a good idea I will look for one. Thanks!
-
Thanks munky! I'm still working on getting the fill better and flow better. But it's a start.
-
Thanks @Ferg, I would like to learn how to do it on the computer but I can't seem to figure it out lol
-
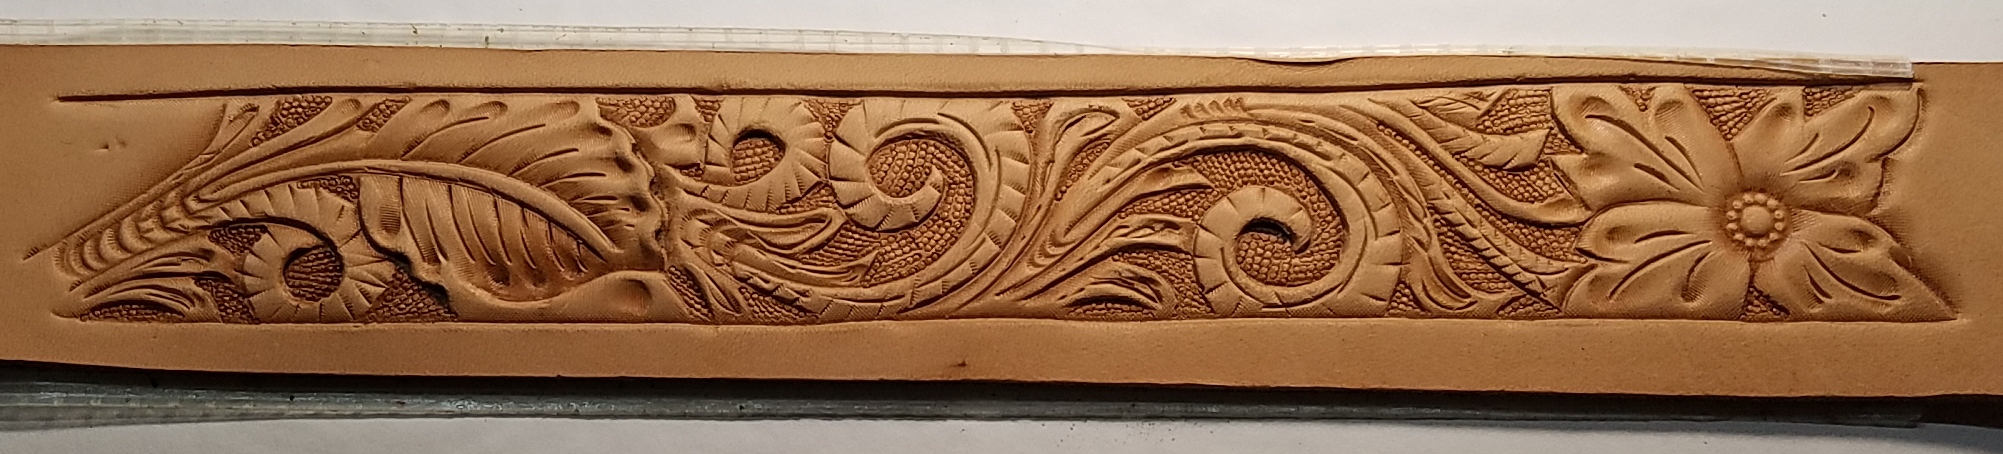
I've tried my hand at drawing a floral pattern. I need to improve a lot with everything. It's a new process to me. I wasn't going to use both of these together just one or the other. I know there's a lot of background. Something g to work on. Thoughts and critiques welcome. Thanks!
-
Sheridan Styled Photo Album
Stetson912 replied to IngleGunLeather's topic in Books, Journals and Photo Albums
That's not a bad idea either haha -
Sheridan Styled Photo Album
Stetson912 replied to IngleGunLeather's topic in Books, Journals and Photo Albums
Hey Mr Ingle, I know this is an old Post, but I was wondering if you could tell me where you got the 3 ring mechanism for this and about what size it was? My sister is getting married and I thought this would be a good gift. Thanks! -
Immiketoo answered it pretty well. You have plenty of thickness there for it to work. A steep beveler will help.it looks to me like the lines were cut in with a swivel knife as well. Maybe experiment with this? I know immiketoo would say cut less bevel more, meaning cutting lightly with a swivel knofe or not at all. so i would give it a try both ways (cutting light and heavy) and see which gives the best results. It'll also help to make sure you are casing your leather enough and it isn't too wet wen beveling. Just my thoughts.
-
Steve, are you just using a beveler? How thick is your leather?
-
Thanks kseidl. I'll keep practicing for sure haha.
-
@JLSleather, I agree with both those points. As for now I'm just trying to get the tooling aspect down. But, maybe I should try to draw up and tool a pattern myself. I'm not good at drawing but I might be able to manage haha.
-
Thanks guys. I'm still working on the little leaves of the scrolls getting those smooth and less choppy. @Rockoboy I like the scalloped veiner too, I just don't have one that is any good. :/ I will get one one day. I'm using craftool pro stamps that were on super sale because they are being discontinued. I wanted something intermediate to get the use of the tools down before I invest heavily in better tools. So I'm making due for the time being haha.
-
Thanks Rockoboy, It actually is a veiner. Just a thin lined veiner though. I also didn't strike it very hard because it's really easy to over do it with that veiner and sail right to the middle of the leather. That's just more practice on my part though. I'm thinking of giving it one more try today. My bar grounding is terrible haha
-
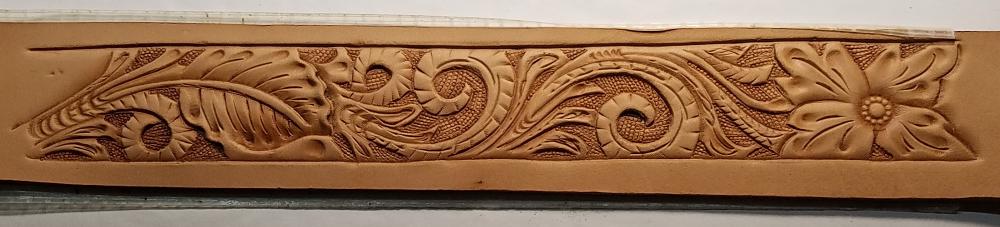
Well, I used my plan and tried it again. Took into account everyone's advice too. Best as I could remember. Here it is.
-
Haha thanks Jeff. I had you in mind when I went to creating my plan. Lol