Danne
Members-
Posts
772 -
Joined
-
Last visited
Content Type
Profiles
Forums
Events
Blogs
Gallery
Store
Everything posted by Danne
-
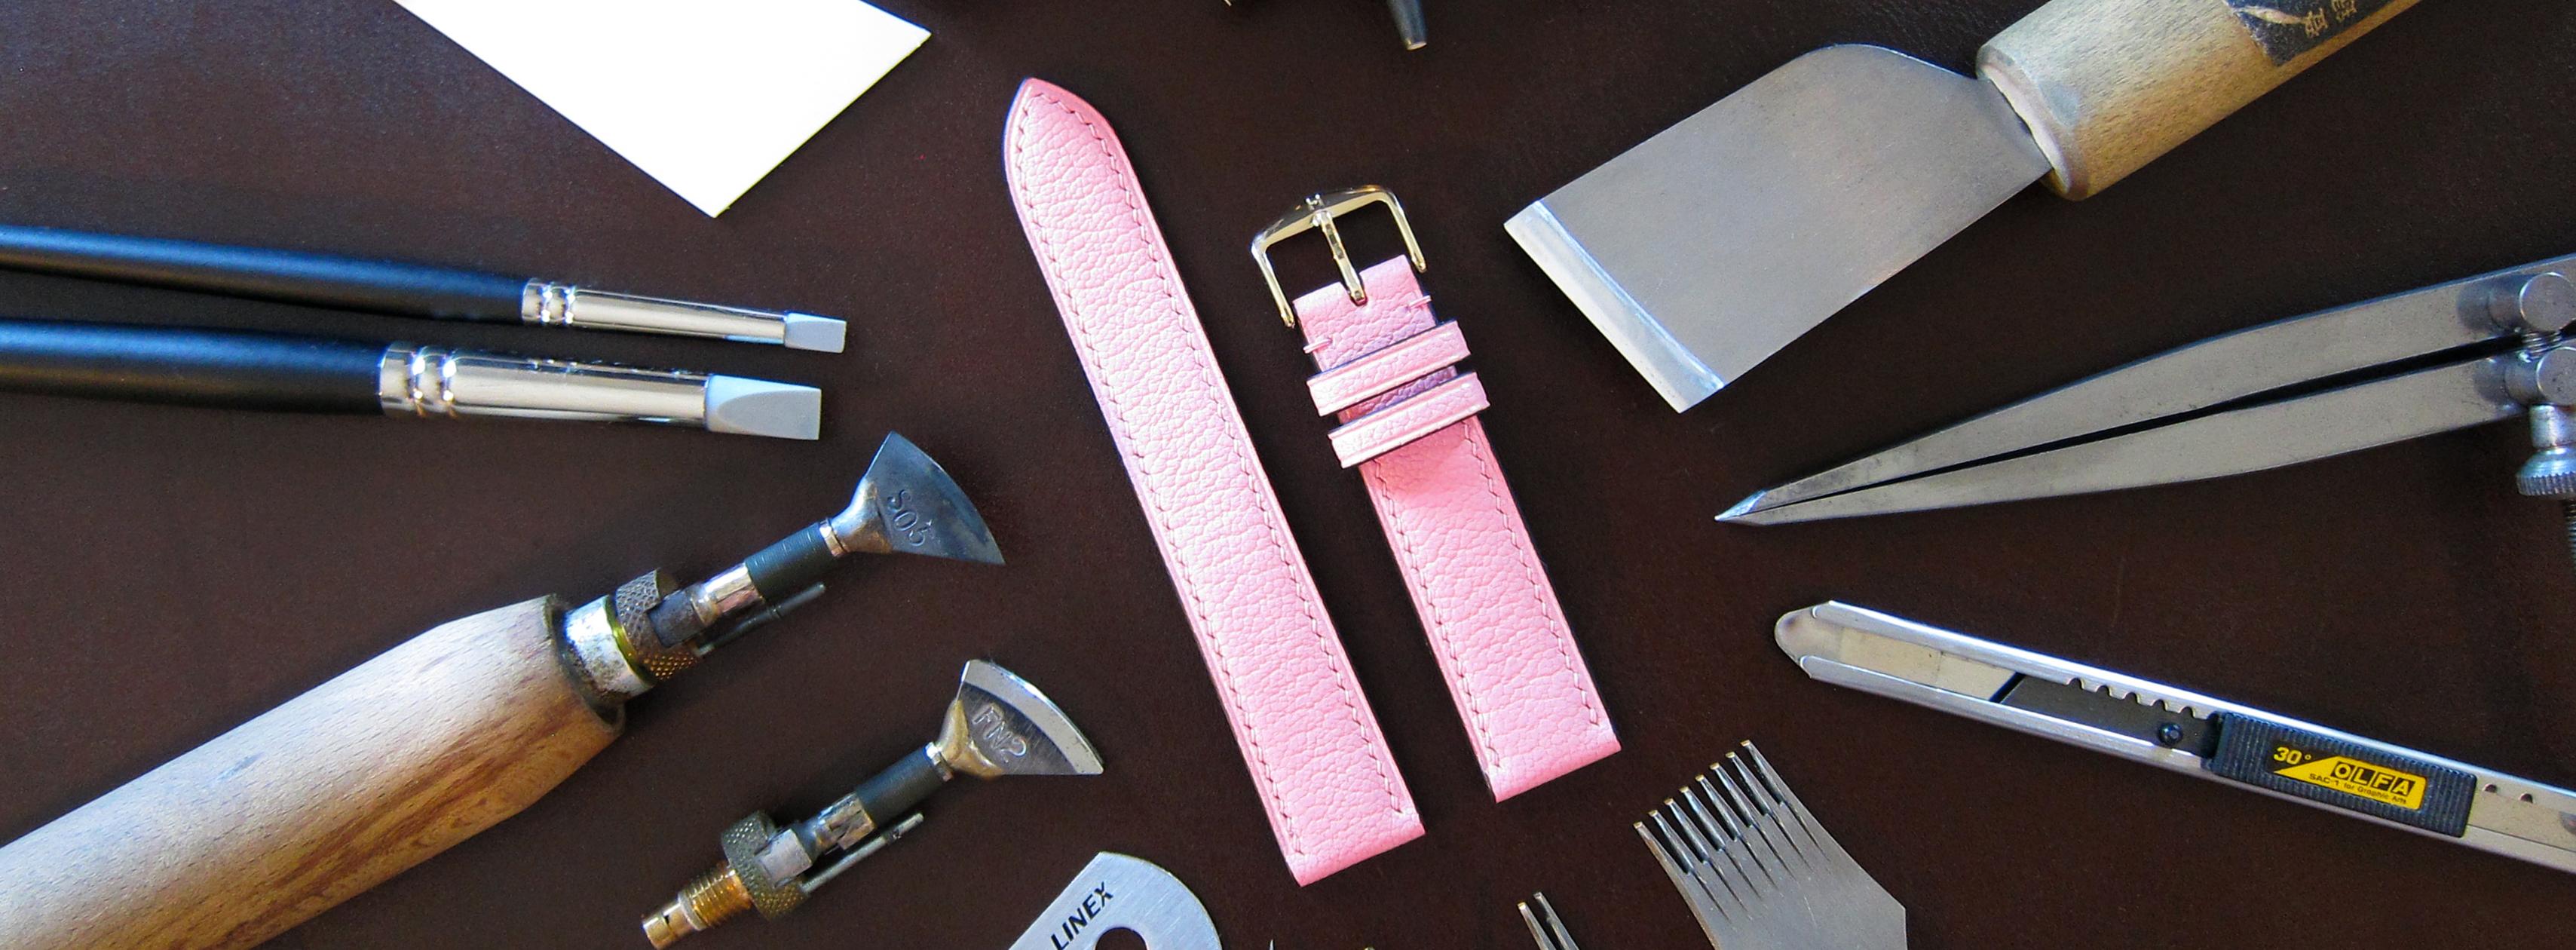
Taper from 20-18mm, thickness 5mm down to around 2.7mm, edges 2.2mm Exterior leather: Alran Sully goat Lining: Haas Zermatt calf Stitching: Meisi Xiange twist #30/0.3mm, 2.7mm/10spi Completely reinforced construction (including reinforced and lined keepers) (Photos is after the strap is used, so some folds are visible from the buckle)
-
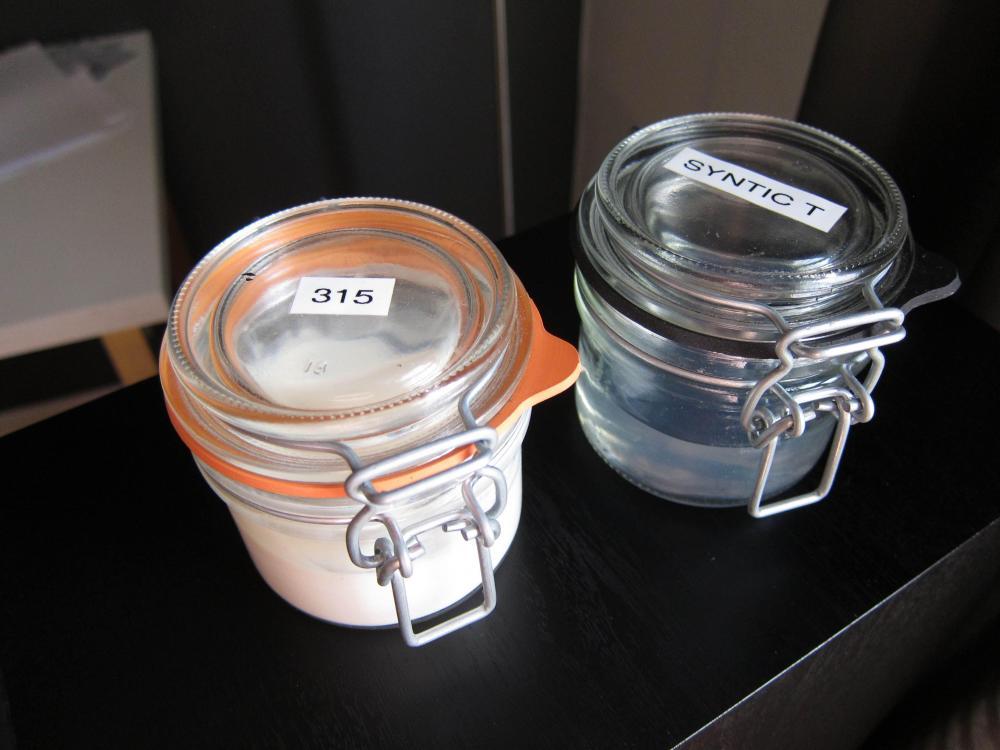
I use canning jars. For water based glues I use the regular gasket. For solvent based glues I bought industrial rubber mat in the correct thickness and cut out a new gasket. Unfortunately I don't have a source for this rubber. But I would guess you can find it on a lot of industrial suppliers. I have tried it and it's resistant against Xylene, acetone and such. (I put a small piece in the solvent and left it there for a day and it doesn't do anything to the rubber. The good thing with this gasket is that with a jar with a decent amount of glue in it (not much space for oxygen when you open and close it) it stays thin for a long time compared to all other solutions I tried. The black one is the industrial rubber.
-
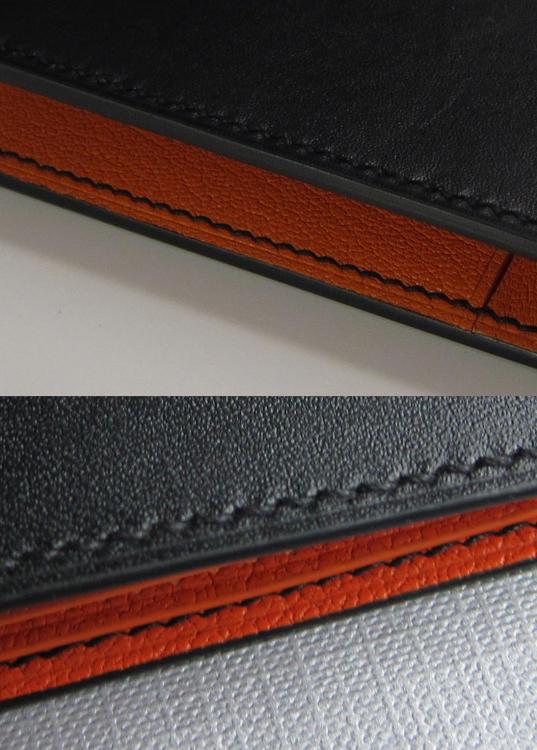
Yes, round off the edge with sand paper around 400 grit. And dry burnish and slightly sand with around 1000 grit (dry burnish to flatten the grain at the edge so I get a cleaner edge when I paint. And the reason I slightly sand after 1000 grit is to promote adhesion of the paint. Here you see the difference. The top wallet is without this technique, and the paint bleed into the grain. The bottom wallet is done years later with the technique I explained, and it makes a cleaner edge. (You have to right click and open in a new window for full size to see the difference, I should have "zoomed in" more)
-
When I use grained leather. I sand the edge, and burnish it laying flat. And before start painting the edge I sand the transition slightly with higher grit 800-1000 (so the edge paint adhere good at the transition between edge and the top of the leather.
-
As you have seen I really like to mix semi-aniline veg tan cow exterior with goat interior. That way I can make a relatively slim construction and still get patina on the exterior, but no extreme patina.
-
I have very little experience from Dollaro (But have made a watch strap with it) In my opinion (Some people will not agree with me) I wouldn't go as thin as 2oz with veg tan cow for a card pocket. Or I wouldn't with any other leather either, an exception would be goat with a turned top edge. Or fully lined constructions I haven't tried at those weights. Also keep in mind, this is MY opinions, and only based on my limited knowledge, because I haven't worked with a lot of different weights of leather. (Mostly 0.5mm and 1mm)
-
There are a lot of things that will affect your stitching. Hole size/hole shape, thread size, leather thickness, leather temper. And you will sometimes have to make decisions. let's say you have a black exterior and red interior and stitch with black thread, the back side is more important, and if the edge is relatively thin so you can't get a nice slant on both sides, at least I will focus on get a nice slant on the back side and a little straighter on the front side (where the thread color is the same as the leather. Let's instead say you stitch the top of a wallet with a bill compartment. And the top is around 1.5mm (3-4oz) and you use a constrasting thread color for the exterior, it might be a good idea to not cast the thread to get a nice slant on the exterior. Is it possible to stitch 1.5mm leather with a nice slant on both sides? yes for me I can do it on some leather types. And if I use very thin thread like (like in the range of 0.35mm) I can do it on all the leather i've tried. Another solution can be to punch from both sides before assemble (with the same iron) sometimes referred as X-punching. So you punch before assemble and line up the holes, and stitch without cast and you get a nice slant on both sides. Two crafters who always (almost always) do this is Shiang and Chestermox. If the back side is hidden in a pocket for example, then there is no reason for this, and stitching without casting the thread is a better solution. My recommendation to you is to experiment with different angles, and tension (different tension on either side) and write down your results, because different leather behave different.
-
It depends on the type of leather. If it's veg tan leather I use a creaser, a softer chrome/combination tanned leather I often prefer to use a sandpaper to round off the edge. If I crease before or after a round off the edge depends on the type of creaser I use. I use Regads F and FN, with F-irons I prefer to round off the edge after I crease (Because F-irons don't change the shape off the edge. FN-irons do round of the edge because the shape of the iron, so when I use those irons I prefer to round off the edge with a edge beveler or sandpaper before I crease. Thank you.
-
Of course I don't have a lot of experience from used wallets, but I have done a couple for friends that have been used for a couple of years. And they have put two cards in some of the card slots. The problem I see with this is that once you start putting to cards on one pocket, you can't really go back, because leather will stretch to make room for those cards. But i'm not worried the leather will rip. I do have one thing to say about card pockets though, and I know a lot of crafters will see this different (even large brands, will not mention which brands though) Goat have a lot more strength than cow leather. And from my amateur observations, the goat I use stretch a little bit when needed, full grain cow leather I use doesn't stretch as much and can tear easier. So what do I want to to say with this? If you look at my photos in this thread you can see that I skived the "card pocket ears" I start skiving from the stitch line so I will stitch through the full thickness or close to full thickness. And this have never been a problem, but if you have a look at my Instagram and look at my latest card case in brown veg tan cow (with the scare pattern) those card pockets are 0.9-1mm thick and edges are not skived at all (except for the overlapping part and T-slot edges) And the reason is because I don't want it to tear if it's "abused" I mean in my opinion, that card holder should hold a drivers license and a credit card and maybe one more card in the middle and/or a folded bill/bills. But I told the person who have it now (Made it for a friend) start with two or three cards, after a week you can add one more card so you have totally four cards. And the reason to wait a week is because it will be a little hard to remove the cards before the pockets have stretched a little bit (which it will do with time) I don't say it's wrong to skive card pockets on cow leather. And as I said I know large brands who does it. But a skived edge will of course not be as durable, and I have done tests on cow leather and decided not to skive those edges. (I'm talking about veg tan cow leather now) and of course different leather behave different, but for the leather I use I don't see it as a good solution. Disclaimer: I'm a hobbyist, and no expert, this is based on the few different leathers I used, and the tests i've done, and from analyzing wallets that friends have been using for 2-3 years. And I don't say the methods I use are the best methods, but it's methods I personally feel confident with and I don't feel worried about the durability, even when that wallet is abused.
-
Oh, i'm not really sure. The person I made it for said he would need six cards in total (So one in each pocket) And when I glued those pockets in place I put a card in the pocket when I glued it in place, removed the card, put it under the next pocket when I glued that in place. And it worked perfect. I have the same type of wallet but with two pockets on each side (Never been used) and I just tried to put two cards in each pocket and it works fine without bending or stress on the stitches.
-
Here I used Google Sketchup in 2d-mode. But prefer Autocad LT (because it's possible to calibrate the printer for the error you often get in the feed direction of the printer) which is often smaller errors 0.7-1mm for a 200mm (From my tests of different cheap and more expensive laser printers) But Autocad is also a lot more expensive, and have a little steeper learning curve. Thank you Chris
-
I think we use a similar type of sandpaper then, I buy mine from a shop that sell supplies for painting cars. Spray adhesive sounds like a really good solution. I just wet the sandpaper and it sticks to my granite slab, but after a while it starts to "curl up" so I have to hold it down. I did use water on the King stone, but for some reason it still clogs up with metal. But at least with that stone it makes no sense for me to use it, because I still have to use a lot of sandpaper to flatten it. So from the sharpening options I have right now (That stone and wet and dry sandpaper) it makes sense for me to use the sandpaper. If I did this professionally and did crafting everyday it wouldn't really make sense to use sandpaper. And I still look for a solution with sharpening stones. And I think a good set of diamond stones could be a good solution for me. Which I also could use to sharpen kitchen knives.
-
Thank you for your input here. I really agree with you that there is no logical reason to use sandpaper. The reason I use it right now is because I started with buying a cheaper King 1000/6000, because I have seen other crafters who seem to get good results from that stone. But for me it just caused trouble. The 1000 side hade to be flattened all the time, the 6000 side clogged up with steel and stopped sharpening very quick, so I never really got any good results (Maybe I used the wrong technique I don't know) but had to use a lot of sandpaper to flatten the stone. So I decided to start using sandpaper until I found a better solution. And the problem is that it seems like it's as many opinions as there are stones out there. But if I could avoid haven to flatten my stones it would be nice. I think I will try your recommendations with the diamond stones and white compound. I'm super happy with the edge I get from up to 2500 grit wet and dry and green chrome oxide. And from what you are writing, I have a feeling that those diamond stones in combination with white compound will work fine for me.
-
No need to block me, if you don't want to discuss this I respect this. Have a nice day.
-
I wasn't trolling. And i'm not sure what context I removed. I'm not trying to be rude in any way, and if you took it that way i'm sorry, it was certainly not my intention. Im just trying to understand why I would benefit from Japanese water stones instead of sand paper (apart from the obvious thing that sand paper can get expensive if I sharpen a lot) or why I should choose Japanese water stones instead of for example diamond stones.
-
Is it some special Japanese tools you are talking about? I have a cheap Skiving knives from Kyoshin Elle (Aogami #2 steel) and there are not need for water stones. Gets razor sharp with regular wet and dry and some stropping. And cuts leather like butter. As I said before i'm certainly no expert on knife sharpening. But I do know that my knives get really sharp and it's super easy to skive with a clean result.
-
Also one more tip. Something I did before, and it helped me to to learn how to keep the angle. In the beginning I leaned the knife against the "distance piece" but after a while I just had it there without almost touching it. And I could finally remove it.
-
I'm no expert on sharpening, but keep one thing in mind there are no wrong methods if the knife gets sharp. I use wet and dry from Mirka (There are a lot of good brands, I just have access to that here in a store close) I have grits from 180 up to 2500 (I also use this for leather edges) I have no idea what "Japanese tools need Japanese maintenance" means. But at least for my Japanese knives regular wet and dry sandpaper work awesome. I just wet it and put it on my granite plate. If they edge isn't chipped, I start with 1000 grit, and finish with 2500 grit. And between sharpening I strop with green chrome oxide. At first I didn't have good results with stropping, but after I lifted the knife a little bit (Like you would when you sharpen a secondary bevel on a knife) just a few strokes make the edge razor sharp again. What mistake did I do in the beginning? 1. Hesitation when I sharpened, so I practiced on cheap Chinese knives (Like those 2€ knives) 2. When I needed to resharpen a knife I used 2500 grit (correct me if i'm wrong here) but for me it didn't work that great because when I had stropped my knife for a while I round off the edge. And I had to "define" the edge again with 1000 grit.
-
I also bought mine from a countertop place. They where willing to give me "cut off pieces" for free. But I wanted a specific dimension, and it wasn't that expensive as long as I was ok with cut and chamfered edges and not polished edges. And the edges are not sharp.
-
"The European veg tan (Swedish, I think it was)" sounds like Tärnsjö. If you have a company you can buy directly from the tannery. Unless you do large bags and can accept some small scars (that you can cut around) standard grade is a good choice. I see no need for first grade for wallets and smaller items. I really like the veg tan from Swedish Tärnsjö also, but I use their dyed leather (Semi-aniline) Since it sounds like you want natural veg tan. Here are some alternatives. (There are of course more alternatives, so if you looking for something special, I can probably answer where you can source it) I would recommend you to order one skin from La Perla Azzurra and ask them to include samples of their different products. I did order samples, and hade to use my own courier (expensive like 100€) La Perla Azzurra: http://www.venditapelle.it/product/5/Naturale.html (Around 8oz) La Perla Azzurra: (Oily really nice) http://www.venditapelle.it/product/6/Vacchetta-1967.html (Around 8oz) Walpier Buttero: https://buyleatheronline.com/en/walpier/438-walpier-natural-buttero-veg-tan-shoulder.html (Around 7oz) Badalassi Carlo: https://buyleatheronline.com/en/badalassi-carlo/444-badalassi-no-fin-natural-veg-tan-shoulder.html (Around 5.5oz)
-
Maybe it's the US-distributor? I live in Europe, but I think everyone can order directly from Meisi, but not sure. Ask them.
-
http://www.meisi108.com/product-17210-23781-85397.html Contact them on Instagram for order: https://www.instagram.com/meisi108/


