
.jpg.d60258221c476480a6e073a8805645bb.jpg)

Pintodeluxe
-
Posts
286 -
Joined
-
Last visited
Content Type
Profiles
Forums
Events
Blogs
Gallery
Everything posted by Pintodeluxe
-
Pfaff 545 - Tread Pickup Lever Lifting Product Up
Pintodeluxe replied to Kryptonite's topic in Leather Sewing Machines
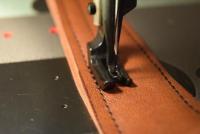
Looks like your foot pressure knob is backed off all the way. You might try adjusting the black double knurled knob on top of the machine. Unscrew it to increase foot pressure. -
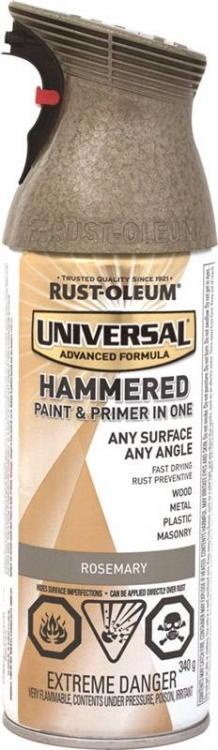
As far as paint color... Rustoleum Hammered Rosemary is a dead ringer for the factory LU-562 and LU-563 color. I found it in stock at my local Home Depot, but it can be ordered online as well.
-
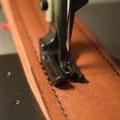
Looks good from here!
-
Manual for the 1245 shows not to go around the pin on the tension disc. I never go around that pin. That one change would add some tension inherently to the upper thread path. It might be so much that you are "out of range" and the bobbin case tension cannot make up for it. I know there are differences of opinion on this one, but lots of people thread the 1245 that way at first. It looks like the thread will fall out of the tension discs if you don't go around the pin. In my experience with the 1245, the thread has never fallen out of the tension discs... even when you don't go around the pin. Bobbin tension should feel really pretty light in normal use.
-
Just picked up a Consew 206RB-2 for $300
Pintodeluxe replied to myjtp's topic in Leather Sewing Machines
I like the 206rb-1's and rb-2's. Good dependable machines. They are quite easy to tune as well. Takes 135x16 needles. -
I had a similar issue on a flatbed machine, and it wound up being a faulty bobbin case. The bobbin case was simply defective, and wouldn't apply light, even tension on the bobbin thread which caused erratic tension problems. Replacing the bobbin case solved that problem. To test it, load a bobbin and pull on the bobbin thread. Gradually pull out 2-3 feet of thread and see if you have light consistent bobbin tension. I like Uwe's comment about a thread net. I use a short length of my wife's nylons for the same purpose.
-
Did you mean "feed dog" where you said "presser feet"?
-
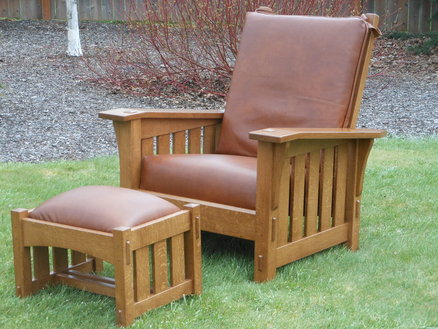
Nice work! I think you'll find many here that dabble in woodworking. Here's a Morris chair I built a while back. More on my Lumberjocks project page... http://lumberjocks.com/pintodeluxe/projects
-
Putting a Consew 225 on a Singer 78-1 table?
Pintodeluxe replied to FresnoFox's topic in Leather Sewing Machines
The Consew 225 needs a 18-7/8 x 7-1/8" opening. -
Yeah, I took it on trade. I'm not planning on keeping it, I'm just trying to identify the make. Underside of slide plates say Simanco, but they could be aftermarket too.
-
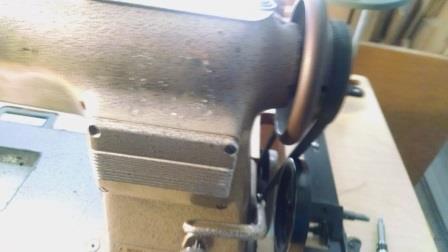
The reverse lever is small, and the stitch length adjustment knob is quite low.
-
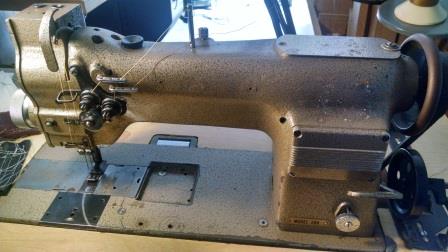
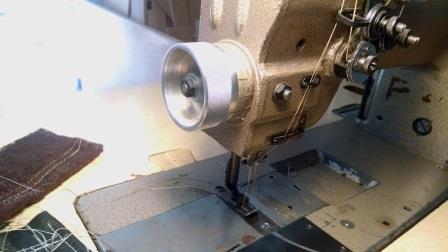
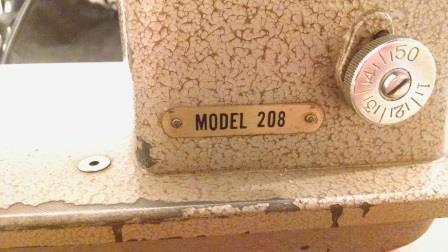
So far I've been unable to identify this double needle industrial machine. It says model 208 on the front. The only other markings are an apparent serial # C-680227. It's a needle feed machine, and is brown in color. There is a selector clutch on the left of the head to choose one needle vs. two. Some construction details look similar to older Adler machines. Maybe a clone of another machine? Any thoughts? I'm mostly looking for information regarding what needle class it takes, and to confirm the thread path. Thanks!
-
How do you like that LU-563? I've been eyeing one of those to replace my Consew 226. Mostly looking for more bobbin capacity. Any issues with yours, or pretty smooth sailing?
Thanks
-

I had 3 of them at one time...the two orphans I bought together plus a rebadged machine (Chandler CU-563) I had picked up previously. Treat them about the same as their cousins (226, 111G156, etc etc) and they are pretty smooth sailing. Like all the vertical axis bobbin machines, hang on to the needle thread hard for a couple of stitches and they purr happily. They are one of the better versions of the design and that *U* bobbin will spoil you. I had no trouble sewing with T-210 thread on mine, but I hear some prefer 138. I rarely sew leather, but mine gets a frequent diet of rock-hard compressed 1000D Cordura seams and other oddball sewn-on hardware like 0.065" ABS formed plastic deflectors. If I had to offload my machines, the Juki would go last. Hope you find a good one-
-DC
-
-
-

-
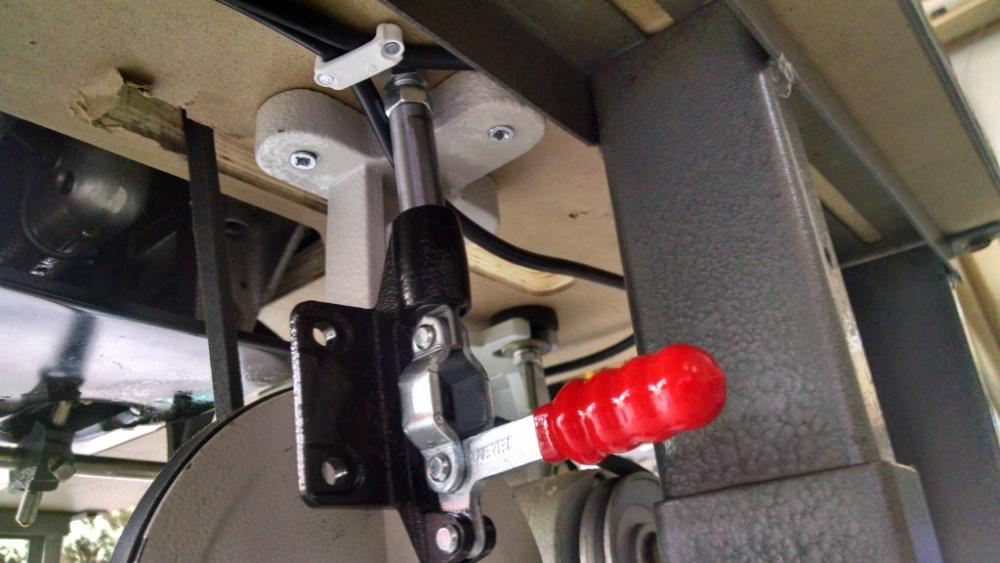
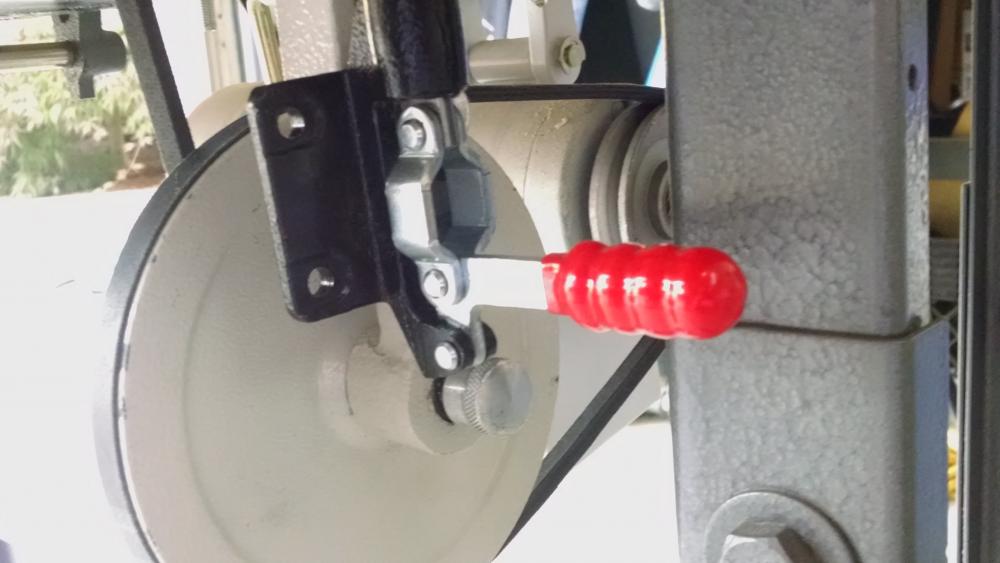
I didn't think I could move the speed reducer far enough backwards to alleviate the problem, so I installed a toggle clamp quick release. Cowboy Bob's solution looks best, but this works in a pinch. Now at least I can release belt tension to tip the machine back for maintenance. When I lock the quick release, the belt tension is set automatically. I did need to drill a slot in the toggle clamp, but no modifications to the speed reducer are required. A low profile furniture connector bolt attaches the toggle clamp to the speed reducer. The bolt that comes with the speed reducer is re-used and threaded finger tight with locktite.
-
BattleAx, that is an impressive looking improvised build. Takes me back to my Erector Set days as a kid! Nice work.
-
Great info here. It sounds like someone installed the speed reducer in the wrong spot, or maybe had to work around obstacles. Uwe, thank you for the detailed description of how to mount the speed reducer properly. If I can't relocate the speed reducer, I'll try my quick release idea. I'll still have to slip the belt off, but at least it will be loose. Thanks for the replies!
-
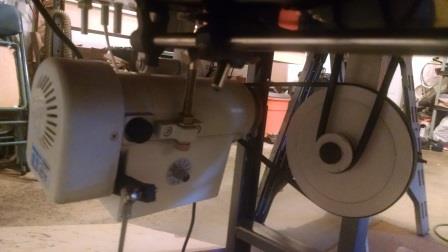
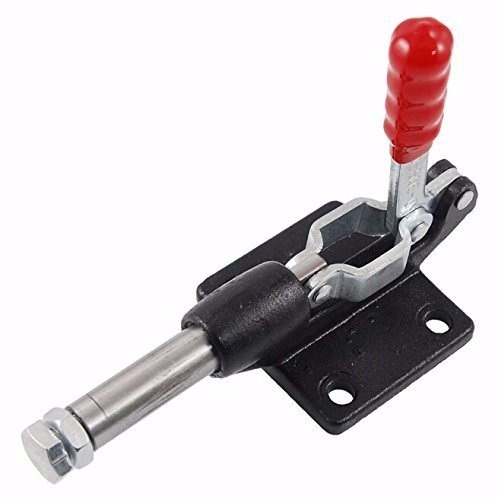
I have a simple speed reducer setup on a Consew 206rb. I like the control and power of the speed reducer, but it's sometimes a hassle to release the belt to tip the head back. Has anyone seen a quick release to de-tension the belt without using a wrench? If there's no commercial solution, I have two ideas... 1. Star knob to replace the bolt that tensions the belt on the smallest pulley. That would allow me to quickly release the belt tension so I could slip off the belt and tip the machine back. However, I'd have to get the belt tension right each time I adjust the knob. 2. Toggle clamp (Push Style) bolted to the sliding portion of the speed reducer frame. This should allow me to quickly release the belt tension, and lock in a consistent tension setting each time. When tightening the toggle clamp to start sewing again, the tip of the clamp would exert light force to the underside of the table. This is pretty hard to picture, but I'll post a picture of the installed clamp if it works.
-
Great answers. Just wanted to chime in that while the experts are answering a question for one person, many people learn and benefit from the conversation. Much appreciated.
-
Well, like anything you sometimes get what you pay for, and I'm not sure it matches your current budget... but I've found the Consew 206rb to be a good basic machine.
-
Anyone know where I can buy a replacement red oval Consew label /badge. The original on my 206RB is missing. It was the oval shaped red metal badge, with two mounting holes. New or used is fine. Thanks!

-
They have always been one of the most attractive models to me. Top loading bobbin like a Juki Lu-562 or a Consew 226, but you get the added benefit of a big bobbin. Class U bobbin if I'm not mistaken, even bigger than M style bobbin. I have a 562 and like it.
-
I have only sandblasted parts and pieces that I could separate from the machine. I didn't want to introduce sand and grit into the moving parts.
-
I sanded the bed area with a random orbit sander, and hand sanded where the tool wouldn't reach. Then I blew off the dust with compressed air, and wiped it down twice with lacquer thinner before spraying. I didn't apply any heat to the paint.


