All Activity
- Past hour
-
The PDF manual I typeset is attached to this post.
- Today
-
Jonas, Thank you for your response and I'm sorry for the delay in replying to your comment. My friend retired from his boot repair business and sold out his equipment several years ago. I might just have to bite the bullet and purchase one. I'm most interested in trying the welt roller along the edges of layered and glued leather belts. I will keep investigating and will keep an eye out for one on the used market. Thanks again for your response.
-
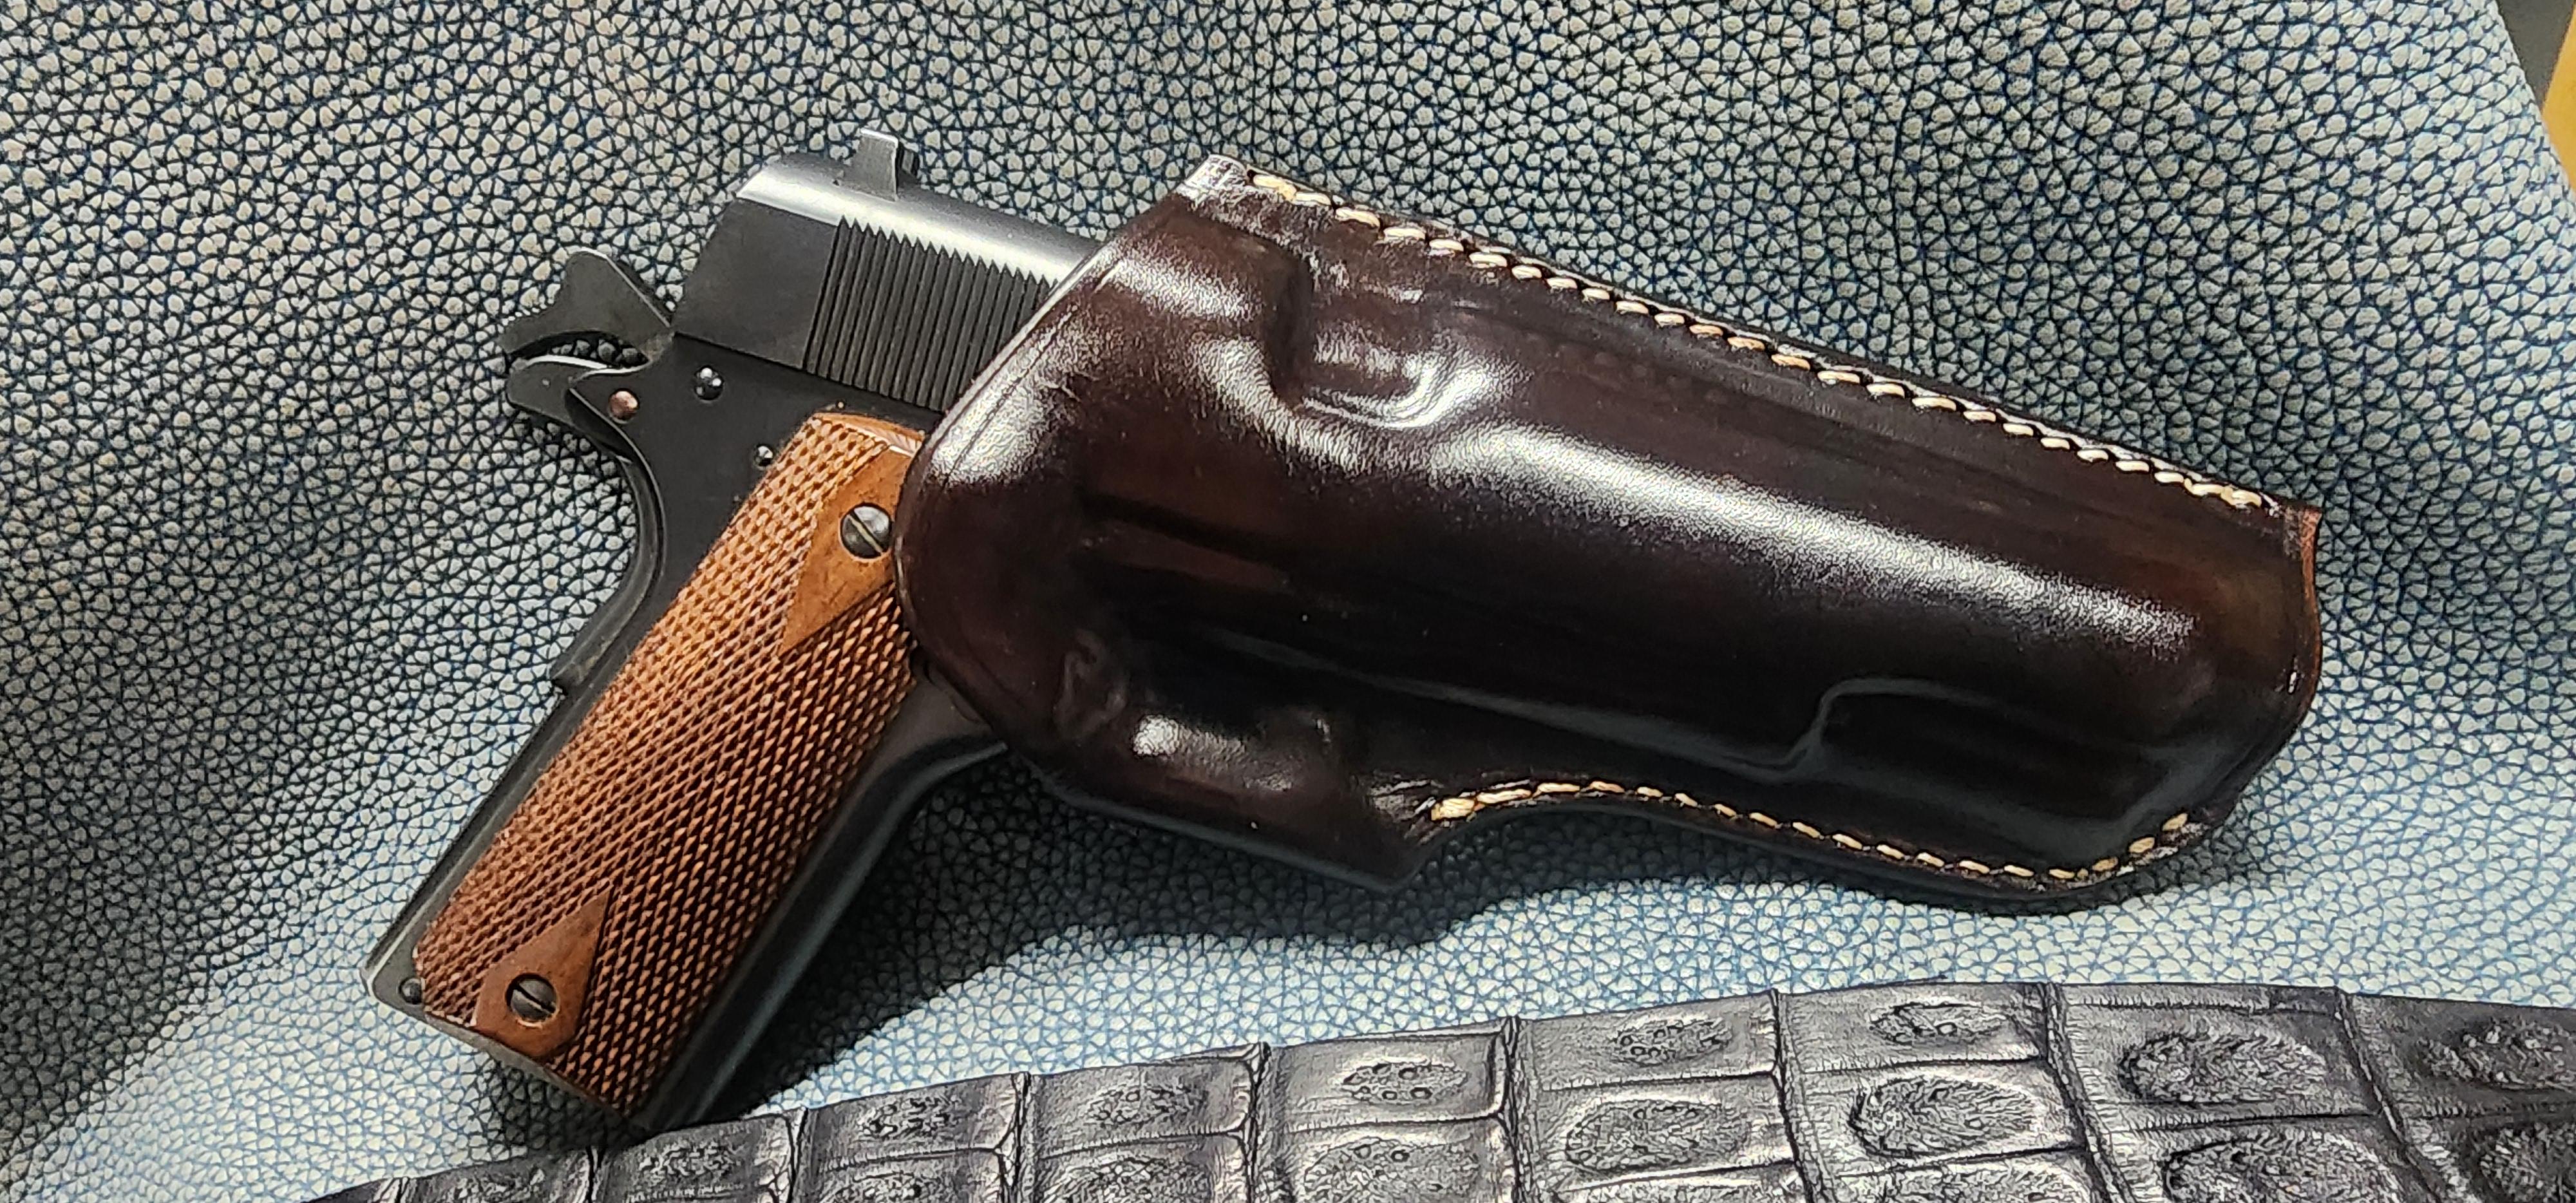
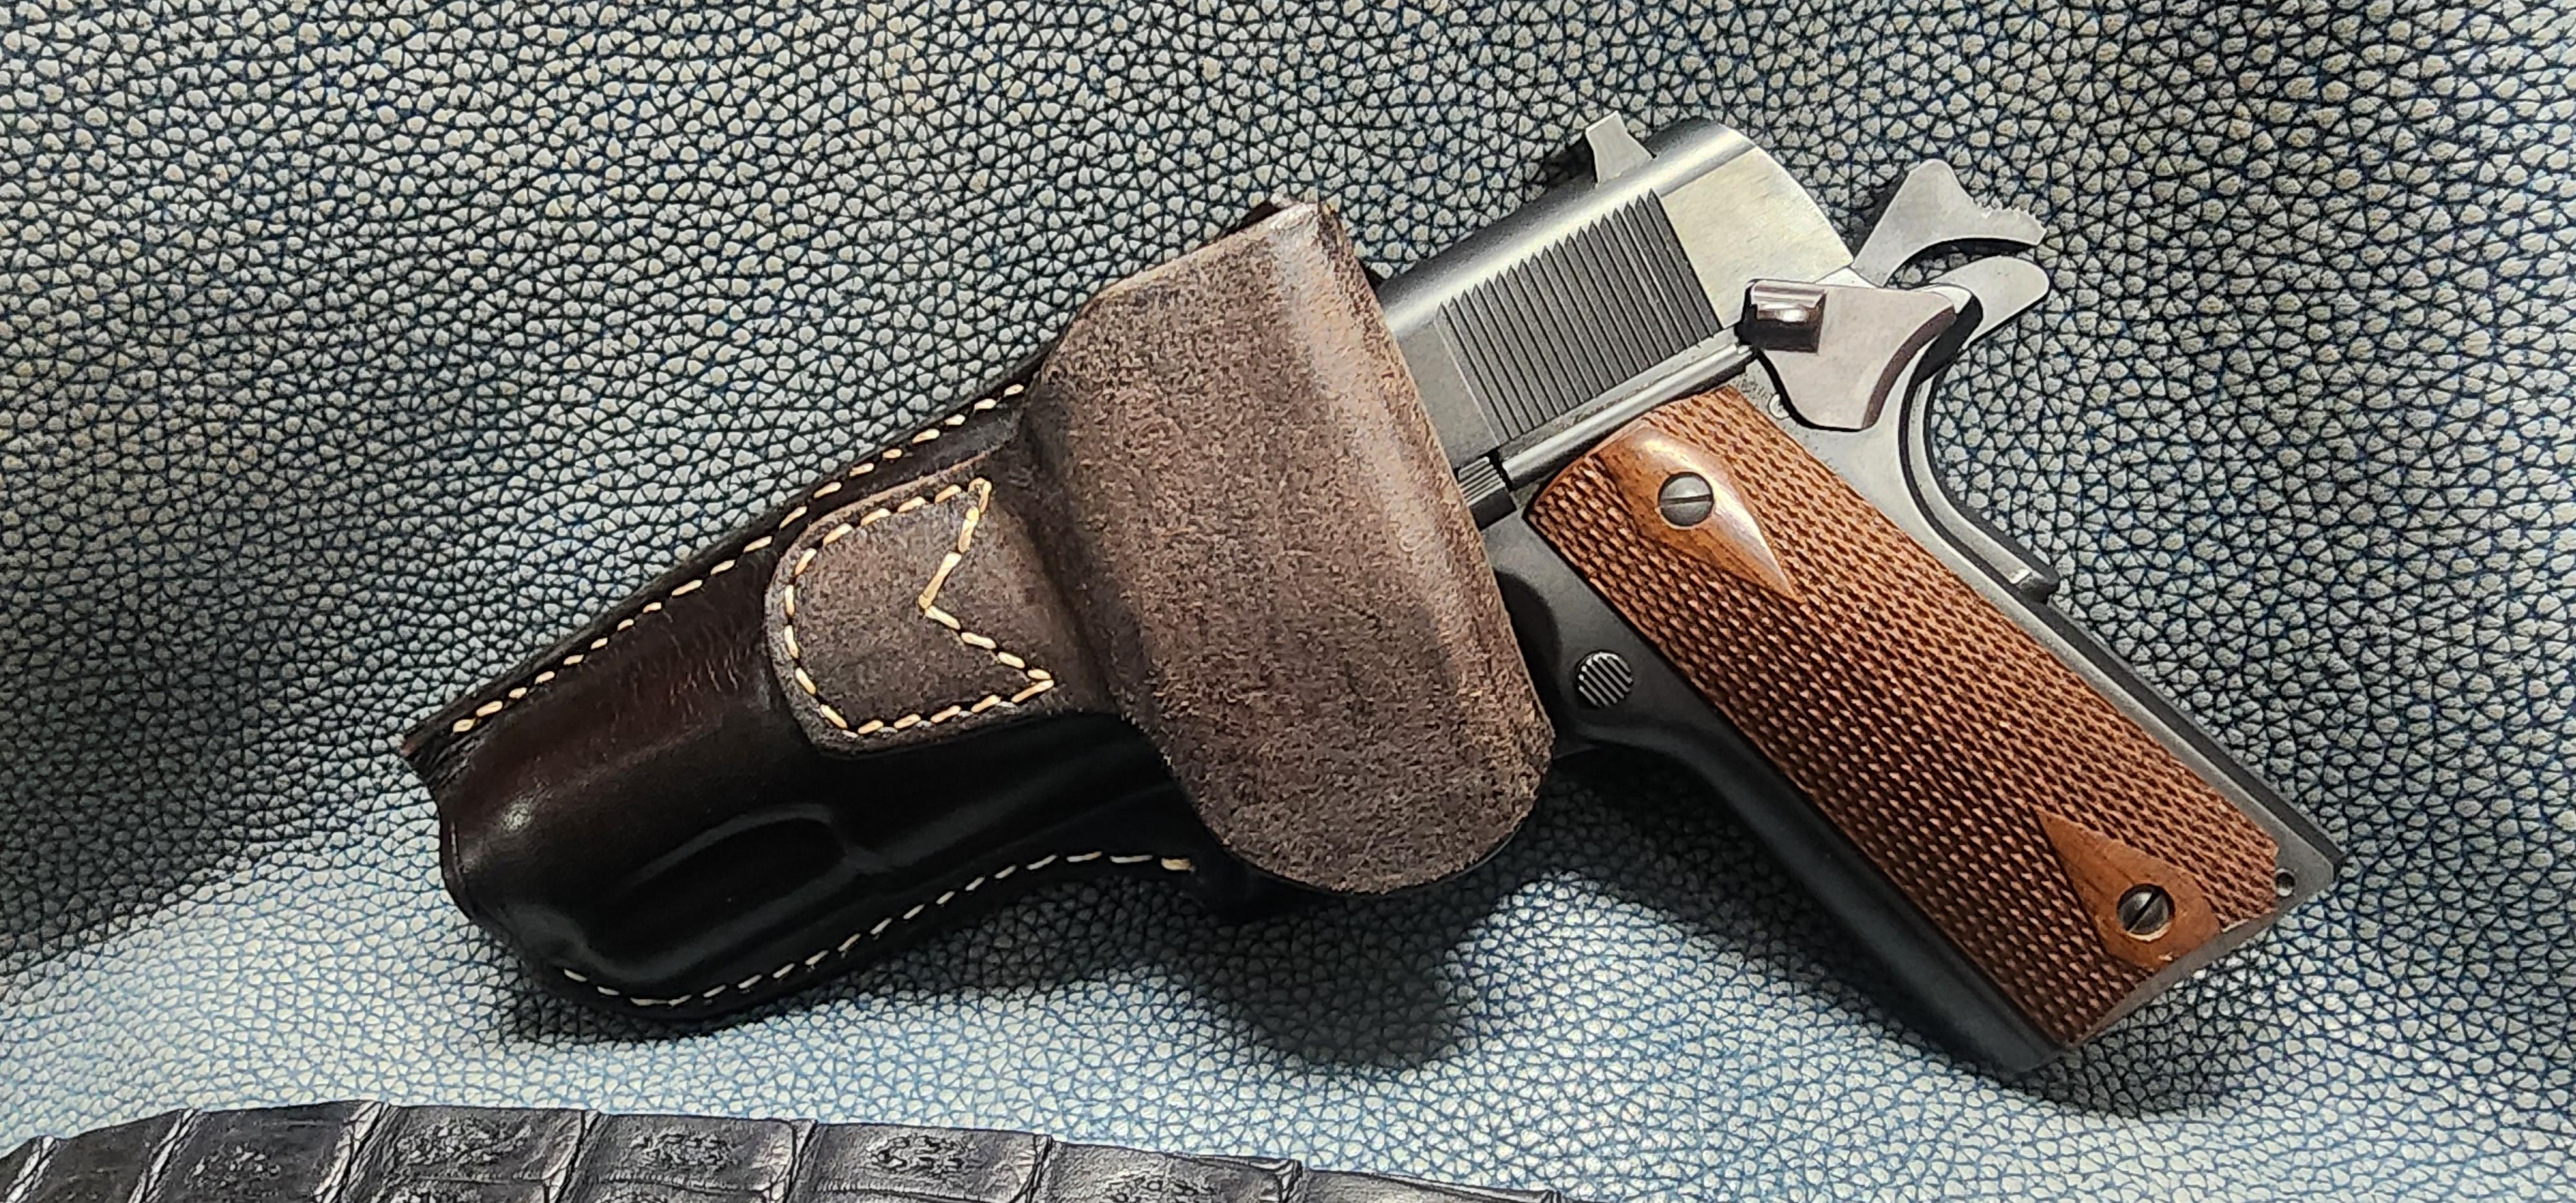
I like how this came out. Simple design but kind of unique. 1911 rhodesian holster in show brown. This leather is heavier than i like at about 9 oz. But it still works.
-
No offense taken. This job requires a sense of humor and I love working outdoors, except during a heat dome or polar vortex.
-
 Are you thinning your pro dye 50/50 or using it straight up out of the bottle. Also instead of hanging your project, try laying it flat on some cardboard. Also when you dip dye it takes a good 24hr or longer to fully dry.
 -
Beiler's Manufacturing sells line 24 snaps in 1/4" and 5/16" lengths. Can cheat a little and bevel/skive around the hole to recess the base of the snap.
-
 Jeff Mosby joined the community
 -
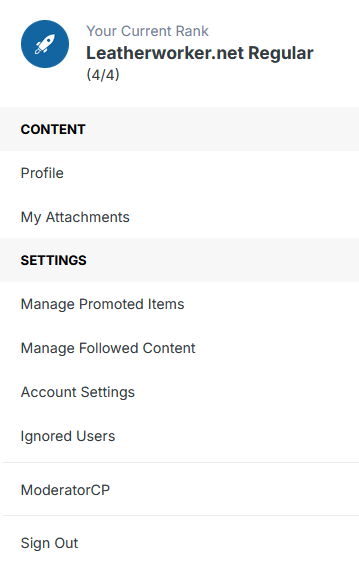
Might be tricky to get good results with aluminum rivets using a manual rivet setter(?). I have replaced solid aluminum rivets that secure the billets to the tree of a dressage saddle using a domed rivet setter like the one shown below. It fits in an air hammer and is handy for directing the peening blows straight on the axis of the rivet. I set 3/16" solid aluminum rivets with a washer/burr using this setup and it was fairly foolproof. Need to support the back face of the rivet with a bucking bar or small anvil/dolly. McMaster-Carr sells a variety of aluminum rivets and setters. PS For halter buckles, I would sew them on. Rivets can pull out.
-
Have you thought of using Chicago screws as you can get them in various sizes (diameter and length). Like @fredk I would be more concerned with using AL but then again I have had Copper rivets turn green. kgg
-
Can't help re strength but aluminium corrodes quickly in damp/wet environments and leaves a blue stain on the leather
-
There's a twelve step program for holsters. Step 12 is your twelfth holster. Then you start over.
- Yesterday
-
Has anyone used aluminum rivet and burrs? I was in Tandy this weekend and saw some for sale, it got me wondering about their strength and durability. They were marketed as decorative which is what sparked the question. I really like using copper rivets they are pretty strong and give a nice look; however when used with stainless hardware it clashes. Aluminum would solve this problem. I know aluminum is a reasonably strong metal so I think they would be fine but anyone with experience using them that has any input would be appreciated. If it helps my intended application for these would be for attaching buckles onto horse headstall or show cattle halters. Thank you for any help.
-
 When we dip leather into a pot of Fiebings dye (light Brown or Saddle Tan ) for 3 to 4 seconds and hang to dry it comes out very dark brown or almost black. Does anyone have an idea of the problem?
 -
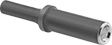
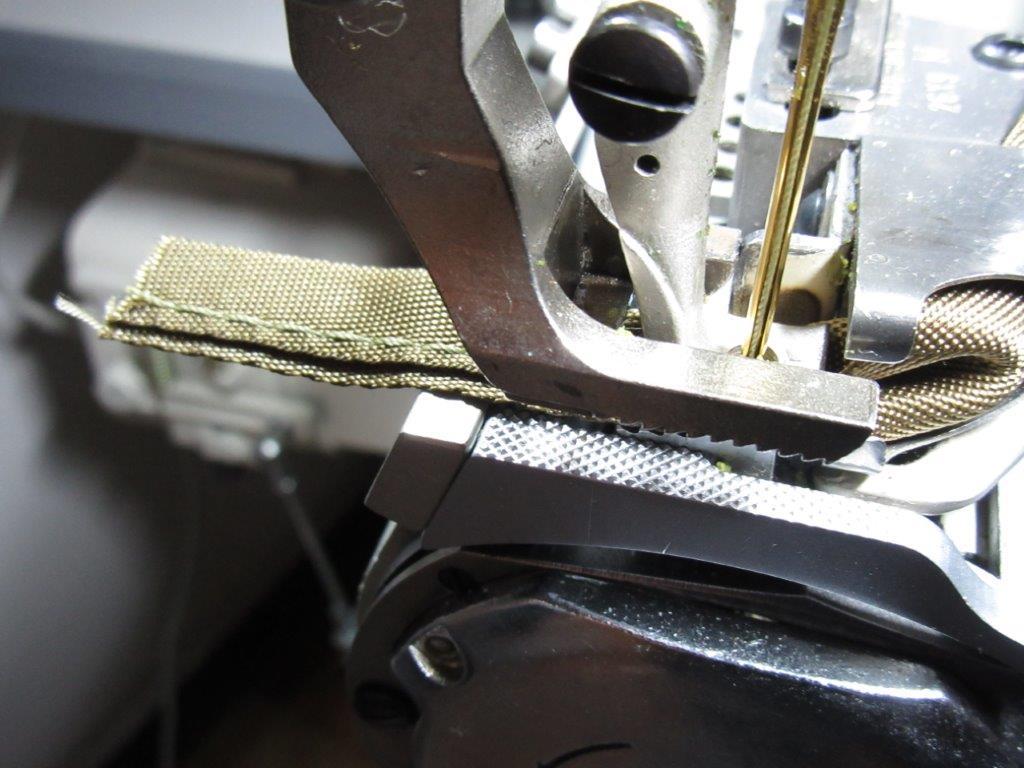
This is just suggestion, and everybody different in their setups and their techniques. This just my technique that been using for long time setting up and binding. and just my opinio for your binding using Cylinder Bed and compound feed, with syncro-move with your feed movement. Don't be intimidated by cutting and shaping both Inner and Outer Feet to make things work , Also Cut/trim that push-stop plate that leads out from the binder throat that you pushing your material up against on the Feed. Your length of that push-plate really does not have to be run out past the needle plunge to do it job with you pushing material against it. Leaving it long, is just working against you on your final results . Also, Your outer-press foot . Your inner R-side toe. ( me ) I like to 'leave it there' . but trim it off and shape it . Your outer L-side toe, just leave or trim to suit the need. Rather than just using only the L-side toe and foot-Heel . Keeping a little of that R-side foot ( even small ) is to your advantage in press/hold down and feed of binding and material. Very Rarely do I ever keep the outer press-Foot that is sold to me with binder kit. I end-up making my own off generic stock Press Foot. And, your inner Foot. I like to trim/shorten and shape the toe of it also . Needs to end-up as tight as possible, and trimming the inner foot and shaping toe let's the binder in more tighter/closer . Also when your holding and feeding your material into the binder and sewing with cylinder bed, make habit of, Don't let it sag lower than the binder. I like to hold and feed material into, on a little higher angle than a flat level feed to binder. Surprising how even angle of material feed can change the binding tracking on the cylinder bed. -- Not same cylinder bed machine as yours, but here in this Pic. this just my technique . In the Pic. The needle is just coming 'out' of it's plunge and just on the rise. Where everything is at it's tightest in it's syncro-feed movement . You can see where the outer press-foot R-toe just shy of touching/meeting the Press-plate tip/ending. With the press-plate length cut just a tad past the needle . Binding system, all has to end-up tight and smooth, movement back and forth. - - -
-
I've gone through this recently with raw edge 90* binders and it wasn't long before I realized the above to be all correct and very important. Also, practice (PRACTICE? we talkin' bout PRACTICE!?!) how you are feeding the material into the binder. I went through a lot of tape, material, and time before I figured things out. I worked with a few different over the counter binders and ended up modifying my binding foot, throat plate, AND binder brackets to get my desired results. Now it works every time on smaller radius curves. This is with a synchronized Juki 246 cylinder arm.
-
Before you know it, youll be on you 10th attempt and still going till it becomes a fever. I think I have about 20 holsters laying around my house. I guess its obvious why Im single?
-
I'd say you were right about the tension, the holster is 10 oz with an additional 2 oz liner. But the loop is just 10 oz, so it may be that very slight different causing the issue occasionally. I'll have to double check that before I go for the second attempt.
-
 This is the penultimate report on Test Pieces Group 1 This Group has mainly been kept in a south facing car windshield. During the test time each piece was re-oiled once #1. Baby Oil; Flex - the same as Control #1, Smell - Slight smell of leather, Colour - Dark Brown, darker on front than rear, No fungus or rot #2. Cooking oil (rape seed oil); Flex - the same as Control #1, Smell - Slight smell of cooking oil, Colour - Dark Brown, same on front and rear, No fungus or rot #3. Lard (pork fats); Flex - about the same as Control #1, maybe slightly better, Smell - No smell, Colour - Light Tan, Same on front and rear, No fungus or rot #4. NFO Compound; Flex - about the same as Control #1, Smell - Very slight smell of leather, Colour - Dark Tan, Same on front and rear, No fungus or rot #5. Olive Oil (extra virgin / pure); Flex - about the same as Control #1, Smell - Very slight smell of leather, Colour - Dark Tan, Same on front and rear, No fungus or rot #6. 3-in-1 oil (contains benzine); Flex - slightly stiffer than Control #1, Smell - Very slight smell oil, Colour - Dark Tan, Same on front and rear, No fungus or rot #7. Vaseline (petroleum based); Flex - stiffer than Control #1, Smell - No smell, Colour - Nearly the same as Control, (which is like slightly darkened raw leather), Same on front and rear, No fungus or rot I'll try to do a report on Group 2, the pieces hanging outside This will be the penultimate report on that group as well as I'm thinking of ending this at the end of September or so 2 years, and we / I have discovered that a lot of these products can be used on leather without harm, all they may do is darken undyed leather
 -
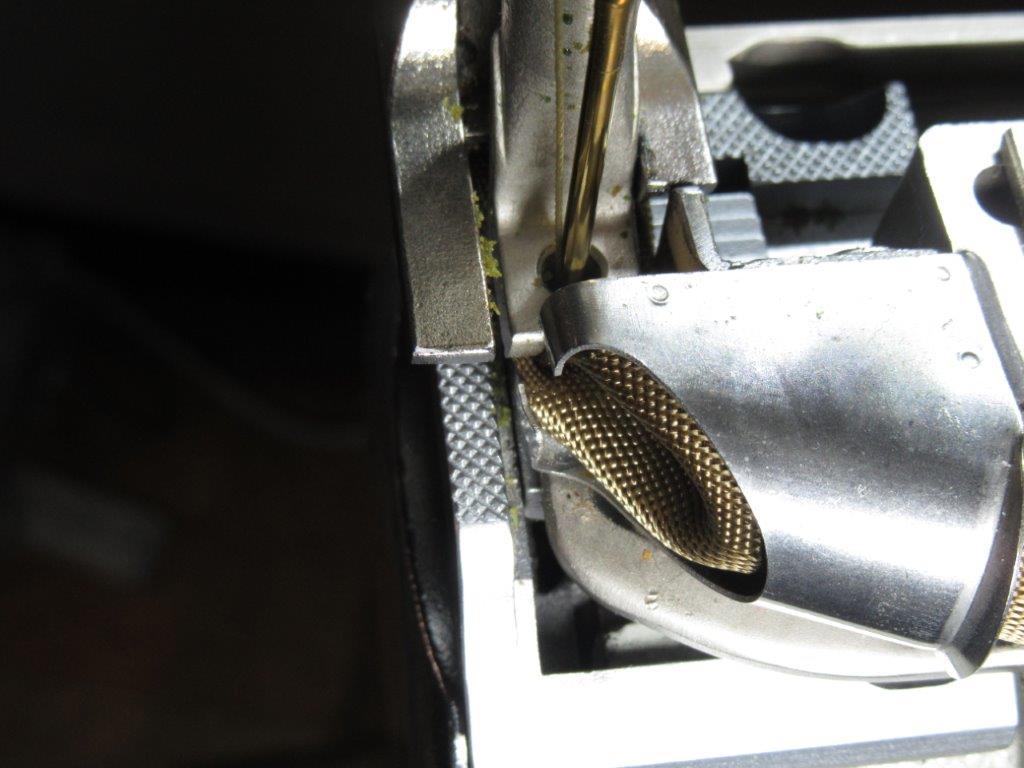
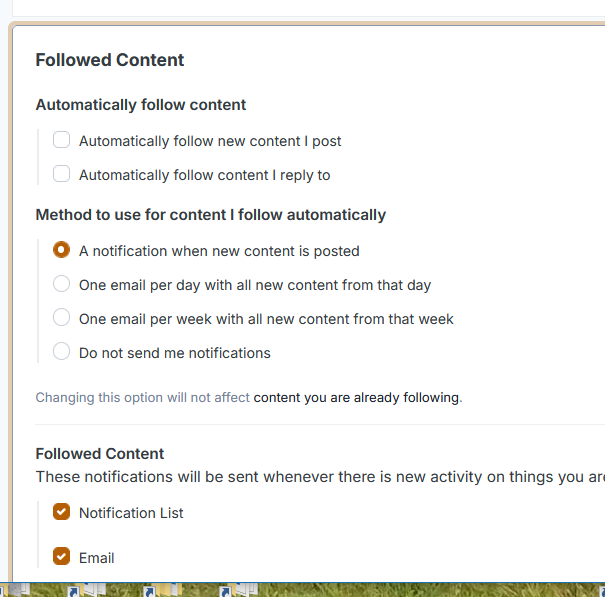
.thumb.jpg.6e903dd66163ad5672f00f144058c571.jpg) You'll get a notice via email if you have setup your notification options. Pick your username in the upper right corner From the popup box, pick account settings Click Notification Settings
You'll get a notice via email if you have setup your notification options. Pick your username in the upper right corner From the popup box, pick account settings Click Notification Settings

-
Well, that worked ! Thanks @CowboyBob He stitches now 🤩, just to have to regulate the tension now. Thanks for your help.
-
 Sorry, and thank you very much for doing this, I presume if I get a response I will see via email? Zoe
 -
Groove is facing left 😬 ... changing that right now ! No manual ... was rather hoping someone on here might have one 🙏🙏
-
OK, Im stumped. Need a snap or sam brown stud for a 16 oz. piece of saddle leather. Cant find anything longer than 3/8". Line 24's are way too short. Using it for a clients double headed axe sheath. Sheath is all 16 oz. Thoughts?
-
 MarineBozo joined the community
 -
Sorry for my part. I had my jackass pants on that day. Jim
-
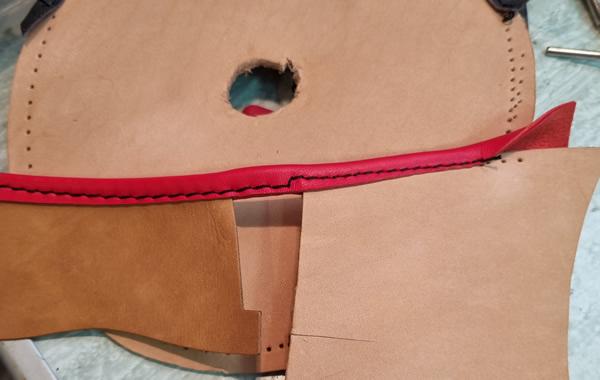
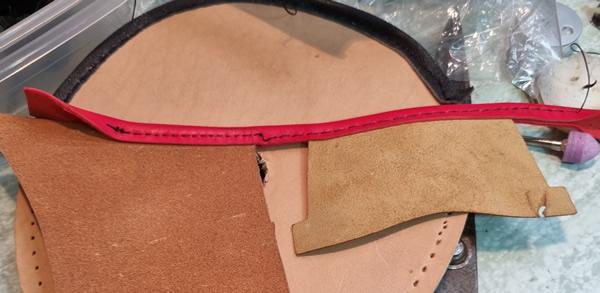
"made by sum yung gui hung lo". Made I larf that did. If I'd said it Tom would've told me off. (Just kidding Tom.) I've drooled over such set ups on YouTube Wiz. Don't get me wrong Wiz, I'm not shy when it comes to spending money when it's right and if I had such contracts I would do the same. I've no doubt that eventually I'll end up with something decent and by the time I've learned what I need to know and enjoyed playing I'll be able to do it with a flourish. Here's todays effort. The red is just over 1mm, the veg tan is 2.5 and 1mm. The red is 18mm
-
I spent good money on a binding setup for my Adler 69 and got nowhere with it, probably my fault but there you are. I bought one folder from JL but it's too small. Maybe it'll come good later. Don't give up.