

All Activity
- Today
-

Internship and maybe a new start
Handstitched replied to Tove09Tilda's topic in All About Us and Off Topic
@Tove09Tilda I really hope everything goes really for you 🙏 A former flame of mine is a scientist, her office was adorned with degrees of all kinds in science , she spent many years at uni, she did do some science based jobs in labs etc, but they didn't last long, some of the jobs she ended up doing were food tasting demos in supermarkets , , when we first met, she worked at fast food takeaway joint, go figure ? HS -
Internship and maybe a new start
Handstitched replied to Tove09Tilda's topic in All About Us and Off Topic
Forgive me if this sounds like a "what do you want to be when you grow up " question, but i wanted to be a farmer, that was until i went an open day at an agricultural college in my younger days , not far from where i live, a few farmers gave a demonstration on how lambs tails are removed, it made me feel ill 😢. Oh well, bang goes that idea. But in hindsight, I'm glad I didn't continue that idea as it's an incredibly tough and frustrating job and often with little and sometimes no return. Many assorted jobs later, out of the blue, I tried my hand at leather work, and enjoyed it, now 20 years later , I still do 😀 HS -

Dye woes
1961Mike replied to Yellowhousejake's topic in Gun Holsters, Rifle Slings and Knife Sheathes
Hi, for the color you showed above, the easiest way to get that saddle tan color is to carve the leather, but don't glue it up or sew it. Put a couple of coats of EVOO (extra virgin olive oil) on the holster and put in your dashboard in the sun. When it's dark enough, finish with Tan or Bag kote and then Resolene. Later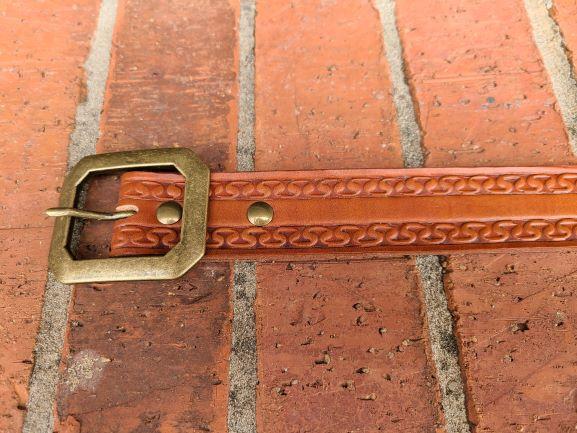
-
Hi I've HEARD of this being done, but haven't needed to try it yet. You can glue and / or sew a strip of leather, roughly the height of the sight, for the sight to ride up and down the holster when drawing and re-holstering. One strip on each side of the barrel. again, HEARD of it. it would be worth a try though, use scrap leather for the first try. Later
-
Olive Oil is what the Cowboy Action leather workers recommend. The leather will almost always turn grey when you dye it, let the leather dry all of the way before you put the olive oil on it. I use the following procedure for making black belts and probably holsters: 1. Tool the belt and let it dry fully, or at least draw the guide lines and tool the belt after dying. 2. Put the belt in the Black Tea Tannin Solution for 2 minutes. 3. Put the belt in the Vinegaroon for 6 minutes. 4. Put the belt in the Baking Soda solution until it quits bubbling. This shows that the vinegar has been neutralized. 6 minutes also works well. 5. Rinse with Cold water. 6. Let the belt dry flat, this takes at least 3 days. 7. Coat the front and back of the belt with Extra Virgin Olive Oil (from Extra Ugly Olives) or Neatsfoot Oil, and let dry. 8. Put on a second coat of EVOO and let dry. 9. Use a couple of coats of Tankote (shiny) or Bagkote (less shiny) on the fur side of the leather. 10. Use multiple coats of Gum Tragacanth on the flesh side of the leather, smooth it with a glass deal and let try. 11. To get Really Shiny finish on the fur side of the leather, use Gum Tragacanth on that side too. Let it get mostly dry and them buff it out. 12. Mix Resolene half and half with distilled water and put on several coats.
- Yesterday
-
 My thought was that it would help keep the veg tan a little more pliable. (I have NFO and saddle soap though) Usually I stiffen leather, and use 6-8oz instead of 3-4oz, so this is just the opposite end of the spectrum for me to learn. — AZR
 -
 Put a coat of 50/50 Resolene and water on that inside . . . then take a glass slicker while it is still wet . . . slick the fibers down real good . . . let it dry for about 1/2 hour . . . then apply another thin coat . . You'll be good to go May God bless, Dwight
 -
What would be the purpose of the conditioner??? Resolene pretty much seals up the leather . . . I've never put on 4 or 5 coats . . . but I'd come close to betting that it would be water proof by then. May God bless, Dwight
-
Finishing Coat
Dwight replied to Cactusman's topic in Dyes, Antiques, Stains, Glues, Waxes, Finishes and Conditioners.
I have never used Pro Resist . . . so I cannot tell you what will happen. All the purses I have ever done either get ONLY an oiled finish . . . or I give them a coat of Resolene . . . 50 / 50 diluted with water. I do that inside and out . . . unless there is some kind of liner inside. My buddy at Tandy said the rub off is probably from the antiquing . . . so you would have to cover the antiquing with either another coat of Pro Resist . . . or Resolene. I've never had any rub off after the Resolene treatment . . . and no dye separation when it gets wet. Find a piece of scrap . . . re-do it to match what your project has done on it . . . then mess with the Resolene or Pro Resist. That's what I would do. May God bless, Dwight -
 Aussie's is mainly petroleum jelly. It could make the flesh side sticky.
 -
Neatsfoot oil before the vinegaroon gives a matte deep black color. It can be used after as well and sometimes turns grey vinegaroon dyed leather black. . If the leather goes grey, it is either because there is insufficient iron acetate or because more tannins are needed. This is what I do. In case of the former, add some more steel wool to the vinegaroon and keep aside a day or two and try again or make a fresh batch of vinegaroon. If the latter, dip in strong black tea for a few minutes and rinse well to get rid of all the loose tea and then try with vinegaroon. In all cases, I rinse the dyed leather well after the vinegaroon and then allow it to dry. The neatsfoot oil first, prevents it from going stiff. The water rinse removes extra vinegaroon which can leave a vinegary smell. The water also balances the pH. All my Vinegaroon dyed pieces are a deep black and not dry or stiff.
-
Vinegaroon made my leather super-stiff (almost unworkable) and gray also. I gave it a coat of mineral oil, because hey, worst case it’s still learning curve, but the oil caused the black to return, and softened it enough that I could use it. For period-correct, maybe NFO or olive oil? — AZR
-
If the flesh side isn’t sealed, can it be oiled/conditioned from there? — AZR
-
Having any issues with the interior? In the process of assembling a purse myself, but I made the dummy move of using water-based dye. I sealed the exterior with Pro Resist, but now I’m paranoid about bleed/stain on the inside (let’s say it got wet or something…). Before I stitch the panels together, is there anything I should do to seal the inside, or do I even need to worry about it? — AZR
-
In the woodworking world, they make a tool called a butt gauge, which you could come in from the side, probably 4 or 5 inches, and a small, custom-ground blade could be easily fitted in that cross beam, set to the depth, and cut away. That would be a simple tool to make.
-
Dwight, since you seem to know what you’re doing, I made the dummy move of using Fiebing’s regular dye instead of the pro dye for a purse, and I’m paranoid about rub off because of my mistake. Aside from a final coat of Pro Resist, is there something I can do to avoid the rub off? Also, because I went to the extra step of dying the interior/flesh side, what can I do to seal it? (Primarily concerned if it got wet…) — AZR
-
Thank you, Fred. Now that I realize that I didn’t even ask my initial question, will NFO penetrate Pro Resist? And follow-up, does saddle soap still clean/condition in spite of the resist? TIA, — AZR
-
I use that same method, I keep some scrap around and make a piece the same thickness I am going to sew then sew a line of stitches on it. Does two things, makes sure everything is running right and it gives me a way to measure 3 stitches. I use my wing dividers set them in the holes and make a mark 3 stitches in on the project and start there and sew back to the start point then forward over the 3 stitches and on down the project. Todd
-
Okay so this thread is so far dead that it’s fossilized, but I’m gonna dig it up again and hope for more insight… So I am actively in the step of finishing the panels for a purse, so I’ll give the process I just used. Full disclosure: just as my handle suggests, I don’t necessarily know what I’m doing aside from following tips from others… 1) I clean/wash the panels with warm water and Dawn dish soap, and rinse well. The intended purpose is to draw out the oils to the surface and wash off. 2) Once dry to touch, I gave a relatively light coat of NFO to replace the oils I removed, and let it sit overnight to even out in the fibers. 3) Cased the leather with water and let sit overnight. 4) Scribed in my stitch lines and pricked out (not punched) where the stitches would lie. 5) “re-cased” the panels with a spray bottle of water until the absorption slowed, and let sit for a few minutes until it looked kinda dry and was cool to touch, and tooled the panels. Sprayed again as needed, but only minimal. Once finished, I let it sit overnight. 6) Dye process. I’ll leave the method I used out because it was experimental for a sunburst effect (not what happened). But, after dying, I buff off the excess dye sitting on the surface, and let sit overnight to fully absorb and even out. 7) Gave it a light coat of Fiebing’s Pro Resist, mixed about 50/50 with water, and quickly wiped off (just to seal surface, not depressions). 😎 Applied a heavy coat of Fiebing’s antique paste (I use my finger so I can really work it down into the depressions), lightly buffing the excess off when I was done. 9) Let dry for half an hour or so, and buffed on my wheel to a nice sheen. This brings us up to now. The edges of one panel don’t feel quite dry enough for my liking, so I’m killing time with dishes, giving my pup some loving, and writing this post. Once I’m happy with the edges feeling dry, I’m going to give another coat maybe 2 of the 50/50 Pro Resist, buff out, and finally punch my stitch line to assemble, burnish the edges with gum trag and/or spit, and finish. Once again, I don’t really know what I’m doing, it just seems to work for me. Still feels like my first rodeo, — AZR
-
 Leeds joined the community
 -
I recently discovered these semi-circular LED light units on TEMU, I bought one at £7 but the price is variable up to about £12 I thought they'd be good for photo lighting or spray booth lighting
-
I think it needs a good cleaning, with saddle soap, first of all The dark stains look like mould on the surface, not deep in the leather. If the saddle soap doesn't remove them try a very weak diluted bleach wash
-
Great work!!
-
 Roger M joined the community
 -
Nice work. Great setup. Yeah I made the mistake of air brushing a couple projects in the house. Fiebings pro dye bout gassed me out.
-
Looks great! Keep up the good work.
- Last week
-
This is a followup to my topic "Airbrushing" for dying leather with a short video of my setup at the end of this long post. The video was done setup on my deep-freezer just for ease. Airbrushing has a natural pocket emptying progression just like sewing machines. Get a Airbrush and a Compressor it'll be easy but what about where to actually do the airbrushing??? The great outdoors when it's + 30 C or - 30 C or the comfort of your leather room, basement, etc. That leads to dealing with any unwanted fumes contaminating the area or dealing with possible over-spray landing on other projects / tools / leather. My solution was to build a fairly inexpensive spray booth and indoor filtration system for indoor use. I didn't want to cut a hole through the side of the house and deal with spray staining the siding or poke a hose out a window particularly in the winter. To that end I decided to use: 1) A clear 102 litre (27 US gallons) plastic tote for a couple of reasons. i) Lighting: Allows room light inside the tote ii) Interior Surface: All totes are not equal the one I choose has a real slippery surface and even a permanent maker will not mark it unlike other clear or colored totes. iii) Size: 102 litre (27 US gallons) iv) Price: $20 CAD 2) Exhausting: i) The interior lighting via a 12v DC LED at a 45 degree angle. ii) The interior of the tote by using two 140mm 12v DC computer fans that suck at 1.8m/s each (measured with air gauge), are almost silent and will empty the interior air space of the tote in 1.7 seconds with 1.8m/s at the exhaust vent of the bucket. iii) I connected two 5" x 8' flexible ducts to the fans. iv) Price: $40 CAD as the LED and fans were left over parts from other projects. 3) Filtration: i) one 5 US gallon bucket and cover. ii) Window Air Conditioner fabric, HEPA filter, iii) Price: $12 CAD 4) Power: i) 120v AC - 12 DC, 150 w Power Supply ii) 120v AC Power Bar to supply spray booth fans, light and airbrush compressor iii) Price: $35 CAD 5) Miscellaneous items i) 3mm nut /bolts / washers ii) 3D printed housings for Fans, Duct Connections to Fan Housings, 5 gallon Filtration Bucket, Power Supply, Airbrush Holder, Rotating Platter Support and LED supports iii) The Rotating Platter was a 5 gallon bucket lid with a 1/4" bolt and some cardboard iv) Price: $20 CAD Total Cost: $127 CAD Now you got to remember that I am an cheap old geezer and depending on what you have kicking around your costs / results may vary. All comments appreciated but be gentle as I am not comfortable with video's. kgg


