JLSleather
-
Posts
7,378 -
Joined
Content Type
Profiles
Forums
Events
Blogs
Gallery
Everything posted by JLSleather
-
71, 179 members, and nobody? Okay..
-

Inline Cowboy presser feet on Cowboy CB4500
JLSleather replied to Wizcrafts's topic in Leather Sewing Machines
Oh, yeah --- prob'ly was intended for use with raised plate (holster / stirrup). Thanks. -
Inline Cowboy presser feet on Cowboy CB4500
JLSleather replied to Wizcrafts's topic in Leather Sewing Machines
I mean this ↑ Requiring adjustment of the bar. Maybe they originally designed for some other setup? -
Inline Cowboy presser feet on Cowboy CB4500
JLSleather replied to Wizcrafts's topic in Leather Sewing Machines
My [obvious] question is; Why are they made short (requiring adjustment of position from other feet)? -
Okay what the what .... got someone wants this design, and I know I've seen it before. Anybody know where? Book? Doodle page? Craftaid template?
-
Inline Cowboy presser feet on Cowboy CB4500
JLSleather replied to Wizcrafts's topic in Leather Sewing Machines
I have got to stop reading these posts. Now there's another thing I want even though I don't really need it -
Hydraulic shop press as a clicker press for cutting dies
JLSleather replied to Anubis78's topic in Leather Machinery
Well, there's the thing.. a shop press travels slowly enough you'd have to be trying pretty hard to "bottom out" with it. Still, it's a decent compromise even though slow. Still much faster than cutting everything with a knife, and far cheaper than a swing arm, so ... I don't have any "stops" on mine, nor do I have any issue with warping or burying dies .. I do replace a cutting surface occasionally, but you'll have that regardless. Harbor Freight has these currently for $150 (20 ton) - in my email this morning. Also a $54 drill press ... -
Social poo 'n' stuff
JLSleather replied to JLSleather's topic in Gun Holsters, Rifle Slings and Knife Sheathes
No idea what you just said Anyway, I had AutoCad (at home) due to the old "job" -- allowed me to purchase the full version at an insane discount. When that finally expired .. well - you've seen teh sticker price there. I did try draftsight, but found it a bit quirky. Maybe the paid version is better? Currently using a combination of this 'n' that, but always looking for new options. Actually what I miss is -- dimensions in inches. I mean, you certainly can offset that curve by 'this many' pixels, but it tends to take some of the fun out of drawing! One guy on the forum once commented that he just scans the gun, and there you have it. When I asked how to do that, the answer was quite short Graph paper works great -- in the end, that's doing much of the work. Got real used to 1/4" grids. Wife really messed me up a bit .. she picked up more - only she got some with .200" squares... surprising how that can throw you off Hence the reason for the scale in my pictures! Far as free, though.. PrimoPDF seems to work pretty well. I used Acrobat Pro for way too long, but haven't been able to get myself to go 'subscription'. Only thing I can't do with the free one is combine pdf's or annotate, which these days I don't need anyway. But then, the whole point of this "show off" thread was displaying my graphic skills -
Hydraulic shop press as a clicker press for cutting dies
JLSleather replied to Anubis78's topic in Leather Machinery
tad less, yeah? just enough to set the die barely a smidge into the cutting board. If you use a bolt, say like a 16 thread pitch, then maybe make a mark on the bolt head with some nail polish, then you know that each full turn of the bolt will run it 1/16" deeper .. easy math ... -
Hydraulic shop press as a clicker press for cutting dies
JLSleather replied to Anubis78's topic in Leather Machinery
Yup... machinist jack would work. Or, just weld a nut on teh press lower section and put a bolt in it... -
Social poo 'n' stuff
JLSleather replied to JLSleather's topic in Gun Holsters, Rifle Slings and Knife Sheathes
Yeah, tha's what I'm talking about right there. HEY .. did you get the Sig yet? Are we there yet? Are we there yet? Are we there yet? Are we there yet? Are we there yet? -
Social poo 'n' stuff
JLSleather replied to JLSleather's topic in Gun Holsters, Rifle Slings and Knife Sheathes
Correct all around. If you've seen my chicken-scratch video on airbrush poo, this is a Glock 43 holster with no lining and no "panel".. so you can tell about how high the front "pooches" with a slimline 9mm Impatient folks fast forward to about th 20 second mark ... And 80/20 is about what I 'figger', if you can call it 'figgerin'. See, now this is interesting. Programs? I'm not spending the money they want for AutoCad... but I do know some CAD.. if you know something that works, maybe we can swap notes? -
Social poo 'n' stuff
JLSleather replied to JLSleather's topic in Gun Holsters, Rifle Slings and Knife Sheathes
I haven't paid any attention at all to 'kits' in forever - maybe should check that out quick. Really is simple idea. Carry for self- or home-defense is harder if the gun don't come out -
First (posted) Project
JLSleather replied to mikesherman's topic in Gun Holsters, Rifle Slings and Knife Sheathes
Well, I can certainly say I've created more rejects than you. Wait... I mean....uhhhh... As a rule, leather should be done - start to finish - without wetting and re-wetting. But in the case you have here, I would think you're fine, since you don't need to "go back over" where you've been. Still, I would recommend doing your stamping with the moisture you need for proper stamping, and then go on form it -- without allowing it to dry out again and then wetting again. For this type of rig, the moisture in the leather for stamping is enough to do the forming also. Maybe take 3-4 short bits of thread, and tie it shut (through a few of the holes) overnight and let it dry that way. Then just put on a finish (if you are going to) tomorrow. Lookin good so far! -
Hydraulic shop press as a clicker press for cutting dies
JLSleather replied to Anubis78's topic in Leather Machinery
Yeah, the time saving goes up the more detailed the piece. For small dies, say less that 12" across, I don't think die life would be affected (mine works fine). Congratulations - maybe Soon as you open a "shop", you'll be assailed by people wanting to sell you everything from sharpening stones to lawn care -
Social poo 'n' stuff
JLSleather replied to JLSleather's topic in Gun Holsters, Rifle Slings and Knife Sheathes
Tough to get that shot.. have to alter the set up a bit maybe for the new camera area. Maybe can tell something from this... Glock 19 / shark -
Social poo 'n' stuff
JLSleather replied to JLSleather's topic in Gun Holsters, Rifle Slings and Knife Sheathes
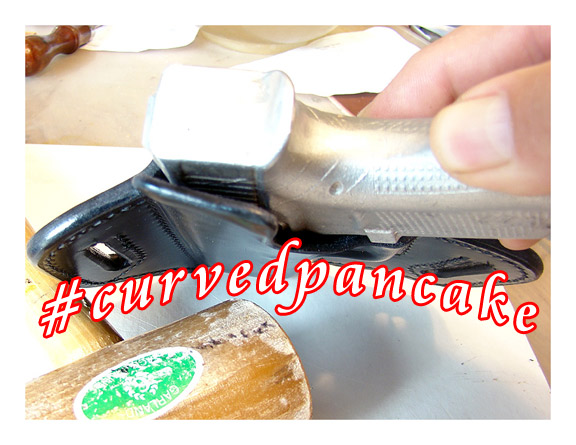
Yeah, that. Leave some room right here → ← for those about to rant that their '50/50' pancakes don't bind by nature Glad I could help -- idea is to get a fella jump in the water.. and presumably he find his own preference 'n' style. Folks must be using it.. got another email the other day.. about bandwidth usage and how to upgrade service so it doesn't 'crash' again -
Yeah, it'll be fine.. works out one way or another. Would have been simpler if Tippman just state what they want for shipping, but Had they done that, they might have sold a couple dies, too...
-
Social poo 'n' stuff
JLSleather replied to JLSleather's topic in Gun Holsters, Rifle Slings and Knife Sheathes
I'd be willin' to chip in on some of that dust if'n ya kin find some That could come in handy in a number of places! But yeah -- the outside is made longer than the inside. How much depends on the model of the gun, and maybe even a little on the size of the wearer (if they're very slim or very large). Seems like usually about a inch (ish). I got a pattern layin' here for a LCP.. got about 5/8" difference between front and back. -
Well that certainly didn't pan out. Some guy say the other guy call me after lunch Never did get a call. Ordered something from somebody.. don't even remmebr now, but I guess I'll see it when it gets here.
-
Hydraulic shop press as a clicker press for cutting dies
JLSleather replied to Anubis78's topic in Leather Machinery
While yer at HF, pick up teh $29 sawzall and a $3 metal cutting blade... take that "bump" off the top "ram" right quick. -
Hippie/Retro purse
JLSleather replied to ETW Grumpy's topic in Purses, Wallets, Belts and Miscellaneous Pocket Items
They sell 'em at Tandy. Maybe just go take a look? -
Social poo 'n' stuff
JLSleather replied to JLSleather's topic in Gun Holsters, Rifle Slings and Knife Sheathes
Well, I do my own patterns, so I just kinda "do it".. not really making one from the other. I know it's "enuf" because I test it and alter/adjust the design if needed (it sometimes does need a tweak). Some ass (that's plural, actually) will be in in a minute to swear that what I said isn't true, but it's simple and basic -- pretty sure my Gramma gets it. Take your belt off. Fold it in half lengthwise. Put an apple between the layers. Falls out, right? Now put the apple in there again, and bend the ends of the belt around (hint: the apple doesn't fall - it's trapped by teh front binding on it). I thought I'd do a bit of a "write-up" about this, with some 'tutorial style' pics. But, now I'm thinking no point doing that here where it's fodder for someone with a complex - no point doing it on my site since I'm the only one I'd be telling -
Social poo 'n' stuff
JLSleather replied to JLSleather's topic in Gun Holsters, Rifle Slings and Knife Sheathes
Nope, sure don't. They bind -- as a rule, binds worse on a slim feller than a big man (sharper angle turn). Most try to alleviate the worst pain by making the front 'wing' longer, but ... this works all the time. Those "pancakes" (regular in your terms) are everywhere, but I find that once a guy tries this he won't go back Front panel is longer than the back, so the curve is built in. As opposed to a "50/50' or 'regular' pancake, where the tabs or 'wings' are pulled into that shape, causing binding on the firearm. Other words, it's natural shape... not twisted into a shape .. thus it retains that position. Advantage is, this fits on the desk, and still fits on the waist.. unlike those "regular" ones that tighten on teh pistol when the belt is tightened, this is the same on or off the belt. -
I must be using that crap more these days.. today, I was able to log on fakebook without looking up my password