-
Posts
1,806 -
Joined
Content Type
Profiles
Forums
Events
Blogs
Gallery
Store
Everything posted by Matt S
-
Now that looks fun. You in the BWSS? I'm at Bisley usually but have been known to trek up to Wedgnock.
-
Hi, I would like to take numbers 14, 28, 29, 35, the patterns and the journals please. I live between Heathrow and Edgware so can meet you at a place and time of your choosing.
-
Near London for now. Mainly shoot paper and steel using vintage rifles.
-

Some recent wallets
Matt S replied to JHobbs's topic in Purses, Wallets, Belts and Miscellaneous Pocket Items
It's a practice borrowed from saddlery. It reinforces a strap when sewing on a buckle or loop. I don't think it provides much utility in a wallet seam, but it does no harm and some people like the look. I guess it proves the seam is hand stitched, at least. If the thread wears through you either need a better thread or to stop carrying rocks in your pocket -
Arrite mate. Where ye from? What you shoot? What issues you been having?
-
You would probably need to have a custom die made up but you could use a $100 shop press instead of a prior clicker press.
-
It is possible to make a permanent impression on treated leather but in my experience the stamp needs heating above 60 degrees Celsius. Ian Atkinson has a good video in the subject.
-
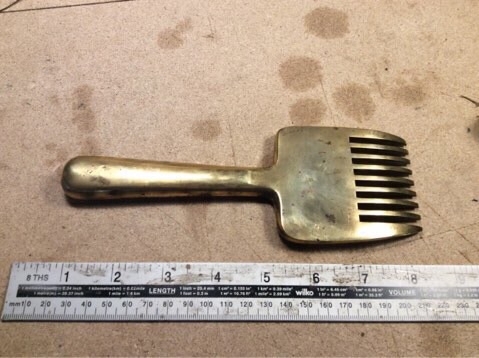
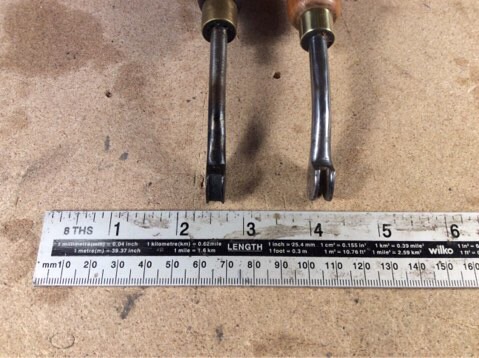
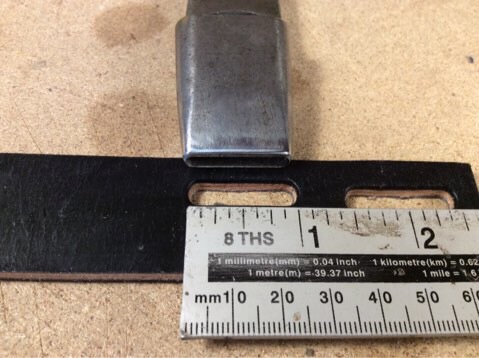
Having a clear out, selling some duplicate and unneeded tools. All prices are plus postage, which I am happy to quote and combine. I will give a 5percent discount on the tool prices to Contributing members. Crew punch, size 39 (1 inch), unmarked but very likely Dixon's. Edge good and polished. £25. (Girth) strap pricker, for girth points on English style saddles. Essentially a 4SPI pricking iron but makes oval pricks rather than slanted, longer ones. Unmarked but a quality older item, looks like an old Dixon but can't say for certain. £20. Brass or bronze straining fork, another saddler's tool for which I have no use. Lovely thing and a lot of gravity in it. There are a few minor cosmetic casting issues but still l looks great. £40. Cobbler's glazing iron. Unmarked and old but unmarked. £10. Two edge irons of slightly different designs. The one with the darker handle looks older and has a slightly wider slot in the head with narrower flanges and can handle a thickness of up to 5mm. The lighter handled one is probably newer and could handle leather up to about 3mm. In use these are heated with a candle or small stove, dipped in wax and then rubbed onto edges in order to seal and burnish them. I am 99 percent sure that these are Dixon tools but cannot say for certain. £25 each. Two single creases, can be used cold or heated. One (with "Made in England" sticker still in it) is unmarked but looks identical to those from Dixon's. The other is marked 2 with a slightly thicker edge. £15 each. Payment can be made by PayPal, or bank transfer.
-

Singer 45K Treadle Base Parts Information or Parts List
Matt S replied to Evo160K's topic in Leather Sewing Machines
I have one with a flat bed 45k on it. What do you need to know? -

Singer 45K - Unsual Needleplate + Feed Dog
Matt S replied to Constabulary's topic in Leather Sewing Machines
Is it a holster or stirrup plate? -
@zuludog I like the CS Osborne awls. The blades and hafts are sold separately except that you can get the size 43 mounted on a comfortable haft for about £8. They don't come perfect but in a much better state than a John James.
-
All edges look rolled to me. A lot of commercial wallets are made from paper thin refinished splits (lined with cloth or paper), with the edges rolled, glued and optionally stitched. The top edges of card pockets often aren't stitched, but are creased, which is what the sample looks like to me. The left hand edge is bound.
-
Sorry I have no first hand experience of other types of leather needles. Schmetz has a comprehensive guide on their website but I don't know what styles are available on your needle system.
- 13 replies
-
- stitch
- sewing machine
-
(and 3 more)
Tagged with:
-
That's a natural result of using LR type leather needles, and an effect some people spend a lot of effort to replicate. To increase or decrease this effect you can try turning your needle to a slightly different angle, but you will soon run into issues with the hook (either not picking up the loop or crashing the needle). You might have better luck with a different needle point style. I like the angled effect so I only have experience of LR (slanted sharp for leather) and R (round and bluntish for canvas) needle points.
- 13 replies
-
- stitch
- sewing machine
-
(and 3 more)
Tagged with:
-
You can slick the back like you do edges, with saddle soap or gum solution or can buy hides with preslicked flesh side (we call this "moss" or "pasted" backs on the UK).
-
I used to use the Tandy/Ivan smaller one (grub screw to adjust). Found, as with many of their products, stropping helped but the steel to be so soft that the edge didn't hold for long. Mine also kept wandering off at awkward times and I think you and I are not alone in this.
-
Yes it's all veg tanned, the outside is a buffalo embossed, predyed calf leather around 1mm thick. The lining is 1.5mm of unfinished veg calf which isn't ideal but it's what I had on hand. It is my opinion that it is best to not make a stitching groove except in the few sitations it actually reduces thread wear, such as a leather soled shoe or certain situations in harness and saddlery work. Where thread wear is not a problem (90+percent of the time) the thread groove simply pulls all of the stitches into a straightish line. For the beginner this is an advantage as they have difficulty in keeping a consistent angle from stitch to stitch. It is handy as it gets the work to an acceptable standard quicker and sells an extra £10 tool per person who wants to try the craft. However if you want to be able to stitch with the //// style of stitching (as in my example) as opposed to the ---- style it is just a crutch that won't help you develop. Further, to cut a stitching groove weakens the leather. With heavier pieces (e.g. three pieces of 2mm leather to make a sheath or holster) it doesn't make an appreciable difference. However if using lighter leathers like the example I showed it will take out a considerable amount of the strength of the piece. It is sometimes possible to crease a groove deep enough to sink the stitches flush with the leather but that would be difficult in any leather thin enough to worry about weakening with a stitch groover. TLDR: don't cut a stitch groove unless you really need to. Save the money for something useful like an Osborne 43 awl , a roll of thread or a Chinese pricking chisel.
-
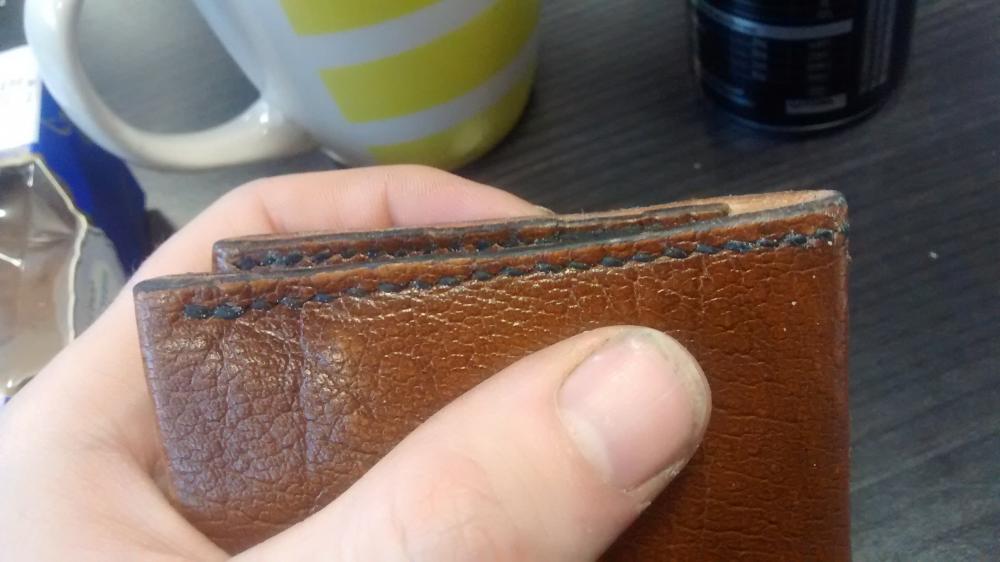
That makes for a good solid seam, I'm sure it won't come apart in a hurry. I tend to prefer a finer thread with a tighter spacing myself. The picture shows my much abused cardholder, which I think is 8SPI (3mm) and 18/3 black linen 3mm from the edge. 18/3 linen is a tiny bit smaller than 0.6mm Tiger, for reference.
-

How to make a linesmans pouch and use a Cowboy 441
Matt S replied to RockyAussie's topic in How Do I Do That?
Looks great Brian. Did you use nylon or polyester thread? Nylon is much more readily available but I'm worried about its UV resistance when used on outdoors products. -
Welcome Michael. What thread and stitch spacing are you using there?
-
If this is like the one I bought years ago from Amazon to go on a dremel, I found it to be absolute dog toffee. Not well balanced, the radii are not what I needed, it's too slick to burnish properly. The shaft is so skinny (since it needs to fit a dremel chuck) that, having been made from mild steel threaded rod, it bends permanently with the application of moderate pressure. £10 wasted.
-

Classic Western Holster
Matt S replied to LumpenDoodle2's topic in Gun Holsters, Rifle Slings and Knife Sheathes
I like that. Have you seen Will Ghormley's photo essays on how he distresses gun leather for Hollywood? -
That's a very useful resource. Thank you for sharing it with us all.


