amuckart
-
Posts
577 -
Joined
-
Last visited
Content Type
Profiles
Forums
Events
Blogs
Gallery
Store
Everything posted by amuckart
-
I think that particular one was Ferdco, but similar attachments have been around for a long time. Singer made a special version of the 45k for this job. There was one on Ebay in the UK some time ago for several thousand pounds. From what I read on ISMACS (I think) they were famously difficult things to use. Here are pics from the ebay auction

-
I don't, sorry. I've only ever seen one and it was too far away for me to realistically get hold of. I'm glad you're getting ahead with timing your machine. Have fun.
-
Yes, the Indian ones. The ones this guy was dealing with were new, not ones people had brought in with problems. All I'm saying is that it might look like a 15k, but it isn't built with anything like the quality of the original. Sure, so long as people understand the limitations of domestic sewing machines, which IME not a lot of people do. They hear about the 15-91 or 201 or whatever being these amazing heavy duty machines and think they will do things they were never designed for. Better, IMO, to start with an true industrial straight stitch like the 31-15, Pfaff 35-4, or Singer 331k which are mechanically simple, easy to get parts for, take high shank feet and which will actually sew light leather and canvas jobs, often without costing more than $100-$150 more than people are asking for the domestic machines. Don't get me wrong, I love my 201. It works beautifully and it'll sew things that will choke modern domestic machines, but it was never designed for leather, and the limitations of low shank feet are just not worth it for anything other than occasional work with garment-weight stuff.
-
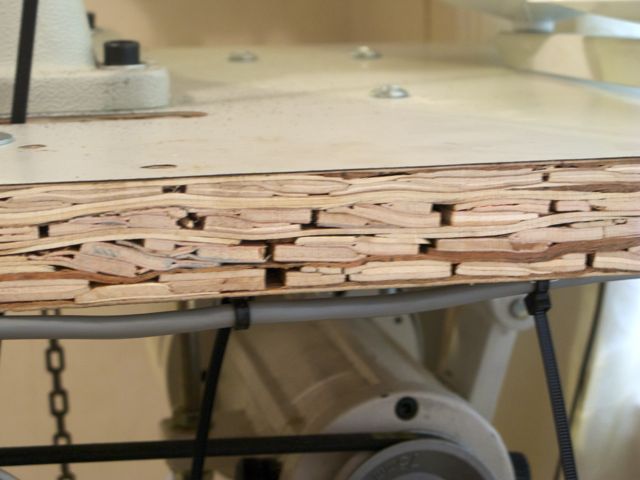
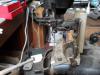
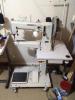
 That's similar to what I ended up doing with my 441 clone. I needed to fit it into a smaller space than the original table would allow so after cutting the original table in two and seeing the awful junk it was made of (pressure bonded scraps of ply with huge voids in it) I chucked it and used laminated MDF from an office desk. Here's the cut edge of the original table showing the junk it's made of: Here's what I originally did with the half width table: That was a good size but I couldn't fit the Ho-Hsing motor on it so when I added that motor I replaced the table top with the formica covered MDF one. It's only an inch thick but it's plenty solid. I wouldn't use it for a flatbed top, it's way too thin, but with the 441 head sitting exactly over the post on the stand it's fine. The only movement in the whole system is the motor moving slightly on the rubber mounting grommets. I also did things like add a holder for the oilcan. Eventually I'll add space to hang the various screwdrivers and hex keys needed to change the feet and make basic adjustments. I put much bigger soft casters on the base. The ones that came with it were tiny and useless for carpet. Unfortunately they were plate mount not post mount so there are some ugly nuts on the top of the base, but I can live with that. I moved the foot pedals as well so that there's more separation between the foot lift pedal and the 'go' pedal. The next plan is to make a better flat top for it. The ones that come with 441 clones are completely stupid in the way they attach to the table.

-
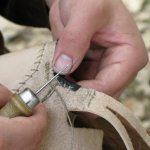
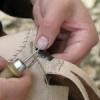
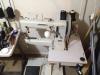
The feet are the easy part, it's the hands that need all the skill. I'm amazed she's doing it on one of those machines though. That's one of the new Indian (I think) "Singer" machines. You can tell because of the garish decals, the modern polyurethaned case, and the fact that the decals on the bed haven't worn off yet. I was talking to a repair man a while ago who's seen quite a few of these come through his shop and he's never managed to get one to sew without basically tearing it apart and completely rebuilding it, which just isn't worth the effort.
-
Seeking A Source For 346 & 415 Bonded Polyester In Colours
amuckart posted a topic in Sewing Leather
Hi all, I'm looking for 346 & 415 bonded polyester thread in colours other than white & black. Does anyone know of a source that will sell by the spool? There are sources here in NZ that can get Coats bonded poly, but I need to buy a whole lot to get them to bring in new sizes. At the least I need a "natural" colour, but ideally I need red, black, white, blue, natural, and brown. I've had zero luck finding any online. It seems that as the thread size goes up the colour selection goes down. Thanks. -
Recommendation - Jack Jk-561A-1 Servo Motor
amuckart replied to Constabulary's topic in Leather Sewing Machines
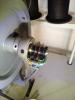
Sure, here they are. The unit has three optical sensors, and a set of disks. Once has regularly spaced tiny holes that tells the motor how many RPM the actual machine is doing (as opposed to how many RPM the motor is doing), and the other two have a chunk out of the rim and can be rotated to set the needle up/down position. Bear in mind that this is quite an old unit. Ho-Hsing haven't made this motor for several years. I don't know if more modern motors use hall effect sensors or still use optical ones. I made the aluminium bracket that prevents the sensor from rotating.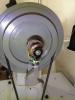
-
Recommendation - Jack Jk-561A-1 Servo Motor
amuckart replied to Constabulary's topic in Leather Sewing Machines
The new ones are expensive. This one came on a Pfaff 441 that I bought second hand for NZ$200. I didn't have space for the machine itself, so I sold that but kept the motor. -
Truth is it hasn't been used since I put it back together again I need to build a table for it and I got sick and couldn't work on any for a couple of years.I'll post pictures of it once I've finished putting the decals on and have somewhere to put it. At the moment it's sitting next to my computer table. One day I hope to find an original treadle stand for it that I can afford.
-
Recommendation - Jack Jk-561A-1 Servo Motor
amuckart replied to Constabulary's topic in Leather Sewing Machines
Thanks for sharing this. I was eyeing those up the other day and it's nice to read some experiences with them. I'd love to know more about your speed reducer. The one that came with my 441 clone is a POS and I need a better one. I have a Ho-Hsing motor on my 441 clone with a needle positioning system and it works with the speed reducer. There is a sensor that attaches to the shaft of the machine on the back of the hand wheel that has adjustments in it. Ho-Hsing were good enough to email me a copy of the manual for the motor, which is pretty ancient, but works fine. -
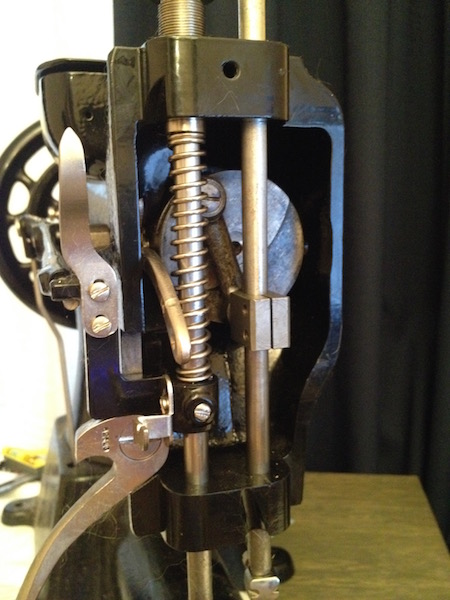
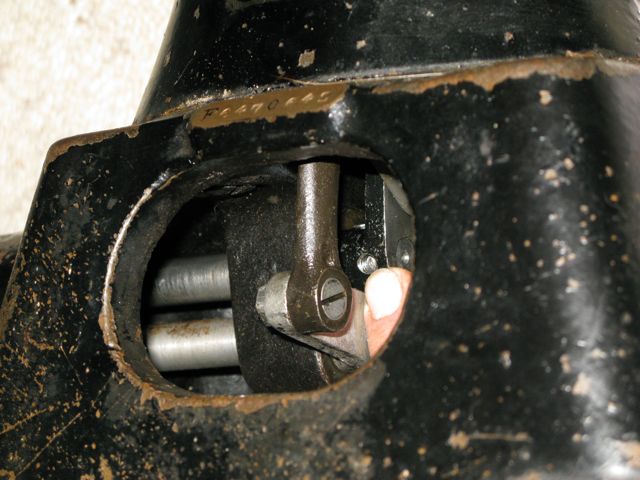
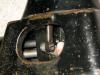
Heh. My first encounter with taper pins was... educational. I've still got one in a 29k58 holding the shuttle rack on that I've never been able to shift. If there is, I've never seen one. There's a "Qwik Fix" manual that purports to be a 45k service manual but it's really basic and IMO not worth the price of admission. I've explained most of the relevant stuff in this thread. They sure look like they should, but I've never seen them. My 45k doesn't have the markings or the hole. I think Constabulary is on the right track with his suggestion to turn the machine over and see if they line up with anything. Here's the inside of my machine: The other thing to do would be to find someone who has a GA5 machine, which is a clone of the 45k, and see if it has the markings. You're welcome. If there's anything else I can do to help shed light on the machine please ask.
-
Thanks You're right. I've been taking things apart and (mostly) putting them back together again since I was about 3 (when I took a wall clock to pieces). It's not a job for the less-mechanically inclined who just want a machine that sews, but a 45k is a piece of cake once you've done an Elna TSP zigzag machine.
-
If you want a good straight-stitch only domestic sewing machine for lightweight stuff the 201k is a much better bet than the 15k. The 201 is fully rotary and geared throughout, so it is both smoother and more robust than the 15k which is an oscillating hook machine. The 201 has a higher and wider clearance than the 15k too. Neither, though, are designed for sewing leather but if you're doing really lightweight stuff then you can put a teflon foot on them which will help the feeding. It won't help with the foot pressure though.
-
I'll offer an alternative viewpoint to Constabulary's with respect to disassembling the machine. I completely disassembled my 45k25, down to the last screw and taper pin. I found it very rewarding because the process taught me a lot about how the machine (and sewing machines in general) work. I was not the first person to have done so. A lot of the screws in my machine had damaged heads from idiots with the wrong size screwdrivers going at them and some of the external parts on my machine are not original. The foot lifter bar in particular is held on with a very jerry-rigged assemblage of nuts and spacers. Once I had it apart, I had the head stripped and powdercoated and had the relevant external parts nickel plated. IMO Powdercoating gives the closest finish to the original japanning and it's extremely durable. I'm fairly mechanically minded to begin with, and I was extremely systematic about how I took my machine apart. I took photographs of every single bit I removed, before, during, and after removal, and I put all the screws and small parts through numbered index cards, which I then photographed as well. This gave me a complete sequence consisting of several hundred photos I could refer to during reassembly. If you want to learn how machines work, and you've got the right set of screwdrivers and spanners, completely stripping a machine and reassembling it can be quite rewarding, and on a machine the size of a 45k it's a hell of a lot less fiddly than on a domestic machine.
-
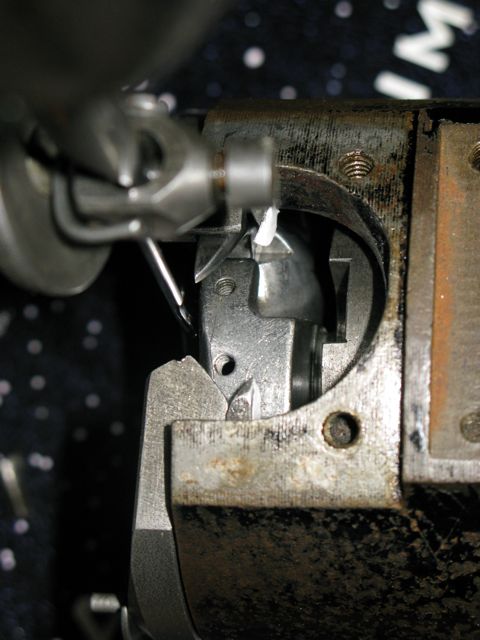
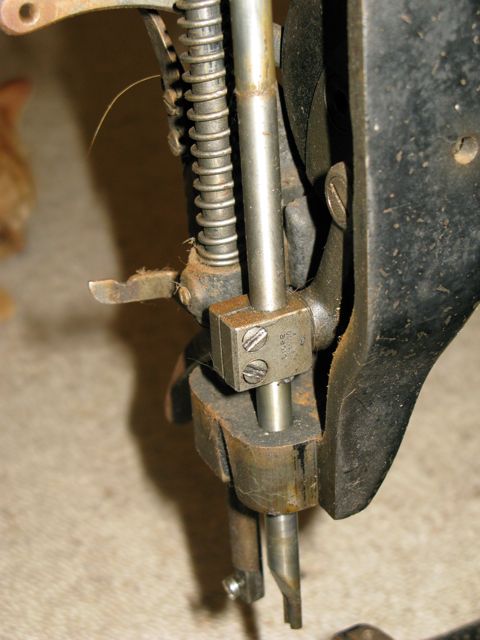
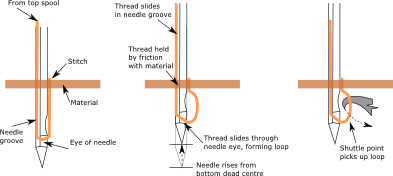
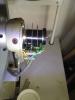
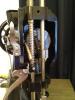
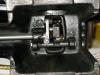
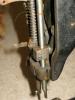
I'll explain the principle for the benefit of the archives, then the process for a 45k, which is basically the same for any oscillating hook machine. To time a machine you need the point of the shuttle to pick up a loop of thread coming off the needle. This loop is then pulled around the shuttle (and bobbin) to pass the top and bottom threads over each other. The loop is formed on the side of the needle that does not have the groove in it. Many modern needles have a scarf or indent above the eye on the side opposite the groove. This scarf allows the needle to be closer to the shuttle and gives the shuttle point a bit more space to pick up the loop in the top threads. This allows a more reliable stitch formation. The loop is formed when the needle has gone all the way down and then risen slightly from bottom-dead-centre. What happens is that the thread in the groove of the needle is held in place by friction with the material, so when the needle moves up, the thread slides in the groove, leaving excess under the material. This excess slides through the eye of the needle and forms a loop on the scarf side. When the loop has formed, but before the needle rises too far and either squishes the loop against the underside of the material or pulls the top thread back up through the material, the point of the shuttle catches the loop and pulls the top thread around the shuttle to make the stitch. Here's a quick and dirty diagram showing the loop formation: Shuttle to needle timing is critical because if the shuttle point passes the needle too early the loop won't have formed and if it passes too late the loop will have moved up above the shuttle point and there will be nothing for it to catch. The general process for timing an oscillating hook machine is as follows: Remove the needle plate and feed dog. This usually involves removing the shuttle race and shuttle, but put them back when you're done removing the feed dog. Put a new needle in. Schmetz size 230 are good for this size of machine Turn the machine until the needle has gone all the way down and keep turning until the needle has come up about 4mm/3/16th inch (the exact height varies by machine, but I think this should be Ok for a 45k. The main thing - and the reason to use a Schmetz 230 needle - is to have the middle of the scarf align with the point of the shuttle. At this stage the point of the shuttle should be in the centre of the needle, exactly in the middle of the scarf. If it does, you're good. If not, you need to either move the shuttle so it is in the correct position (do this if possible) or cycle the machine until the shuttle is in the right position and adjust the needle bar height so that it all lines up. In this picture the shuttle timing is delayed, the shuttle point has not reached the needle yet. Sorry I don't have one with the timing correct. On old machines like my 1919 one, the shuttle timing is fixed and you adjust it by adjusting the height of the needle bar. To adjust the needle bar height, remove the face cover and loosen the two screws in the rectangular block the needle bar passes through: On newer machines, there is a screw where the shuttle driver attaches to the back end of the shaft. Loosen this and you'll be able to turn the shuttle by hand without the rest of the machine moving. It needs to be just tight enough for the shuttle to stay where you put it. The screw you want to loosen is accessed through the hole in the base of the machine that's facing you when you are using the machine. In this picture I'm pointing to the screw (which is missing in my machine) The shuttle driving bit is the rectangular part with two rivets in it in this picture (taken looking up into the machine from underneath). Watch that part move as you turn the machine and it should become clear where the screw is you need to adjust to fix the timing. I hope that helps.


-
What do you want to know? There are treadle machines that you can sew leather on but they're treadle powered industrial machines. The vast majority of treadle machines you'll find are domestic fabric machines. Even the best of those, such as the Singer 201k, won't sew leather well. As a general rule of thumb, if it takes standard 15x1 domestic sewing machine needles, it is a fabric machine, not a leather machine.
-
Yep, it will.
-
The best thing to do is read Wiz's thread on the type of machine you need to sew leather, which is pinned at the top of the sewing machines board and can be found at this link http://leatherworker.net/forum/index.php?showtopic=25239
-
You might want to experiment with reducing your presser foot pressure at well.
-
Most small sewing machine motors are universal AC/DC motors and can be reversed. The easiest way is to open the motor and swap the brush housings around and it should reverse the direction.
-
Is there a particular weight/type of leather you're interested in? Can you post pictures of what you're getting out of your machine at the moment? That might help get suggestions on what to adjust.
-
Leather Thickness For Turnshoe Uppers
amuckart replied to JakeDiebolt's topic in Historical Reenactment
Glad my blog is useful 5-6mm isn't too difficult to turn at all provided you get the right stuff. Avoid sole bend, it's hard rolled and far too stiff for turnshoes. The stuff I have is "48 hour" tanned (normal 'vegetable' tan is 6-12 hours) and it's nicely flexible. I can't get any more though. Regular thick veg tan still turns easily. -
Leather Thickness For Turnshoe Uppers
amuckart replied to JakeDiebolt's topic in Historical Reenactment
I use 2.5mm veg tanned double shoulders and it works very well. I use 5-6mm veg for the soles, which is borderline too thin but works Ok. -
It's a needle and awl machine. The biggest limitation of it is that it has a throat depth of about 4", so the shapes of things you can feed through it are quite limited. If you search the forums I think they've been discussed here before. Here's a video from Lisa Sorrell showing how it works.
-
It looks like an American straight needle stitcher to me.