Josh Ashman
-
Posts
1,183 -
Joined
-
Last visited
Content Type
Profiles
Forums
Events
Blogs
Gallery
Store
Everything posted by Josh Ashman
-
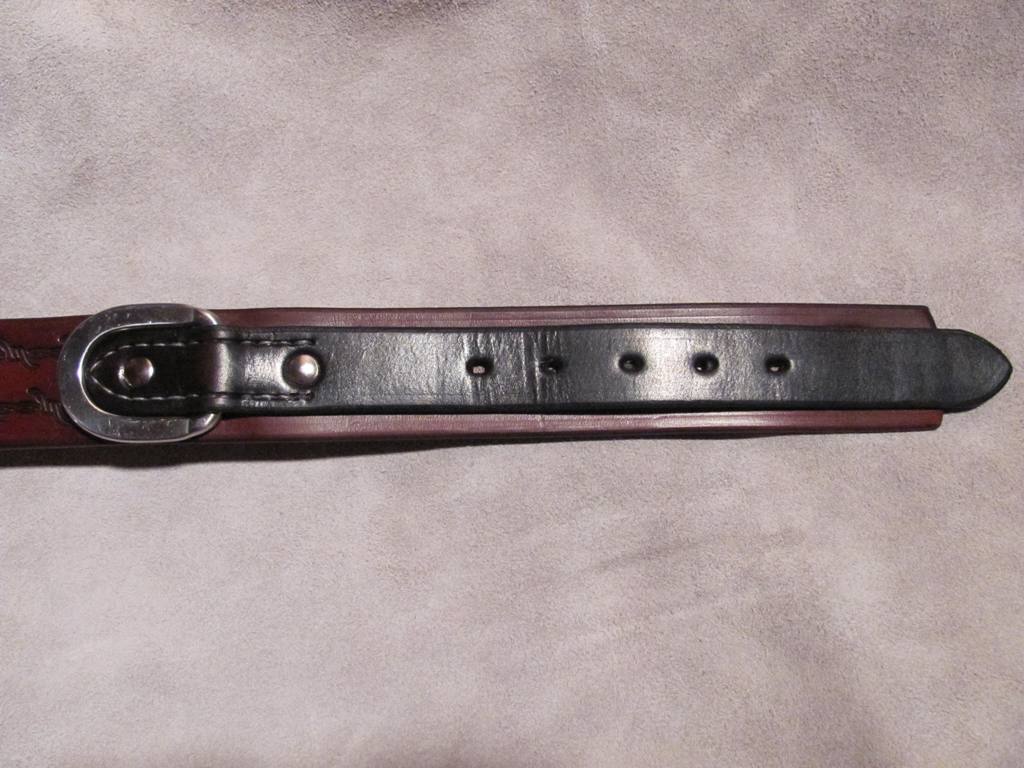
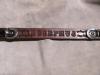
10 oz body, 8 oz billet & chape both HO with a JWP buckle and SS "D"'s from Weaver. Thanks for looking, Josh
-
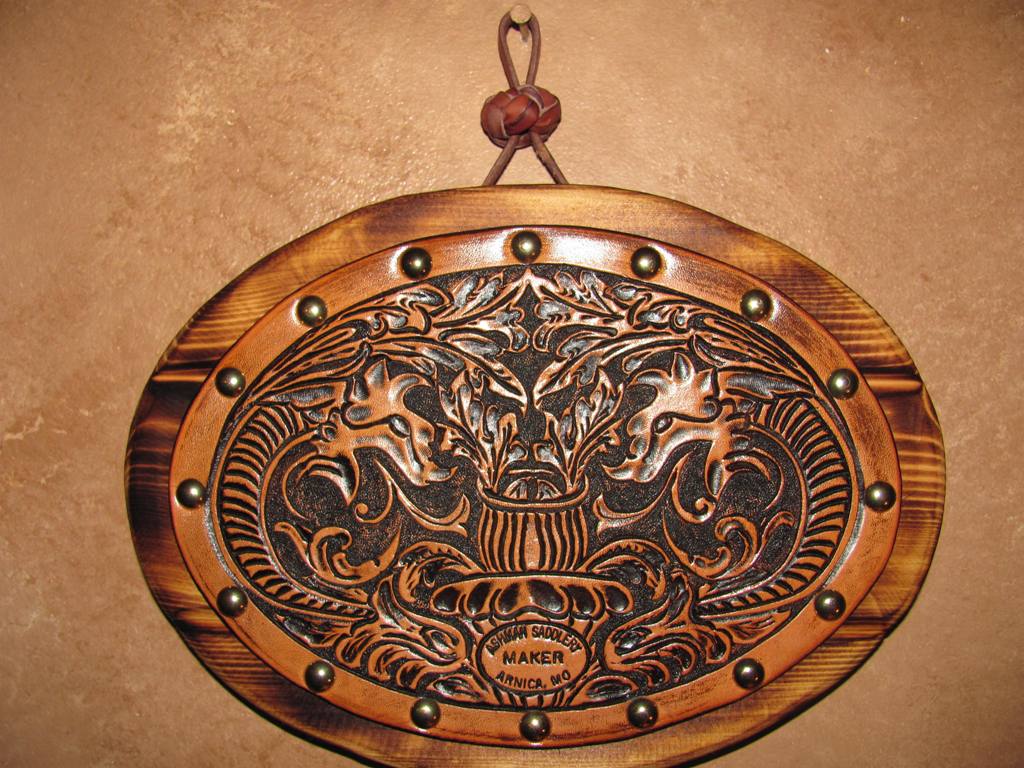
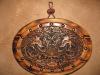
Christmas presents for people who don't need holsters or tack :-) Thanks for looking, Josh

-
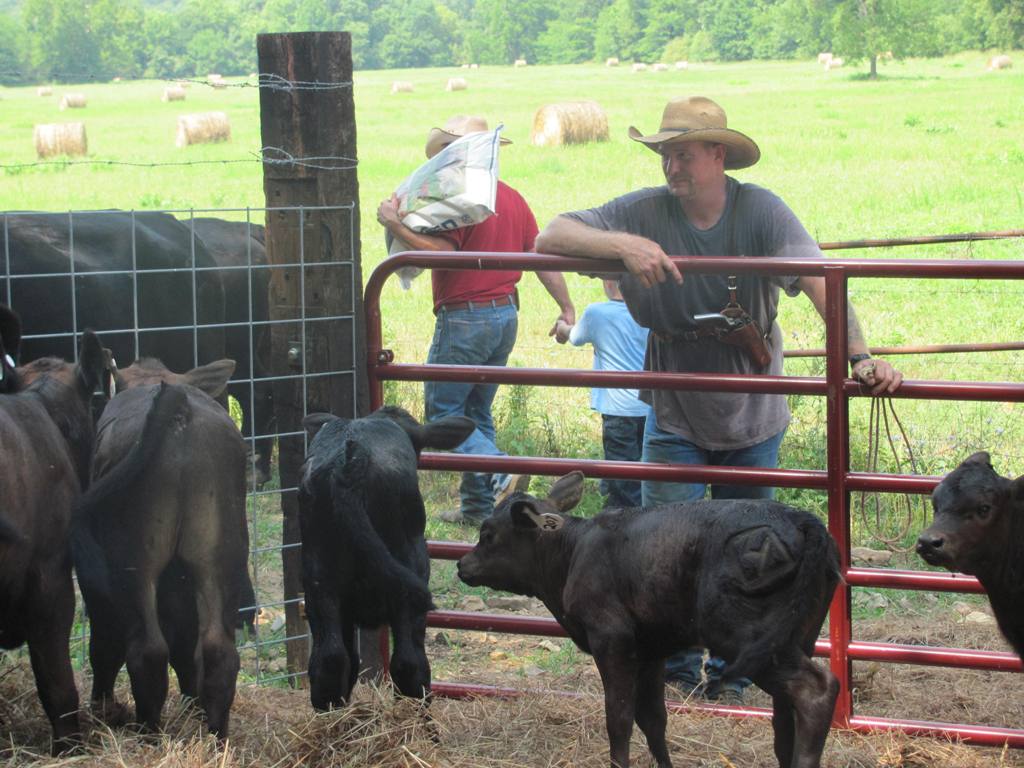
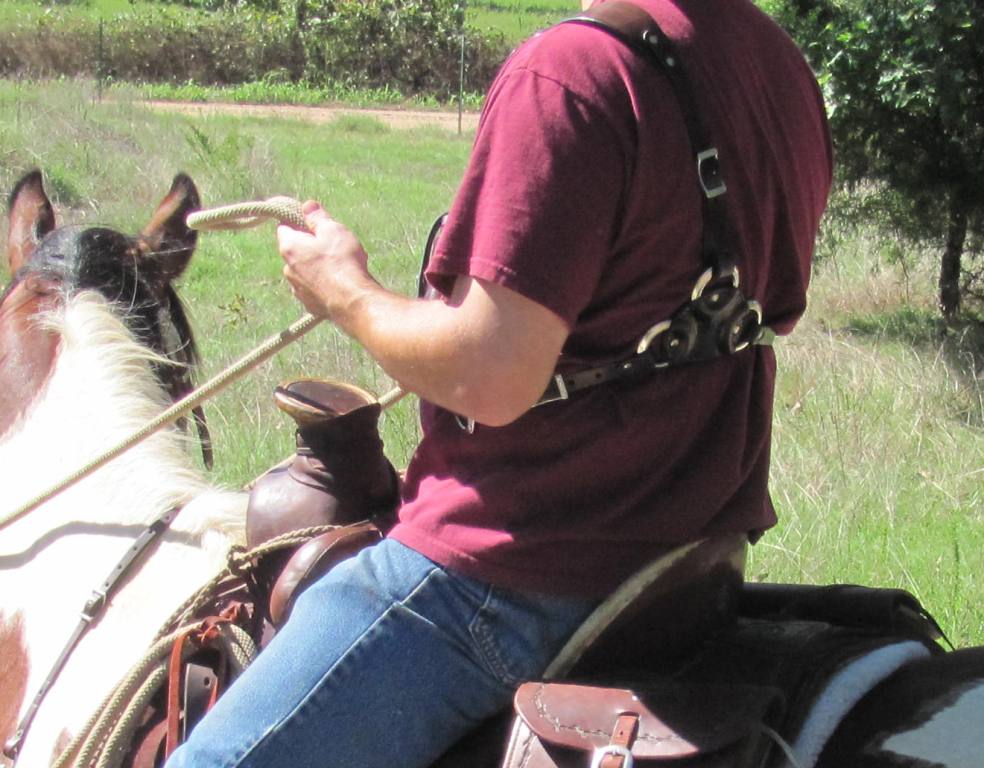
 Yup, they're quite secure. I wore my Blackhawk while being the ground guy working a little group of calves this summer. I'd had it on when we gathered the cows and kept thiking I'd ditch it on a rail while we worked the calves but never got around to it, anyway it was just a small group but I wore it while I threw, branded and casterated 7 head. For just riding and general moving around they stay pretty well put. Best regards, Josh
 -
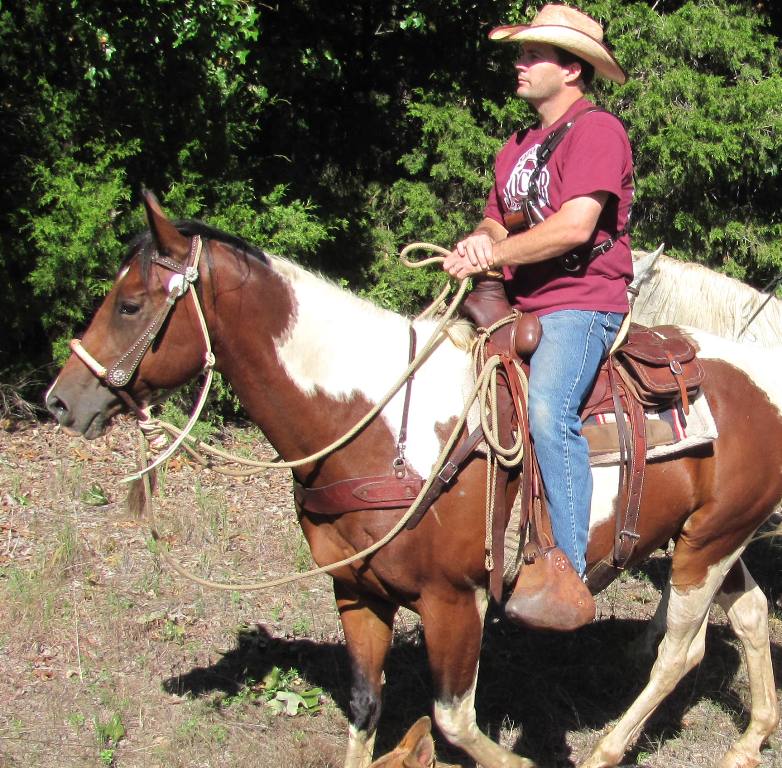
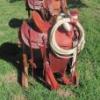
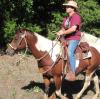
A lot of people like chest holsters which are very handy when horseback or doing about any outdoor activity. They can be built as "cowboy" as a person would like. Here are a few I've made, one for my Ruger Blackhawk and another for a 1911Commander, I've also attached pics of them in use. It'd be easy enough to build something similar for a 92F. These are a simple "envelope" type holster with rings at the top and a D at the bottom, a back plate and some straps. Best regards, Josh


-
Thumb Break Rivets
Josh Ashman replied to SooperJake's topic in Gun Holsters, Rifle Slings and Knife Sheathes
Jake, I use double cap rivets from both SLC and Weaver. They have the domed ends and I set them by hand using a domed rivet setting tool and a piece of 1" steel plate as a "bench anvil". The backside that is flat against the plate looks exactly like your pictures, flat as can be except the little dimple in the center. I believe the dimple is caused by the domed end being smashed flat but that really doesn't matter. Like Twin Oaks mentioned above, using regular double cap rivets and standard setting tools you can get the look you want, just use the flat sides of your setting tool and anvil to flatten the rivets when you set them. Good luck, Josh -
That sure looks good to me, great job! Josh
-
Single Loop 'slinger Cross Draw
Josh Ashman replied to DHopper's topic in Gun Holsters, Rifle Slings and Knife Sheathes
Dave, I sure understand liking an exposed trigger on a Single Six. I had an old Idaho Leather rig like that growing up for a Ruger my dad gave me. We all like different things and looking at a picture on the computer doesn't really show the whole picture. Like I said before, just my two cents. :-) As for the moisture content, the stamping just looked a little "mushy" to me in the picture. Probably just the way it comes out on the computer. The color and white stiching looks very good. Best regards, Josh -
Joel, I'll probably get scoffed at by some of the more experianced or more persnikity folks on here but I tell the treemaker the type of horses I expect the saddle to fit and let them figure out the bottom side of the tree. I buy into the "a saddle should fit a type of horse, not a specific horse" mentality and I trust that the treemaker understands his craft better than I do. Best regards, Josh
-
Single Loop 'slinger Cross Draw
Josh Ashman replied to DHopper's topic in Gun Holsters, Rifle Slings and Knife Sheathes
Hey Dave, lookin good! You asked for comments so here's my 2 cents.... I'm not familiar with the shape you have under the trigger and to me it detracts from the flow of the holster. I use a similar shape but the gun sits lower with the trigger guard down in the holster, like this; I have seen a lot of holsters like yours where the trigger guard sits up on the welt and that's well and fine but typically when they're built that way there is no "bulge" (for lack of a better term) there. You could streamline your pattern under the trigger and I think it would look much better. With the loops being fairly loose around the body of the holster I wonder if you have any problems with the holster wanting pull out of them when you draw the pistol? If the slots in the back of the holster body are to tie it to the skirt that would certainly solve that problem. It also looks like the leather might have been a little bit too wet when you stamped it. That might just be the way I'm looking at the picture but if you let the leather sit until it's pretty much back to the color it was before wetting you'll get crisp impressons that burnish and darken a little. These are just my thoughts, take them or leave them as you see fit. The most important thing is that you like what you're doing! Best regards, Josh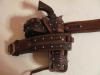
-
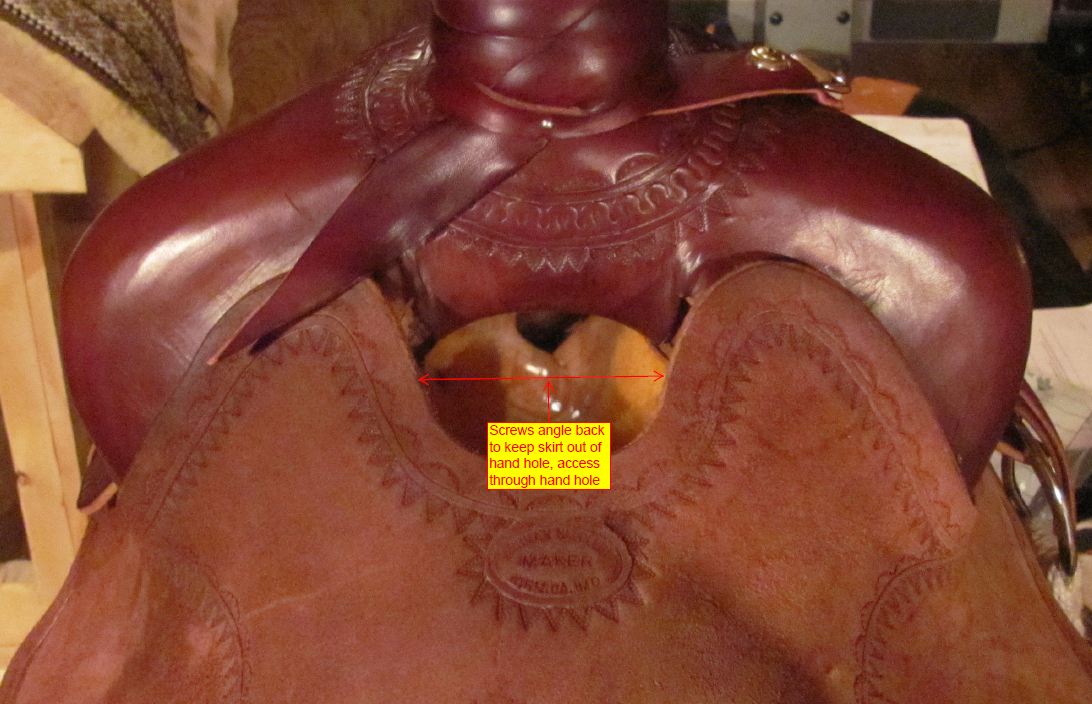
Dan, I looked around on my computer to see if I could find a picture showing where I use the screw and this is the best I could find; The screw is angled as sharply as possible back into the bar to pull the skirt out of the hand hole. You access it through the handhole and set it as high as possible. Between the location, the angle and the way the screw sucks the skirt away from the horse I can't imagine it ever being a problem. I'm pretty new to building saddles so I'm not basing this on "years" but I have spent around 16 months using one I made with no issues at all and our horses have pretty standard withers. Best regards and good luck! Josh PS the pic is of the first saddle I made, judge accordingly : - )

-
I use regular galvanized nails for tacking around the gullet and a ss "saddle screw & washer" right up in the hand hole, you could use a nail there too but it'd be hard to drive it. I think the Stohlman books show this too. Good luck, Josh
-
Question About Square Or "pointed" Skirts
Josh Ashman replied to thenrie's topic in Saddle Construction
My two cents on this is that when somebody talks about "square" skirts they generally mean any type of rectangular shaped skirt even if the corners themselves are rounded while "pointed" skirts are square skirts that go to an actual point or corner. I'm not sure this does you much good for help on cutting pointed skirts. I'd leave them as oversized as possible then cut the exact shape once you have them blocked on the tree. Some of the really cool looking pointed skirts you see have quite a bit of "flare" in them. I guess it all comes down to what you like. Best regards, Josh -
Stitching Groove Placement
Josh Ashman replied to drof99's topic in Gun Holsters, Rifle Slings and Knife Sheathes
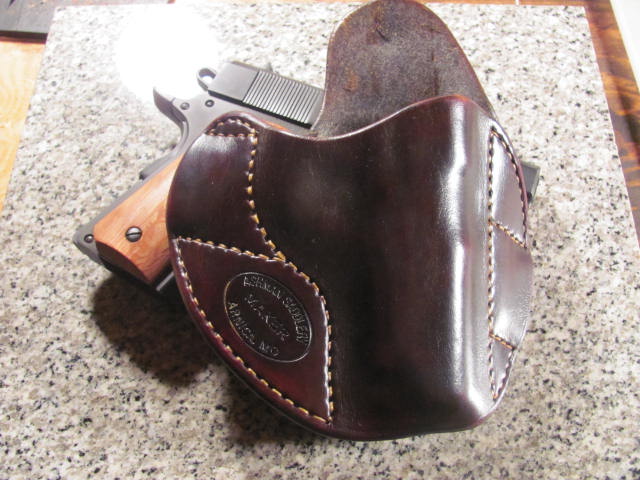
I basically do the same as Country noted above, transfer the pattern to the leather for the stitch lines with an awl (the stitch lines away from the edge that you're asking about) but then I just roll it with an overstitch wheel. I like to have the leather cased enough that the wheel imprints pretty well then stitch while it still has a little moisture. I don't think the lack of a groove shows at all. That's how this crossdraw pancake was done. Good luck, Josh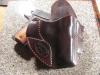
-
Digging Out...
Josh Ashman replied to Eaglestroker's topic in Gun Holsters, Rifle Slings and Knife Sheathes
All very nice, great work! -
Springfield Leather Patterns
Josh Ashman replied to ranger7541's topic in Gun Holsters, Rifle Slings and Knife Sheathes
Ranger, I advise getting Al Stohlman's book making leather cases. There are a few different volumns and each one goes over different cases, any of them woudl be helpful. Usually Tandy will have them in stock, I know SLC does becuase I flip through them while my wife shops for beads. You'll get some very good info on how to design patterns as well as general letherwork tips and tricks. Good luck, Josh -
Chest Rig For 45 Auto
Josh Ashman replied to Josh Ashman's topic in Gun Holsters, Rifle Slings and Knife Sheathes
Rooster, The holster is unlined and probably around 10 oz. I used some lighter leather for the shoulder strap, probably around 8 oz and lined it with chap leather. Best regards, Josh -
Chest Rig For 45 Auto
Josh Ashman replied to Josh Ashman's topic in Gun Holsters, Rifle Slings and Knife Sheathes
Sounds like things are going great Bobby! glad to hear it. Making gun leather for Hamleys is way cool and congrats to your son! Semper Fi, Josh -
Chest Rig For 45 Auto
Josh Ashman replied to Josh Ashman's topic in Gun Holsters, Rifle Slings and Knife Sheathes
I made a simple 6 shell cartridge slide for mine that I wear on the strap that goes under my right arm and buckles the rig on. That works well for me. I'm not sure how having all the fixins for your cap and ball gun would work but if you were to keep them as slim as possible it'd probably be great. Good luck! Josh -
Chest Rig For 45 Auto
Josh Ashman replied to Josh Ashman's topic in Gun Holsters, Rifle Slings and Knife Sheathes
Thanks Bobby, the chest holsters you make were one of the things I looked at when I was making a plan to build these. Hope things are going well for you and yours. Semper Fi, Josh -
Thanks again everybody, glad you liked it! Josh
-
Chest Rig For 45 Auto
Josh Ashman replied to Josh Ashman's topic in Gun Holsters, Rifle Slings and Knife Sheathes
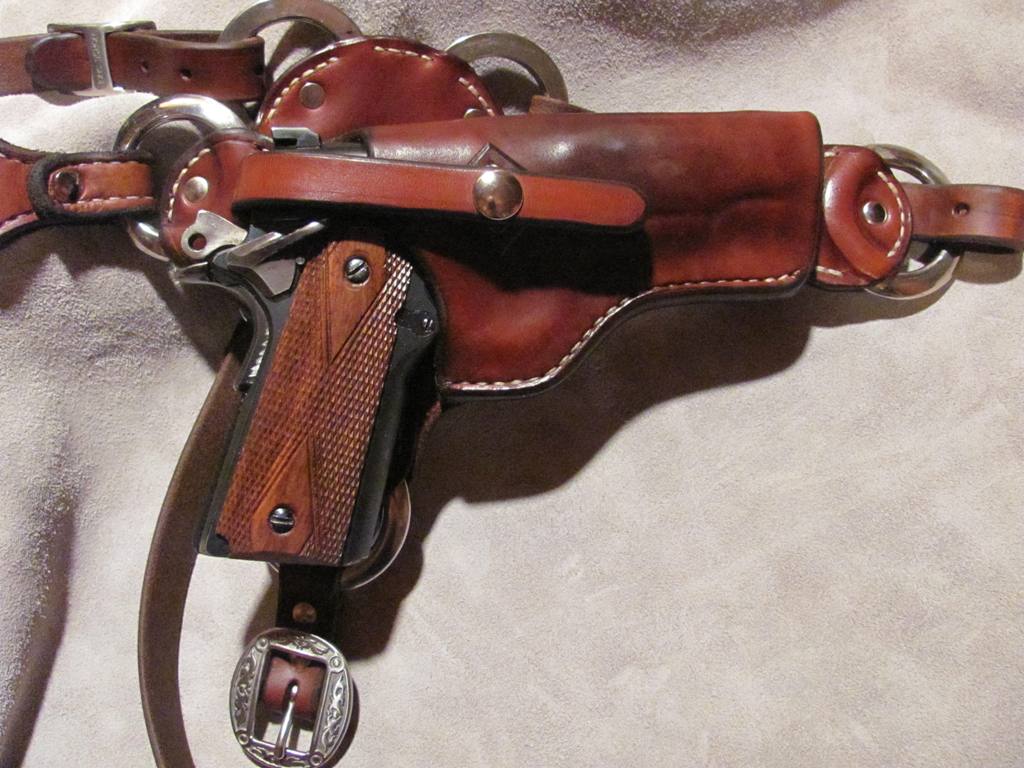
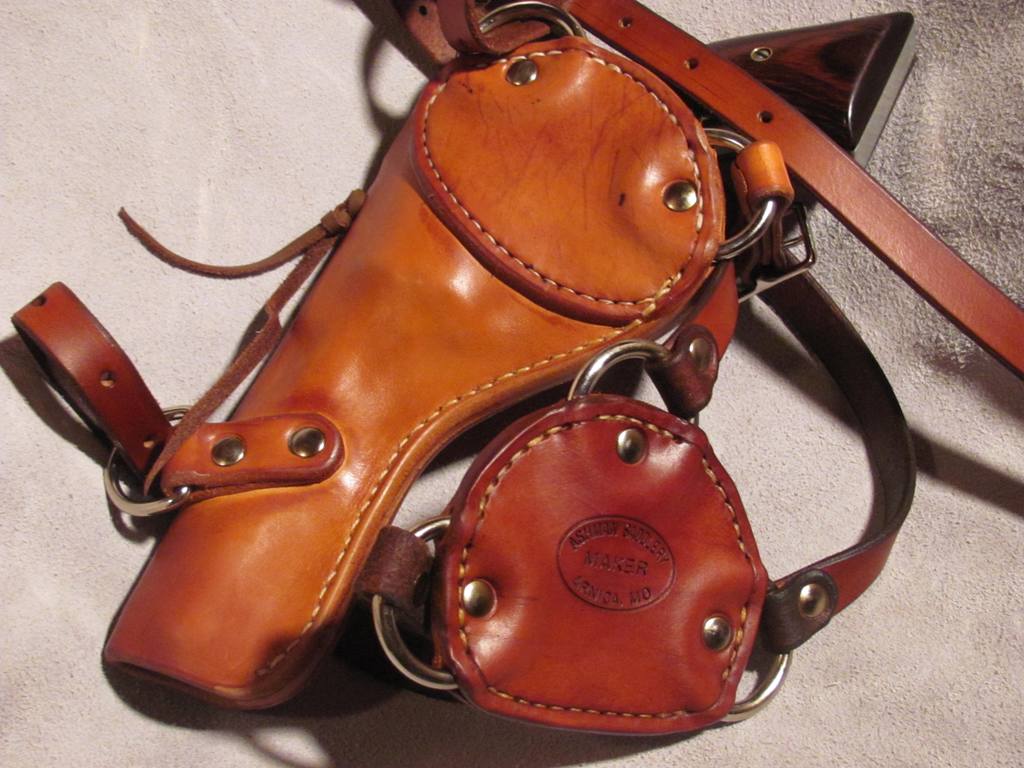
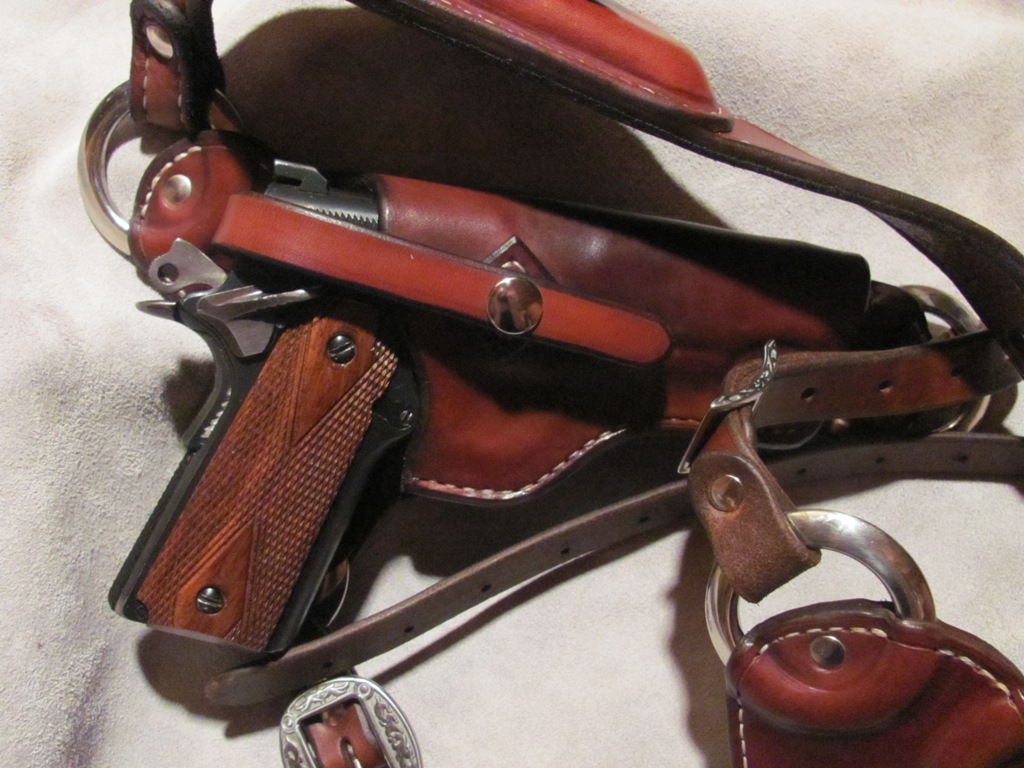
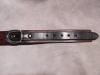
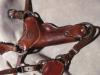
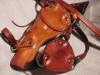
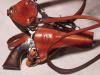
Thanks for the nice comments! No internet at home and I forgot to grab the pattern this morning so although I'm fine to share it, I can't today. I can tell you that my pattern is super simple and I'll attach a few more pictures, that might be enough for anyone who wants try this or use it as a starting point. The actual holster part is a simple "envelope" type, Lobo gave a great description of how to do this here; http://leatherworker...showtopic=43098 Once you have the holster part figured out add rings or D's or whatever you like for the straps, these pictures hopefully show what I did; Here's another similar holster I made for a Ruger Blackhawk that has less fancy hardware and a simpler rigging system; Between all of these I think you can see the back piece and general construction I used. I have conway buckles on the straps going arond the left side and over the shoulder and a regular buckle on the strap going arouns the right side so you can get it on and off easily. These are the first two of these I've made so there is plenty of room for improvement. Best regards, Josh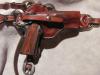

-
Rooster, I've made a few chest holster rigs that use straps. The first was for me to carry my Ruger Blackhawk, it has 6/7 oz straps that are 5/8" wide. The other two are for Commander sized 45 auto's, they each have 10 oz staps that are 3/4" wide. You can see that they barely fit through a JWP conway buckle. Anyway, I felt like the 6/7 was too thin but that was probably compounded by the narrow width, I'd think the 8 oz would be pretty good. It's also true that you could probably use one of the heavier 45 rigs in place of a cinch in a bind . Good luck! Josh


-
The Quick And The Dead Rig
Josh Ashman replied to Boothill Bob's topic in Gun Holsters, Rifle Slings and Knife Sheathes
Very nice Bob, I like it! Josh -
Pancake For 3-1/2" 1911
Josh Ashman replied to Josh Ashman's topic in Gun Holsters, Rifle Slings and Knife Sheathes
Havoc, You're spot on, my slots are rough.I've been punching 5/16 holes then cutting out the piece between with a head knife. I've read where a lot of guys are using a chisel instead of a knife and if I ever remeber to pick one up I'd like to give that a try. It seems like it would give a better look. Thank you for the kind words and the constructive feedback! Best regards, Josh -
Thank you! I'm glad you guys like it. Country, I used Fiebings British Tan roughly cut 50/50 with regular rubbing alcohol, two good coats of neatsfoot oil, Fiebings Aussie Wax and then some glycerine saddle soap to put a little shine on it. Best regards, Josh