


Constabulary
-
Posts
5,801 -
Joined
-
Last visited
Content Type
Profiles
Forums
Events
Blogs
Gallery
Store
Everything posted by Constabulary
-

Singer 17-41 / presser foot swap = headache
Constabulary replied to Webicons's topic in Leather Sewing Machines
No video that I know of but needle hook timing is very similar on most drop feed machines - however here is a Singer 17 manual. It also covers the 17-41 Singer 17-22.pdf -
Presser feet have to match the feed dog. This is what you find on Ebay https://www.ebay.com/sch/i.html?_from=R40&_trksid=p2334524.m570.l1313&_nkw=foot+pfaff+138&_sacat=0&LH_TitleDesc=0&_odkw=feet+pfaff+138+&_osacat=0 but the known sewing machine dealers may have more variants.
-
Singer 17-41 / presser foot swap = headache
Constabulary replied to Webicons's topic in Leather Sewing Machines
I would also check the needle bar height (needle - hook timing). Could be that you have to lower the needle bar a tiny bit maybe just 1/4 - 1/2mm -
You can sew with 1 needle on a double needle machine but that can only be a compromise cause you are limited to 1 single foot that matches the needle space (different needle spaces require complete new gauge sets for each needle space). You can modify a 2nd foot but that still is a compromise and IMO not ideal if you want to use this machine for a longer time.
-
The thread post / tension unit on your machine seems not to be the original part. Looks like someone replaced it with home made parts. Usually there is a hole on the underside of the bulge where the threaded post is mounted. The original post can be hammered out for the underside with a pin punch. So I`m not sure what the former owner did - maybe he tapped a thread into the bulge....
-
First thing you have to ask your self is if you really need a double needle machine for your projects. When you know you will barely sew double seams better buy a single needle machine. I´m barely using my 212 cause most of my work does not require a double seam. I just have this machine cause it was fairly cheap back then so I just keep it. I just have the head not the whole setup (swapping the sewing machine heads in the table). I`m mainly sewing canvas and similar. I do not recall what the original needle system was for the 212 but mine is setup for 135x17 or 13x16 for leather (same needle just different needle tips).
-
is it completely broke or do you just need some bits? I would assume that Weaver leather can help you.
-
Singer 17-41 / fixing it up with a donor 17-16
Constabulary replied to Webicons's topic in Leather Sewing Machines
That is not a sleeve the face plate is one piece of cast iron. When you have all pieces of the tension unit incl the spring rest then I think the cracked piece is not really an issue. the above pic comes from this thread: https://leatherworker.net/forum/topic/109757-move-along-and-save-or-maybe-take-a-risk/ EDIT: noticed it is a picture from your thread anyway -
Or add a speed reducer. That slows down the speed when you start sewing and increases torque. I have speed reducers on all my machines. I have digital servos and stepper motors (you don´t have them in the US AFAIK or at least they are not wide spread). On my side of the pond (Germany) they are called "Anlasser Motor". Speed reducers add a lot of comfort IMO. Just my 2 cents. Forum search for speed reducer via Google - just to give you an idea https://www.google.com/search?client=firefox-b-d&q=speed+reducer+site%3Aleatherworker.net%2Fforum
-
Bartack machine not completing the back stich
Constabulary replied to Cleggy's topic in Leather Sewing Machines
Indeed!!! -
Assuming a mixture of Pfaff 28 and Singer 17 which are the same class of sewing machine and they even share the same hook (among others like Adler 48, Seiko TE-6 / TF-6 and so forth). I´m almost certain that if it is a Necchi it will use the same hook as the above mentioned machines: https://www.ebay.com/itm/142912990618 at that price IMO it is worth giving it a try.
-
I would try some turns on some scrap leather to figure this because different machines may act differently due to sightly different settings, needle thread combination and so forth. BTW If it was me I would use a shorter stitch length on a project like yours. But that's just me.
-
The 29K51 has a lot in common with the later 29K71 but the gear box is completely different and the pinions are no longer available. The 29K51 has a "drop out" gear box. The 29K71 manual and parts list is very helpful but as said it has a different gear box. I also have a German language Manual if you want it let me know
-
Tensioner assembly - repair or replace?
Constabulary replied to Narf's topic in Leather Sewing Machines
The old Singer parts are of better quality than new generic parts from China IMO. I repaired some tension units (making one out of two) a while ago. I hammered out the stud from the rear. I think you can get replacement studs from College Sewing. Just check the parts list of your machine and check the number on the College sewing website. I would also order some spare screws for the feed dog, Needle bar, needle plate... Maybe some bobbins lint brush... they have everything. -
Check the below attached parts list and note the sentence "THIS MACHINE IS THE SAME AS 29K1 WITH THE FOLLOWING EXCEPTIONS:" The 29K1 is the basic machine and the other subclasses just have some small differences. 29 and and 29K are the same machine. The 29 are US made and the 29K UK made and the parts are interchangeable. The ancient 29 / 29K just differ in the accessories but the basic machines are the same. F.I. front wheel or side wheel, presence of a wax pot or not, different needle plates... I once restored a 29K1 https://leatherworker.net/forum/topic/60554-29k1-pre-christmas-barn-find/ You can modify the modern Singer 29 / 29K bell crank levers. Most parts are no longer available for the old 29K models and do not expect that modern 29K parts (as for 29K51 or 29K71) will work for the ancient 29 / 29K machines, some do but most don`t. 29K1 TO K4,K10 TO K18,K12 TO K23,K30 TO K33.pdf
-
Here is a free English language Junker & Ruh SD28 Manual. The Pedersen 308 is the same machine. SD 28 Junker & Ruh Outsole stitcher Parts list and manual.pdf
-
Are you talking about triple feed machines? If yes, then Adler, Pfaff and Singer have their own foot system but a lot of modern clones are using the Singer foot system. So depending on the machine model it is very likely that Consew, Seiko, Juki, Mitsubishi, Brother are using the "Singer 111! foot system. But again - it depends on the machine model.
-
When the needle - hook timing was right at your machine and it worked properly with this setting and when your new needle bar is in you have to adjust the needle bar height. The procedure is mentioned in the manual on Page 14. Does not matter what needle system you are using, the procedure is the same. 51W51,W52,W53-Inst.pdf
-
Missing parts? tension release bracket Consew 255
Constabulary replied to YelloBird's topic in Leather Sewing Machines
This video by LW member UWE may be helpful for you: -
Questions re: DIY box style speed reducer
Constabulary replied to shelr1's topic in Leather Sewing Machines
You are welcome BTW - toothed V-belts are better when you go around small size pulleys. -
Questions re: DIY box style speed reducer
Constabulary replied to shelr1's topic in Leather Sewing Machines
Back then I had no proper size V belt for the test setup. But yes, it actually works. -
Questions re: DIY box style speed reducer
Constabulary replied to shelr1's topic in Leather Sewing Machines
I forgot this picture: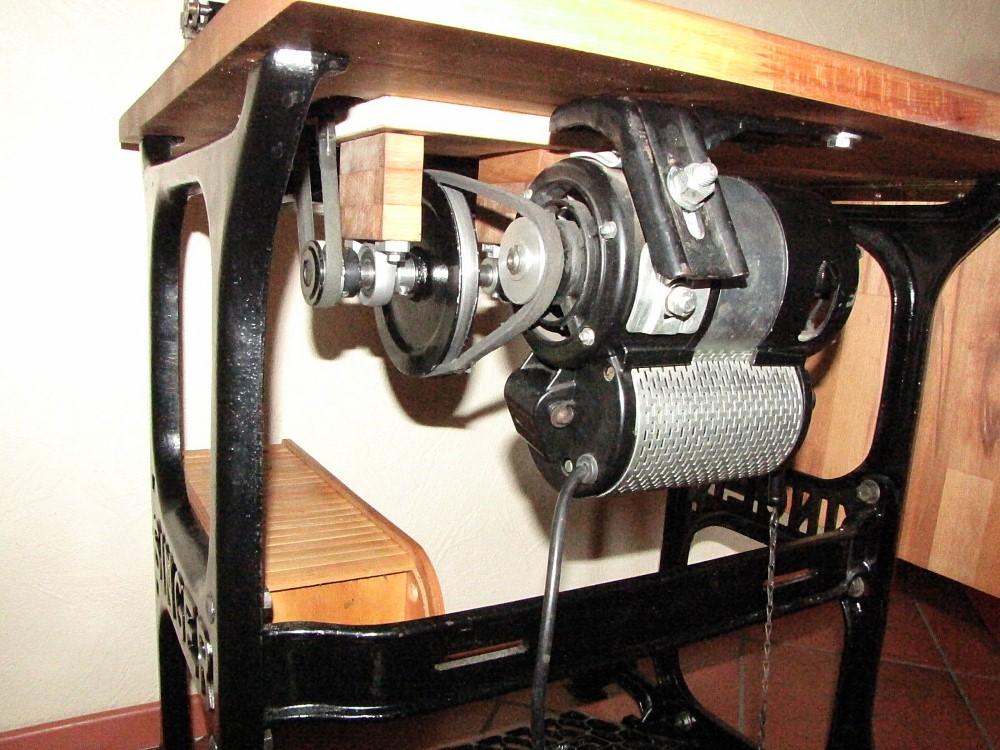
-
Questions re: DIY box style speed reducer
Constabulary replied to shelr1's topic in Leather Sewing Machines
Not sure what he used but cheap pillow blocks for 15mm shafts can be found on Ebay F.I. Pillow Block Type KP002 https://www.ebay.com/itm/144782907792 a 40mm and 120mm pulley (for 1:3 reduction) with 15mm bore can be found here: https://www.ebay.com/itm/264553616997 15mm shaft: https://www.ebay.com/itm/163869249505?var=463451784748 Just some suggestions I have used these bits for some speed reducers and I´m running one with the above components on my Singer 51w post bed machine. I just have the reducer in a different position. Depends on your stand where you mount it. This is just how I did it. EDIT: You may find the bits cheaper if you dig deeper but smallest pulley here is 45mm https://www.ebay.com/itm/272680918308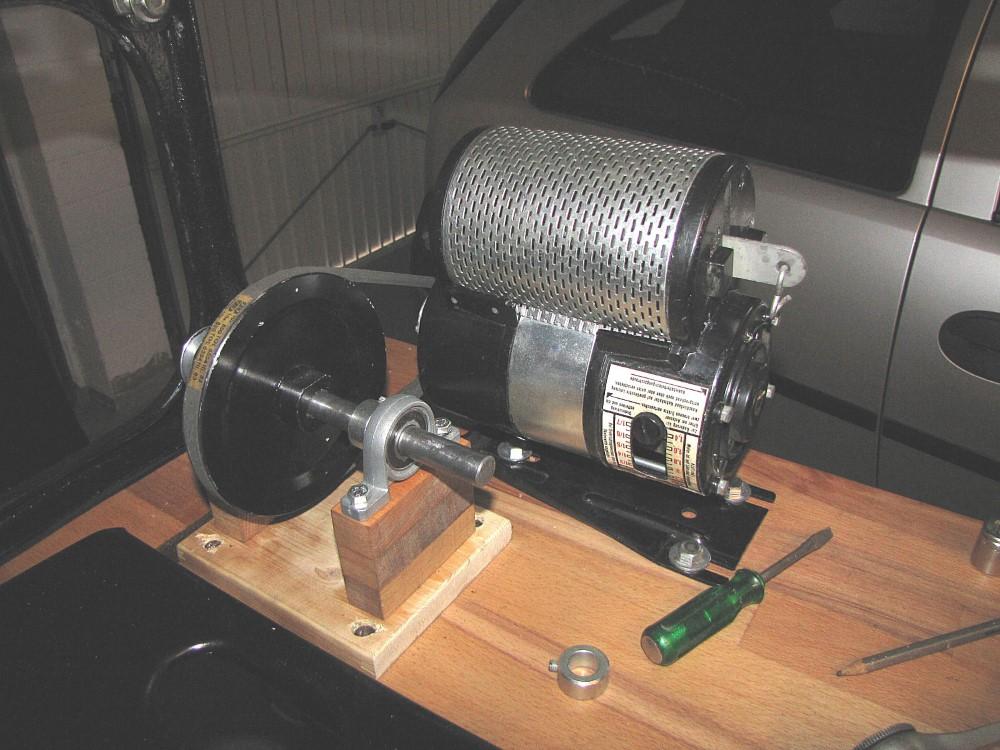

-
Should I repair/rebuild this clutch?
Constabulary replied to YelloBird's topic in Leather Sewing Machines
If it was my machine I would replace the entire clutch. I think that will prevent you from headaches. The safety clutch AFAIK is the same as on the Singer 111 machines and they are still made today: https://www.ebay.com/itm/142979170694 -
Swapping clutch motor to servo motor, please assist
Constabulary replied to Ana1234's topic in Leather Sewing Machines
Looks like the 650W motors are gone already but here is one for less that 80€ (if they do not change the price). https://www.ebay.de/itm/285271068358 Not too bad I think.