
Constabulary
-
Posts
5,764 -
Joined
-
Last visited
Content Type
Profiles
Forums
Events
Blogs
Gallery
Everything posted by Constabulary
-
Don´t tell me you went to from Denmark to Bulgaria for picking up a 335 parts machine. https://www.google.com/maps/dir/Bulgarien/Kopenhagen,+Dänemark/@48.5993965,9.7962758,5z/data=!3m1!4b1!4m13!4m12!1m5!1m1!1s0x40a8fec1c85bf089:0xa01269bf4c10!2m2!1d25.48583!2d42.733883!1m5!1m1!1s0x4652533c5c803d23:0x4dd7edde69467b8!2m2!1d12.5683372!2d55.6760968 I guess you were on a road trip, right?
-
Pictures are quite small, dark and tilt... If I see it right the thread is fraying close to of what I think is a needle guide or to the needle eye. So I would check the needle guide hole (or inner foot??) for sharp edges, I´d also replace the needle and / or go up 1 size with the needle. Maybe you even have to enlarge the hole in the needle guide slightly. Really can't tell much from the picture - tried to enlarge and brighten it but... well... BTW - looks like the Outlaw is using Singer 111 type presser feet - is that correct?

-

I found 2 old Singer machines for sale
Constabulary replied to TomWisc's topic in Leather Sewing Machines
Wow - now that's a machine I never have seen or even heard of. Looks like a Singer 17 with either jump foot or driven top feed and with oscillating barrel hook as used on the 45K (or maybe a bit smaller type). Very cool find! $120 OBO? I would buy them in a heart beat! -
Looking for a 3/4” binder for leather binding tape
Constabulary replied to JeannieH's topic in Old/Sold
Your current foot set looks like the Singer type so this set here should work, it has a smooth bottom: https://www.ebay.com/itm/SINGER-111W-211W-WALKING-FOOT-SEWING-MACHINE-SMOOTH-BOTTOM-BINDER-FOOT-SET/401174055700 But I do not know your machine so check with the seller first I´d say. Or check with the dealer you bought the machine from. -
Looking for a 3/4” binder for leather binding tape
Constabulary replied to JeannieH's topic in Old/Sold
ha - even better - great that it works. However I would try to bring the binder closer to the needle and install the correct foot set (the inner foot is too long) otherwise you may have issues with making turns / binding curved pieces. Check my pictures - my binder is very close to the needle - guess why your feed dog is so short and the throat plate has the cutout. -
Singer 29K60 Walking Foot Not Lifting
Constabulary replied to Superduty's topic in Leather Sewing Machines
ouh.... okay, things I notice: the cup on the tension discs is either odd or upside down, the tension spring seems to be missing or is under the cup (if its the original cup then both parts are installed the wrong way) the nut on the tension unit is bubba-ed / wrong part, the tension disc are the wrong ones the originals need to be flat type (Singer parts # 8616). Because of the wrong & too high tension discs and the upside down installed cup (rim rests on tension discss as it seems) the "foobar revolving joint" comes up to high and this may cause your issues. Cannot explain in English how the parts play together but the main issue from my view are the tension unit and the wrong tension discs - no joke. I´d recommend comparing pictures of other machines (29K60, 62, 70, 71, 72, 73) and check this manual and parts list https://leatherworker.net/forum/applications/core/interface/file/attachment.php?id=149218 It has a well detailed parts list and show how the parts should be assembled. -
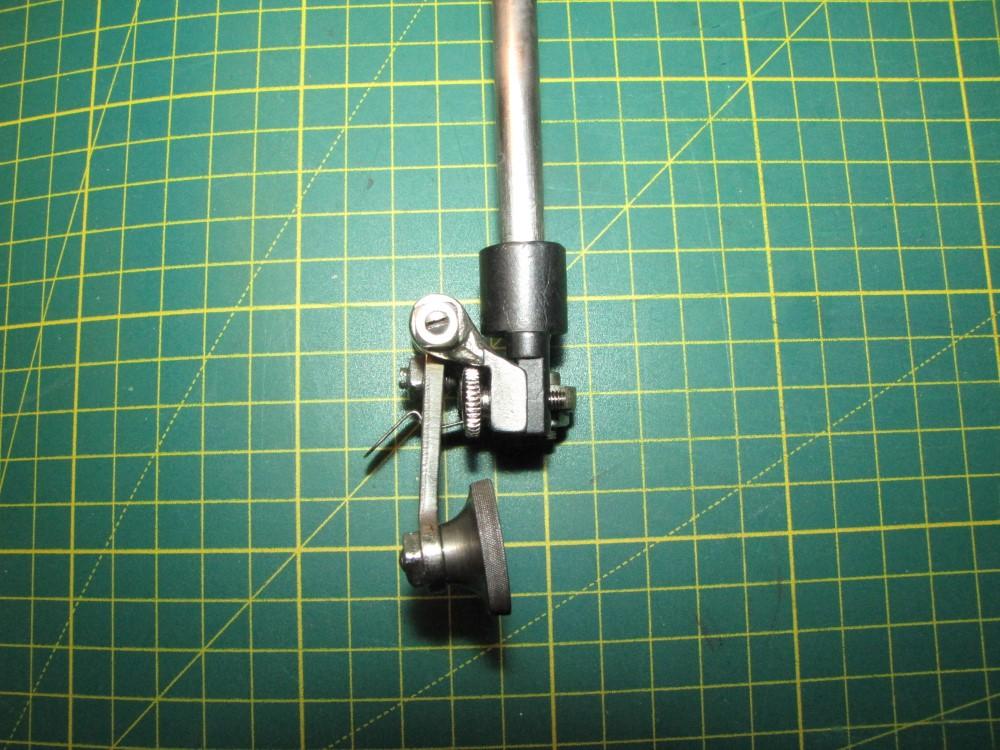
I of course cannot test this on all above mentioned (and unmentioned) machines - I just wanted to give an idea of how it "could work". As a sample - this is a 107W1 - this machine has a closed foot pressure screw and you have to shorten the presser foot bar and adjust the foot bar bushing. Conclusion - if you don´t like / dare tinkering on your machine - "Don´t do this at home" ! I guess you know what I mean....

-
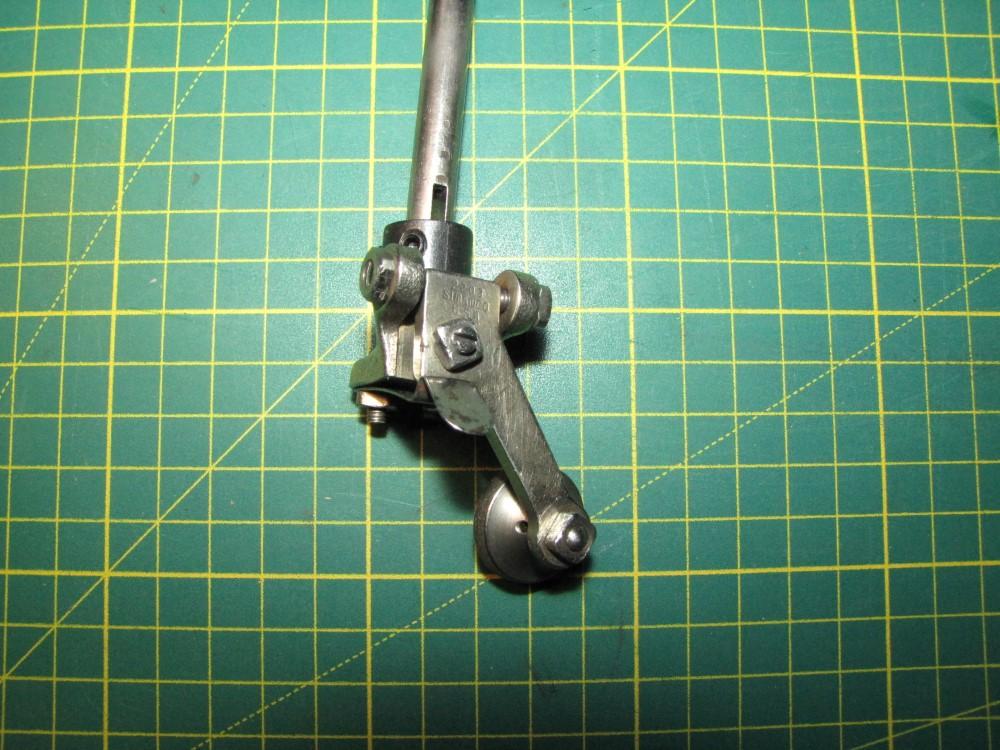
I´m not sure if this is known but at least to me it was new that there is an adapter for retrofitting a roller foot to Singer needle feed and drop feed machines which have the "Split Presser Foot Bar". Usually this type of presser foot bars cannot accommodate roller feet. So with this adapter you can install roller feet like the ones you find for the Singer 31K / 331K and similar machines (works best with small diameter roller I think). Quick explanation - I restored a 51WSV2 last year and replaced the old presser foot bar with a dedicated roller foot bar - fortunately it had same diameter as the later Singer foot bars. And while looking for parts that could fit this very old but very nice machine I stumbled over a "supporting base" but the purpose was not clear to me at that time so I just ordered one to see what it really is. This is it: https://www.ebay.com/itm/Presser-Foot-Supporting-Base-Fit-For-Golden-wheel-Cs-810-820-Sewing-Machine/163656522197 It turned out that this is an adapter you can fit on the typical "large diameter" Singer split presser foot bars you find on many vintage Singer industrial machines and even some modern clones. Machines which have this type of foot bar are f.i. Singer 111w, 211w, 107w, 143w, 153w just to mention a few but it depends on the subclass and it only works for drop feed and needle feed machines. Good thing is you can use the standard feet that belong to the machine ex factory and put on roller foot when needed (but may depend on the machine you have). So this enhances the spectrum of use of certain machines. And maybe (have not tested this) you can even use the standard "garment" presser feet of the 31K and similar machines with this adapter. "Bad thing" is on machines with a "closed top" foot pressure screw you probably have to shorten the presser foot bar and have to adjust the presser foot bar bushing to achieve more foot lift - so it depends on the machine what modifications are required... So this may work for you or not and it may require "tinkering" (depending on your machine) and maybe it´s not everyone's cup of tea but it could be a workaround for one or two members here... I just wanted to share this. And this is how it works:


-
Singer 29K60 Walking Foot Not Lifting
Constabulary replied to Superduty's topic in Leather Sewing Machines
Please post some good clear pictures of your machine especially showing front and backside of the head. -
Looking for a 3/4” binder for leather binding tape
Constabulary replied to JeannieH's topic in Old/Sold
That exactly was my point when I started tinkering with these binders... I tried em - they worked and I´m happy with em. As I said, I meanwhile have a few "el cheapo binders" and all work fine but have to be fine tuned / well positioned in relation to the feed dog and needle when I change them. But yet I cannot complain. None cost more than ~20-25 bucks or so. Now I even know I can do binding with leather tape - I learned something today Good luck with your work and let us see some results when your binder has arrive and is set up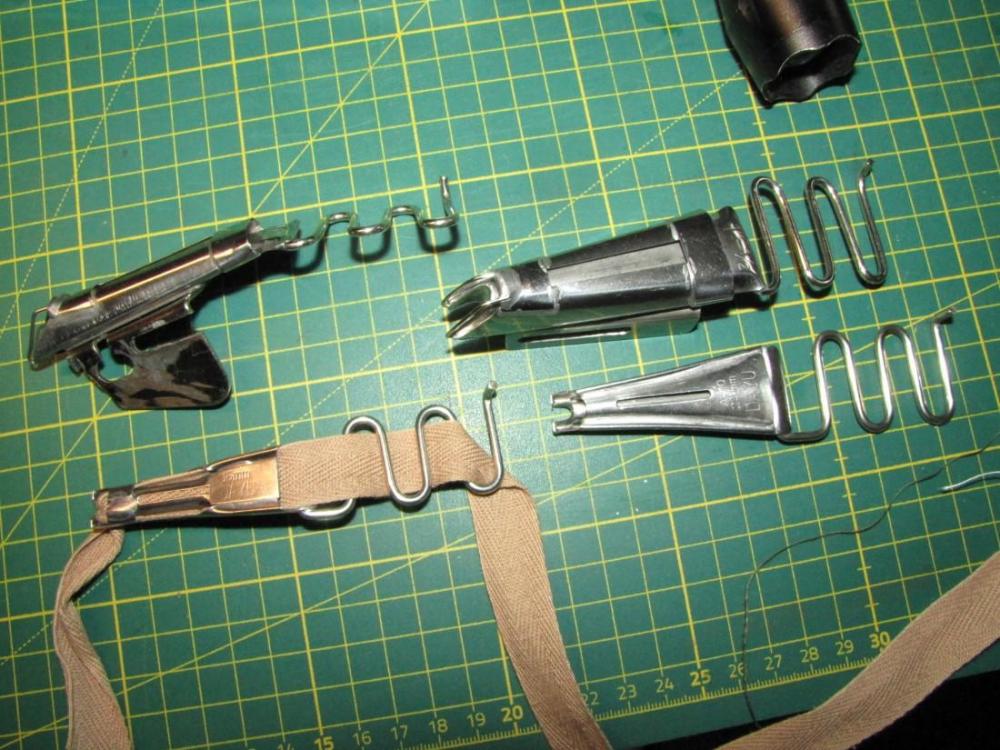
-
Looking for a 3/4” binder for leather binding tape
Constabulary replied to JeannieH's topic in Old/Sold
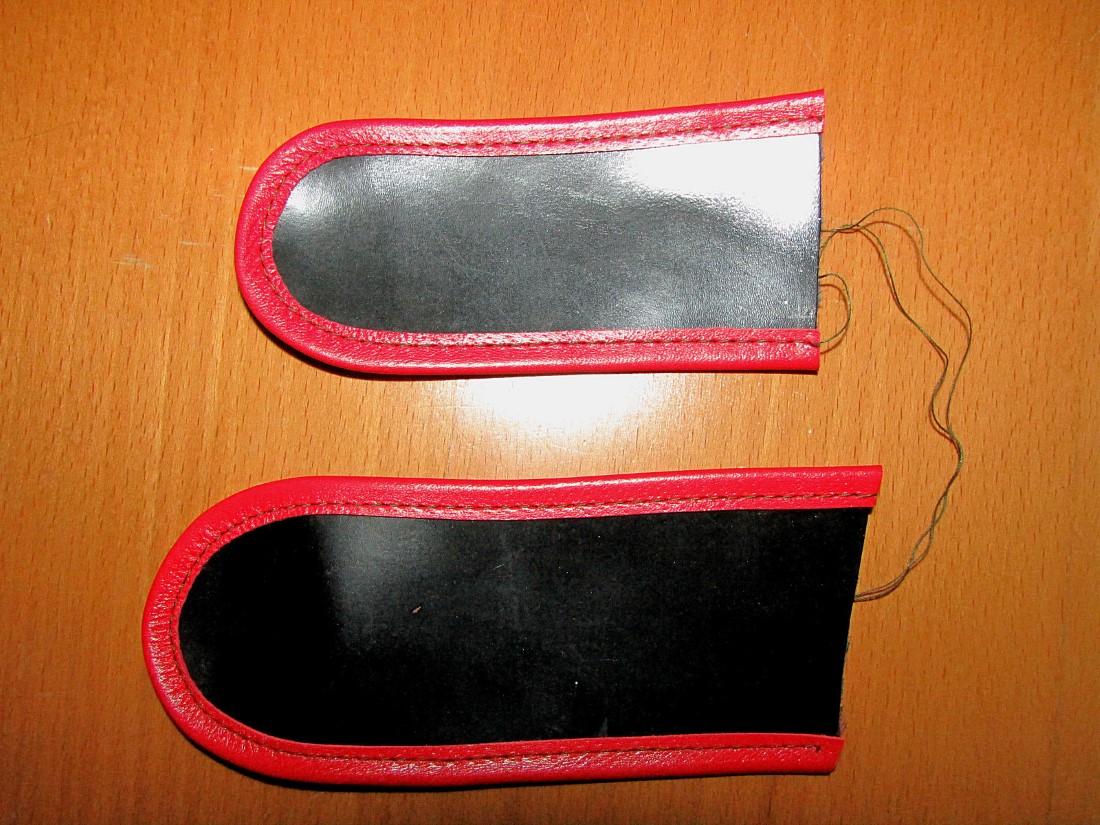
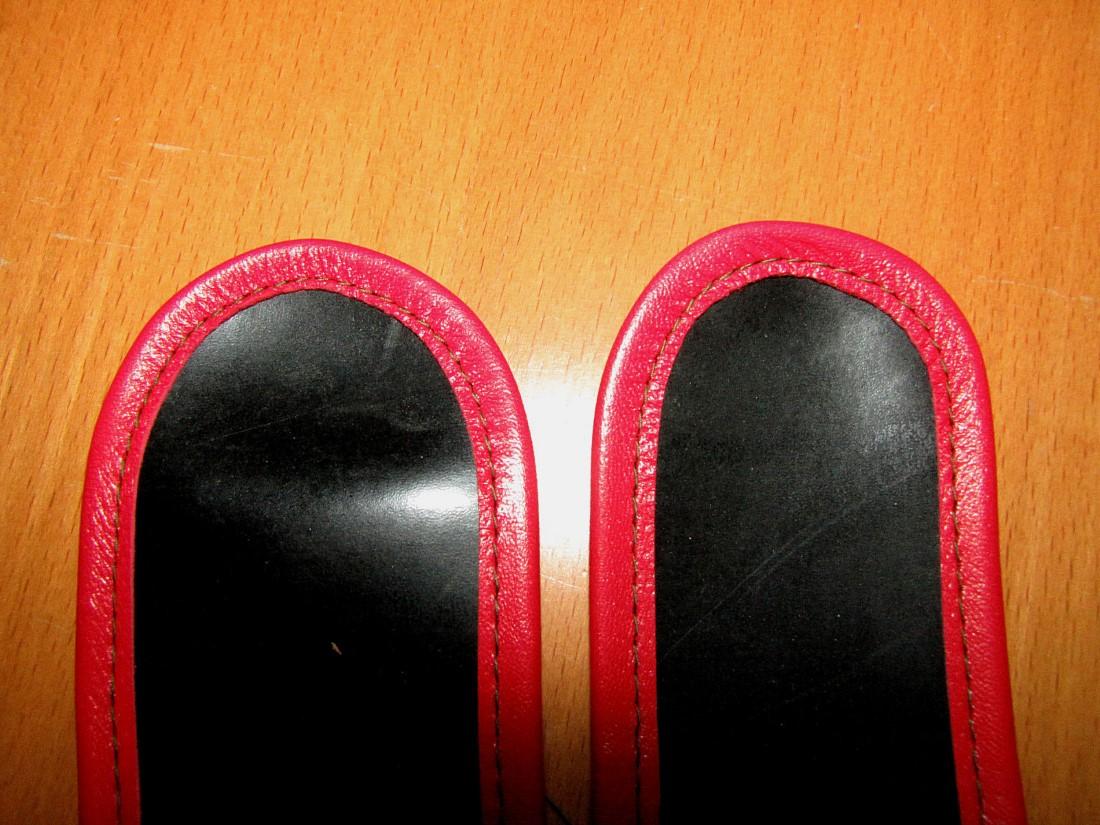
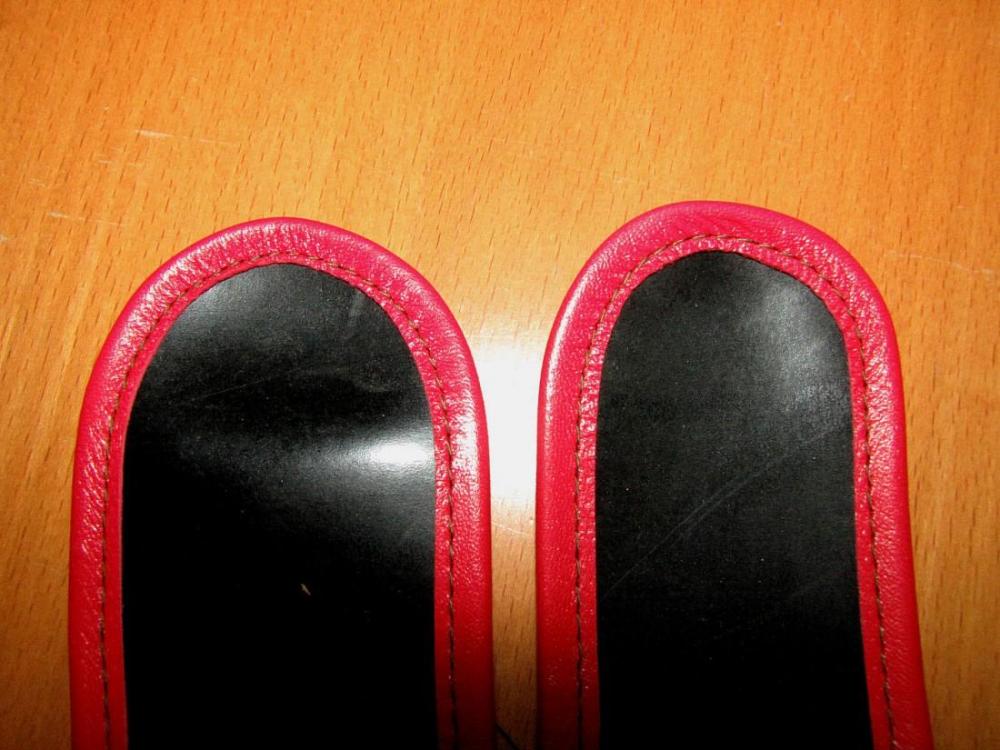
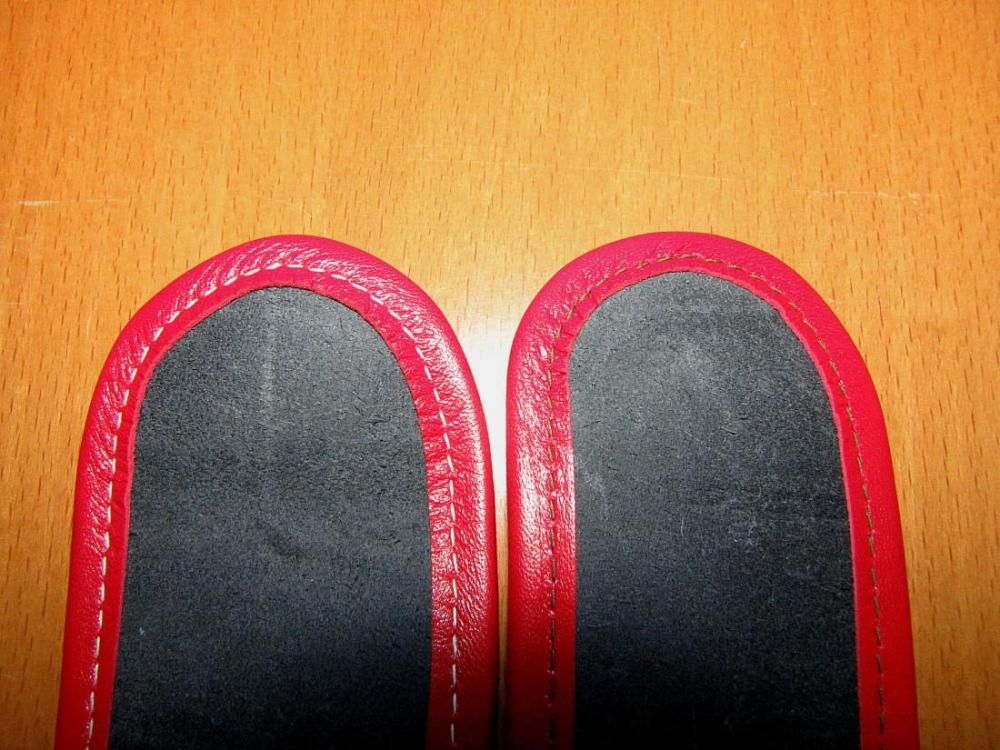
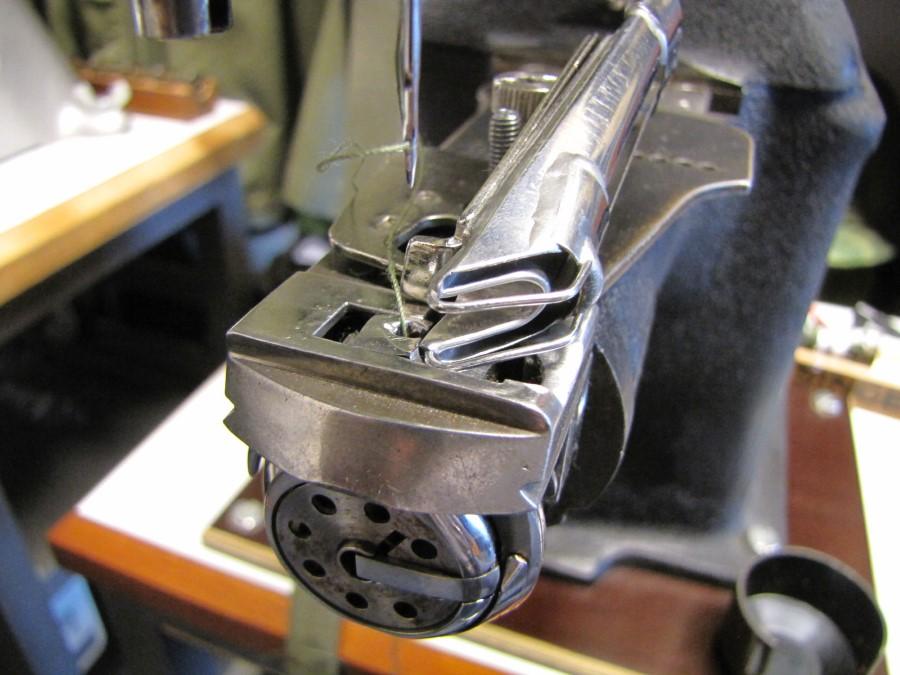
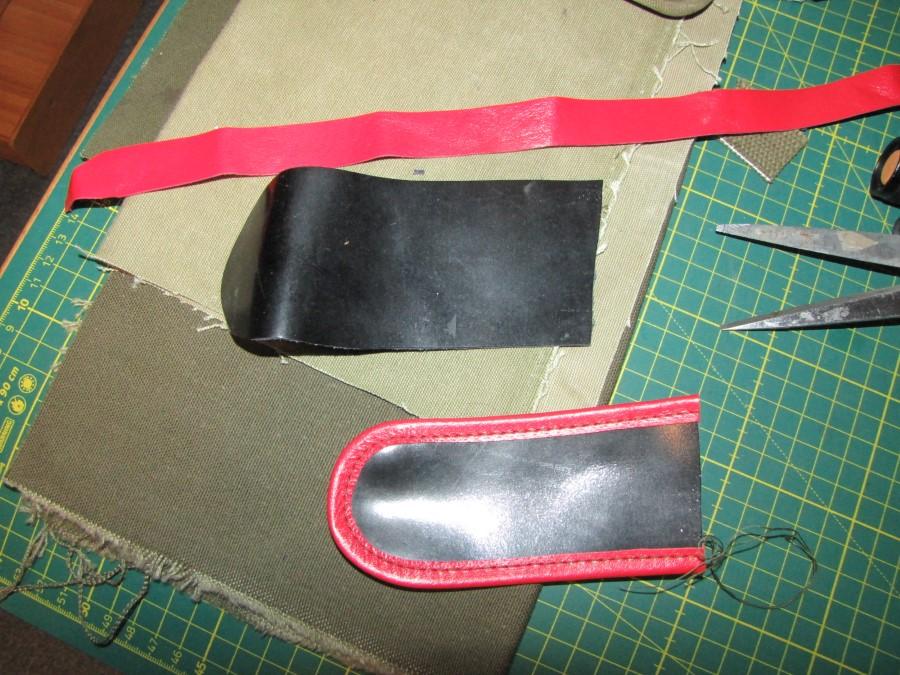
Some close ups - the larger piece with white thread on bottom side is the 2nd try. The 1st try looks a bit better IMO so the problem sits in front of the machine And the video:
-
Looking for a 3/4” binder for leather binding tape
Constabulary replied to JeannieH's topic in Old/Sold
Keep in mind - I`m not used to run leather tape and my setup is probably not perfect for this task. I probably have top practice and the setup may need some fine tuning. I usually run thicker cotton tape through this binder but this should just give you a rough idea. Above pics show my 1st try. Video is the 2nd try I´m loading the video to YT so stay tuned - may take a while... -
Looking for a 3/4” binder for leather binding tape
Constabulary replied to JeannieH's topic in Old/Sold
sure... wait... EDIT: Your binder hat to be closer to the needle... So it works for me but I´m not really into leather binding so this is just a quick test... 1mm very soft leather, cut to 19mm strips, #18 / 110 round point needle, #69 thread, my binder feet are knurled (for webbing) thats not ideal for soft leather I think. I will shot a quick video of how it looks when I run this setup with the leather tape and stuff...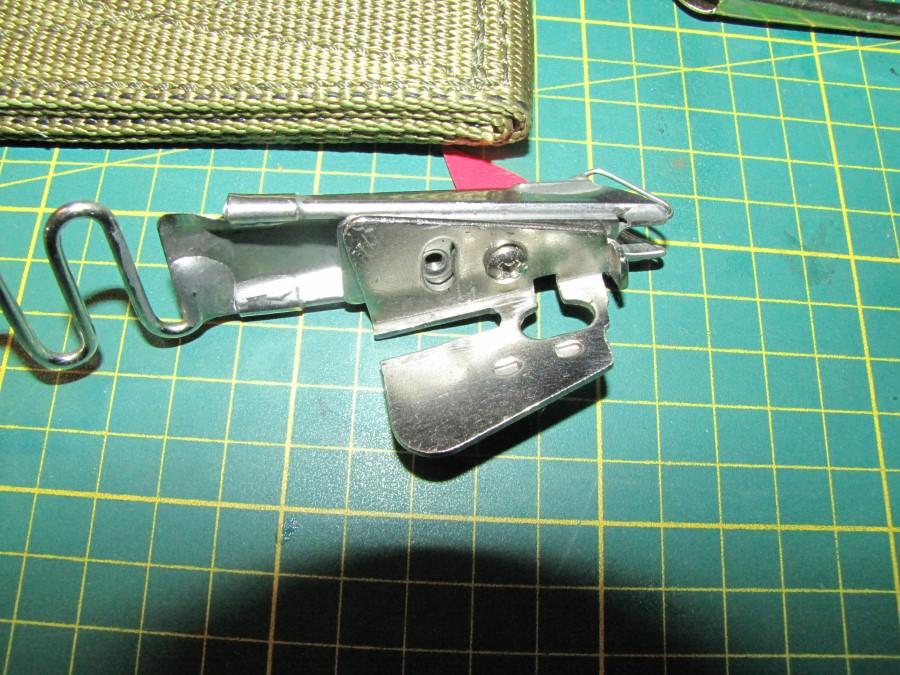


-
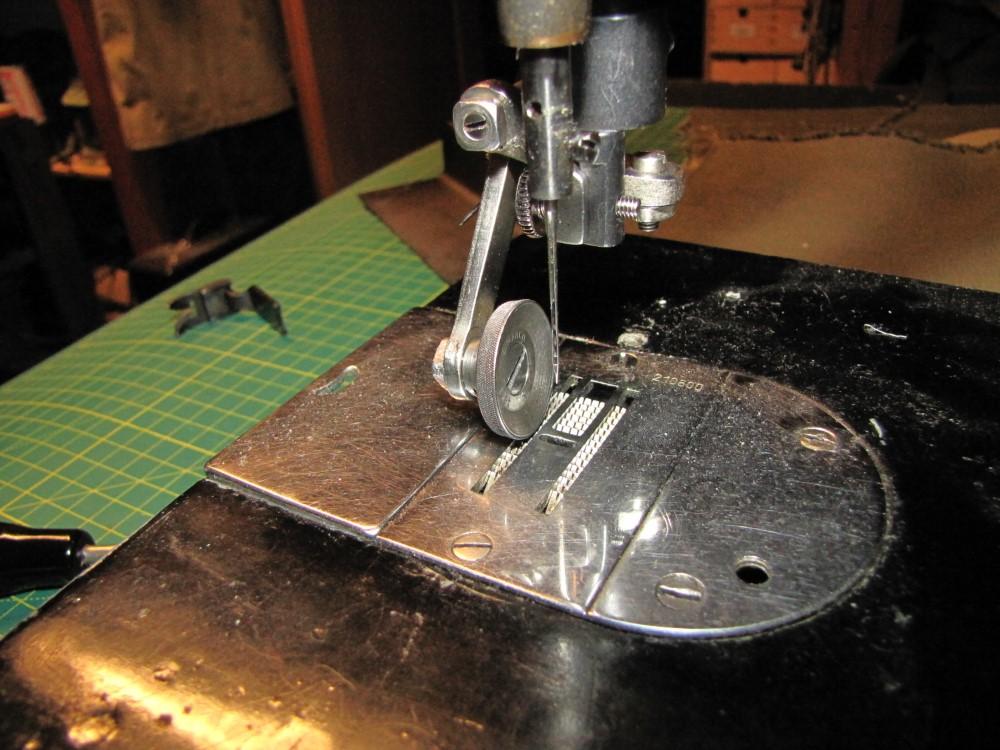
Official Stitch Lenght for Singer 29K is...
Constabulary replied to Constabulary's topic in Leather Sewing Machines
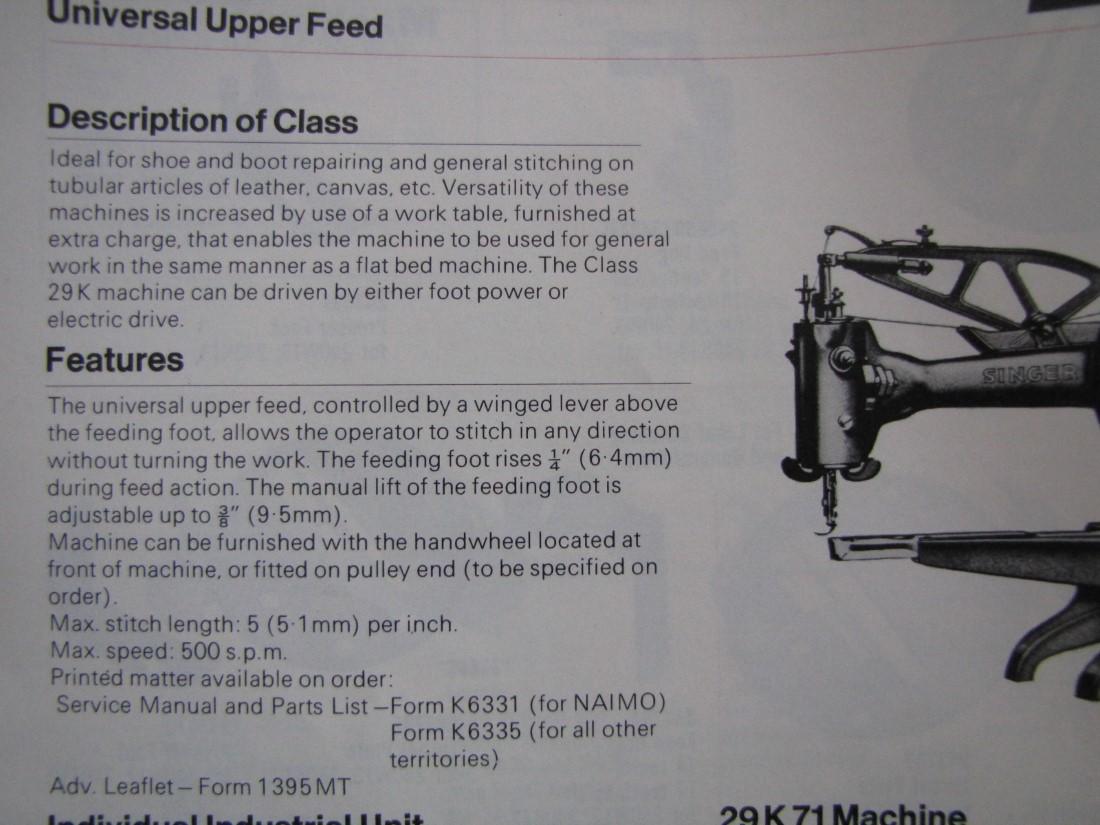
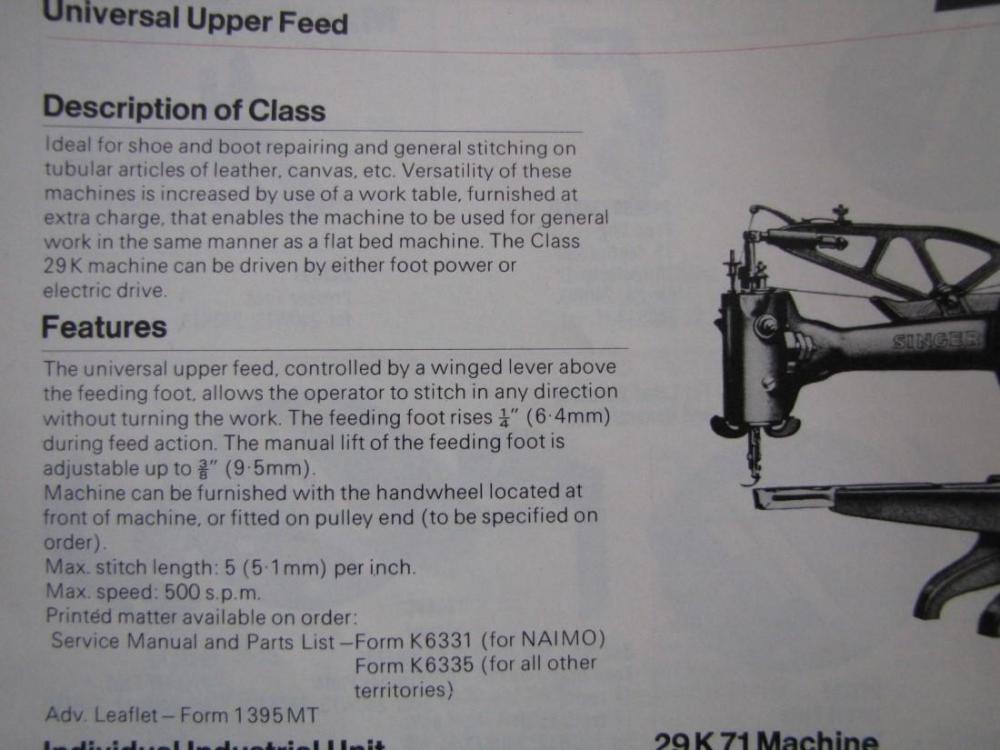
Found another document (1973-74 Singer Parts catalog) and here the stitch length is stated with 5.1mm max. - funny how different information in official Singer documents can be. So the truth is somewhere between 4.5mm and 5.1mm Catalog also states the manual foot lift is 9.5mm - funny - I have sewn 12mm materials with my machine w/o pushing it.
-
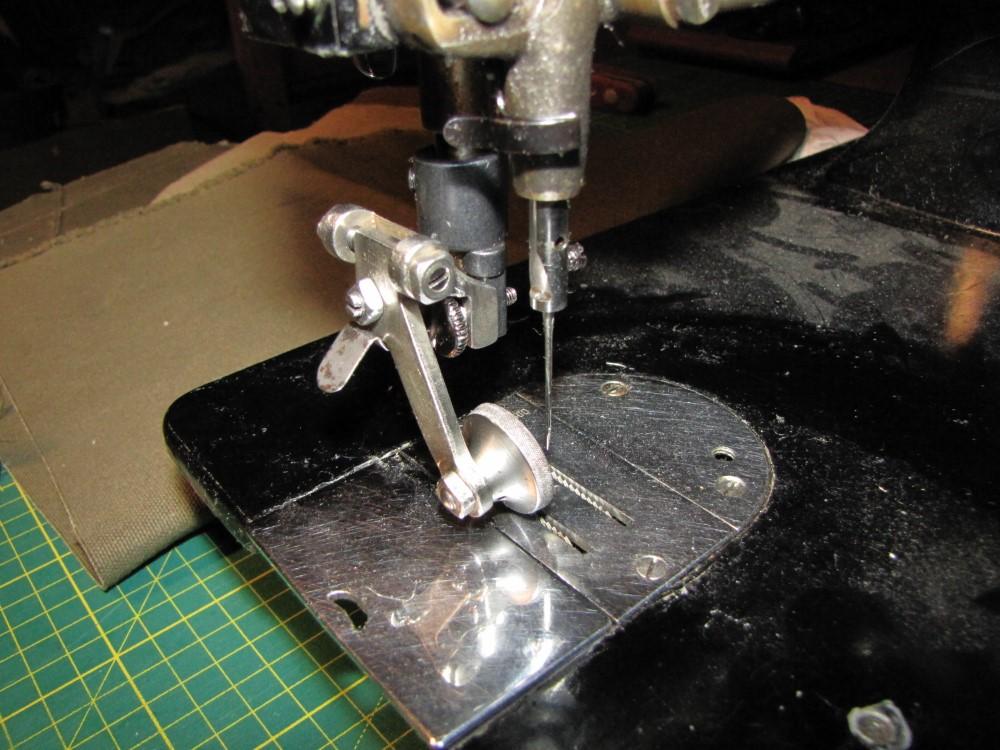
You can adust the the foot lift on a small cam on the backside of the head. It´s marked H M L for High, Medium, and Low foot lift depending on the material thickness you want to sew. The "official" stitch length for the 29K models range somewhere between 4.5mm and 5.1mm (I have seen both mentioned in official Singer documents). On the 29K model you have a pendulum effect - meaning the thicker the material the shorter the stitches - thats normal. So when you are close to 5 SPI on thin material that is a perfect result for a used patcher of this type! EDIT: BTW - seems you have used the front hole for mounting the lamp. This is a "tool hole" for adjusting the small timing eccentric. If it was my machine I´d put the lamp on the back side.
-
Looking for a 3/4” binder for leather binding tape
Constabulary replied to JeannieH's topic in Old/Sold
If it helps you I can cut a strip of thin and soft leather (goat I guess) and run it through my binder... -
Looking for a 3/4” binder for leather binding tape
Constabulary replied to JeannieH's topic in Old/Sold
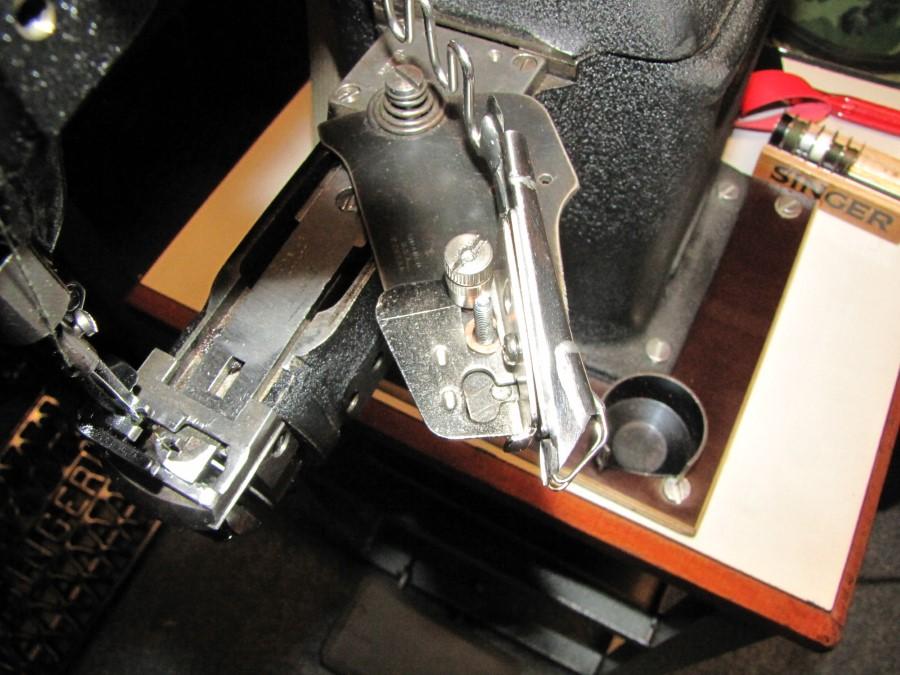
Holy crap $434 / $335 is a lot of money. When you are using thin leather tape its all fine but at a certain tape thickens you may have too much drag so I guess you are making things like handbags, purses and so forth and you are using rather thin leather tape like 1mm thickens or less, right? Then cheap standard binder may work fine. The tape thickness really matters! When I set up my binder I had problems finding the right one for the tape width I wanted to use. Meanwhile the "cheap binder situation" became better but back then I had to modify my binders to suit my application. I do not have the output that would justify a $300 binder so I tinkered a little bit. I `m using cheap binders for flat bed machines and modified the bracket - works absolutely perfect. I meanwhile have several of the same type. This is the type I´m using. https://www.ebay.com/itm/SINGLE-FOLD-RAW-EDGE-PLAIN-RIGHT-ANGLE-BINDER-SET-S64-fits-JUKI-DDL-8700/122464240878 My Singer 108w20 usually would use a kind of "Pfaff 335 binder" but this is how it looks and I´m very pleased with it: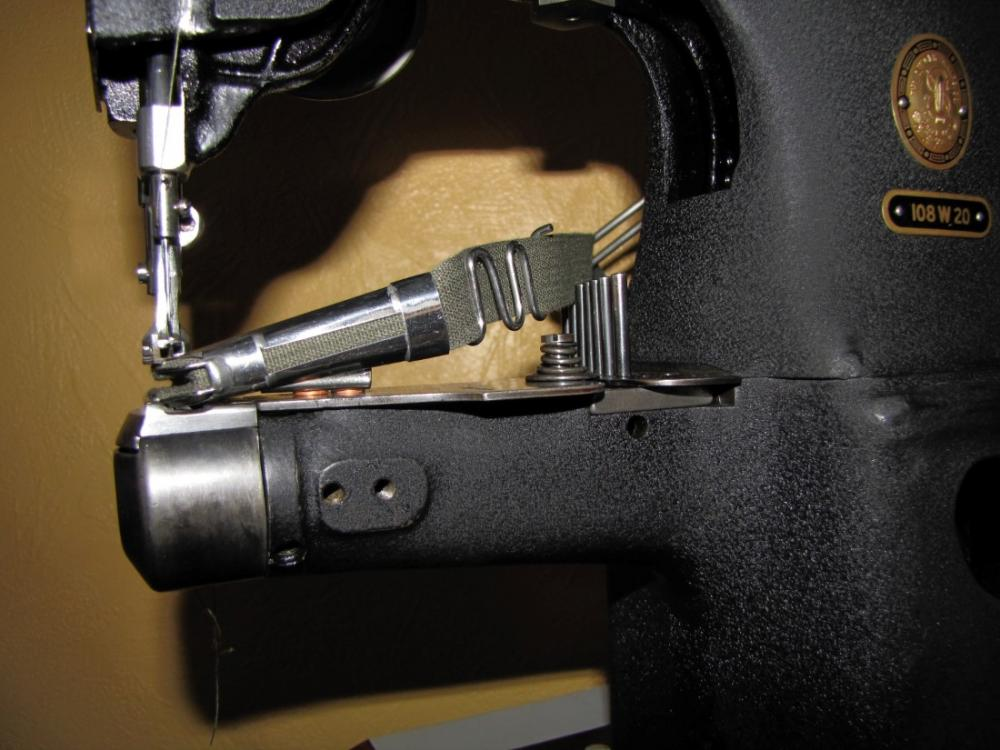
-
Is this a synchronized binding machine?
Constabulary replied to JeannieH's topic in Leather Sewing Machines
it would not surprise me when certain parts of the binder setup are interchangeable between the models - welcome to the clone world Upper front section of the Zoje 2628 looks very much "Singerish" to me, certain parts are typical for the Singer 111w / 153w machines. So I would suspect that the feet are Singer type too but of course I do not know for sure.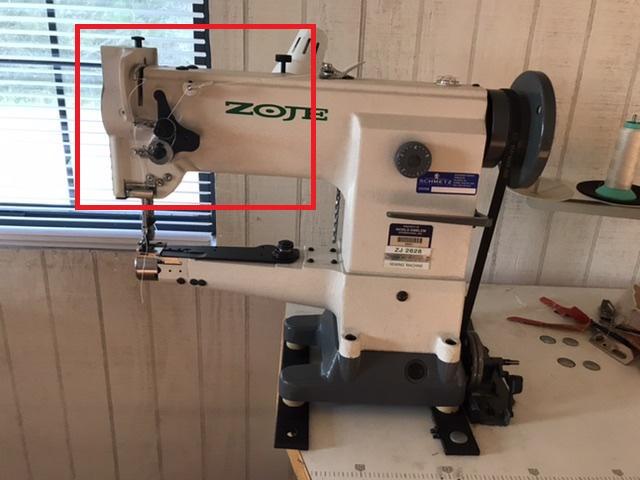
-
Ebay is your friend (sometimes) - check the links Badges: Singer Sewing Machine Badges Decals: Singer Sewing Machine Decals
-
Is this a synchronized binding machine?
Constabulary replied to JeannieH's topic in Leather Sewing Machines
okay - did not know they shut until Feb. 28. Wondering how many orders have piled up until then. Pretty sure you have dealers in the US who can supply these binders - maybe check with the known industrial sewing machine dealers who have adverts on top of this site. However - I think I have seen the "335 binders" for 18mm and 20mm tape but 3/4" is 19mm but I of course don´t know what else is available. -
Is this a synchronized binding machine?
Constabulary replied to JeannieH's topic in Leather Sewing Machines
Worried because of Corona? Seems the virus will nor survive the transit. We had this topic here just recently... https://leatherworker.net/forum/topic/88680-suppliers-from-china/ -
Looking for a 3/4” binder for leather binding tape
Constabulary replied to JeannieH's topic in Old/Sold
If it was me (cheap Charlie sometimes and I like trial end error engineering ) I would try a binder like this for leather tape because I think it is not causing much drag due to the smaller body and shell. https://www.ebay.com/itm/Single-Needle-Binders-for-shoes-for-thick-leather-and-rubber-Material/153055486111 But you of course have to modify things because it is not designed for your machine. This of course is just a very "cheap sample". Another idea - check with LW member UWE - he sells some right angle binders binders that seem to fit your machines and I think he is able to tell you if they are suitable for leather tape or not: https://uwe.store/products/khf2s-tape-folder?variant=7012296622123 EDIT: regarding UWE and leather tape binders - check this thread: -
Excellent work! Very impressive! Now you have to "invent" a 29K bell crank lever that never wears out and produces 6mm stitches...
-
Looking for a 3/4” binder for leather binding tape
Constabulary replied to JeannieH's topic in Old/Sold
Do not expect that all 3/4 binder can feed leather tape - a lot depends on the tape thickness and material it self. Most binder are meant for rather thin fabric tapes. Leather tape is critical and depending on the application often requires a custom binder. If the tape you want to use is causing too much drag the tape will either not feed or the stitches become shorter and / or the material you want to bind may stretch and the result looks odd. I guess you need a singe fold binder, right? If you need a double fold binder it would cause even more drag. So the quote from ATL (we do not know how much it was) may sound high compared with the $10 binders on Ebay but they for sure will work trouble free when you sent them samples of you leather tape. How much was the quote from ATL? -
Is this a synchronized binding machine?
Constabulary replied to JeannieH's topic in Leather Sewing Machines
could also be that it is a JUki DCS 246 clone - if so It would not take Pfaff feet, then it needs Singer 111 type feet. Or do the Pfaff 335 clones take Singer feet too? Not speaking fo the other parts... So be careful. When the Company (Sewing machine dealer I guess) sold you this machine as a binder machine they should have it set it up like one and ready to use