


DavidL
-
Posts
1,516 -
Joined
-
Last visited
Content Type
Profiles
Forums
Events
Blogs
Gallery
Store
Everything posted by DavidL
-
I used stiff chrome tan kangaroo leather before, only a few offcuts for practice. If you use kangaroo, in my opinion it will look different than saddleback bags. Saddleback is meant to look rugged, so they use thick leathers with scratches and don't finish the edges of the bag. If thats not an issue you just have to add extra leather or stiffener so that it will hold its shape. Veg tan in itself will hold its shape, at 2-3 ounces it may be too thin for a rugged adventure bag, so if kangaroo is 2-3 ounces it could be too thin without any stiffener. Another thing I want to add is that attempting a bag like that is not un heared of by a beginner but is a intermediate to advanced project. There are members that attempted the bag that had great results, but it is a difficult project that may put you off leather working...
-
try ians method on thicker leathers (4-7 ounces), it should be identical look to non cast technique. peter nitz, who is a luxury bag maker pre awls the holes in his videos.
-
One thing that helped more than I though it would is sharpening the awl tip to a fatter profile, not a pointy tip. When sharpened correctly the rounded awl tip will penetrate just as well, only its fits perfectly in the pricking hole marks. Search on youtube leathertoolz, he has a video on the subject.
-
I would like to know this as well.. I have read oil it before dyeing, also read some do it after dyeing, unsure if it is oiled after finish. Conditioner is after finish? As with everything its a matter of preference. I think if you add something like aussie or anything that isn't an oil before dyeing that will block the dye from setting in. Someone who has experience with this first hand would know better.
-
3 good suggestions. Thank you. I haven't thought about online instructors that could be a good way to learn. Design and construction by wc double is extremely difficult to find. A library near be has a copy but you can't sign it out... Handbag designer 101 I will look into.
-
Stitching on thin leathers I always go without casting The backside will never be angled like the front when not casting. At best the backside stitching will have a 15 degree angle. With very thin threads there could be a change (.52mm for 6 SPI) On leathers that are 2 - 2.5 ounces I do not cast the thread as the front stitches become flat. Leathers that are 2.5 ounces and up there is no benefit in my opinion not to cast the thread, some do not cast the thread, so its a matter of preference. For me personally when I cast the thread on 2.5- 3 ounces and up the front side does not differ drastically than not casting the thread (there is a difference on some leathers but a small one), the difference is so small if I was to stitch one sample with casting and one without it would be hard to guess. On the backside of the casted stitching the stitches are angled and tidy.
-
Thanks for the suggestions. I will look into arthur porter. The thing I'm looking for is a book on bag "joinery" like gussets, styles of different bags, and how to create different forms of bags. Al stohlman and valerie have great books, they however don't go in-depth on different styles of bags and the design of them, only the construction. If anyone has a specific book they have liked that would be helpful.
-
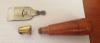
What Is This Leather Edge Painting Tool? Common For Watch Straps.
DavidL replied to mylesbu's topic in How Do I Do That?
http://elfitakorea.blogspot.ae/2013/09/edge-dyeing-roller.html -
Which books do you recommend or look promising for clear instructions on: single gusset 3 piece gusset accordian gusset gusset w/ gusset Different styles of bags, briefcases, small accessories pockets drop in linings The books I do have are al stohlmans vol 1 to 3 on making leather cases. Valerie michael. They do not have information on those styles of gussets or are in-depth on bag making. The book does not have to be specifically done with hand stitching, the patterns and how they come together would be what I'm after.
-
I prefer Ian atkinson's method. The different ways I have tried that worked for me. right hand needle enters: on top of the hole. on top of the hole casting the thread away from you. django's method. on the bottom of the hole. on the bottom of the hole casting the thread towards you. Ian atkinson's method. https://www.youtube.com/watch?v=3zTOqJCWbfY&spfreload=10.
-
varied results on veg tan leathers by my experience.
-
huns, I have a few questions if you don't mind. When making the bag what thickness do you aim for the edge? Altogether the edge thickness looks like 5-6 mm. If edge is 3mm is this too thin of an edge for the bottom of the bag? I see the edges even for the handle are in the 5-6mm thickness is this so they do not bend? When stitching do you hit the pricking iron almost through the leather? How do you keep the back side of the stitching to look so even. I stitch a lot but can not get a completely consistent stitching all the time. Once in a while stitching will look bad for a couple of stitches or one stitch will not look good, making the project have a bad look.
-
Back stitching slants the opposite direction of the front. That was done a year ago and I don't have it on hand. Based on how the thread lays nearly flat I can tell that was done with a regular stitch (leather is too thin to cast thread anyways) If I casted the thread it would be same direction. Out of all the stitching I have done I haven't been able to fully replicate the stitching above. Why? I don't know for sure. The change from then is I no longer use leather like that anymore (which was hard and dense kangaroo) and just as important I sanded down my dixon iron teeth width slightly thinner. That specific picture above I hit all the way through with my iron and stabbed to open it up as I go. When it comes to getting consistent stitching the variables are extremely important. So my post will be in-depth about things that seemingly don't matter but makes tiny changes to the stitching. All the common things, like keeping you awl straight, 45 degree angle, hitting the pricking iron solidly (solid NEVER hollow backing like a tree stump) is important. Hammering glued edges first to combine the two leathers into one. If you don't do these for sure the stitching will not look the best it could. Stiffer leathers in my opinion create a better looking stitch. More in-depth things include keeping your forearm stiff. A different thickness of awl for different SPI. It may not seem like a difference but the hole in the back needs to be bigger for thicker SPI, meaning thicker thread - too small on the back side the thread lays uneven because its compacted in, it needs some room to lay properly. Grinding your awl to a rounded tip rather than a pointy tip - the small tip isn't great in my opinion, a youtuber under the name leathertoolz has a video talking about this exact subject. Even more in-depth is focusing on the arm movements like a rhythm like you are shooting a pool shot, basketball shot or whatever. Placing the needle in the hole quickly and pulling the thread at the same angle and strength. Overtime you shouldn't need to think about anything. Best things to make sure: Technique is proper thread, SPI, and thickness of awl is proper Leather is stiff and high quality leathers, better quality the stitches look better Not letting your focus stray Thing to look out for: Too soft of a leather (very difficult to keep tension light, hole closes up quick) - sometimes unpredictable stitch not too thick of leather over 6mm - difficult to stab through all pieces besides pricking all pieces individually Anyways.. thats just how I look at it. Once you figure out what works with all the practicing you don't have to think about it at all and the information will come to your brain like the way you can recite your birthday, your favourite foods without thinking. Some may say parts of it are wrong so the only way to tell is practice and figure out what is true for you.
-
Monica, heres another one you might want to consider.. sorry.. Was thinking about an alternative to a skiving machine with an edge guide of some sort and saw that video. At very least it may be useful to skive roughly and finish off with a skiving knife.
-
Wicked welts if the hand planes are small wooden blocks with a japanese plane they could be very valuable. Some go for a 150 just for the blade. A question I want to ask is if there are any other ways a round knife can be used besides cutting and skiving. Or benefits over a regular pen knife. Using a round knife would suit cutting heavy leathers in one cut and in what I seen cut rounds on belts by cradling the knife back and forth while rotating the belt. With a japanese or french skiving knife if you need to cut off a straight line you can press down. For long straight lines it is great, tight curves not so great.
-
if you buy only 1 tool goods japan will usually have better value. Buying a few tools then leathercrafttools prices are 20-30 percent less, shipping from Japan EMS shipping is fairly cheap. Only way to tell is to add them to the cart and tally up the total.
-
huns, when you free hand cut do you cut on the line you draw with the pen or on the outside of the line and sand it flush?
-
If the leather is too thin it will not hold itself up like it is in the picture. Using a draping type of chrome tan wouldn't work too well, too stiff maybe not so good. Someone else may be able to confirm if using the belly is okay for the gusset. I would imagine the front and back pieces would use the best pieces. The gusset would need a good piece but slight grain imperfections may be allowed depending on what you are after.
-
Matt, the next time you contact vergez do you mind asking what SPI they recommend using what thickness of thread? If you are able to contact the main company that sell Fil au chinois and asking what thread works best for what SPI. I have a general idea but would like to hear what the manufacturer recommends. My thoughts on it is 632 for 8-10 SPI 532 for 6-8 SPI 432 for 4-7 SPI 321 for 4-6 SPI 532 with 9 SPI is a bit too thick, but just barely.
-
Canvas And Leather Weekender Bag
DavidL replied to coreysyms's topic in Purses, Wallets, Belts and Miscellaneous Pocket Items
Both coats of dye are water stain? Did you wait for first coat to dry then applied the other colour afterwards? -
I have a clicker knife from Knip. Amazing knife to hold and look at, came sharp out of the box. You wont be disappointed with his products. He does do custom projects for not much more than the prices on the site. I was quoted under 100 for the below style knife from knip, full tang cocobolo handle. I figured a smaller length blade can help control the cut.
-
I wouldn't get the vegez knife for one reason. HSS steel is difficult to sharpen, only diamond stones can sharpen HSS. Some ceramic stones can sharpen HSS. If diamond stones are something you already have that would be a good choice. I have a japanese skiving knife that works well for skiving. Would prefer a left handed version so the bevel is on the right side of the blade. When held vertically on a left handed blade, flat side is on the left, bevel is on the right creating a 90 degree angle cut (cutting on the right side of pattern always). The labelling of left hand and right hand knives are switched around for some reason. A japanese skiving knife from leathercrafttools.com Nobuyoshi 38mm- right hand (Super blue steel according to a reviewer - known to have long lasting edge, can be sharpen to a beyond keen edge). yujin left handed knife 38mm - don't know much about the steel but is japanese steel. \ Youtuber under leathertoolz who is one of LW member has a review of the knife.
-
I don't know much about laser machines, some of them can cut through vegetable tanned leather. A clicking machine can cost somewhere from 300 - 1500 for a basic machine. Most basic being a shop press with a large cutting board on top and below the die. Dies can be bought any where from 30-100+ depending on design. What they do not tell you is that the dies don't come out 90 degrees if they are bend by hand. They usually have a small curve around its corners. If you need the corners to be 90 degrees they have to be cut and welded. There are other dies available like forged dies, not all dies are made equal, the most basic being a steel rule die bent by hand. Most expensive (300+) is a die made 100 percent by machine CNC that is used for the highest precision (medical, automotive ect) . Somewhere in-between is a company that uses machinery to check its accuracy. Usually this means a laser machine cuts out grooves in wood and the die is fitted into the groove cutting side down, if it fits then the die is ready to ship. Not all companies do this.. some just use a piece of paper and fold around it.. check first if accuracy is necessary.
-
First Try At Stitching
DavidL replied to Tokarsky's topic in Purses, Wallets, Belts and Miscellaneous Pocket Items
The thread is too large for that length of stitch. As a test only, use that same pricking iron and stitch every second hole. Your stitching if done correctly should improve on the backside. At that same stitch length (looks like 7 SPI) no matter who is stitching using the same thickness of thread it will look identical to your photo. The shape of your awl will also change the stitching consistency (wide awl tip). Vid below by another member explains it well. -
Looking For Materials Advice For Bag Project
DavidL replied to SonnyMarrow's topic in How Do I Do That?
The look you want for the bag will determine the leather and thickness. Type of construction will determine type of leather too. How thick do you want the edges? Do you intend to skive edges? Turned edges? Welt/piping? Stiffener in-between lining? Do you want the bag to stand vertically by itself? do you want to add padding to areas that are in contact with your body? Weight? Weather resistant? Something I should be doing more often is to write down all the questions and answer them with what I would need.. therefore I have a general plan and can go through with what I have written down, no second guessing or trying to figure out as I'm doing it. I can also self critique the bag with real experiments, plus change things that don't work or need tweaking. When its all written down you will remember why you made something a certain way instead of trying to remember a few months down the line.
