-
Posts
1,229 -
Joined
-
Last visited
Content Type
Profiles
Forums
Events
Blogs
Gallery
Store
Everything posted by Halitech
-
Show off
Halitech replied to Halitech's topic in Purses, Wallets, Belts and Miscellaneous Pocket Items
there is a bucket of tools and segma type snaps and eyelets and the 4 and 6 key hook assemblies as well. I need to sit down and look through them later -
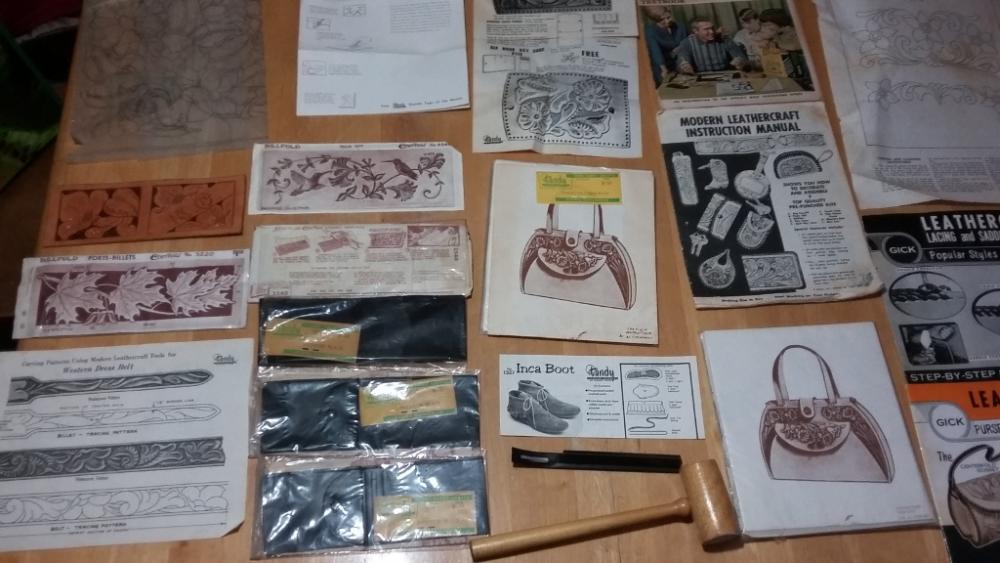
Not really anything I did myself but my father was working at a golf tournament with another board member and he told the guy about me doing leather work. Well, it turns out that years ago when the guy was younger, he had an accident that required removal of part of 1 leg and 3 fingers on 1 hand. As part of his recovery, he got into leather working. He hasn't done much since so he brought the tools and books over to give to me. This is just a small sampling of the books and patterns he sent over. can't see it that clear but the 3 packages of black next to the wooden mallet is 3 wallet interiors from tandy, all priced at 1.20
-

Latest Project
Halitech replied to JimBilt's topic in Purses, Wallets, Belts and Miscellaneous Pocket Items
mine too lol although getting paid for a pair of belts tomorrow -

Latest Project
Halitech replied to JimBilt's topic in Purses, Wallets, Belts and Miscellaneous Pocket Items
looks good and I really like the double stitching around the edges. What's the inside look like? -
the 2 sided keeper is a cool idea but, how would you flip it inside out? Not like there would be a lot of slack to allow you to flip it.
- 21 replies
-
- reversible
- belt
-
(and 1 more)
Tagged with:
-
with me it was because I needed a belt and couldn't find one big enough in the stores lol
-
unless you made a card wallet with 2 pieces of leather, you way undercharged her. Say thank you and put the money back to work with more materials and tools.
-
hello and welcome to the asylum lol there are a few firefighters or makers of fire fighter things that will probably help you out some but we probably won't give you exact measurements and steps (especially if we sell said items) but you can get help designing your own items which believe me, is even more rewarding then making one someone else did all the work on
-
the keeper floats so he could store whichever one he;s not using at the time I kinda like it too but it is up to the customer
- 21 replies
-
- reversible
- belt
-
(and 1 more)
Tagged with:
-
- 21 replies
-
- reversible
- belt
-
(and 1 more)
Tagged with:
-
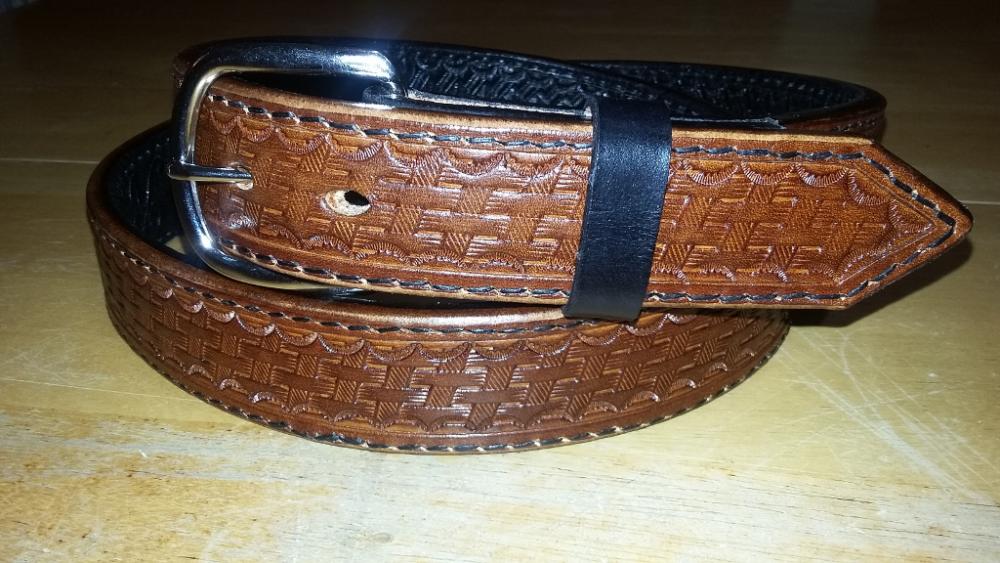
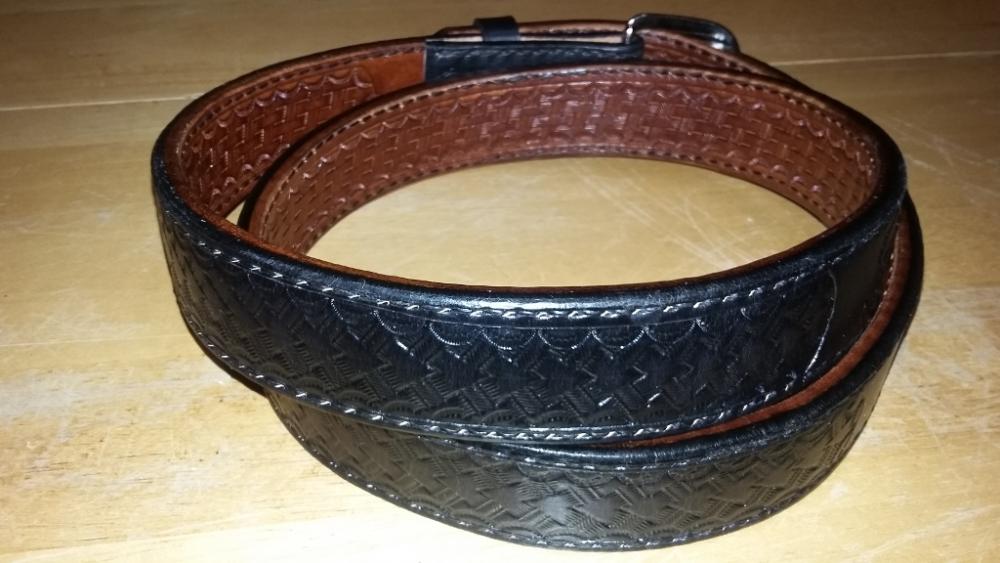
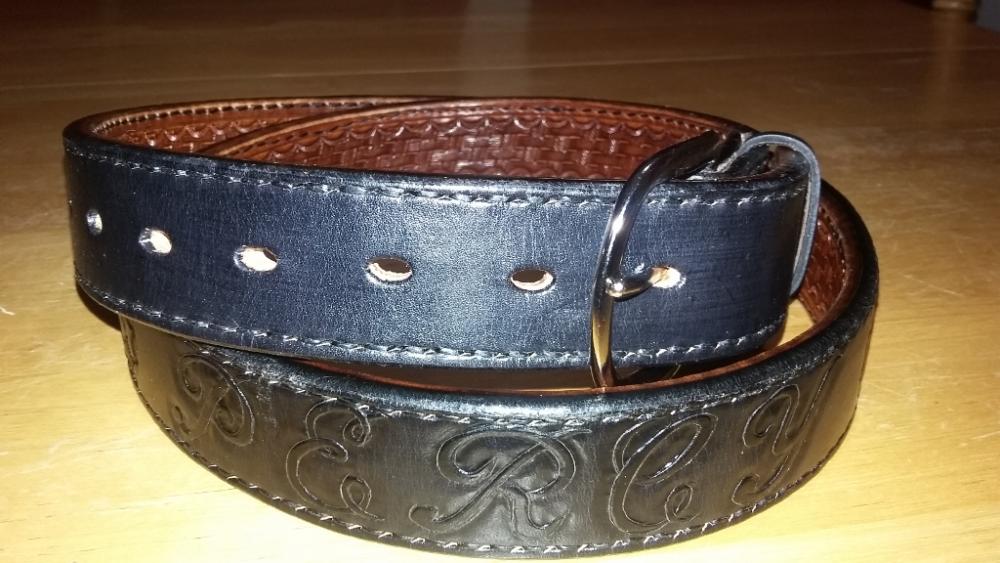
I just finished resizing them so I could upload them here Arrow head pattern and his name on the black side, regular basket weave on the timber brown side. 2 line 20 snaps holding the buckle on
- 21 replies
-
- reversible
- belt
-
(and 1 more)
Tagged with:
-

Knife/multi-tool Holder
Halitech replied to venator's topic in Gun Holsters, Rifle Slings and Knife Sheathes
Nice work overall and I like how you tooled around the edges of the pouch part. Only suggestion would be for on the back where the knife and multitool come up, I'd have added a backer like most gun holsters have to keep the sharp edges from jabbing into the ribs when bending and moving. -
That's what I was thinking about. I've gotten all the other work done and waited on doing the snaps/screws while thinking about it. If this belt doesn't survive the next 50 years, I'll be surprised
- 21 replies
-
- reversible
- belt
-
(and 1 more)
Tagged with:
-

cutting close to a top stitch.. (what is used -please see vid)
Halitech replied to beltbuckles's topic in How Do I Do That?
Looks to me like a thin piece of plastic to protect the leather they don't want to cut and then a ruler to guide the blade. -
saddle soap may do it then. Try a small amount in the armpit area and see what it does to the leather
-
do you know what type of leather it is and how is it finished? You might be able to use saddle soap to clean it
-
might be, I literally just cut 2 1.5" belt lengths off the one I have here right now and I just had it laying on my bed and it cut fine
-
I've used 3 pieces of it so far and while it is tough, a new blade each time in my strap cutter when I start a side and it cuts fine without wetting or doing anything else to it
-
Thanks Matt. Do you use snaps or do you prefer to use chicago screws? I've got to think ease of use as it is for an older gentleman
- 21 replies
-
- reversible
- belt
-
(and 1 more)
Tagged with:
-
I need some help from my fellow leather workers. I have a customer that wants a reversible belt. Should be easy to do right? not from what my searches are telling me. They want a 1.5" belt and the largest reversible buckle I can find is 1.35". They do not want it tapered and they do want both sides tooled. They also want it as thick as I can make it which is easier because I do have some saddle skirting I can use. Here's my 2 part question: 1. Does anyone have a source for larger reversible buckles like the big names use or 2. Can I do it the same as normal for the buckle and use a normal buckle that can be taken off (using snaps) and reversed. The back side would obviously have 2.5" of the opposite color (black on 1 side, timber brown on the other) and use a 6-7oz "liner"? that would meet up with the folded over part Any other ideas would be welcome
- 21 replies
-
- reversible
- belt
-
(and 1 more)
Tagged with:
-
LW, come in the chat the pnj started, I'm in there now kiwi, FO, it's not my fault lol
- 100 replies
-
then your only option is veg tanned leather strips http://springfieldleather.com/Belt-Strip-Long-1-1-2-in-5pk http://springfieldleather.com/1-2-Wide-2-Import-Veg-Straps_5
-
are you planning on tooling or dying them or are you looking for something pre-finished so you just have to add buckles and cut holes? you will pay more for pre-cut strips and it doesn't take that much room to cut your own
-
if you want to use a client, it's irc.freenode.com #leatherworker
- 100 replies


