Eccho
-
Posts
185 -
Joined
-
Last visited
Content Type
Profiles
Forums
Events
Blogs
Gallery
Store
Everything posted by Eccho
-
You may never realize it when you are good enough. Judge by reaction of others when they see your work. I have thrown some things aside as ruined, only to have them picked up and purchased by someone, you never know.
-
Wet your leather from the finished side only. Apply water with a "damp" sponge, not saturated. Wipe in a circular motion get all areas covered or you could get a water stained appearance if you don't. The water will absorb very quickly at first, and gradually will slow to the point that it is taking 20-30 seconds to absorb. Stop adding moisture. If you are going to work right away, simply set the piece aside and it will begin to return to its natural color in 30 minutes or less. Wait until the entire piece is back to its color and then begin working. If you cannot work it right away after adding the moisture, seal it in a zipper bag, with ALL of the air removed, and place it in the fridge. When ready remove from the fridge, and let it surface dry to natural and begin work.
-
Very nicely done:>)
-
On the Armitage Leather video he does mention that he has most of the awl blade tucked inside the haft, and that only the tip is sharpened to cut. The rest is pushed through only to enlarge the hole, but not cut it any further.
-
You are your own worst critic. It is beautiful ! Also you have impressed the only one who matters, your husband.
-
Welcome,to the most informative leather site on the net, IMHO:>) Great bunch of folks who give willingly of their knowledge, enjoy your time here.
-
 Very cool video, beautiful work.
 -
You beat me to it, but you are 100% corrrect. I use the Tandy Sega snaps and light taps is the key. When installed like this they "Snap" very securely
-
Elephant Hide
Eccho replied to electrathon's topic in Purses, Wallets, Belts and Miscellaneous Pocket Items
Love it! Any chance of you sharing how the two tone lace was achieved? -
Pirate Wallet
Eccho replied to pzarkov's topic in Purses, Wallets, Belts and Miscellaneous Pocket Items
Love it! But lose the V-twin concho and try a skull and crossbones...JM2C -
Celtic Style Belt Pouch
Eccho replied to DavidKManuel's topic in Purses, Wallets, Belts and Miscellaneous Pocket Items
I quite like it. Approx. dimensions please. -
Contenti short shipped my last two orders, and it has been back ordered for over a month.
-
Recent Key Fobs
Eccho replied to asoupley's topic in Purses, Wallets, Belts and Miscellaneous Pocket Items
Very nice! Are those hand stitched or machine? -
Some use two sided tape to adhere to their work station.
-
I really like that design. Is it an original pattern or is it available somewhere?
-
Finish is exactly as the name implies. After you apply dye, you buff and apply finish, either gloss or matte, to seal ( for lack of a better word ) the item. This is to stop the dye from bleeding off and give the leather some protection from the elements. Now you can apply an anti-weathering agent such as Aussie to help waterproof the leather. Resolene is very popular, but once applied to the leather, it will no longer absorb any other agent. The atom wax itself is considered a finish,as is clear lac,sheer lac, etc. They all do the job of sealing in the dye. Do the strings have a smooth finish, or more of a suede texture?
-
I am certainly no expert, but if I understand the term strings, you are dying deer lace or fringe. I would dye it by immersing it in dye, remove, wipe off excess, and here is maybe the kicker. let them dry for a full 48 hrs. Run them through a cloth held in your hand, and then immerse them in finish, again let dry for at least 24hrs. I think 48hrs. works better, but that just me. Now try your atom wax. I dye a lot of leather, most of it to black, and I do not have a bleed problem. I do use Eco-Flo water stain exclusively, because that has given me the best result with the least problems. I sure hope this helps, and don't give up. Problems were invented so solutions could be found:>)
-
The pressure point on your arbor press, cannot handle the size of your plate. You could try to place a metal plate on top of your makers mark if that is possible to try to distribute the pressure a little more evenly. I made a simple press with two steel plates 3/4" thick and a hydraulic bottle jack. You would need to build a simple frame, ( I used 3/4" threaded rod) that way you can make the jaws larger or smaller to accommodate different dies.Just google simple bottle jack press. I hope this is of some help. Merry Christmas!
-
Сover For Keys " Dragon"
Eccho replied to Tatyana's topic in Purses, Wallets, Belts and Miscellaneous Pocket Items
Classic! Well done indeed. -
You can be proud to use that strap any where any time Chief. Makes me determined to improve.
-
Thanks to everyone for your input. It looks like a harbor freight 20 ton press would do the job for the least cash outlay. That being said when I went to look at one in person, it does have a rather large footprint. I have seen what seem to be bench mounted ones that would be better suited for a small shop like mine, but it is difficult to find prices on many of them. Now that I have a better idea of what can be done, I think I will see if I can possibly create something on my own. Again thanks to all.
-
I find myself thinking about a small hand operated clicker. I try to use up even my smallest scraps to make cheaper items for sales venues. I would love to sell a $75-$100 item to every customer that walks up, but the truth of the matter is, most folks are hard to separate from their money,At the end of the day the items that make or break a live sales event are the $5-$10 ones. So the cut aways that become ends for vest extenders, key fobs, braided bracelets, money clips, etc. become important once more. However, hand cutting the little devils out with these old hands is becoming tedious and I might add, a little painful.I have looked around the internet and I am having a difficult time finding a price line on a small manual clicker press. If I have to spend two or three thousand to get something I guess it wont happen, it would take to long to recoup my investment, and I don't know how long I have left. If anyone can point me in the right direction, offer some input into my thinking, and maybe offer up some places to order small dies from, I would be very grateful. Ya'll have a Merry Christmas and a Joyous New Year.
-
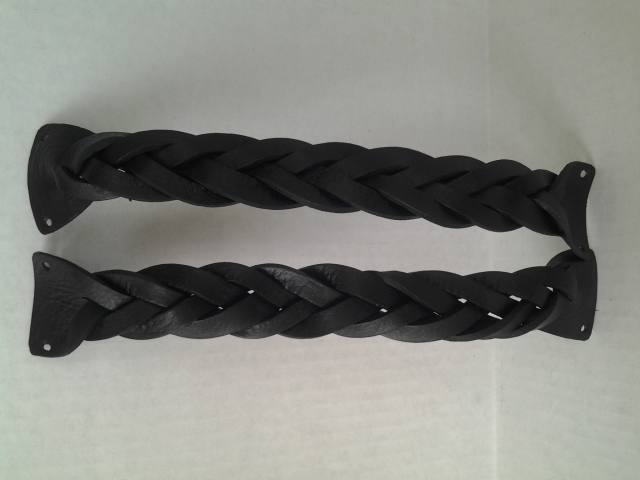
Thank you to all for having a look at this and giving it your thoughts. I too looked at snaps pawpaw, I have some nice skeleton head snaps that would lend to the occasion. A hat band was what made me wonder about a well placed stitch or two. I did a little experiment without permanent attachment, and while the braids do lift from the base a little, it is not enough to warrant a lot of attention, the customer would more than likely never notice.I have lost a lot of sleep worrying about things that I thought were deal breakers, only to find the customer never, ever, saw them, or cared about them. Again, I thank all of you for your input, what a marvelous site this is. eccho
-
nargil, You can be proud............they are beautiful...........well done !
-
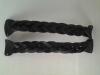
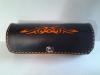
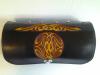
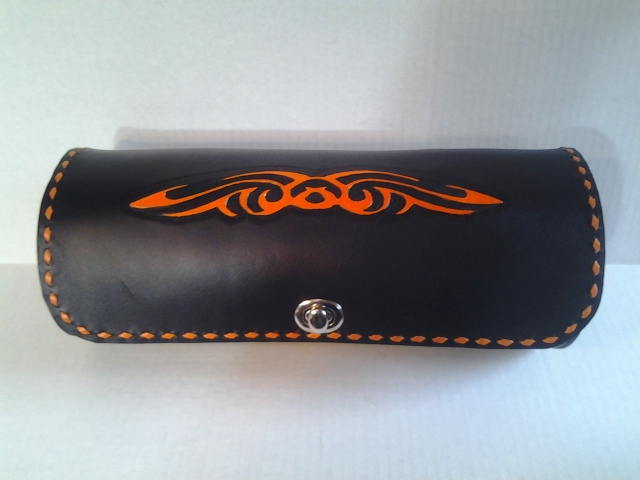
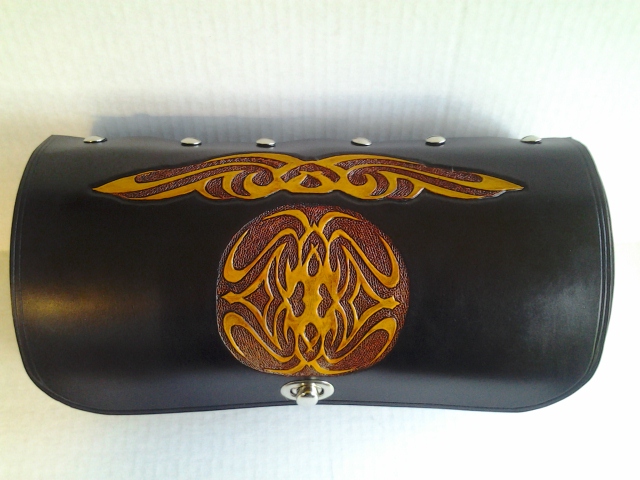
Hey folks, here I am again looking for some advice. I am planning on attaching two mystery braids as seen in the pics to the front flap of a motorcycle tool bag. They will be going on the leading edge, one on each side, and are simply there as decoration. The bag in the pic is not the one in question, but it will be a round style bag exactly like that one. I am planning on putting a pair of rivets at each end to attach it to the bag. Now, finally the question. Could I, should I , or would you advise trying to attach the body of the braid to the bag along its length. Possibly adhesive.............maybe a discreetly placed stitch or two.........I'm not sure if either would work. The bottom of the braid is slightly concave due to its nature, so I'm not sure an adhesive would hold, plus the opening and closing of the bag is going to make it have to flex. Any input, thoughts, or experience in a similar circumstance would be greatly appreciated.